
Subscribe to Our Youtube Channel
Related Manuals for Bridgeport SERIES I


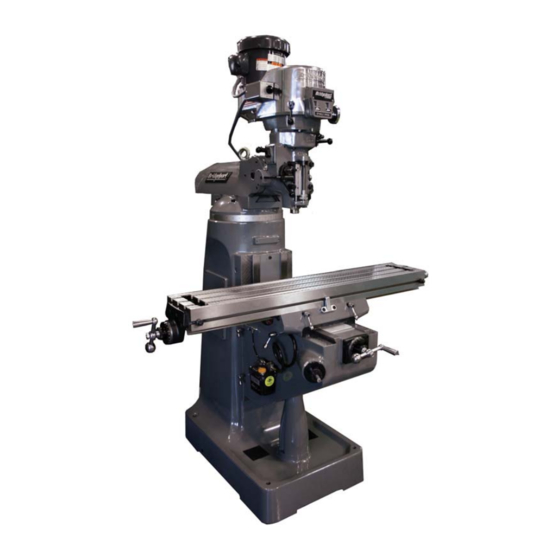
Summary of Contents for Bridgeport SERIES I
- Page 1 INSTALLATION, OPERATION, MAINTENANCE, AND PARTS LIST SERIES I MILLING MACHINES TP8035A Revised: March 21, 2018 Manual No. M-508 Litho in U.S.A. Part No. M -0009500-0508 June, 2010...
- Page 2 Information in this manual is subject to change without notice. This manual covers installation, operation, maintenance, and parts list for Bridgeport Series I milling machines with serial numbers ending with the let- ter "M". The machine serial number is located on the front of the knee. If the machine serial number does not end with the letter "M", refer to the latest...
- Page 3 SAFETY PRECAUTIONS To prevent serious bodily injury, observe the following basic safety precautions when installing, operating or servicing the milling machine. 1. Follow all instructions in the manual. 2. Wear approved industrial safety glasses and safety shoes. 3. Do not wear gloves, long sleeves, long hair, rings, watches, jewelry or other items that could become caught in moving parts.
- Page 4 CONVENTIONS USED IN MANUALS DANGER DANGER indicates a hazardous situation that, if not avoided, will result in death or serious injury. WARNING WARNING indicates a hazardous situation that, if not avoided, could result in death or serious injury. CAUTION CAUTION indicates a hazardous situation that, if not avoided, could result in minor or moderate injury.
- Page 5 SAFETY RECOMMENDATIONS DO NOT OPERATE EQUIPMENT until you have read and understood the appropriate opera- tor and safety maintenance manuals. DO NOT OPERATE EQUIPMENT until you have read and understood all machine and con- trol key signs. DO NOT OPERATE EQUIPMENT for the first time without a qualified instructor. Consult your supervisor when in doubt as to the correct way to perform an operation.
- Page 6 PROTECT YOUR HANDS. Stop the spindle completely before opening safeguards or covers. NEVER REACH around a safeguard. PROTECT YOUR HANDS. Stop the machine before changing or adjusting belts, pulleys or gears. PROTECT YOUR HANDS. Keep hands and arms clear of spindle start switch when changing tools.
- Page 7 INSTALLATION AND USE OF SAFEGUARDS Both American National Standard B11.8 and OSHA Section 1910.212 assign responsibility for point of operation safeguarding of milling machines to the employer/user. Therefore, to prevent serious injury resulting from the rotating cutter, flying chips, or splashing coolant, point of operation safeguarding should be used on milling machines to the greatest extent practicable.
- Page 8 GENERAL PURPOSE SAFEGUARDS There is no single safeguard which can match the versatility of the Series I machine. As a result, you will find that the guard assembles shown in Figures I.I and I.II, like all safeguards, will be suitable for some operations, but not for others.
- Page 9 Installation for Machines with Erickson 30 Quick Change Spindles 1. Remove the spindle locknut. This is done by removing the long button head black finish screw, which is normally left of the cadmium-finished button head screw on the locknut of the spindle. This will allow you to unscrew the locknut by turning it counter-clockwise.
- Page 10 Guard Assembly Component Lists BP 11060813 – R-8 SHIELD ASSEMBLY Refer to Figure I.I. Item Part Number Description BP 11191203 Shield Assembly, Rear BP 11010060 Screw, Hand 8-32 x .500 0300312 Screw, BHC 10-32 x .750 BP 11010065 Washer, Plastic #10-32 BP 11010055 Nut, Stop, #10-32 (Elastic) BP 11060824...
- Page 11 - NOTES - M-508...
- Page 12 - NOTES - M-508...
-
Page 13: Table Of Contents
Table of Contents CHAPTER 1 - INSTALLATION Uncrating ........1-1 Shortages . - Page 14 Machine........2-14 Swivel the Belt Housing ......2-14 Swivel the Turret .
- Page 15 CHAPTER 5 - SPECIFICATIONS Machine........5-1 Principle Dimensions .
- Page 16 - NOTES - M-508...
-
Page 17: Chapter 1 - Installation
CHAPTER 1 - INSTALLATION UNCRATING Carefully remove protective crating and skids so that the machine and parts are not marred, scratched or impaired. In the event of damage having occurred during transit, communicate at once with our representative and the transportation company making delivery. SHORTAGES Check shipment carefully against the itemized packing list which is included in the parts box. -
Page 18: Positioning The Head Upright
POSITIONING THE HEAD UPRIGHT If delivery of your machine is made with the milling head in an upside-down position, follow the instructions below to prepare your machine for operation. For shipping purposes, the hand cranks are inverted to face the machine. To reverse them, engage the lock mechanism to the saddle and table. - Page 19 TP5280 Figure 1.4 - Tightening Sequence M-508...
-
Page 20: Lifting The Machine
LIFTING THE MACHINE WARNING BE SURE to use proper sling when lifting. improper lifting could cause serious in- jury. Note position of ram and table when lifting with sling. Machine should be lifted by placing a sling under the ram as illustrated in Figure 1.5. TP5279 Figure 1.5 - Lifting the Machine M-508... -
Page 21: Foundation
FOUNDATION PLACING ON A SOLID FOUNDATION - NOTE - It is recommended that the machine be secured to the floor to prevent movement or tipping due to off-center loading. It is the customers responsibility to supply all necessary hardware if the machine is to be secured to the floor. When setting machine on a concrete foundation, it is advisable to use grout (thin mortar) to take care of any unevenness in the concrete as well as to provide a solid foundation at all points. -
Page 22: Leveling The Machine
LEVELING THE MACHINE Set machine by leveling the work table lengthwise and crosswise with a precision instrument as shown in Figure 1.8. Level Level TP5282 Figure 1.8 - Leveling the Machine M-508... -
Page 23: Remove The Varidisc Shipping Screws
REMOVE THE VARIDISC SHIPPING SCREWS (Machines Before Serial Number HDNG7009M Only) NOTICE The varidisc shipping screws must be removed before operating the machine. 1. Loosen screw "D", Figure 1.9. 2. Remove tag "E". 3. Pivot motor pulley cover "F", Figure 1.10, to gain access to the varidisc assembly. 4. -
Page 24: Machine Power Supply
MACHINE POWER SUPPLY WARNING Machine must be connected by a qualified electrician. CONNECTING THE POWER SUPPLY To connect the machine to the plant supply, have a qualified electrician proceed as follows: 1. Check required voltage against power supply to ensure that they are compatible. 2. -
Page 25: Lubrication
LUBRICATION Lubrication Instruction Plate Recommended Lubrication Few Drops Twice Daily TP5283 Figure 1.12 - Lubrication Requirements Indicator Lubrication Area Type of Lubrication Way Surfaces and Lead Screws Sunoco Waylube #1180 or equivalent S.A.E. 10 or 10W Light Oil Milling Heads (Spindle Bearings) (None on grease-packed heads) Motor None required. -
Page 26: Alignment Of The Head For Fine Work
ALIGNMENT OF THE HEAD FOR FINE WORK For precision boring or work of that nature, where it is necessary to have the head perfectly square with the table, use method described below. To set head perfectly square with table, adjust ram adapter through vertical adjusting worm shaft with ram adapter on ram. - Page 27 - NOTES - M-508 1-11...
- Page 28 - NOTES - 1-12 M-508...
-
Page 29: Chapter 2 - Operation
CHAPTER 2 - OPERATION HEAD CONTROLS TP5285 Figure 2.1 - Head Controls Parts Assembly M-508... -
Page 30: High-Low Range Switch
HIGH-LOW RANGE SWITCH High-Low Range Switch “A”, Figure 2.2, is a motor reversing switch. When the attachment is in direct drive (HIGH SPEED), the motor and spindle are turning in a clockwise direction as viewed from the top of machine. When the attachment is in “Back Gear”... -
Page 31: Spindle Brake
SPINDLE BRAKE Spindle Brake “C”, Figure 2.4, can be moved in either direction to stop spindle; however, when locking spindle, brake lever should be moved either by pulling towards the operator or pushing away from the operator, then raised. When brake is worn out it has to be replaced. -
Page 32: Quill Stop Knob
QUILL STOP KNOB Quill Stop Knob “E”, Figure 2.6, is used to disengage automatic feed in either direction as well as the stop point setting working depths. MICROMETER NUT Micrometer Nut “F”, Figure 2.6, is used for setting depths. Each graduation on nut indicates .001” of depth, it reads directly to scale mounted along the side of it. -
Page 33: Feed Control Lever
FEED CONTROL LEVER Feed Control Lever “I”, Figure 2.8, engages overload clutch on pinion shaft when positioned left and will stay engaged until either quill stop comes in contact with micrometer adjusting nut, forcing feed control lever to drop out automatically, or release manually by engaging lever to right. -
Page 34: Quill Feed Handle
QUILL FEED HANDLE Quill Feed Handle “M”, Figure 2.10, is used to raise and lower the quill manually. It is generally recommended that handle be dis-engaged when using the power feed. It may be removed by simply pulling handle off. TP5294 Figure 2.10 - Quill Feed Handle POWER FEED TRANSMISSION ENGAGEMENT... -
Page 35: Hi-Neutral-Lo Lever
HI-NEUTRAL-LO LEVER NOTICE Do not shift hi-lo lever while motor is running. The Hi-Neutral-Lo Lever “O”, Figure 2.13, is used to put the attachment into either back gear or direct drive. Rotate the spindle by hand to facilitate meshing of clutch or gears. Neutral is provided to permit free spindle rotation for indicating and setup work. -
Page 36: Speed Change Handwheel
SPEED CHANGE HANDWHEEL NOTICE DO NOT attempt to change spindle RPM unless the motor is running. Dial speeds will only be approximate. Belt wear will cause a slight variation in speeds from what is indicated on the dial. Spindle speeds are adjusted by turning Speed Change Handwheel “P”, Figure 2.14, on the front of the belt housing. -
Page 37: Drawbar
DRAWBAR When tightening or loosening the Drawbar “R”, Figure 2.15, it is necessary to lock the spindle. To accomplish this, use the spindle brake which is located on the left side of the belt housing, pulling towards the operator or pushing away from the operator until it binds, then raise the quill feed handle. Drawbar has 7/16”-20 right hand thread and should be tightened by hand with normal amount of pressure using wrench furnished with machine. -
Page 38: Operational Procedures
OPERATIONAL PROCEDURES Spindle Speed NOTICE DO NOT change speed when spindle is stationary. Change speed only when spindle is running. To change speed within range: 1. Start spindle. 2. Turn handwheel “A”, Figure 2.16, to select required speed. TP5300 Figure 2.16 - Spindle Speed Change Back Gear (Low Speed) NOTICE DO NOT change range while spindle is... -
Page 39: Direct Drive (High Speed)
Direct Drive (High Speed) To change range from back gear to direct drive: 1. Switch “B” to OFF (Stop spindle rotation). 2. Move lever “C”, Figure 2.18, through neutral to HIGH. High 3. Rotate spindle by hand until the clutches are felt to engage. - Page 40 AUTOMATIC FEED - NOTE - Maximum loading .375” (9.5mm) diameter drill steel. 1. Ensure quill lock “G”, is off. 2. Set micrometer dial “H” to required depth. 3. Engage auto quill feed “D” when motor has stopped 4. Select feed rate “I”. 5.
-
Page 41: Spindle Brake
Spindle Brake Brake Brake lever has capability to rotate in either direction to brake and lock. CAM upwards to lock and prevent movement of spindle (see Figure 2.21). Brake Turn and Lift to Lock TP5306 Figure 2.21 - Spindle Brake Quill Sensitive Hand Feed 1. -
Page 42: Machine
MACHINE SWIVEL THE BELT HOUSING NOTICE Incorrect spline alignment can be caused by unequal tightening of the locknuts ’J’ causing fluctuation of the quill feed which can be felt through the sensitive feed handle. It is advised to call Hardinge service department be- fore attempting this procedure. -
Page 43: Move The Ram Slide
MOVE THE RAM SLIDE 1. Use wrench provided with machine to loosen bolts “L” and “M”, Figure 2.25. 2. Use wrench to move the slide to the desired position using bolt “N”. Rear 3. Tighten bolts “L” and “M”, starting with the rear bolt. -
Page 44: Knee Clamping
TABLE CLAMPING The table clamp levers are located on front of saddle and should always be clamped when longitudinal movement is not required (see Figure 2.27). Lock Unlock Table Clamp Levers TP5311 Figure 2.27 - Table Clamping KNEE CLAMPING The knee clamping levers are at the left side of the knee. Leave clamped at all times unless using knee in operation (see Figure 2.28). - Page 45 - NOTES - M-508 2-17...
- Page 46 - NOTES - 2-18 M-508...
-
Page 47: Chapter 3 - Maintenance
CHAPTER 3 - MAINTENANCE 2J-HEAD MOTOR REMOVAL 1. Run head to adjust to lowest speed. 2. Disconnect power. 3. Remove three screws “A” and cover “B”, Figure 3.1. 4. Using the two screws “A”, compress spring “C”. 5. Rotate the speed changer to the highest speed. -
Page 48: Drive Belt Replacement
DRIVE BELT REPLACEMENT 1. Remove the motor as described on page 3-1. 2. Remove the three screws “F”, Figure 3.3, insert into the adjacent tapped holes and withdraw bearing housing “G”. 3. Remove the two screws and the bushings “H”. 4. -
Page 49: Brake Shoe Replacement
BRAKE SHOE REPLACEMENT 1. Remove the top section. 2. Remove the two screws “P”, Figure 3.5. 3. Remove the clutch hub assembly “Q”. 4. Replace the brake shoes “R”. 5. Remove the bearing, drive discs and circlips from the hub assembly “Q”. 6. -
Page 50: Head
HEAD MICRO FEED TRIP ASSEMBLY AND QUILL REMOVAL 1. Remove screw “A” and ball reverse lever “B”, Figure 3.6. 2. Remove retaining ring “C”, screw “D” and arm “E”. 3. Thread shaft “F” through micro nuts and remove. 4. Remove screw “G” and stop “H”. 5. -
Page 51: Balance Spring Replacement
BALANCE SPRING REPLACEMENT 1. With quill in maximum up position apply quill lock. 2. Remove screw “I”, hub “J”, and key “K”, Figure 3.7. 3. Remove screws “L”, allowing housing to rotate slowly releasing spring tension. 4. Lift end of spring from pin on the pinion shaft. 5. -
Page 52: Collet Aligning Screw Replacement
COLLET ALIGNING SCREW REPLACEMENT 1. Use felt pen, mark reference line on quill and nose cap “S”, Figure 3.9. 2. Remove set screw “R”. 3. Unscrew nose cap “S”. 4. Remove lock screw “T” and collet aligning screw “U”. 5. Replace “U”; insert collet and check that the dog on the end of the screw does not interfere with the bottom of the guide slot. -
Page 53: Gib Adjustment
GIB ADJUSTMENT ADJUSTMENT OF THE TABLE GIB The table is equipped with a tapered gib and adjusting screws at the left and right sides of the table. To Adjust the Gib: 1. Loosen table clamps "B", Figure 3.10. 2. Clean the slides and apply lubricant. 3. -
Page 54: Adjustment Of The Saddle Gib
ADJUSTMENT OF THE SADDLE GIB The saddle is equipped with a tapered gib and adjusting screws at the front and rear of the saddle. To Adjust the Gib: 1. Loosen saddle clamp "D", Figure 3.12. 2. Clean the slides and apply lubricant. 3. - Page 55 5. To tighten the gib: A) Loosen the rear gib screw. B) Tighten the front gib screw slightly and test the saddle movement. C) Repeat step B until a slight drag is felt when moving the saddle by hand. D) Tighten the rear gib screw. - NOTE - Press the wipers downward and inward while tightening the mounting screws.
-
Page 56: Adjustment Of The Knee Gib
ADJUSTMENT OF THE KNEE GIB The knee is equipped with a tapered gib and adjusting screws at the top and bottom of the knee. To Adjust the Gib: 1. Loosen the two knee clamps located on the left side of the knee. 2. - Page 57 4. To tighten the gib: A) Loosen lower gib screw "M", Figure 3.18. B) Tighten the upper gib screw slightly and test the knee movement. C) Repeat step B until a slight drag is felt when moving the knee by hand. D) Tighten the lower gib screw.
- Page 58 TABLE FEED SCREW BACKLASH ADJUSTMENT 1. Move the table to the center of travel. 2. Insert the larger end of the two-piece backlash adjustment tool, shown in Figure 3.19, into the left side of the saddle. 3. Loosen lock nut “P”, Figure 3.20, one full turn. 4.
-
Page 59: Saddle Feed Screw Backlash Adjustment
SADDLE FEED SCREW BACKLASH ADJUSTMENT 1. Move the saddle back (toward the column) 3/4 of the way through the range of travel. 2. Remove four socket head cap screws securing bracket “Q”, Figure 3.21, to knee. 3. Pull the saddle forward to expose lock nut “R” and adjusting nut “S”, Figure 3.22, through the hole in the front of the knee. - Page 60 - NOTES - 3-14 M-508...
-
Page 61: Chapter 4 - Parts Listings
CHAPTER 4 - PARTS LISTINGS 2J-HEAD TOP HOUSING TP5340 Figure 4.1 - 2J-Head Assembly M-508... - Page 62 2J-HEAD TOP HOUSING Item Part Number Description BP 11011033 Screw, Socket Hd Cap, .250”-20 x .750” Lg BP 12180094 Cap, Top Bearing BP 11181977 Washer, Wave Spring BP 11180252 Bearing, Ball, Fafnir #9107 NNP BP 11180848 Ring, Snap, #5100-137 BP 11011069 Screw, Socket Hd Cap, .312”-18 x 6.00”...
- Page 63 Item Part Number Description BP 11182122 Key, Plastic BP 11011707 Nut, Hex Jam, .250”-20 BP 12180084 BP 12180107 Pin, Taper, #4 x 1.00” 53** BP 12180052 Base, Belt Housing (see BP 12183923) BP 12180088 Cover, Motor Pulley BP 11011552 Screw, Drive, Type U, #0 x .250” BP 11182893 Nameplate, Hi-Low Range BP 11182894...
-
Page 64: Back Gear
2J-HEAD BACK GEAR TP5341 Figure 4.2 - 2J-Head Back Gear Assembly M-508... - Page 65 2J-HEAD BACK GEAR Item Part Number Description BP 11011710 Nut, Hex, .312” BP 11180133 Dial, Spindle Speed BP 11183646 Bushing, Bronze, .502” x .628” x 5.00” BP 11011380 Screw, Full Dog Socket Hd Set, .250”-20 x .500” BP 12180055 Housing, Speed Changer BP 12182003 Block, Plastic Bearing BP 11011031...
- Page 66 Item Part Number Description BP 11182071 Spring, Compression, .375” OD x .3.00” Lg BP 11181794 Locknut, Bearing, #–08 57*** BP 12183924 Sleeve, Bearing BP 11181977 Washer, Wave Spring BP 12180067 Pinion, Bull Gear Shift BP 12180161 Plate, Hi-Low Detent BP 11181732 Nut, Hex, .375”-16 BP 11151913 Lockwasher, .375”...
-
Page 67: 2J- And J-Head Lower Housing
2J- AND J-HEAD LOWER HOUSING TP5343 Figure 4.3 - 2J- and J-Head Lower Housing Assembly M-508... - Page 68 2J- AND J-HEAD LOWER HOUSING Item Part Number Description BP 11011445 Screw, Round Hd Machine, #10-24 x .375” Lg BP 12190163 Washer, Bevel Pinion BP 12190203 Gear, Feed Bevel Pinion BP 12190164 Sleeve, Feed Worm Gear Shaft BP 11192303 Bushing, Worm Cradle BP 11011287 Screw, Stainless Steel, .250”-20 x .250”...
- Page 69 Item Part Number Description BP 12193435 Assembly, Bevel Feed Gear BP 11183646 Bushing, Bronze, .502” x .628” x 5.00” BP 12193432 Gear, Feed Reverse Bevel BP 12190153 Clutch, Feed Reverse BP 11011547 Lock, Screw, Stainless Steel, .312”-18 x .156” BP 11011375 Screw, Stainless Steel, .312”-18 x .312”...
- Page 70 Item Part Number Description BP 11010513 Pin, Roll, .125” x .437” BP 11192053 Spring, Compression BP 12190091 Plunger, Trip BP 12190092 Bushing, Feed Trip Plunger BP 12190090 Bushing, Trip Plunger BP 12190089 Plunger, Feed Trip BP 12193519 Assembly, Handwheel BP 12190191 Spindle BP 11190081 Skirt, Quill...
- Page 71 Item Part Number Description BP 12190079 Hub, Quill Pinion 177*** BP 12190066 Cover, Spring 178*** BP 11192020 Spring, Clock 179*** BP 28007150 Pin, Outside Clock Spring BP 28007064 Pinion, Quill (see BP 12190108) BP 12190085 Lever, Reverse Trip Ball BP 12190086 Plunger, Feed Reverse Trip BP 12190087 Screw, Reverse Trip Ball Lever...
-
Page 72: Basic Machine
BASIC MACHINE TI5727 Figure 4.4 - Basic Machine Assembly 4-12 M-508... - Page 73 BASIC MACHINE Item Part Number Description BK 0001500C141 Body BK 0001500C103 Column BK 0001500C139 Elevating screw nut (Inch) BK 0001500C137 Elevating screw (Inch) BK 0001500C077 Bevel gear (Big) BK 0001500C175 Knee BK 0001500C096 Bevel gear (Small) BK 0001500C094 Elevating shaft BK 0001500C092 Bearing Housing BK 0001500C090...
- Page 74 Item Part Number Description BK 000026602 Bearing BK 0001500C076 Washer BK 000026601 Bearing BK 000146602 Nut, 3/8 BK 000033804 Hexagon socket screw BK 0001500C170B Leveling screw BK 0001800C146 Leveling pads BK 000631704 Key, 4 X 4 X 20 BK 000033805 Hexagon socket screw, M6 X 20 BK 000033806 Hexagon socket screw, M6 X 16...
- Page 75 TABLE AND LEAD SCREW ASSEMBLY TI5728 Figure 4.5 - Table and Lead Screw Assembly M-508 4-15...
- Page 76 TABLE AND LEAD SCREW ASSEMBLY Item Part Number Description BK 0001500C035 Table BK 0001500D024B Right leadscrew bracket BK 0001500D023B Left leadscrew bracket BK 0001500D005 Right dial holder BK 0001500D0161 Dial (inch) BK 0001500C086 Dial nut BP 12060271 Ball crank handle BK 0001500D006 Lock nut BK 0001500D021...
-
Page 77: Flood Coolant
FLOOD COOLANT TP5347 Figure 4.6 - Flood Coolant Assembly Item Part Number Description BP 11713642 Tank, Pump and Motor BP 11715470 Tubing, Coolant Pressure Hose, Vinyl, .50”Æ x .625” 10 ft BP 11565476 Valve, Check BP 12561010 Block, Manifold BP 11565470 Tubing, Drain Hose, Vinyl, .750”... -
Page 78: Lubrication System
LUBRICATION SYSTEM STANDARD MACHINE TP8034 Figure 4.7 - Lubrication System (Standard Machine) Item Part Number Description BP 11060490 Ferrule BP 11060491 BP 11060492 Lubricator Kit BP 11060493 Plug BP 11060494 Adapter BK 0001500LU150 Hose, Lubrication Spring 4-18 M-508... -
Page 79: Machine With Splashguard Option
MACHINE WITH SPLASHGUARD OPTION TP8963 Figure 4.8 - Lubrication System (Machine with Splashguard Option) Item Part Number Description BP 11060492 Lubricator Kit BP 11060493 Plug LH 0011030 Nut, Lubrication Line BP 28303617 Ferrule, Double BP 11060490 Ferrule, Single BP 11413212 Junction, 3 Way MS 0103619 Screw, M6-1.0 x 20mm... -
Page 80: Replacement Motor Assemblies
REPLACEMENT MOTOR ASSEMBLIES Motor Assembly 2J-Head 2 HP Unified without NFPA, BPA12550001 Part Number Description BP 11010514 Pin, Roll, .125 X .500 BP 11012760 Marker, 230 Volt BP 11550001A Motor, 2 HP Multi Volt 50/60 BP 11562534 Wire Nut Connector, Medium, Type-Y BP 12550007 Key, Drive, Fixed Varidisc BP 12550006... -
Page 81: 2J Milling Head
2J MILLING HEAD 1-1/2 HP – Spare Parts Part Number Description BP 11182120 Belt, Varispeed BP 11182106 Belt, Timing BP 12180073 Shoe, Brake, Set BP 11182081 Spring, Brake BP 11182121 Key, Motor BP 11182122 Key, Plastic BP 12193437 Assembly, Clockspring and Cover BP 12180117 Lubricant, Gear BP 11183147... -
Page 82: Nfpa Electrical Case (Option)
NFPA ELECTRICAL CASE (Option) 26 27 28 17 31 SPINDLE SPEED POWER FEED COOLANT RANGE SETUP ENABLE MIST FLOOD HIGH START START 36 37 38 39 TI6282 Figure 4.9 - NFPA Electrical Case: Front View with Operator Pendant 4-22 M-508... - Page 83 NFPA ELECTRICAL CASE (Option) MOUNTING HOLES FOR MOTOR DRIVES MOUNTING HOLES FOR MOTOR DRIVES TI6283 Figure 4.10 - NFPA Electrical Case: Interior View with Mounting Rails and Wire Ducts M-508 4-23...
- Page 84 NFPA ELECTRICAL CASE (Option) 44 49 22 23 TI6284 Figure 4.11 - NFPA Electrical Case: Interior View with Electrical Components 4-24 M-508...
- Page 85 NFPA ELECTRICAL CASE (Option) 25 45 BOTTOM VIEW RIGHT SIDE VIEW TI6285 Figure 4.12 - NFPA Electrical Case: Right Side and Bottom Views M-508 4-25...
- Page 86 NFPA ELECTRICAL CASE (Option) Item Part Number Description BP 00005490052 Hole Plug 1 Conduit Seal BP 14031008 Transformer (Input 230/460) (Output 115V @ 750VA) BP 00005490203 Label, NFPA Serial 7 0001502 Hex Nut 3/8-16 BPA11591331 NFPA Enclosure with Modifications BP 11591333 Electrical Panel NFPA with Modifications BP 11591497 Din Rail 35mm 6’...
- Page 87 Item Part Number Description ML 0010366G Tag, Ground Symbol BP 11591338 Weldment, Operator Remote Pendant BP 11591370 Remote Enclosure Cover BP 11591371 Remote Enclosure Cover Overlay BP 11591374 Remote Enclosure Cover Gasket BP 00005490196 Selector Switch Assembly, 3 Position Maintained BP 00005490192 Switch Assembly, Green Illuminated Push Button BP 00005490193...
- Page 88 - NOTES - 4-28 M-508...
-
Page 89: Chapter 5 - Specifications
CHAPTER 5 - SPECIFICATIONS MACHINE PRINCIPLE DIMENSIONS Left Side View of Machine TP5264 Figure 5.1 - Machine Principle Dimensions: Side View 85.56” (2180) 51” (1295) 8.750” (222) 2.500” (64) 6.750” (171) 85.56” (2180) 63” (1600) 20.750” (527) 18.500” (470) 12” (305) 18.750”... -
Page 90: Top View Of Machine
Top View of Machine 24 [610] 20 [508] 63 [1600] 36¼ [921] 29½ [749] 99½ [2527] NOTE: All dimensions shown as inches [millimeters]. TP5265A Figure 5.2 - Machine Principle Dimensions: Top View M-508... -
Page 91: Machine Specifications
MACHINE SPECIFICATIONS Range Table Travel (X-Axis) without Power Feed (end of table to end of saddle) 31 in. (787 mm) with Power Feed 33.5 in. (851 mm) Saddle Travel (Y-Axis) 12 in. (305 mm) Quill Travel 5 in. (127 mm) Knee Travel (Z Axis) without Flood Coolant 16 in. - Page 92 Drilling Capacity Power Quill Feed 3/8 in. (9.5 mm) Milling Capacity (mild steel) 2 in / minute Boring Capacity (mild steel) 6 in. dia. (152 mm) Spindle Diameter 1.875 in. (48 mm) Quill Diameter 3.375 in. (86 mm) Space and Weight Floor Area (Power case door closed) 8.3 x 5.3 ft.
-
Page 93: 2J-Head
2J-HEAD GENERAL SPEED RECOMMENDATIONS FEET PER MINUTE ROUGH ROUGH AND LIGHT AND MATERIAL TO BE CUT FINISH FINISH CUT Cast Iron – Soft (Under 150 Brinnell) 80 – 90 Cast Iron – Med (150-200 Brinnell) 60 – 70 Cast Iron – Hard (Over 200 Brinnell) 50 –... - Page 94 TP5268 Figure 5.3 - 2J-Head Specifications ENGLISH METRIC Spindle Taper Spindle Speeds – RPM 60-4200 60-4200 Motor *2 HP 1.5 kw Quill Travel 5” 127mm Power Feed of Quill .0015” .04mm per Rev of Spindle (3 Rates) .003” .08mm .006” .15mm Collet Capacity .125”...
- Page 95 - NOTES - M-508...
- Page 96 - NOTES - M-508...
-
Page 97: Document Revision Record
DOCUMENT REVISION RECORD Document Date Revision Description Level June 4, 2010 Initial Release. August 3, 2011 Corrected table and lead screw assembly parts list. Added removal of the varidisc shipping screws. May 23, 2014 Updated document format for Danger, Warning, Caution, and Notice. Updated parts list: Added lubrication system for machine with July 3, 2014 splashguard option.
Need help?
Do you have a question about the SERIES I and is the answer not in the manual?
Questions and answers