Table of Contents
Advertisement
Quick Links
Advertisement
Table of Contents

Related Manuals for GL-INET Collie GL-X300B


Summary of Contents for GL-INET Collie GL-X300B
- Page 1 Collie (GL-X300B) USER MANUAL...
-
Page 2: Table Of Contents
Table of Contents 1. Getting Started with GL-iNet Collie ................... 1 1.1. Power on ............................ 2 1.2. Connect ............................3 1.3. Access the Web Admin Panel ..................5 2. INTERNET............................7 2.1. Cable ............................. 8 2.2. Repeater ..........................11 2.3. 3G/4G Modem ........................12 3. - Page 3 8.2. Remote Access ........................27 8.3. Captive Portal ........................28 9. MORE SETTINGS ......................... 30 9.1. Admin Password ......................... 30 9.2. LAN IP ............................31 9.3. Time Zone ..........................31 9.4. GPS .............................. 32 9.5. MAC Clone ..........................36 9.6. Custom DNS Server ......................36 9.7.
-
Page 4: Getting Started With Gl-Inet Collie
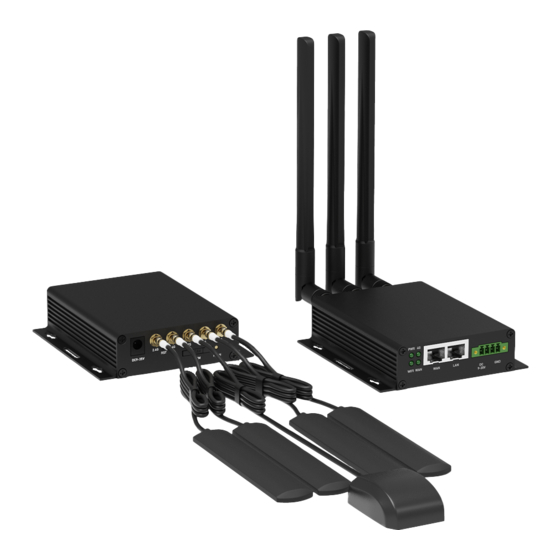
1. Getting Started with GL-iNet Collie Model:GL-X300B Tips on How to Insert the SIM Card 1|39... -
Page 5: Power On
Please use a paper clip or a SIM-eject tool to insert and push into the "Push" hole, the SIM tray will slide out. The SIM card's cut mark should be pointing to the lower left corner. Correct SIM : Mini SIM-2FF 1.1. -
Page 6: Connect
Note: Hot plug for SIM card is not supported. If you want to use it, please insert the SIM card before powering on the router. 1.2. Connect You can connect to the router via Ethernet cable or Wi-Fi. Note: This step only connects your devices to the local area network (LAN) of the router. - Page 7 please finish the setup procedures below and follow the steps listed under Internet to set up internet connection. 1) Connect via LAN Connect your device to the LAN port of the router via Ethernet cable. 2) Connect via Wi-Fi Search for the SSID of the router in the admin panel and input the default password: goodlife.
-
Page 8: Access The Web Admin Panel
• GL-X300B-XXX 1.3. Access the Web Admin Panel Open a web browser (we recommend Chrome, Firefox) and visit http://192.168.8.1. You will be directed to the initial setup of the web Admin Panel. 1) Language Setting You need to choose the display language of the Admin Panel. Currently, our routers support English, 简体中文, 繁體中文, Deutsch, Français, Español, Italiano,日本語... - Page 9 2) Admin Password Setting There is no default password for the Admin Panel. You can set your own password, which must be at least 5 characters long. Then, click Submit proceed. Note: This password is for this web Admin Panel and the embedded Linux system.
-
Page 10: Internet
2. INTERNET There are 3 types of connection method that you can use to access the Internet: Cable, Repeater, 3G/4G Modem. 7|39... -
Page 11: Cable
Click to create an Internet connection. INTERNET 2.1. Cable Connect the router to the modem or main router via Ethernet cable to access the Internet. Before plugging the Ethernet cable into the WAN port of the router, you can click to set the WAN port as a LAN port. - Page 12 Plug the Ethernet cable into the WAN port of the router. The information of your connection will be shown on the Cable section. DHCP is the default protocol. You can click to change the protocol. Modify 1) DHCP DHCP is the default and most common protocol. It does not require any manual configuration.
- Page 13 2) Static Static is required if your Internet Service Provider (ISP) has provided a fixed IP address for you or if you want to configure the network information such as IP address, Gateway, Netmask manually. Change it according to your needs and then click Apply 3)...
-
Page 14: Repeater
2.2. Repeater Using Repeater means connecting the router to another existing wireless network, e.g. when you are using free Wi-Fi in a hotel or cafe. It works in WISP (Wireless Internet Service Provider) mode by default, which means that the router will create its own subnet and act as a firewall to protect you from the public network. -
Page 15: 4G Modem
2.3. 3G/4G Modem Collie has a built-in 3G/4G modem which you can insert your SIM card directly. Please insert the SIM card before powering on the router. Then, you should find the name of your carrier, click to create the connection. Auto Setup Note: Some 3G/4G modems will be recognized as Tethering connection. - Page 16 Advanced Settings: Dial Number: Generally, it is a default value and you don't need to set • it manually. However, if you have this info, please input it. • Pincode, Username and Password: Generally, these are not necessary for an unlocked SIM card. However, if you have a locked SIM card, please consult your service provider.
- Page 17 It is connected when the IP address of your SIM card shows up. AT Command The built-in modem supports AT command for managing and configuration of the modem. In 3G/4G Modem section, Click AT Command Shortcut: There are several pre-configured AT commands that you can use •...
-
Page 18: Wireless
3. WIRELESS , you can check the current status and change the settings of the WIRELESS wireless network created by the router. The wireless network can be turned on or off by switching the ON/OFF button. Wi-Fi Name (SSID): The name of the Wi-Fi. It is not suggested to use unicode characters such as Chinese. - Page 19 Channel Optimization: It will optimize your Wi-Fi signal and channel according to the Wi-Fi environment. Click to change the settings of the wireless network. Modify 16|39...
-
Page 20: Clients
4. CLIENTS You can manage all connected clients on this page. You can see the device name, IP, and MAC address. Click the button on the right to block any unwanted client. Click the button on the right corner to enable real-time speed and traffic statistics, this feature requires higher CPU load. -
Page 21: Upgrade
5. UPGRADE Click to check any available update and upgrade the firmware. UPGRADE 18|39... -
Page 22: Online Upgrade
5.1. Online Upgrade You can find the current firmware version here. If your router is connected to the Internet, it will check for the latest available firmware version for download. Note: We suggest unchecking Keep setting after the firmware upgrade. If you keep the settings and encounter problems after the upgrade, please reset the router. - Page 23 1) Official OpenWrt/LEDE firmware You can download the official firmware from our website. • Collie: http://download.gl-inet.com/firmware/x300b/ Find the available firmware from the folder according to your device model, they are in different sub-folders: release: Official GL.iNet OpenWrt/LEDE firmware. clean: Clean versions of OpenWrt/LEDE firmware with Luci admin page only.
-
Page 24: Auto Upgrade
5.3. Auto Upgrade You can enable auto upgrade. The router will search for available update and upgrade automatically according to the time that you set. 6. FIREWALL , you can set up firewall rules like port forwarding, open port and FIREWALL DMZ.。... -
Page 25: Port Forwards
6.1. Port Forwards Port Forwarding allows remote computers to connect to a specific computer or service behind the firewall in the local LAN (such as web servers, FTP servers, etc.) To set up port forwarding, click Port Forwards and input the required parameters or click Add a New One Name: The name of the rule which can be specified by the user. -
Page 26: Open Ports On Router
6.2. Open Ports on Router The router's services, such as web, FTP and so on, require their respective ports to be opened on the router to be publicly reachable. To open a port, click Open Ports on Router and input the required parameters or click Add a New One. -
Page 27: Vpn
Click and enable . Input the internal IP address (E.g. 192.168.8.100) of Open DMZ your device which is going to receive all the inbound packets. 7. VPN GL.iNet routers have pre-installed VPN server and client in OpenVPN and WireGuard. Shadowsocks is not a default function and you need to install packages in Plug- ins. Please refer to the links below for the detailed setup instruction: OpenVPN ... - Page 28 Internet Kill Switch Starting from firmware version 3.100. Please refer to the links below for the detailed setup instruction: Internet Kill Switch Starting from firmware version 3.022, users can define VPN routing policies. Please refer to the links below for the detailed setup instruction: 25|39...
-
Page 29: Applications
VPN Policies 8. APPLICATIONS 8.1. Plug-ins Plug-ins allows you to manage OpenWrt packages. You can install or remove any package. Remember to click whenever you access this packages repository. Update 26|39... -
Page 30: Remote Access
8.2. Remote Access 1)GoodCloud Management GL.iNet GoodCloud cloud management service provides an easy and simple way to remotely manage routers. On our website, you can remotely check your router status, change the password, control clients, even set email alarm when a device is online or offline. In 3.021 version or above, this is a default function, other 3.0 version need to install packages in Plug-ins. -
Page 31: Captive Portal
For the details, please refer to Cloud. 2) DDNS DDNS (Dynamic Domain Name Service) is a service used to map a domain name to the dynamic IP address of a network device. You can remotely access your router by url though this function. In 3.021 version or above this is a default function, other 3.0 version need to install packages in Plug-ins. - Page 32 For the setup guidance, please refer to Set a Captive portal. 29|39...
-
Page 33: More Settings
9. MORE SETTINGS 9.1. Admin Password Change the password of the web Admin Panel, which must be at least 5 characters long. You can input your current password to change it. 30|39... -
Page 34: Lan Ip
9.2. LAN IP LAN IP is the IP address that you use to connect to this router. The default IP address of GL.iNet router is 192.168.8.1. If it conflicts with the IP address of your main router, you can change it. 9.3. -
Page 35: Gps
9.4. Click the MORE SETTINGS menu, and then click GPS to enter the following interface: 32|39... - Page 36 Device MAC: The WAN MAC Address of the Device. Status: Check if the current location is valid. UTC Time: UTC Time Latitude: Latitude Longitude: Longitude Data Reporting: GPS Data Reporting Switch, the default status is OFF. The GPS location data details are shown as follows:...
- Page 37 When you turn on the Data Reporting Function, the interface is displayed as follows: After the data is reported successfully, you can track the GPS information on the cloud. 34|39...
- Page 38 The historical route is as shown on the map below: 35|39...
-
Page 39: Mac Clone
9.5. MAC Clone Clone the MAC address of your current client to the router. It is used especially in hotels when the network checks your MAC address. For example, if you got your smartphone registered on the network, you can clone the MAC address of your smartphone to the router so that the router can also connect to the network. -
Page 40: Network Mode
Manual DNS Server Settings: Input a custom DNS server manually. 9.7. Network Mode Change the network mode to cater your usage scenario. You may need to reconnect your client device whenever you change the network mode of the router. Be aware that you may not be able to access the web Admin Panel with the default IP 192.168.8.1 if you use the router in Access Point, Extender or WDS mode. -
Page 41: Revert Firmware
9.8. Revert Firmware Revert the router to factory default settings. All your settings, applications and data will be erased. 38|39... - Page 42 39|39...
Need help?
Do you have a question about the Collie GL-X300B and is the answer not in the manual?
Questions and answers