Table of Contents
Advertisement
Quick Links
Advertisement
Table of Contents

Related Manuals for ELMETRON CX-461


Summary of Contents for ELMETRON CX-461
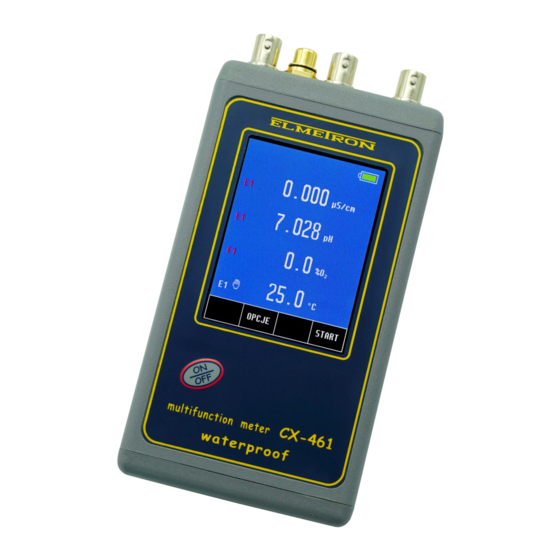
- Page 1 WATERPROOF MULTIFUNCTION METER CX-461 USER‘S MANUAL...
- Page 3 USER‘S MANUAL WATERPROOF MULTIFUNCTION METER CX-461 Read the instructions carefully before use...
-
Page 5: Table Of Contents
CONTENTS INTRODUCTION 1.Exploitation notices 2.Characteristics of the meter 3.The meter‘s use 4.The outside view 5.The meter‘s maintenance 6.Switching the meter on and off 6.1.Choosing the measurement function 7.Preparation to work 7.1.Choosing the kind of the temperature compensation pH MEASUREMENT 8.Preparation of the pH electrode 9.Setting the pH measurement parameters 9.1.Resolution 9.2.Electrode number... - Page 6 19. Salinity and total dissolved solids measurement 19.1. Salinity measurement with conversion to NaCl or KCl 19.2. Determining the W coefficient 19.3. The salinity measurement with conversion to TDS 20. Simplified way of determining the α coefficient OXYGEN CONCENTRATION MEASUREMENT 21.
-
Page 7: Introduction
- 1 - I. INTRODUCTION... - Page 8 - 2 - User‘s manual for CX-461 multifunction meter v1.40...
-
Page 9: Exploitation Notices
- 3 - 1. EXPLOITATION NOTICES Dear User! We present you a device distinguished by accuracy according to the technical data and by a high stability of the displayed results. We believe that the measurements would not cause you any trouble and that the meter would operate without any inconvenience. -
Page 10: Characteristics Of The Meter
- 4 - 2. CHARACTERISTICS OF THE METER CX-461 multifunction meter belongs to the newest generation of measuring devices. It offers wide range of additional functions. The meter ensures high accuracy and repeatability of readings. Two kinds of power source: the rechargeable battery and the power adapter, enable work in field and long- lasting measurements in the laboratory. -
Page 11: The Meter's Use
- 5 - 3. THE METER‘S USE CX-461 waterproof multifunction meter is a precise and easy-to-use meter designed for measuring: hydrogen ion concentration in pH units, redox potential (mV), conductivity in µS/cm or mS/cm, oxygen dissolved in water in % of saturation or mg/l, oxygen content in air in %, atmospheric pressure in hPa and accurate air and solutions temperature in F or K. -
Page 12: The Outside View
– calibration validity date expiry, or the electrode efficiency loss detected during the last calibration. The parameter screen of each function displays all parameters entered by the user. The rechargeable battery condition is signalised by the symbol . User‘s manual for CX-461 multifunction meter v1.40... - Page 13 - 7 - button (Pic. 2) placed below the display is used for switching the meter on and off. In the upper wall of the meter connectors are placed with the symbols given below: pH - the BNC-50 input for connecting the combination pH electrode or the redox electrode;...
-
Page 14: The Meter's Maintenance
Turn the meter on and off with one mechanical button. When a measurement series is collected, the button is not active until the process of collecting ends or is stopped. User‘s manual for CX-461 multifunction meter v1.40... -
Page 15: Switching The Meter On And Off
- 9 - 6. SWITCHING THE METER ON AND OFF After switching the meter on with the button, the memory test proceeds. If the test ends successfully, the meter enters the measurement screen with settings entered before switching it off previously. In case of detecting the manufacturer‘s calibration data loss, the following information will appear: Pressing the button accepts standard manufacturer‘s calibration... -
Page 16: Choosing The Measurement Function
Choosing the function which has been already selected in another window automatically sets the status to in this window. NONE Return to the measurement screen by pressing the button. User‘s manual for CX-461 multifunction meter v1.40... -
Page 17: Preparation To Work
- 11 - 7. PREPARATION TO WORK Before starting measurements: - connect the power adapter plug to the P input, if work with the power adapter is planned; - connect the combination pH electrode or the redox electrode to the pH (BNC-50) input;... - Page 18 - 12 - User‘s manual for CX-461 multifunction meter v1.40...
-
Page 19: Ph Measurement
- 13 - II. pH MEASUREMENT... - Page 20 - 14 - User‘s manual for CX-461 multifunction meter v1.40...
-
Page 21: Preparation Of The Ph Electrode
- 15 - 8. PREPARATION OF THE PH ELECTRODE The electrode should be prepared to work according to the producer’s instructions. If the instructions weren’t given please act accordingly to the following steps: - new electrode should be put into saturated KCl solution for about 5 hours; - before starting measurements, the protecting rings (if used in this kind of electrode) should be removed. -
Page 22: Setting The Ph Measurement Parameters
When the parameters are set, return to the measurement screen by pressing button. 9.1. Resolution The reading can be displayed with low or high resolution. By pressing the window, choose: RESOLUTION - 0.01 pH measurement resolution; - 0.001 pH measurement resolution. User‘s manual for CX-461 multifunction meter v1.40... -
Page 23: Electrode Number
- 17 - 9.2. Electrode number If the meter stores more than one electrode’s characteristic, the electrodes may be replaced without calibration. This option is very useful for field work. After pressing the window the table with electrode ELECTRODE NUMBER numbers appears (Pic. -
Page 24: Calibration Solution
Expiry of this date is signalised with yellow electrode number. To set the calibration validity expiry date, press the window, the VALIDITY numerical keyboard will appear to enter the number of days and confirm with button. User‘s manual for CX-461 multifunction meter v1.40... -
Page 25: Calibration
CX-461 enables storing characteristics of three calibrated pH electrodes separately, recorded under different numbers (E1, E2 or E3). This feature is very useful when it is necessary to change the electrode quickly or to replace a broken one. -
Page 26: Calibration In Buffer Or Standard Solutions
4. In case of accurate measurements in a full range it is recommended to calibrate the electrode in each of the 5 points given in the table. The solutions may be used randomly. In CX-461 the electrode characteristic is approximated linearly between the calibration points. -
Page 27: Entering The Buffers' Values Into The Meter's Memory
- 21 - 10.2. Entering the buffers’ values into the meter’s memory If the calibration with use of buffers has been chosen and the pH values set by the manufacturer are used, there is no need to change them. However, it should be verified whether the values correspond to those of applied buffers. - Page 28 10.2. In such case there is no need to adjust the solutions temperature. Attempt to enter pH values beyond the ranges given in the table 1 will not be accepted by the meter. User‘s manual for CX-461 multifunction meter v1.40...
-
Page 29: Calibration In Buffer Solutions
- 23 - 10.3. Calibration in buffer solutions When the electrode is prepared for measurement, start calibration in buffer solutions. The buffers may be applied randomly. To start calibration: choose the electrode number (E1, E2 or E3) according to the point 9.2 and mark the electrode with this number;... -
Page 30: Calibration With Use Of Standard Solutions
When the reading stabilises, press the button. Next to the detected buffer value the marking will appear, what informs that the calibration value has been recorded. Simultaneously, the measurement value will be adjusted User‘s manual for CX-461 multifunction meter v1.40... - Page 31 - 25 - to the detected buffer value. If the reading is still different than the solution value, wait until the reading stabilises and press the button again. If the meter doesn‘t detect the buffer‘s value, it will signalise the error after pressing the button with a tripple warning sound.
-
Page 32: Checking The Electrode Condition
- electrode condition loss, if the zero and condition parameter are displayed in yellow; - calibration validity date expiry if the last calibration date is also displayed in yellow. In case of 1 point calibration, only the zero offset parameter is displayed. User‘s manual for CX-461 multifunction meter v1.40... -
Page 33: Ph Measurement
- 27 - 12. PH MEASUREMENT Before starting measurement the meter and the pH electrode have to be prepared for work (chapters 7 and 8 respectively). Good condition of the electrode is crucial for correct readings. If the electrode is calibrated, choose its number according to the section 9.2 and the measurement resolution according to the section 9.1. -
Page 34: Measurement With Manual Temperature Compensation
- measure the temperature of the solution with use of a laboratory thermometer and enter the value according to the point 29.5; - wait till the value stabilises and read the result. Pic. 8 User‘s manual for CX-461 multifunction meter v1.40... -
Page 35: Notices About The Temperature Compensation And Interpretation Of The Ph Measurement Results
13. NOTICES ABOUT THE TEMPERATURE COMPENSATION AND INTERPRETATION OF THE PH MEASUREMENT RESULTS CX-461 multifunction meter enables manual and automatic temperature compensation, what eliminates errors resulting from the electrode characteristics being affected by the temperature changes. The pH meter is a mV meter which displays voltage counted to pH unit. - Page 36 They differ one from another with shape, membrane’s look, kind of junction and body. Using unsuitable electrodes may cause their damage and make measurements impossible. User‘s manual for CX-461 multifunction meter v1.40...
-
Page 37: Conductivity And Salinity Measurement
- 31 - III. CONDUCTIVITY AND SALINITY MEASUREMENT... - Page 38 - 32 - User‘s manual for CX-461 multifunction meter v1.40...
-
Page 39: Basic Information About Conductivity Measurement
14. BASIC INFORMATION ABOUT CONDUCTIVITY MEASUREMENT The conductivity measurement consists in applying electric current with a suitable voltage and frequency to the measured solution. In CX-461 the voltage comes to several dozens of mV and the frequency depends on the measuring range and may vary from 100 Hz to 10 kHz. -
Page 40: Entering The Conductivity Parameters
When the parameters are entered, return to the measurement screen by pressing the button. 15.1. Resolution The reading may be displayed with low or high resolution. By pressing the window, choose: RESOLUTION - 3½ digit measurement resolution; - 4½ digit measurement resolution. User‘s manual for CX-461 multifunction meter v1.40... -
Page 41: Cell Number
- 35 - 15.2. Cell number If the meter stores more than one cell characteristic, the cell may be replaced without calibration. This option is very useful in case of using different types of cells, i.e. for sewage, clear water etc. After pressing the window PROBE NO the table with electrode numbers appears (Pic. -
Page 42: Calibration Points And Date
VALIDITY appear to enter and confirm the number of days. 15.6. Entering the α α α α coefficient The α coefficient range in CX-461 is 0 ÷ 10.00 % / C with accuracy 0.01 % / C. Generally for measurements, the most frequently applied temperature compensation coefficient is equal α... -
Page 43: Entering The Reference Temperature
- 37 - 15.7. Entering the reference temperature The range of the reference temperature is 10.0 ÷ 40.0 o C with accuracy 0.1 o C. The most frequently applied value is 25 o C. To enter the reference temperature value, press the „ “... -
Page 44: Choosing And Maintaining The Conductivity Cell
16. CHOOSING AND MAINTAINING THE CONDUCTIVITY CELL 16.1. Choosing the cell The measurement range in CX-461 is 0 to 2000 mS/cm. The meter cooperates with conductivity cells with K constant = 0.010 ÷ 20.00 cm -1 , and BNC-50 connector. Depending on the required measuring range it is necessary to choose the cell with a K constant which enables receiving correct results. -
Page 45: Maintenance Of The Cell
- 39 - 16.2. Maintenance of the cell In order to receive stable results it is advisable to soak the cell for a few hours before measurement, especially in case of measurements in distilled water. Maintenance of the conductivity cell consists mainly in washing the inside of the measuring cell accurately with distilled water. -
Page 46: Calibration
K constant of the conductivity cell. This value may be given by the cell manufacturer or may be determined with use of CX-461 meter. The meter has to be calibrated in the standard solution. -
Page 47: Calibration With Use Of Standard Solution
- 41 - Pic. 12. 17.2. Calibration with use of standard solution The meter enables 1-point calibration in a freely chosen standard solution. To decrease the error it is recommended to use solutions with a value close to the expected conductivity of the measured solution. It is required to use sample solutions of high quality. - Page 48 - choose the unit, numerical keyboard will appear to enter the value and confirm with the button. - in the calibration mode enter the measurement screen by pressing the button, or escape the calibration mode by pressing the button once again . Pic. 13. User‘s manual for CX-461 multifunction meter v1.40...
- Page 49 - 43 - 17.2.2. Calibration with automatic temperature compensation Follow the instructions: - connect the conductivity cell and the temperature probe; - enter the calibration mode: on the measurement screen select the conductivity measurement, press and hold the button until the background changes its colour to red, the meter will automatically change the unit to S/cm (Pic.
- Page 50 If the meter does not recognise the standard, it will signalise the error with a tripple warning sound after pressing the button. Pic. 15 The meter is calibrated and ready for performing measurement. User‘s manual for CX-461 multifunction meter v1.40...
-
Page 51: Conductivity Measurement
- 45 - 18. CONDUCTIVITY MEASUREMENT 18.1. Measurement without temperature compensation An accurate conductivity measurement should be performed without the temperature compensation. The measured solution should be adjusted to the reference temperature entered earlier. When controlling, it is possible to use the temperature probe. -
Page 52: Measurement With Automatic Temperature Compensation
- air bubbles may be removed by moving the immersed cell. In order to make moistening of the electrodes easier, it is recommended to immerse the cell in distilled water with washing-up liquid, and than wash it in distilled water. User‘s manual for CX-461 multifunction meter v1.40... -
Page 53: Measurement With Manual Temperature Compensation
- 47 - 18.3. Measurement with manual temperature compensation Measurement with manual temperature compensation may be performed in stable working conditions, i.e., measurements in laboratory, especially with use of thermostat, or in case of the temperature probe breakdown. Disconnecting the temperature probe switches the meter to manual temperature compensation. -
Page 54: Salinity And Total Dissolved Solids Measurement
18.174 15.000 17.46 The microcontroller in CX-461 calculates actual dependence between conductivity and salinity what greatly reduces the error. There is a possibility of counting the salinity in NaCl or KCl, because the dependence for this two salts is slightly different. -
Page 55: Salinity Measurement With Conversion To Nacl Or Kcl
- 49 - The results are more accurate for homogeneous solutions (NaCl, KCl). Concentration of salts mixture with unknown composition in most cases is counted to NaCl. The usefulness of water for home or industry is usually checked by determining of TDS. In order to use the conductivity readout for determining the TDS it is necessary to specify the W coefficient, which enables automatic conversion after having introduced it to the meter’s... -
Page 56: Determining The W Coefficient
15.8; - choose the measurement of salinity with conversion to TDS and the unit (g/l or %); - act as during conductivity measurement. Check the reading when it stabilises. User‘s manual for CX-461 multifunction meter v1.40... -
Page 57: Simplified Way Of Determining The Α Coefficient
- 51 - 20. SIMPLIFIED WAY OF DETERMINING THE α α α α COEFFICIENT The knowledge of α coefficient is significant during measurements in temperatures different than the reference temperature. This coefficient is changing with the temperature and concentration. Table 4 contains values of α... - Page 58 25° C the formula is different: α = x 100 (%/ (25 - T where: - changed temperature in - conductivity at 25 - conductivity measured at T temperature User‘s manual for CX-461 multifunction meter v1.40...
-
Page 59: Oxygen Concentration Measurement
- 53 - IV. OXYGEN CONCENTRATION MEASUREMENT... - Page 60 - 54 - User‘s manual for CX-461 multifunction meter v1.40...
-
Page 61: Basic Information About The Oxygen Measurement
- 55 - 21. BASIC INFORMATION ABOUT THE OXYGEN MEASUREMENT Measurement of dissolved oxygen in water solutions is performed with use of the oxygen sensor. The basic element of the sensor is a teflon semi- permeable membrane, which enables penetration of oxygen contained in the measured solution, into the electrolyte –... - Page 62 Even the best oxygen sensors have so-called drift about ±1%/24 h. Wide measuring range in the CX-461 multifuncion meter enables making measurements in water permeated with oxygen, i.e.
-
Page 63: Entering Dissolved Oxygen Measurement Parameters
- 57 - 22. ENTERING DISSOLVED OXYGEN MEASUREMENT PARAMETERS The oxygen meter parameters screen is entered by pressing the oxygen readout (the frame will display around it – Pic. 19A), and next the button. On this screen (Pic. 19B) choose the unit, the method of salinity compensation and its value. -
Page 64: Unit
- the salinity measured simultaneously with oxygen concentration calculated automaticaly; - the salinity value entered manually with the numerical keyboard or collected once from the conductivity measurement course; - the salinity compensation off. User‘s manual for CX-461 multifunction meter v1.40... -
Page 65: Automatic Compensation Of The Atmospheric Pressure Influence
- 59 - 22.6.1. Manual introduction of the salinity value After choosing the manual mode the window will appear (Pic. 19C) SALINITY for entering the salinity value. To enter, press the window, the SALINITY numerical keyboard will appear for entering the salinity value and confirm with the button. -
Page 66: Calibration Of The Dissolved Oxygen Sensor
The characteristic erase is signalised with red coulour of the sensor number on the screen. User‘s manual for CX-461 multifunction meter v1.40... - Page 67 - 61 - To calibrate, follow the instructions: - choose the sensor number according to the point 22.2. - enter the calibration mode: select the dissolved oxygen measurement on the measurement screen, press and hold the button until the background changes its colour to red, the meter enters the calibration mode and automatically changes the unit to %.
-
Page 68: Measurement Of Oxygen Concentration In Water
- for accurate measurement of oxygen concentration in mg/l enter the salinity value (section 22.6); - check or simulate the solution flow; - wait about 1 ÷ 1.5 min until the reading stabilises (depending on sensor) and read the value. User‘s manual for CX-461 multifunction meter v1.40... -
Page 69: Measurement With Manual Temperature Compensation
- 63 - 24.2. Measurement with manual temperature compensation Follow the instructions: - disconnect the temperature probe; - turn the meter on with the button; - choose displaying the oxygen concentration value according to the point 31.1; - choose the unit according to the section 22.3; - for accurate measurement of oxygen concentration in mg/l enter the salinity value (section 22.6);... -
Page 70: Measurement Of Oxygen Content In Air
(on the left) the %O Air symbol is displayed to differenciate it from the reading of percentage of the dissolved oxygen concentration in water. User‘s manual for CX-461 multifunction meter v1.40... -
Page 71: Atmospheric Pressure Measurement
- 65 - V. ATMOSPHERIC PRESSURE MEASUREMENT... - Page 72 - 66 - User‘s manual for CX-461 multifunction meter v1.40...
-
Page 73: Atmospheric Pressure Measurement
- 67 - 26. ATMOSPHERIC PRESSURE MEASUREMENT The meter enables atmospheric pressure measurement. To read its value: - turn the meter on by pressing the button; - choose the atmospheric pressure measurement function on the measurement screen according to the point 31.1 - return to the measurement screen by pressing the button and read the pressure value (Pic. - Page 74 - 68 - User‘s manual for CX-461 multifunction meter v1.40...
-
Page 75: Redox Potential (Mv) And Temperature Measurement
- 69 - VI. REDOX POTENTIAL (MV) AND TEMPERATURE MEASUREMENT... - Page 76 - 70 - User‘s manual for CX-461 multifunction meter v1.40...
-
Page 77: Setting The Redox Potential Parameters
- 71 - 27. SETTING THE REDOX POTENTIAL PARAMETERS The redox potential parameters window is entered by selecting the redox potetial readout (a frame will be displayed around it – Pic. 24A) and the button. The screen (Pic. 24B) enables choosing the resolution, the reference temperature and setting the zero offset for the relative measurement. -
Page 78: Relative Measurement
To enter the current reference voltage value, press the button during the measurement process, the currently measured reference voltage value will be entered into the REF. window automatically. VOLTAGE User‘s manual for CX-461 multifunction meter v1.40... -
Page 79: Redox Potential Measurement
- 73 - 28. REDOX POTENTIAL MEASUREMENT CX-461 is an accurate voltmeter. The measurement may be made with redox electrode or during titration. To make measurement: - turn the meter on by pressing the button; - choose the redox potential measurement to be displayed on the measuring screen according to the point 31.1;... -
Page 80: Setting The Temperature Measurement Parameters
After setting the parameters return to the measurement screen by pressing button. 29.1. Resolution The reading can be displayed with low or high resolution. By pressing the window, choose: RESOLUTION C measurement resolution; - 0.1 C measurement resolution. User‘s manual for CX-461 multifunction meter v1.40... -
Page 81: Probe Number
- 75 - 29.2. Probe number The meter may store parameters of three probes, which may be replaced without the need of entering the group again, only the number which symbolises the sensor group has to be selected. By pressing the PROBE NO. -
Page 82: Temperature Measurement
Instead of the measured temperature value, the value inserted by the user is displayed. Displaying of -50° C value in red while making measu rement at positive temperature informs about short circuit in the temperature probe. User‘s manual for CX-461 multifunction meter v1.40... -
Page 83: Options
- 77 - VII. OPTIONS... - Page 84 - 78 - User‘s manual for CX-461 multifunction meter v1.40...
-
Page 85: Options Screen
- 79 - 31. OPTIONS SCREEN Enter the options screen by pressing the button in the measurement screen. The OPTIONS screen contains the following tabs: - choose the measurement functions to be displayed on the FUNCTIONS measurement screen; - parameters for collecting measurement series; SERIES - choose the language, set the economical mode, time and MISC. -
Page 86: Series
/ off, chosse the 12 / 24 clock mode and set the current time; DATE SETUP - after pressing the poka e się ekran DATE SETUP (Pic. 29C), na którym mo na włączyć lub wyłączyć wyświetlanie daty i wprowadzić aktualną datę; User‘s manual for CX-461 multifunction meter v1.40... - Page 87 - 81 - To enter a logical value (lanuage, sound, brightness), press the chosen window, a table will appear to choose the value. To enter a numerical value, press the chosen window, a numerical keyboard will appear to enter the value and confirm with the button.
-
Page 88: Info
- 82 - 31.4. Info The INFO tab contains the company address and the software version number. (Pic. 30). Pic. 30. Return to the measurement mode by pressing the button. User‘s manual for CX-461 multifunction meter v1.40... -
Page 89: Recording The Readings, Memory Readout
- 83 - 32. RECORDING THE READINGS, MEMORY READOUT The meter enables recording 2000 readings of the displayed measurement functions. The readouts are stored in memory even in case of power shortage. Before the measurement set the recording parameters for the readings. - Page 90 The table below shows the dependency between the number of banks and the maximal number of samples in one bank. number of max. number of banks samples in one bank 2000 1000 User‘s manual for CX-461 multifunction meter v1.40...
-
Page 91: Entering Single Readouts Into The Memory
- 85 - 32.2. Entering single readouts into the memory If, according to the previous section, collecting single readouts has been chosen, than pressing the button starts up manual readouts collecting (the button will show at the bottom of the measurement screen). -
Page 92: Collecting Measurement Series
Pic. 33 Notice: pressing the button during manual or automatic series collection results in signalising an error with a tripple warning sound. Collecting series will be continued until the button is pressed. User‘s manual for CX-461 multifunction meter v1.40... -
Page 93: Reviewing The Readouts
- 87 - 32.4. Reviewing the readouts The stored readouts may be viewed on the meter‘s screen. Follow the instructions: - on the measurement screen press the button and choose the tab on the options screen; SERIES - Choose the number of bank that is to be viewed and press the button. -
Page 94: Power, Replacing The Rechargeable Batteries
This kind of failure is not repaired under the warranty conditions. Caution: aplication of batteries instead of rechargeable batteries when using the power adapter may result in fire and damage the meter! User‘s manual for CX-461 multifunction meter v1.40... -
Page 95: Cooperation With Pc
- 89 - 34. COOPERATION WITH PC Connecting the meter with PC enables collecting the data directly on the computer, what makes a possible number of results to store unlimited. The PC should be equipped with a serial RS-232 connector. Connection to USB port may be obtained with use of a RS-232/USB converter (additional equipment). -
Page 96: Technical Data
(table page 19) IN RANGE 0 ÷ 60 o C THERMAL STABILITY OF ZERO: 0.001 pH/ mV MEASUREMENT: accuracy range resolution (±1 digit) -2000.0 ÷ 2000.0 mV ±0.1 mV 0.1 mV Ω INPUT IMPEDANCE: >10 User‘s manual for CX-461 multifunction meter v1.40... - Page 97 - 91 - CONDUCTIVITY MEASUREMENT: accuracy* ranges resolution frequency (±1 digit) 0.000 ÷ 19.999 µS/cm 0.001 / 0.01 µS/cm ±0.1 % 100 Hz 20.00 ÷ 199.99 µS/cm 0.01 / 0.1 µS/cm ±0.1 % 1 kHz 200.0 ÷ 1999.9 µS/cm 0.1 / 1 µS/cm ±0.1 % 2 kHz 2.000 ÷...
- Page 98 POWER CONSUMPTION: 0% brightness 70 mW 100% brightness 180 mW recharging batteries max. 2.4 W DISPLAY: LCD 55 x 45 mm DIMENSIONS: 149 x 82 x 22 mm WEIGHT: 260 g (with rechargeable battery) User‘s manual for CX-461 multifunction meter v1.40...
-
Page 99: Equipment
- 93 - 36. EQUIPMENT The standard equipment includes: 1. Pt-1000B temperature probe (standard). 2. Plastic container for the meter, electrode and temperature probe. 3. 6V/500mA stabilised power adapter. 4. User‘s manual on CD. Additionally may be ordered: 1. Combination pH electrde (glass membrane). 2. - Page 101 W A R R A N T Y The ELMETRON company ensures a 24-month warranty for the multifunction meter CX-461 number: ..........In case of damage the manufacturer will repair the meter within 14 days from the day of delivery.
- Page 106 ® Sp. j. 41-814 Zabrze - Grzybowice ul. Witosa 10 tel. +48 32 / 2738106 fax +48 32 / 2738114 www.elmetron.com.pl e-mail: info@elmetron.com.pl...
Need help?
Do you have a question about the CX-461 and is the answer not in the manual?
Questions and answers