Advertisement
Available languages
Available languages
Quick Links
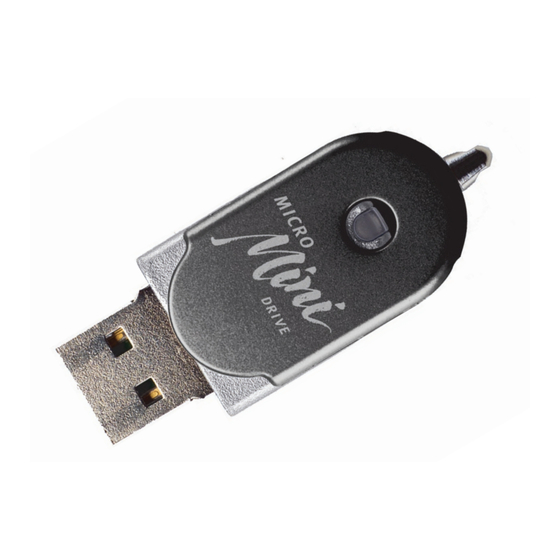
Iomega ® Micro Mini USB Drive
Quick Install
Installation rapide
Schnellinstallation
Guida di installazione
rapida
Instrucciones rápidas
Instalação rápida
Snelle installatie
Snabbinstallation
Models may vary
Les modèles peuvent varier
Modelle können unterschiedlich sein
I modelli sono suscettibili di variazioni
Los modelos pueden variar
Os modelos podem variar
Modellen kunnen verschillen
Modellerna kan variera
Modellerne kan variere
Modeller kan variere
Mallit saattavat vaihdella
Hurtig installation
Rask installering
Pika-asennus
Advertisement

Subscribe to Our Youtube Channel
Related Manuals for Iomega Mini


Summary of Contents for Iomega Mini
- Page 1 Iomega ® Micro Mini USB Drive Models may vary Les modèles peuvent varier Modelle können unterschiedlich sein I modelli sono suscettibili di variazioni Los modelos pueden variar Os modelos podem variar Modellen kunnen verschillen Modellerna kan variera Modellerne kan variere...
-
Page 2: Start-Up Instructions
USB drive is on. A faster pulse means it is transferring data. CAUTION! Do not remove the Iomega Micro Mini USB drive during data transfer; data loss may occur. 2. The Iomega Micro Mini USB drive is ready to use just like any other removable drive connected to your computer. - Page 3 PC users: Click on the Remove Hardware icon on the right side of the taskbar to stop the Iomega Micro Mini USB drive, then remove it. (Windows 98/98SE users will not see this icon, simply remove the Iomega Micro Mini USB drive.)
-
Page 4: Instructions De Démarrage
USB est déjà pris en charge par votre système. 1. Faites pivoter le capuchon de votre lecteur Iomega ® Micro Mini USB et connectez ce dernier à un port USB de votre ordinateur. L’icône du lecteur Iomega Micro Mini USB s’affiche dans le Poste de travail, dans l’Explorateur Windows... - Page 5 Windows 98/98 Deuxième Edition ; dans ce cas, supprimez simplement le lecteur Iomega Micro Mini USB.) Utilisateurs Mac : Faites glisser l’icône du lecteur Iomega Micro Mini USB dans la poubelle avant de la supprimer. 5. Pour formater le lecteur Iomega Micro Mini USB, utilisez les utilitaires de formatage de système de votre PC ou Mac.
- Page 6 Benutzer von Windows Me/2000/XP, und Mac OS 9.X oder höher: Ihr System unterstützt USB bereits. 1. Drehen Sie die Verschlusskappe Ihres Iomega ® Micro Mini USB-Laufwerks und schließen Sie es dann an einem beliebigen USB-Anschluss Ihres Computers an. Das Laufwerkssymbol Ihres Iomega Micro Mini USB-Laufwerks wird im Arbeitsplatz, dem Windows Explorer oder dem Desktop Ihres Mac(r) angezeigt.
- Page 7 Sie es anschließend. (Bei Windows 98/98SE wird dieses Symbol nicht angezeigt, entfernen Sie einfach das Iomega Micro Mini USB-Laufwerk). Mac-Benutzer: Ziehen Sie das Iomega Micro Mini USB-Laufwerk über den Papierkorb, bevor Sie das Laufwerk entfernen. 5. Zum Formatieren des Iomega Micro Mini USB-Laufwerks verwenden Sie die Formatierungsfunktion Ihres PC oder Mac.
- Page 8 USB durante il trasferimento delle informazioni; potrebbe verificarsi una perdita delle informazioni. 2. L’unità Iomega Micro Mini USB può essere usata come qualsiasi altra unità rimovibile collegata al computer. Per iniziare a usare l’unità Iomega Micro Mini USB, fare doppio clic sull’icona disponibile in Risorse del computer, Gestione risorse/Esplora risorse o...
- Page 9 Utenti Mac: trascinare l’icona dell’unità Iomega Micro Mini USB nel cestino prima di rimuoverla. 5. Per formattare l’unità Iomega Micro Mini USB, usare le utilità di formattazione del sistema disponibili su PC o Mac. ATTENZIONE! Durante la formattazione verranno cancellati tutti i dati residenti sull’unità...
- Page 10 Usuarios de Windows Me/2000/XP y de Mac OS 9.X y superior: Su sistema ya admite USB. 1. Haga girar la tapa de su unidad Iomega ® Micro Mini USB y conéctela a cualquier puerto USB de la computadora. El icono de la unidad Iomega Micro Mini USB aparecerá en Mi PC, el Explorador de Windows o en el escritorio de Mac.
- Page 11 USB y luego retírela (los usuarios de Windows 98/98SE no verán este icono, simplemente deben retirar la unidad Iomega Micro Mini USB). Usuarios de Mac: Arrastre el icono de la unidad Iomega Micro Mini USB a la papelera antes de retirarla.
- Page 12 Usuários do Windows Me/2000/XP e Mac OS 9.X e versões posteriores: Seu sistema já tem suporte para USB. 1. Gire a tampa da unidade Iomega ® Micro Mini USB e conecte-a em qualquer porta USB do seu computador. O ícone da unidade Iomega Micro Mini USB aparecerá em Meu computador, Windows Explorer ou na mesa do Mac.
- Page 13 Iomega Micro Mini USB, só depois remova-a. (Os usuários de Windows 98/98 SE, que não verão este ícone, devem apenas remover a unidade Iomega Micro Mini USB.) Usuários do Mac: Arraste o ícone da unidade Iomega Micro Mini USB para o lixeira antes de retirar a unidade.
- Page 16 Windows ME/2000/XP-gebruikers en gebruikers van Mac OS 9.X en hoger: Uw systeem ondersteunt reeds USB. 1. Draai het kapje van de Iomega ® Micro Mini USB-drive af en sluit daarna de drive aan op een USB-poort van uw computer. Het pictogram van de Iomega Micro Mini USB- drive verschijnt in Deze computer, Windows Verkenner of op het Mac-bureaublad.
- Page 17 Iomega Micro Mini USB-drive te registreren en coole software te downloaden. Hiervoor moet u met het Internet verbonden zijn. 4. Als u de Iomega Micro Mini USB-drive wilt loskoppelen, controleert u eerst dat er geen gegevensoverdracht bezig is. PC-gebruikers: Klik op het pictogram Hardware...
- Page 18 1. Vrid runt locket på din Iomega ® Micro Mini USB-enhet och anslut den till vilken USB-port som helst i din dator. Ikonen för Iomega Micro Mini USB-enheten visas i Den här datorn, Utforskaren eller på skrivbordet (om du har en Mac).
- Page 19 4. Se till att enheten inte överför data när du tar bort Iomega Micro Mini USB-enheten. PC-användare: Klicka på Remove Hardware-ikonen till höger på aktivitetsfältet för att stoppa Iomega Micro Mini USB-enheten. Ta sedan bort den. (Windows 98/98SE-användare ser inte denna ikon. Ta bara bort Iomega Micro Mini USB-enheten.) Mac-användare: Dra ikonen för Iomega Micro Mini USB-enheten till papperskorgen...
- Page 20 Iomega Micro Mini USB-drevet vises i Denne computer, Windows Stifinder eller på Mac-skrivebordet. Den langsomt blinkende indikator indikerer, at Iomega Micro Mini USB-drevet er tændt. Hurtigere blinken beyder, at det overfører data. FORSIGTIG! Fjern ikke Iomega Micro Mini USB-drevet under dataoverførsel; der kan opstå datatab.
- Page 21 Brugere af pc: Klik på ikonet Fjern hardware på højre side af proceslinjen for at standse Iomega Micro Mini USB-drevet og derefter fjerne det. Brugere af Windows 98/98SE ser ikke dette ikon og skal blot fjerne Iomega Micro Mini USB-drevet.
- Page 22 Micro Mini USB-stasjonsikonet vises i Min datamaskin, Windows Utforsker eller på Mac-skrivebordet. En langsomt pulserende lampe betyr at Iomega Micro Mini USB-stasjonen er på. En raskere puls betyr at den overfører data. FORSIKTIG! Ikke ta ut Iomega Micro Mini USB-stasjonen under overføring av data.
- Page 23 PC-brukere: Klikk på Fjern maskinvare-ikonet til høyre på oppgavelinjen for å stoppe Iomega Micro Mini USB-stasjonen før du tar den ut. (Windows 98/98SE-brukere vil ikke se dette ikonet, men tar bare ut Iomega Micro Mini USB-stasjonen.)
- Page 24 Windows Me-, 2000- ja XP-käyttäjät sekä Mac OS 9.X -käyttäjät: Järjestelmä tukee USB-liitäntää. 1. Avaa Iomega ® Micro Mini USB -aseman suojus ja kytke asema tietokoneessa olevaan USB-porttiin. Iomega Micro Mini USB -aseman kuvake tulee näkyviin Oma tietokone- tai Windows Resurssienhallinta -ikkunaan tai Mac-tietokoneen työpöydälle.
- Page 25 USB -aseman toiminnot napsauttamalla työkalurivin oikealla puolella olevaa Poista laite -kuvaketta. (Windows 98- tai Windows 98 SE -järjestelmässä ei ole tätä kuvaketta, vaan Iomega Micro Mini USB -aseman voi irrottaa ilman erikoistoimenpiteitä.) Macintosh-tietokoneen käyttäjät: Vedä Iomega Micro Mini USB -aseman kuvake roskakoriin, ennen kuin irrotat aseman.
- Page 30 • Consult the dealer or an experienced radio/TV technician for help. CE (European Community) This Iomega product conforms to the following European Directive(s) and Standard(s): Application of Council Directives: 89/336/EEC. Standards to which Conformity is declared: EN55022, EN55024, EN61000-3-2, EN61000-3-3.
- Page 32 Copyright © 2003 Iomega Corporation. All rights reserved. Iomega, the stylized “i” logo, and all Iomega brand blocks are either registered trademarks or trademarks of Iomega Corporation in the United States and/or other countries. Mac is a trademark of Apple Computer, Inc. and may be registered in the United States and other countries.
Need help?
Do you have a question about the Mini and is the answer not in the manual?
Questions and answers