Table of Contents
Advertisement
Advertisement
Table of Contents

Related Manuals for Logiquip Dri-Stor


Summary of Contents for Logiquip Dri-Stor
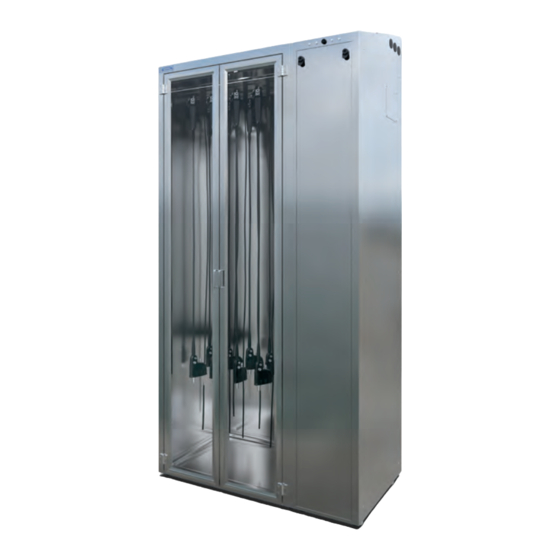
- Page 1 USE & CARE GUIDE Dri-Stor USE & CARE GUIDE Read and understand all of the instructions and safety CAUTION information in this document before operating this product. SAVE THESE INSTRUCTIONS (800) 665-3760 www.logiquip.com customersupport@logiquip.net...
-
Page 2: Table Of Contents
TABLE OF CONTENTS INTRODUCTION SAFETY PRECAUTIONS Symbol Definitions ........4 Malfunction Instructions . -
Page 3: Introduction
INTENDED USE LogiQuip Dri-Stor Cabinets are designed to ensure a clean storage location for disinfected Endoscopes and Probes while protecting them from damage while in storage. Configurations within the product family may also provide added functionality such as moisture control, scope tracking, and other security features. -
Page 4: Safety Precautions
2. Use the troubleshooting information on pages 22-26 to determine what is causing the issue. 3. If it is not possible to identify or eliminate the cause using this document, switch the device off and call LogiQuip Customer Support at (800) 665-3760. -
Page 5: Safety Precautions
Do not replace or use Mains cords with inadequately rated supply. Use only cables labeled for applicable voltage or voltage range, frequency or frequency range, and/or power or current RATING when stated on the label by LogiQuip, and install in the order of the instructions shown. -
Page 6: Use & Care
USE & CARE INITIAL CLEAN AND DISINFECTION All reprocessing steps provided in the Endoscope’s instructions for use, including drying steps, need to be completed prior to placing any device in the Cabinet. Once components have been verified to be running properly, an initial clean must be performed. See section ‘Cleaning Methods &... -
Page 7: Operating Instructions For Hepa & Hepa Channel Purge
1. Enter: #9# 123456 on the keypad Enter program mode. 2. Enter 01# 21# XX# 1# Where ‘XX is the time from 0 – 60 seconds. 3. To unlock the Cabinet for 10 seconds, enter the following: 01# 21# 10#. 4. Enter **# Exit program mode. www.logiquip.com... -
Page 8: Endotrack Software Operation
USE & CARE ENDOTRACK SOFTWARE OPERATION EndoTrack is the touchscreen software present on HEPA with EndoTrack, and HEPA with Channel Purge & EndoTrack Cabinets. Scope and user operations within Cabinets configured for tracking with barcode or RFID tags are performed through use of the touchscreen as configured by a supervisor or manager of the department. -
Page 9: Hanger Information
9. Scope Expiry Duration 10. Scope Model 11. Expiration Date for Checked-in Scope 12. Checked-in Scope ID 13. Close Hanger Details Screen 14. Scope ID of Removed Scope 15. Orange: Scope Removed Scope List 16. Remove Scope ID from Hanger Fig. 68 www.logiquip.com... -
Page 10: Scope Check-In
USE & CARE ENDOTRACK SOFTWARE OPERATION (CONTINUED) PERFORM SCOPE CHECK-IN USER AUTHENTICATION & SCOPE CHECK-IN 1. USER AUTHENTICATION: From the Main Menu, scan the Users Barcode/RFID Tag or press the Manual Entry Button to enter the User ID manually, and then press the “Enter” button (Fig. 69-70). 2. -
Page 11: Scope Check-Out
4. CONFIRM SCOPE CHECK-OUT: Press the ‘Done’ button (Fig. 77) to complete the Checking-Out process and go to back to the Main Page. Hanger numbers that were checked out will now be gray (Fig. 78). Fig. 77 Fig. 76 Fig. 78 www.logiquip.com... -
Page 12: Re-Assign Scope
USE & CARE ENDOTRACK SOFTWARE OPERATION (CONTINUED) RE-ASSIGNING SCOPES It may be required to re-assign a Checked-In Scope to another hanger location without checking it out. Follow the steps provided to re-assign a checked-in scope: RE-ASSIGN A CHECKED-IN SCOPE 1. USER AUTHENTICATION: From the Main Menu, scan the Users Barcode/RFID Tag or press the Manual Entry Button to enter the User ID manually, and then press the “Enter”... -
Page 13: Channel Purge Operation
WARNING: PERSONAL INJURY This product may only be used with the accessories delivered by or approved by LogiQuip. The use of any other accessories is not verified for safety. -
Page 14: Cleaning Instructions
USE & CARE CLEANING INSTRUCTIONS CLEANING THE CABINET Glass cleaner can be used on the glass part of the doors. The stainless steel is easily cleaned by many different methods. While some contaminants may be easily removed, others may require specific cleaners for effective removal. It may be necessary to identify the contaminant or experiment with various cleaners. - Page 15 Even the finest cleaning powders can scratch or burnish a finish. On polished finishes, rubbing or wiping should be done in the direction, NOT across, of the polish line or grain of the surface. GRAIN DIRECTION FOR BEST PRACTICES WIPE SIDE TO SIDE www.logiquip.com...
- Page 16 CLEANING INSTRUCTIONS (CONTINUED) GLASS CABINETS RECOMMENDED CLEANING PROTOCOL LogiQuip recommends disinfectants use on the inside of the Endoscope Cabinet on a weekly basis, or as required by hospital and/or local standards. 1. Ensure the Cabinet has been turned off. 2. Remove all Endoscopes and equipment stored inside the Cabinet.
- Page 17 11. Replace the mechanical compartment front panel, top panel, or shroud. Store the Allen wrench in the hold on the top side of the Cabinet. 12. Turn on Cabinet Power Supply. Cabin HEPA Filter Box With Top Removed Cabin HEPA Filter VOC Carbon Filter Twist Cap (To Left) To Access HEPA Filter www.logiquip.com...
- Page 18 USE & CARE CLEANING INSTRUCTIONS (CONTINUED) REPLACING THE CHANNEL PURGE FILTER 1. Turn off the Power Supply to the Cabinet. 2. Using the provided 8mm Allen wrench, remove the mechanical compartment front panel, if the unit has a side component Cabinet.
-
Page 19: Preventative Maintenance
Any work performed by inexperienced or unqualified persons or the installation of unauthorized parts could cause personal injury, invalidate the warranty or result in costly damage. Preventive Maintenance is essential in keeping this equipment in optimal working condition. LogiQuip recommends establishing an annual maintenance agreement with LogiQuip service. Please contact your LogiQuip Sales Representative for additional information. -
Page 20: Endotrack Software Service & Maintenance
USE & CARE ENDOTRACK SOFTWARE SERVICE & MAINTENANCE WARNING: PERSONAL INJURY Repairs and adjustments to this equipment should be made only by fully qualified service personnel or verified persons. Maintenance performed by inexperienced, unqualified personnel or installation of unauthorized parts could cause personal injury, invalidate the warranty or result in costly damage. - Page 21 2. Press the Logo button on the Top Right of the screen and enter the Service page access code. 3. On the General Tab, press the ‘Apply USB Update’ button (Fig. 86). 4. The software will restart automatically once the update is complete. Fig. 86 www.logiquip.com...
-
Page 22: Troubleshooting
TROUBLESHOOTING TROUBLESHOOTING INFORMATION WARNING: PERSONAL INJURY Repairs and adjustments to this equipment should be made only by fully qualified service personnel or verified persons. Maintenance performed by inexperienced, unqualified personnel or installation of unauthorized parts could cause personal injury, invalidate the warranty or result in costly damage. IDENTIFYING A CABINET THAT IS NOT LEVEL The leveling of a Cabinet can cause a variety of issues. - Page 23 Entire Cabinet is leaning forward or backward Leveling tool shows Cabinet is leaning forward or backward • Move doors apart by adjusting one or more door hinges. Doors are rubbing against each other when opening or closing the door Start with middle hinge first. www.logiquip.com...
- Page 24 (CONTINUED) TROUBLESHOOTING HEPA CABINET LED LIGHT NOTIFICATIONS Users/supervisors may use the following information and steps within the scope of approved/operating instructions only. Contact LogiQuip Customer Support prior to action outside the scope of operating instruction in all cases. INTENDED NOTIFICATION...
- Page 25 TROUBLESHOOTING HEPA CABINET LED LIGHT NOTIFICATIONS (CONTINUED) Users/supervisors may use the following information and steps within the scope of approved/operating instructions only. Contact LogiQuip Customer Support prior to action outside the scope of operating instruction in all cases. INTENDED NOTIFICATION...
- Page 26 TROUBLESHOOTING HEPA CABINET LED LIGHT NOTIFICATIONS (CONTINUED) Users/supervisors may use the following information and steps within the scope of approved/operating instructions only. Contact LogiQuip Customer Support prior to action outside the scope of operating instruction in all cases. INTENDED NOTIFICATION...
-
Page 27: Warranty
Electronic components, Cart Covers, Custom Products, LogiCell Tambour Doors, Label Holders, and Casters. During this period, LogiQuip will, in its sole discretion, repair defects in materials or workmanship that existed when the product was received or replace the product. Visit LogiQuip com/Warranty for more details.
Need help?
Do you have a question about the Dri-Stor and is the answer not in the manual?
Questions and answers