
Related Manuals for Rasonic RSG-TT203/W


Summary of Contents for Rasonic RSG-TT203/W
- Page 2 – 1 –...
- Page 3 – 2 –...
- Page 4 – 3 –...
- Page 5 清潔保養 內腔: 附件: 用沾有溫和清潔劑的布塊擦拭, 用溫水清洗附件,避免直接用 再用扭乾的濕布擦淨。 冷水沖洗。 – 4 –...
- Page 6 – 5 –...
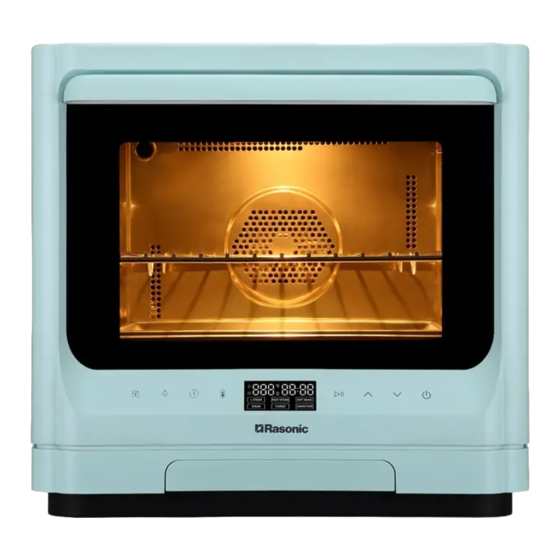
- Page 7 排氣孔 把手 1. 排氣孔 2. 把手 7. 隔熱手套 控制面板 水箱 7. 隔熱手套 烤盤 接水盤 3. 控制面板 4. 水箱 吸水海綿 9. 烤架 8. 烤盤 5. 接水盤 6. 吸水海綿 9. 烤架 擺放注意事項 擺放注意事項 爐上方位置應保持開放式 為防止與牆私物體接觸, 以防止冷凝水及排氣不佳 請保持安全距離。 上方 注意:高溫表面 爐上方位置應保持開放式 為防止與牆私物體接觸, 頂部、背面以及 以防止冷凝水及排氣不佳...
- Page 8 低溫蒸 高溫蒸 烤焗 純蒸 蒸烤 熱風對流 顯示螢幕介紹 溫度圖標 水箱狀態 時間圖標 預約圖標 低溫蒸 高溫蒸 烤焗 烹調功能 純蒸 蒸烤 熱風對流 按鍵說明 自選食譜 爐燈 時間 溫度 啟動/暫停 上調 下調 電源 1.1 在待機狀態,長按 時間鍵[ ]三秒 進入時間設置; 1.2 按 或 設置小時值, 然後按啟動╱暫停鍵[ 確定; 1.3 按 或...
- Page 9 – 8 –...
- Page 10 在待機狀態,按選 或 擇蒸烤功能; 蒸烤 按溫度鍵[ ]進入溫度設置, 按 或 設置烹調溫度; 蒸烤 按時間鍵[ ]進入時間設置, 按 或 設置烹調時間, 按啟動╱暫停鍵[ ]啟動, 蒸烤 產品會按設定啟動運作。 – 9 –...
- Page 11 蒸烤 按溫度鍵[ ]進入溫度設置, 按 或 設置數值; 蒸烤 按時間鍵[ ]進入時間設置, 按 或 設置數值; 蒸烤 按啟動╱暫停鍵[ 恢復運作。 蒸烤 – 10 –...
- Page 12 在待機狀態下,按 自動食譜鍵[ ]進入 自選食譜功能設置; 按 或 設置代碼,然後按 啟動╱暫停鍵[ ]確認啟動。 – 11 –...
- Page 13 – 12 –...
- Page 14 在待機狀態,按 或 選擇蒸烤功能; 蒸烤 按溫度鍵[ ]進入溫度設置, 按 或 設置溫度值; 蒸烤 按時間鍵[ ]進入時間設置, 按 或 設置時間值; 蒸烤 長按時間鍵[ ]進入 預約功能的相關設置; 長按3秒 蒸烤 按 或 設置小時值, 按啟動╱暫停鍵[ 確定; 蒸烤 按 或 設置分鐘值, 按啟動╱暫停鍵[ ]啟動 預約倒計時,倒計時結束後 蒸烤 啟動烹飪。 溫馨提示 預約時間為開始烹調時間,以倒數形式計算; 食物完成時間為預約時間加上烹飪時間。 – 13 –...
- Page 15 在待機狀態下,按 自動食譜鍵[ ]進入 自選食譜功能設置; 按 或 選擇代碼 , 按啟動╱暫停鍵[ ]確認啟動。 第一階段完成後,清潔水 箱並加入淨水,按啟動╱ 暫停鍵[ ]繼續運作。 第二階段完成後,清潔水 箱並加入淨水,按啟動╱ 暫停鍵[ ]繼續運作。 – 14 –...
- Page 16 – 15 –...
- Page 17 – 16 –...
- Page 18 – 17 –...
- Page 19 – 18 –...
- Page 20 – 19 –...
- Page 21 – 20 –...
- Page 22 – 21 –...
- Page 23 – 22 –...
- Page 24 – 23 –...
- Page 25 1. Ventilation vent 2. Handle 7. Insulation gloves 3. Control panel 4. Water tank 8. Baking tray 5. Droplets tray 6. Water absorbent sponge 9. Grill rack Free space shall be left on Do not place the appliance top of the appliance to against the wall or other objects, prevent condensation and please keep a safe distance.
- Page 26 Temperature display Water tank level Time display Preset icon Cooking function Menu Oven Time Temperature Start/Pause Increase Decrease Power selection light – 25 –...
- Page 27 1.1 In standby mode, press and hold Time button [ to enter the time setting interface; 1.2 Press to set the hour value, press Start / Pause button [ to confirm; 1.3 Press to set the minute value, press Start / Pause button [ to confirm;...
- Page 28 – 27 –...
- Page 29 In standby mode, press to select the COMBO function; COMBO Press Temperature button ] to enter the temperature setting interface, then COMBO press to set the value; Press Time button [ ] to enter the time setting interface, press set the value and then COMBO press Start/Pause button ] to start.
- Page 30 COMBO Press Temperature button [ to enter the temperature setting interface, then press COMBO to set the value. Press Time button [ ] to enter the time setting interface, then press COMBO to set the value. Press Start/Pause button [ to resume operation.
- Page 31 Press Menu Selection button [ to enter the temperature setting interface. Press to set the menu code, then press Start/Pause button [ to confirm and start. – 30 –...
- Page 32 – 31 –...
- Page 33 In standby mode, press to select the COMBO function; COMBO Press Temperature button ] to enter the temperature setting interface, then COMBO press to set the value; Press Time button [ ] to enter the time setting interface, then COMBO press to set the value;...
- Page 34 In standby mode, press Menu Selection button [ to enter the setting interface of menu selection function; Press and set the code to , then press Start/Pause button ] to confirm and start. After stage 1, clean the water tank and fill it with clean water, then press Start/Pause button ] to continue operation.
- Page 35 – 34 –...
- Page 36 – 35 –...
- Page 37 – 36 –...
Need help?
Do you have a question about the RSG-TT203/W and is the answer not in the manual?
Questions and answers