Table of Contents
Advertisement
Quick Links
INSTALLATION INSTRUCTIONS
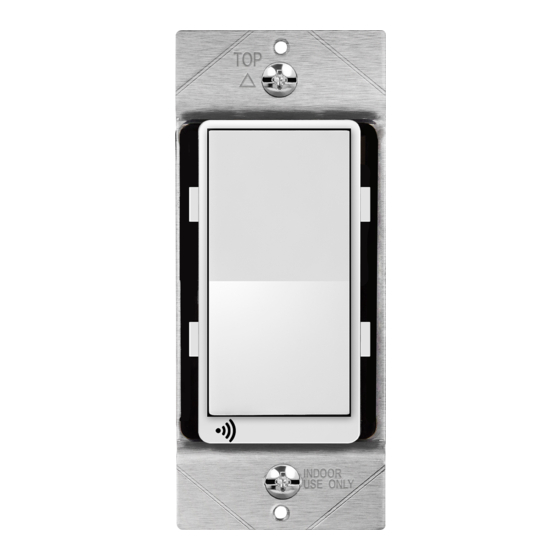
Model: WF15S
Wi-Fi On/Off Switch
FEATURES
• Control your lights with your smart devices without the need of any
hub.
• Easy to configure, easy to use Smart App by Enerwave
• Save energy by automating the ON/OFF times or using the timer
• Compatible with Amazon Alexa, Google Assistant, Android, and
iOS (see system requirements below)
• Single Pole or 3-Way compatible.
• Interchangeable face covers included: White, Light Almond and
Black
SPECIFICATIONS
Voltage...........................................................................................120VAC, 60Hz
Incandescent...............................................................................................1000W
Electronic Ballast...............................................................................................5A
Standard Ballast........................................................................................1200VA
Resistive...........................................................................................1800W (15A)
LED...............................................................................................................150W
Motor............................................................................................................1/2HP
Protocol.......................................................................................IEEE 802.1b/g/n
Wireless Type............................................................................................2.4GHz
System Requirements................................Android 4.1 or higher/ iOS 8 or higher
Operating Temperature..........................................................32°-104°F (0°-40°C)
REQUIREMENTS
• Secure 2.4GHz Wi-Fi network connection
• Smart Device such as a Smart Phone or Tablet with an operating
system of Android version 4.1 or higher or iOS 8 or higher
• Installation of the ENERWAVE Smart App on the Smart Device
• Neutral wire required
1
WARNING
Turn the POWER OFF at the circuit breaker before installing the
Switch
Read and understand these instructions before installing. This device
is intended for installation in accordance with the National Electric
Code and local regulations. It is recommended that a qualified
electrician performs this installation.
Use copper wire only
Only Use Wires with Minimum Temperature Rating 75°C (167°F)
WIRING DIRECTIONS
First, find out if you will be controlling the lights from one location or multiple locations.
Next, identify all the wires. Once you've identified the wires, follow the diagram below
for wiring.
COMMON 3-WAY WIRING
SWITCH
ONE
TRAVELER A
NEUTRAL
TRAVELER B
LOAD
DIAGRAM 1
Step 1. Identify all your wires (DIAGRAM 1). Label the wires or draw a diagram of existing wires.
Step 2. Convert the TRAVELER B wire to the LOAD wire. To do so, Take the LOAD wire and
TRAVELER B wires off SWITCH 1 and connect them together with a wire nut (DIAGRAM 2).
Step 3. Connect the other end of the TRAVELER B wire to the LOAD terminal on WF15S
Step 4. Connect the NEUTRAL wire to both switches.
Step 5. Connect the TRAVELER A wire from the WF15S to one of the terminals on the 3-way switch.
Step 6. Connect the HOT wire to the HOT terminal on the WF15S.
Step 7. Connect the GROUND wire to the GROUND terminals on both switches.
2
RETROFIT WIRING
SWITCH
NEUTRAL
CHANGING THE FACE COVER
To replace the face cover, use a flat screwdriver and insert the tip at the gap
shown in the diagram above and pry cover off. To re-install, simply align the
cover and snap back on.
FCC COMPLIANCE STATEMENT
FCC Grant of Equipment Authorizations of this device and transmitters installed in this device can be found
at FCC website by entering the FCC ID number on the device.
Caution: Changes or modifications not expressly approved by the part responsible for compliance could
void the user's right to operate the equipment. This device complies with Part 15 of the FCC Rules.
Operation is subject to the following two conditions: (1) this device may not cause harmful interference, and
(2) this device must accept any interference received, including interference that may cause undesired
operation of the device.
SWITCH
HOT
This equipment has been tested and found to comply with the limits for a Class B digital device, pursuant to
TWO
part 15 of the FCC rules. These limits are designed to provide reasonable protection against harmful
NEUTRAL
interference in a residential installation. This equipment generates, uses and can radiate radio frequency
energy and, if not installed and used in accordance with the instructions, may cause harmful interference to
radio communications. However, there is no guarantee that interference will not occur in a particular
installation. If this equipment does cause harmful interference to radio or television reception, which can be
determined by turning the equipment off and on, the user is encouraged to try to correct the interference by
one or more of the following measures:
•
Reorient or relocate the receiving antenna.
•
Increase the separation between the equipment and receiver.
GROUND
•
Connect the equipment into an outlet on a circuit different from that to
which the receiver is connected.
•
Consult the dealer or an experienced radio/TV technician for help.
LOAD
TRAVELER
WF15S
ONE
DIAGRAM 2
GROUND
© 2019 Enerwave Home Automation
WWW.ENERWAVEAUTOMATION.COM
0206190140
3
NEUTRAL
HOT
Advertisement
Table of Contents

Related Manuals for Enerwave WF15S


Summary of Contents for Enerwave WF15S
- Page 1 • Installation of the ENERWAVE Smart App on the Smart Device Step 5. Connect the TRAVELER A wire from the WF15S to one of the terminals on the 3-way switch. Step 6. Connect the HOT wire to the HOT terminal on the WF15S.
- Page 2 • When LED indicator starts blinking green controller while in EZ mode. When LED turns off, the device has the fullest extent permitted by the applicable state law, Enerwave shall not be rapidly on the device, press "Confirm the liable to the purchaser or end user customer of Enerwave products for direct,...
Need help?
Do you have a question about the WF15S and is the answer not in the manual?
Questions and answers