
Subscribe to Our Youtube Channel
Related Manuals for Medion AKOYA P52408


Summary of Contents for Medion AKOYA P52408
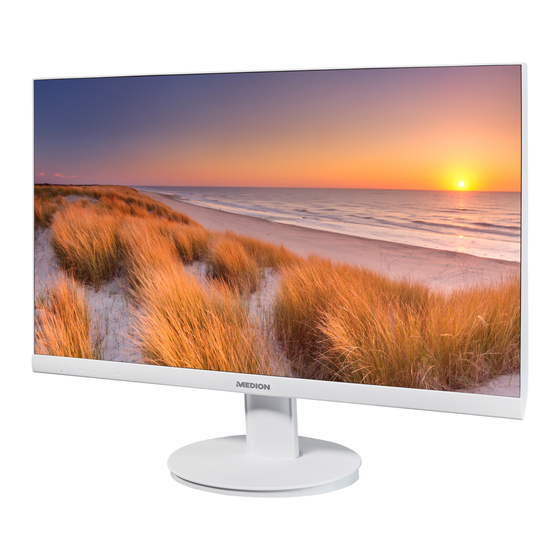
- Page 1 Instruction manual 60.5 cm (24“) Full HD Monitor MEDION AKOYA ® ® P52408 (MD 22000)
-
Page 2: Table Of Contents
Table of Content Information about this user manual ............5 1.1. Explanation of symbols ..................5 Proper use ....................6 EU Declaration of conformity ..............7 3.1. Information on trademarks ................7 Safety instructions ..................8 4.1. Operating safety ....................8 4.2. -
Page 3: Information About This User Manual
1. Information about this user manual Thank you for choosing our product. We hope you enjoy using it. Read the safety instructions and all other instructions carefully befo- re using the appliance for the first time. Note the warnings on the appli- ance and in the user manual. -
Page 4: Proper Use
2. Proper use This TFT monitor is designed exclusively for the playback of vid- eo and audio signals from external devices, such as computers, whose connections and screen resolutions match the specified technical data of the TFT monitor. Any other use is deemed as improper. -
Page 5: Eu Declaration Of Conformity
3. EU Declaration of conformity MEDION AG hereby declares that the radio equipment type MD 22000 complies with the directive • EMC Directive 2014/30/EU • Low Voltage Directive 2014/35/EU • Ecodesign Directive 2009/125/EC However, the device is not equipped with a full function for minimising pow- er consumption in accordance with the Ecodesign Directive. -
Page 6: Safety Instructions
4. Safety instructions 4.1. Operating safety • This device may be used by children over the age of 8 and by persons with limited physical, sensory or mental abilities or by those without experience and knowledge, if they are super- vised or have been instructed in the safe use of the appliance and have understood the dangers that result from it. -
Page 7: Installation Location
4.2. Installation location • Keep your monitor and all connected devices away from moisture and avoid dust, heat, direct sunlight and naked flames (such as candles, for instance). Non-compliance with these instructions can lead to faults or damage to the moni- tor. -
Page 8: Repairs
4.3. Repairs • Contact customer services if: – the power cable is burnt or damaged – liquid has penetrated the monitor – the monitor is not operating correctly – the monitor has been dropped or the housing is damaged. • Repairs to your monitor should only be carried out by quali- fied specialists. -
Page 9: Power Supply
4.5. Power supply DANGER! Risk of electric shock! Even when the device is switched off, some compo- nents are live. In order to disconnect the power to your monitor or to completely isolate the device from voltage sourc- es, remove the mains plug from the mains socket. •... -
Page 10: Package Contents
5. Package contents Please check your purchase to ensure that all items are included. If anything is miss- ing, please contact us within 14 days of purchase. The following items are supplied with your monitor: • Monitor • HDMI cable •... -
Page 11: Overview Of The Device
6. Overview of the device 6.1. Front 3 4 5 6 Monitor stand Screen M E N U – Open the menu; confirm selection In the menu: navigate to the left, change options; select signal input. In the menu: Navigate to the right, change options; In basic status: Set volume A U T O - In the menu: Confirm selection;... -
Page 12: Rear
6.2. Rear AC in HDMI Opening for Kensington® lock Headphone jack L I N E I N – Audio connection (3.5 mm stereo jack) V G A – VGA connection H D M I – HDMI connection D P – DisplayPort connection A C I N –... -
Page 13: Using The Device For The First Time
7. Using the device for the fi rst time 7.1. Before connecting the monitor It is possible that your existing monitor supports a physical resolution that is not supported by your new monitor. In this case, the image on your new monitor may not appear correctly after it has been connected. -
Page 14: Setting Up And Positioning
7.3. Setting up and positioning Avoid dazzle, reflections and strong bright-dark contrast in order to pro- tect your eyes. The monitor should never be placed next to a window because this is the brightest part of the room in daylight. This brightness can make it more difficult for the eyes to adjust to the darker monitor. - Page 15 • In general – change your position frequently (around every 20-30 minutes) and take regular breaks to avoid tiredness. • Back – when sitting at your workstation, your back must be supported by your chair’s backrest, which must be upright or angled slightly back. •...
-
Page 16: Connecting
7.4. Connecting AC in HDMI In order to avoid any damage or malfunctions, only connect the connec- tion cable when the monitor and the computer are switched off. 7.4.1. Connecting the signal cable Plug the signal cable into one of the connections on the monitor: –... -
Page 17: Switching On / Standby
7.4.4. Connecting power supply Connect the supplied power adaptor to the power supply socket A C I N of the device. Connect the other end to a suitable power outlet. The mains socket must be close to the monitor and easy to access (use the same power circuit as for the computer). -
Page 18: Setting The Screen Resolution
7.6. Setting the screen resolution The monitor supports the physical resolutions listed in the table. The aspect ra- tio of the monitor is 16:9. You will get a distortion-free picture if you select the 1,920 x 1,080 pixels resolution. This is a native 16:9 aspect ratio. Picture distortions or black bars at the edge of the picture can occur with all other resolutions. -
Page 19: Menu
8. Menu MENU AUTO You can change various settings via the screen menu. Press the M E N U button to activate the OSD. Use the buttons to select the options from the menus. Confirm your selection by pressing the A U T O button. ... - Page 20 LANGUAGE Select the menu language. OSD H.POS. Position of the menu in the picture. OSD V. POS. Hides the menu after a set period of time OSD TIME has expired. TRANSPARENCY Show or hide the menu background. MODE Select a pre-configured colour profile. Set the volume of the integrated louds- VOLUME peaker.
-
Page 21: Power-Saving Features
9. Power-saving features This monitor switches to different power-saving modes which are specified by the respective computer/operating system. This complies with the current require- ments for reducing the energy consumption. The monitor supports the following types of power-saving modes: Power Colour of Ready for consumption... -
Page 22: Incorrect Colour Display; Picture Is Too Bright/Dark
10.2. Incorrect colour display; picture is too bright/dark • Check the colour settings in the monitor’s OSD menu or in the computer’s oper- ating system. • Select AUTOM. ADJUST to optimise the settings for brightness and contrast. For optimisation, the display should show a text page. 11. -
Page 23: Pixel Defects On Screens
12. Pixel defects on screens For active matrix TFTs with a resolution of 5 Pixel 1,920 x 1,080 pixels, which are each made up of three sub-pixels (red, green, blue), there are a total of approximately 6.2 million control tran- Rows sistors in use. Due to this very high number of transistors and the associated extremely com- plex manufacturing processes used, occasional- Pixel... -
Page 24: Disposal
13. Disposal PACKAGING Your device has been packaged to protect it against transportation damage. Packaging is raw material and can be reused or added to the recycling system. DEVICE All old appliances marked with the symbol illustrated must not be dis- posed of in normal household waste. -
Page 25: Technical Data
14. Technical data Device Type No. EM247EW Rated voltage 100-240 V ~ 50-60 Hz 1.0 A Standby: < 0.5 W Power consumption In operation: < 40 W (max) Audio output 2 x 2 W max. via speakers Picture Screen size 60.5cm (24"), TFT with LED backlight Aspect ratio 16:9... -
Page 26: Product Data Sheet
Dimensions / weight Weight With stand: approx. 3.3 kg Dimensions (WxHxD) With stand: approx. 540 x 410 x 198 mm Wallmount Vesa standard, hole spacing 100 x 100 mm 15. Product data sheet Scan the QR code that matches the model on the energy label or alternatively in the operating instructions to download the product data sheet. -
Page 27: Service Information
In our Service-Community, you can meet other users, as well as our staff, and you can exchange your experiences and pass on your knowledge there. You will find our Service-Community at community.medion.com. • Alternatively, use our contact form at www.medion.com/contact. -
Page 28: Legal Notice
These operating instructions are protected by copyright. Mechanical, electronic and any other forms of reproduction are prohibited without the written permission of the manufacturer. Copyright is owned by the company: MEDION AG Am Zehnthof 77 45307 Essen Germany Please note that you cannot use the address above for returns. Please always con-... -
Page 29: Privacy Statement
18. Privacy statement Dear customer, We wish to inform you that we, MEDION AG, Am Zehnthof 77, D-45307 Essen, Ger- many process your personal data as a data controller. For matters regarding data protection, we are supported by our company data pro- tection officer who can be contacted at MEDION AG, Datenschutz, Am Zehnthof 77, D-45307 Essen;...
Need help?
Do you have a question about the AKOYA P52408 and is the answer not in the manual?
Questions and answers