Table of Contents
Advertisement
Quick Links
Important Information
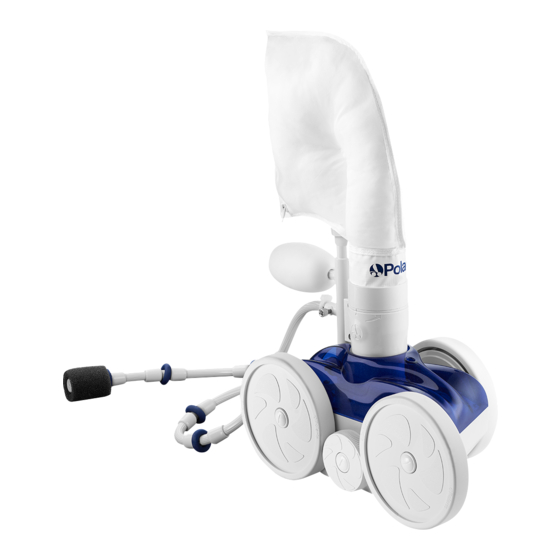
The Polaris Vac-Sweep ® 180 automatic pool cleaner comes ready to connect to a threaded 1-1/2"
female pipe fitting on a dedicated cleaner line. Other connections are possible, but they require addi-
tional fittings (see Section B on page 4).
The Polaris 180 is intended for use with a Polaris Booster Pump. You should have a licensed electrician
install the cleaner's booster pump. The booster pump must be installed according to the electrical
codes applicable in your area. Improper installation can result in serious or even fatal injury.
The following are important points to remember when installing and operating the Polaris 180.
•
Always turn the filtration pump on before turning on the booster pump.
•
Always disconnect the Polaris from the pool wall when cleaning or backwashing the pool filter.
•
After cleaning or backwashing, let the filtration system run for at least five minutes before
reconnecting the Polaris.
•
New plumbing lines should be flushed out before installing the Polaris.
•
The Polaris should not be used to remove plaster dust in new pools.
•
Always remove the Polaris before swimmers enter the pool.
•
Always handle the Polaris with care. Do not let children or pets play with the Polaris; it is not a toy.
•
Except when checking the wheel RPM, do not handle the Polaris while it is operating (see page 7).
•
Never pick up the Polaris by the head float.
•
Always remove the Polaris from the pool before chemical shock treatments. As a general rule, any
pool water that is unsafe for swimming is unsafe for the Polaris.
•
Carefully cut the hoses following the instructions on page 5.
By following these simple guidelines, you can help protect against injury and prolong the life of your new
Polaris 180.
Before the Polaris is installed, please take a moment to record the serial number. For the location of
the serial number, refer to the Exploded Parts Diagram on page 14. You will be asked for this
number when you contact our Customer Service Department.
Polaris 180 U.S. Patents: 4,618,420; D 288,373. Unique product shape is a registered trademark.
Serial # A ______________________
Advertisement
Table of Contents
Troubleshooting

Subscribe to Our Youtube Channel
Related Manuals for Polaris Vac-Sweep 180


Summary of Contents for Polaris Vac-Sweep 180
- Page 1 Always remove the Polaris before swimmers enter the pool. • Always handle the Polaris with care. Do not let children or pets play with the Polaris; it is not a toy. • Except when checking the wheel RPM, do not handle the Polaris while it is operating (see page 7).
-
Page 2: Table Of Contents
D. Connecting/Disconnecting the Polaris ........ -
Page 3: Introduction
You can be sure you are buying genuine the manual refer to the index numbers in the Exploded Parts Diagram on pages 14-16. There Polaris parts if they come in Polaris part bags or are also part numbers listed in parentheses to have the Polaris logo on them. -
Page 4: Installation Instructions
A. Polaris 180 Components C. Installing the Universal Wall Fitting The Polaris 180 box contains (the numbers below re- fer to the exploded parts diagram on pages 14-16): 1. Turn on the filtration pump and flush out the plumbing line. -
Page 5: Cutting The Feed Hose
6. Stretch the hose to the farthest point of the the pool depth is 10 feet or more, do not cut pool. (The Polaris will not usually climb onto the top step, so do not count it in your measurement.) the clear hose and skip to step 5. -
Page 6: Assembling The Polaris
1-1/2 feet and no more than 3 feet apart, most of the steps and swimouts. The Polaris will so the white hoses do not sag. It may be neces- clean an average pool in 3 hours or less. -
Page 7: Head Float Adjustment
Polaris from the pool. Mark the outer edge of If you still have less than 28 RPM: a tire. Place the Polaris back in the pool and turn • Clean the filter screen in the quick discon- on the pumps. -
Page 8: Iii.operation And Maintenance
Wait at least 30 seconds and turn on the booster pump. If the Polaris has been installed with time clocks, set them so the Polaris is turned Velcro on at least one half hour after the filtration pump... -
Page 9: Periodic Maintenance
Inside the quick disconnect there is a safety filter H. Backwashing the Polaris to keep debris that is not caught by the pool filtra- tion system out of the Polaris. If it clogs often, Occasionally flush out the Polaris by following the consult your pool professional. Note: Running steps below. -
Page 10: Storage
2. Ladder Guard Kit (Part #G-21) mast and one over the sweep hose barb. Have The ladder guard kit will help prevent the Polaris someone turn on the pumps. Let the water run from getting hung up around the pool ladder or through the Polaris for approximate one minute. -
Page 11: Iv.troubleshooting The Polaris
11 on page 6. 2. Adjust the thrust jet (#26) to make 3. Check the wheel RPM. See page 7. the Polaris go in more of a straight 4. Make sure the swivels (#47) direction. See page 6. are turning freely and the flow 3. -
Page 12: Troubleshooting Worksheet
Polaris parts may adversely affect the unit's and look into the vacuum tube. There should be one distinct, even jet of water.) performance. Filter bags are an excellent example; "generic" bags are not specifically designed to work with the Polaris and can cause operating problems. -
Page 13: Polaris Booster Pump
1/8 " NPTM Plug, Plastic PLEASE NOTE: All of the parts fit the PB3 Booster Pump produced in 1978 except P-20 and P-25. Call 1-800-VAC-SWEEP (USA and Canada only) or (760) 599-9600 for more information on the Polaris Booster Pump. -
Page 14: Exploded Parts Diagram
Install dished side out Serial Number To insure proper operation and long life for the Polaris, be sure to insist on genuine Polaris parts. - Page 15 Part # Description C-45 Lock Washer for C-36 C-16 Idler Wheel, Small, White C-60 Ball Bearings, Wheels Sweep Hose Complete C-25 Spring for C-36 C-30 Screw, 4-40 x 3/16" SS Pan Hd C-32 Screw, 6-32 x 1/2" SS Pan Hd C-36 Swing Axle Kit A-10...
- Page 16 G-53 Mechanism for G-52 Parts Not Shown A-15 Leaf Bag First 10-foot Second 10-foot A-47 Polaris 180 Factory Rebuild Kit White Hose White Hose A-49 Polaris 180 Factory Tune-up Kit Weight, Sweep Hose C-11 Tire, Black Feed Hose Complete w/UWF, No Back-up Valve Coupling, 1-1/2"...
-
Page 17: Warranty
The warranty commences on the date of installation of the Polaris. The Polaris 180 frame is warranted for a period of five years. The rest of the Polaris parts are warranted for a period of one year, but in no event shall be in effect for more than two years from the date of manufacture of the unit as established by the serial number.
Need help?
Do you have a question about the Vac-Sweep 180 and is the answer not in the manual?
Questions and answers