Electrolux N7E Installation And Operating Manual
Electric and gas fryers
Hide thumbs
Also See for N7E:
- Installation and operating manual (30 pages) ,
- Installation and operating manual (28 pages) ,
- Installation and operating manual (26 pages)

Related Manuals for Electrolux N7E


Summary of Contents for Electrolux N7E
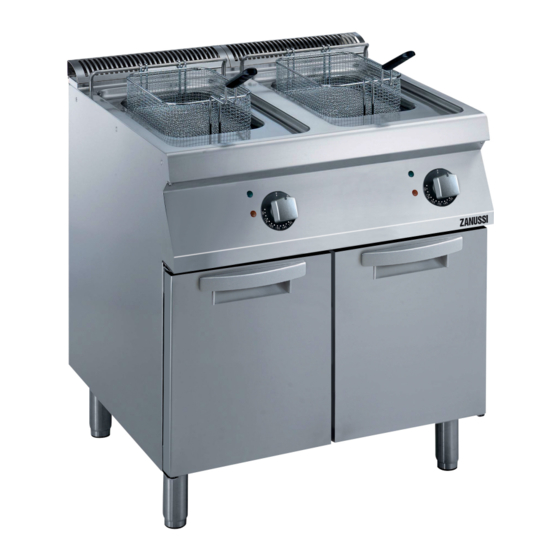
- Page 1 E E l l e e c c t t r r i i c c a a n n d d G G a a s s F F r r y y e e r r s s E E N N Installation and operating manual * 59589DY00- 2017.04...
- Page 2 F F o o r r e e w w o o r r d d The installation, use and maintenance manual (hereinafter Manual) provides the user with information necessary for correct and safe use of the machine (hereinafter “machine“ or “appliance“). The following must not be considered a long and exacting list of warnings, but rather a set of instructions suitable for improving machine performance in every respect and, above all, preventing injury to persons and animals and damage to property due to im- proper operating procedures.
- Page 3 Dataplate position........................16 Appliance and manufacturer's identification data ................16 Technical data ........................... 17 B.3.1 N7E Gas / Electrical appliance Technical data ................. 17 B.3.2 N7E Gas / Electrical appliance Technical data ................. 17 B.3.3 N7E Electrical appliance Technical data................. 17 C GENERAL INFORMATION ........................
- Page 4 F.6.5 Using a set programme ...................... 26 Draining oil..........................26 F.7.1 7L – 14L – 40L Built-in versions .................... 26 F.7.2 7L –14L Counter Top versions ..................... 26 F.7.3 All versions ........................26 G MACHINE CLEANING AND MAINTENANCE..................... 26 Ordinary maintenance ......................... 26 G.1.1 Precautions for maintenance ....................
- Page 5 W W A A R R N N I I N N G G A A N N D D S S A A F F E E T T Y Y I I N N F F O O R R M M A A T T I I O O N N A A .
- Page 6 A A . . 2 2 P P e e r r s s o o n n a a l l p p r r o o t t e e c c t t i i o o n n e e q q u u i i p p m m e e n n t t S S u u m m m m a a r r y y t t a a b b l l e e o o f f t t h h e e P P e e r r s s o o n n a a l l P P r r o o t t e e c c t t i i o o n n E E q q u u i i p p m m e e n n t t ( ( P P P P E E ) ) t t o o b b e e u u s s e e d d d d u u r r i i n n g g t t h h e e v v a a r r i i o o u u s s s s t t a a g g e e s s o o f f t t h h e e m m a a c c h h i i n n e e ' ' s s s s e e r r v v i i c c e e l l i i f f e e .
- Page 7 • The weighted sound pressure level emitted A does not exceed 70 dB (A). • Turn the appliance off in case of fault or poor operation. • Do not use products (even if diluted) containing chlorine (sodium hypochlorite, hydrochloric or muriatic acid, etc.) to clean the appliance or the floor under it.
- Page 8 • Before carrying out any operation on the machine, always consult the manual which gives the correct procedures and contains important information on safety. Residual risks • The machine has several risks that were not completely eliminated from a design standpoint or with the installation of adequate protection devices.
- Page 9 Mechanical safety characteristics, hazards • The appliance does not have sharp edges or protruding parts. The guards for the moving and live parts are fixed to the cabinet with screws, to prevent accidental access. Protection devices installed on the machine •...
- Page 10 Electrical connection Before connecting, make sure the mains voltage and frequency match those indicated on the appliance data plate. • Work on the electrical systems must only be carried out by specialised personnel. • If the power cable is damaged, it must be replaced by the After-Sales Service or in any case by specialised personnel, in order to prevent any risk.
- Page 11 • If the machine is installed in a place where there are corrosive substances (chlorine, etc), it is advisable to go over all the stainless steel surfaces with a rag soaked in paraffin oil to create a protective film. • The appliance can be installed separately or combined only with other appliances of the same range.
- Page 12 • tampering with the guards or safety devices; • failure to use personal protection equipment by operators, specialised personnel and maintenance personnel; • failure to use suitable accessories (e.g. use of unsuitable equipment or ladders); • keeping combustible or flammable materials, or in any case materials not compatible with or pertinent to the work, near the machine;...
- Page 13 Precaution in case of long periods • Machine maintenance, checking and overhaul operations must only be carried out by specialised personnel or the After-Sales Service, provided with adequate personal protection equipment (safety shoes and gloves), tools and ancillary means. • Work on the electrical equipment must only be carried out by a specialised electrician or the After-Sales Service •...
- Page 14 M M a a i i n n t t e e n n a a n n c c e e , , i i n n s s p p e e c c t t i i o o n n s s , , c c h h e e c c k k s s F F r r e e q q u u e e n n c c y y R R e e s s p p o o n n s s a a b b i i l l i i t t y y a a n n d d c c l l e e a a n n i i n n g g...
- Page 15 • Only original spare parts can ensure the safety standards of the appliance. • Only repairs undertaken by an Electrolux approved service technician are covered by the guarantee. A A . . 1 1 2 2 M M a a c c h h i i n n e e d d i i s s p p o o s s a a l l •...
- Page 16 T T E E C C H H N N I I C C A A L L D D A A T T A A B B . . 1 1 D D a a t t a a p p l l a a t t e e p p o o s s i i t t i i o o n n I I M M P P O O R R T T A A N N T T This instruction manual contains information relevant to various appliances.
- Page 17 Pmbar Electrolux Professional SpA Viale Treviso 15 33170 Porde- manufacturer none Italy B B . . 3 3 T T e e c c h h n n i i c c a a l l d d a a t t a a B B .
- Page 18 Given below is some information regarding the intended use of Manufacturer Electrolux Professional SpA or any other this appliance, its testing, and a description of the symbols service centre authorised by Electrolux used (that identify the type of warning), the definitions of terms Professional SpA.
- Page 19 • non-application of the current provisions in the country of Electrolux Professional SpA declines any liability for inaccur- use, concerning safety, hygiene and health in the workplace. acies contained in the manual, if due to printing or translation The Manufacturer declines any liability for damage caused by errors.
- Page 20 E E . . 6 6 G G a a s s c c o o n n n n e e c c t t i i o o n n • Turn one of the two plates inside the appliances 180℃ (Fig.1C) E E .
- Page 21 E.6.1.5Gas pressure regulator follow the instructions given in E.6.1.6 Conversion to another type of gas paragraph of this section). • The section of the gas supply line must be sufficient to The supply pressure must be measured with the appliance ensure the gas flow necessary for full operation of all the operating, using a pressure gauge (min.
- Page 22 • Retighten screw “A“ and seal with paint. Replacing the main burner injector (tube version) • Unscrew nozzle “C“ and replace it with one suitable for the required type of gas, according to that given in table “B“(see handbook Appendix). •...
- Page 23 (refer to right under the frame. The screw is marked with the symbol B.3.3 N7E Electrical appliance Technical data ). • Secure the power cable with the cable gland. E E . . 8 8...
- Page 24 C C A A U U T T I I O O N N F F . . 2 2 . . 2 2 I I n n t t e e r r l l o o c c k k •...
- Page 25 • Turn on the main switch located ahead of the appliance. • Turn the knob of thermostat “A“ to the value corresponding to the required cooking temperature. • Lighting up of green indicator “B“ signals that the power is on. Lighting up of yellow indicator “C“ signals that the heating elements are on;...
- Page 26 • If the LED of key “2“ is: – RED: the temperature of the oil has still not reached the set temperature. – GREEN: the oil has reached the set temperature. Cook- ing can begin. F F . . 6 6 . . 2 2 C C o o o o k k i i n n g g t t i i m m e e s s e e t t t t i i n n g g •...
- Page 27 C C A A U U T T I I O O N N To clean: The manufacturer declines any liability for • Remove the filter from its seat; operations carried out on the machine • If the filter is dirty with grease, wash it with degreasing soap, without following these instructions.
- Page 28 • Faulty thermostat. • Electrolux - Tom Stoddart Pty Ltd a a d d j j u u s s t t e e d d . .
- Page 29 NOTE! Dismantle the appliance, grouping the components according When scrapping the machine, any marking, this to their chemical characteristics, remembering that the com- manual and other documents concerning the appli- pressor contains lubricant oil and refrigerant fluid which can be ance must be destroyed.
- Page 32 Electrolux Professional SPA Viale Treviso 15 33170 Pordenone www.electrolux-professional.com...
Need help?
Do you have a question about the N7E and is the answer not in the manual?
Questions and answers