MADRIX NEBULA User Manual
Hide thumbs
Also See for NEBULA:
- Quick start manual (41 pages) ,
- Quick start manual & technical manual (37 pages) ,
- Technical manual & quick start manual (37 pages)

Related Manuals for MADRIX NEBULA


Summary of Contents for MADRIX NEBULA
- Page 1 MADRIX NEBULA User Manual [Hardware User Guide] Date: March 2022 © 2022 inoage GmbH...
-
Page 2: Table Of Contents
..............18 Part 3 Using MADRIX 5 Software 1 Output [Art-Net] . -
Page 3: Part 1 Overview
//PART Overview... -
Page 4: Introduction
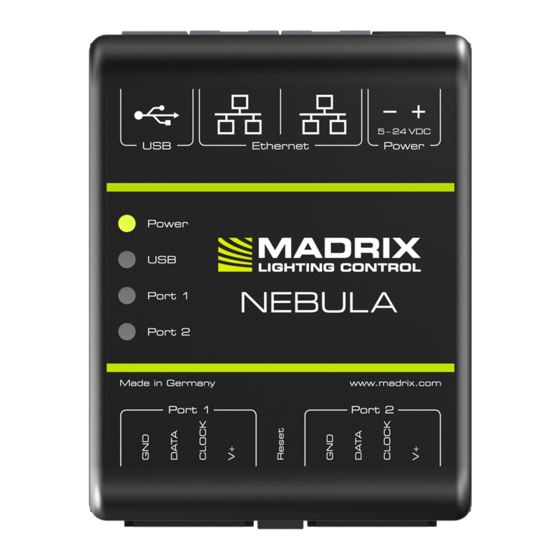
MADRIX NEBULA is a versatile interface to directly control a wide range of digital LEDs. The MADRIX NEBULA directly connects to your LED pixels. This advanced SPI decoder receives control data over Ethernet network or USB and is built to provide excellent image quality. -
Page 5: Hardware Features
Initiate Poll Using A 3rd-Party Controller MADRIX NEBULA is a standard network node. Because of this, you can use the device with applications, consoles, desks, or controllers that are compatible with Art-Net or Streaming ACN [sACN] to distribute data via Ethernet network. - Page 6 MADRIX NEBULA User Manual [Part 1] Overview § § GS8208 TM1814 § § GW6201 TM1829 § § GW6205 UCS1903 § § LPD1882S UCS2903 § § LPD6803 UCS2904 § § LPD8806 UCS512B3 § § MBI6024 UCS8904 § § MBI6120 UCS9812S §...
- Page 7 MADRIX NEBULA User Manual [Part 1] Overview § 4 MHz § 2 MHz § 1 MHz § § APA104 800 kHz § 585 kHz § § APA106 585 kHz § § GS8206 800 kHz § § GS8207 800 kHz ·...
- Page 8 MADRIX NEBULA User Manual [Part 1] Overview § § 800 kHz Limit 33 % § § 400 kHz Limit 33 % § § MY9291 16 Bit § 8 Bit § § P9883 800 kHz § § § SJ1221 800 kHz 100 % §...
- Page 9 MADRIX NEBULA User Manual [Part 1] Overview § 4 MHz § 2 MHz § 1 MHz § § TLC5973 3 MHz § 2 MHz § 1 MHz § 800 kHz § 400 kHz § § § TLS3001 2 MHz Linear §...
- Page 10 MADRIX NEBULA User Manual [Part 1] Overview § § UCS1903 800 kHz § 400 kHz § 800 kHz § UCS2903 § 400 kHz § § UCS2904 800 kHz § § UCS512B3 750 kHz § 500 kHz § 250 kHz §...
- Page 11 250 kHz Addressing Putting The Device Into Operation 1] Connecting Your LEDs Please see the MADRIX NEBULA Technical Manual & Quick Start Guide on how to connect your LEDs to MADRIX NEBULA. » help.madrix.com 2] Connecting To Power And Data Please see the MADRIX NEBULA Technical Manual &...
- Page 12 MADRIX NEBULA User Manual [Part 1] Overview 4] Setting The Network Data Source Make sure to set the correct network data source and other settings according to the controller/sender you want to use. Learn more: § Configuration Using A Web Browser www.madrix.com...
- Page 13 MADRIX NEBULA User Manual [Part 1] Overview LED Status Codes The following tables describe the LED status codes of the device. STATUS STATUS LED POWER Powered off Power not connected. > The device has no power. Permanently green Connected to power. > The power is on.
- Page 14 MADRIX NEBULA features 2 separate Ethernet network ports in its second generation [hardware revision/model: NEBULA V1.2]. Either one is fully functionally for IN and OUT and can be used for the data connection without using a separate network switch or router.
- Page 15 § In the MADRIX 5 Software, we highly recommend to activate ArtSync for excellent image quality. Reset To Factory Default Settings In rare cases you might need to do a reset to factory default settings, for example to reset to the device to its default...
- Page 16 MADRIX NEBULA User Manual [Part 1] Overview Initiate Poll During normal operation, quickly pressing the Reset button sends an Art-Net PollReply and a MADRIX PollReply for device discovery to the network. www.madrix.com //16...
-
Page 17: Part 2 Device Configuration
//PART Device Configuration... -
Page 18: Web Configuration [Ethernet]
When connected to Ethernet network, you can easily configure MADRIX NEBULA using the built-in web configuration page. You have 2 options to access the web interface. Both, NEBULA and your computer, need to be in the same network. A] Using a standard web browser: §... - Page 19 Assign correct network settings for your PC in the Windows operating system. [Recommended default settings: IP address 10.0.0.1 / Subnet mask 255.0.0.0] [Please note: Your devices and the sender, such as the PC that runs MADRIX 5, need to have the same subnet mask!] §...
- Page 20 MADRIX NEBULA User Manual [Part 2] Device Configuration www.madrix.com //20...
- Page 21 § Example: You can set up that NEBULA #1 only listens to universe 1 - 8, while NEBULA #2 listens to universe 9 - 16, and NEBULA #3 listens to universe 17 - 24, and so on. FPS - Shows the output frame rate that can be achieved with the current settings. The attainable frame rate is calculated according to the following settings: §...
- Page 22 ArtRdm (Act As RDM Responder) - Enables ArtRdm to be able to reply to RDM requests by an RDM controller as an RDM responder over Art-Net with status and sensor data. This enables monitoring of the device via MADRIX RADAR. The option is disabled by default.
- Page 23 § Art-Net And sACN SPI Output Output Protocol - In order to put MADRIX NEBULA fully into operation, it is Configuration necessary to set the correct output protocol according to the LEDs you have connected. You can set it up here.
- Page 24 1 - 512 - Limits the number of output channels to this value. If your controller sends more channels than set up here, any channels that are higher than this value will be discarded. If your controller sends fewer channels, NEBULA will fill up the rest of the channels with values of 0 [Black].
- Page 25 LEDs used. § Using MADRIX 5: By default, MADRIX 5 sends optimized frames as set up in the Device Manager. That means according to the number of channels used by the fixtures and Patch, MADRIX 5 and then NEBULA will send out the correct number of channels to the LEDs.
- Page 26 MADRIX NEBULA User Manual [Part 2] Device Configuration having never received data in the first place or when the data is not being received anymore and a timeout is reached]. Choose from the following options: § Send The Last Received Frame Continually [If no data is received at startup, black frames will be sent.]...
- Page 27 2. Connect to power and data. Learn more » Putting The Device Into Operation 3. Choose the corresponding Addressing Protocol as Output Protocol of the MADRIX NEBULA. Confirm with 'Set'. You only have to do this once for your each LED tape.
-
Page 28: Part 3 Using Madrix 5 Software
//PART Using MADRIX 5 Software... - Page 29 The MADRIX NEBULA works great in combination with the MADRIX 5 Software. MADRIX 5 Software License § The MADRIX 5 Software license is not included and sold separately. A MADRIX 5 KEY is necessary if you want to use output. Operating Modes You can use 3 operating modes together with the MADRIX 5 Software: §...
-
Page 30: Output [Art-Net]
Data Output Over Ethernet Network [Art-Net] You can connect the NEBULA over Ethernet network to the network card of your computer that runs the MADRIX 5 Software. Data is distributed to the device over network cabling [Ethernet] and sent to the output ports [Port 1 and Port 2]. - Page 31 [Via factory default settings, MADRIX NEBULA devices will have an IP address in the 10.x.x.x network range, such as 10.77.64.86, for example]. [Please note: Your devices and the sender, such as the PC that runs MADRIX 5, need to have the same subnet mask!] §...
- Page 32 MADRIX NEBULA User Manual [Part 3] Using MADRIX 5 Software 3] Fixture Patching In MADRIX 5 § Start MADRIX 5. § Configure the virtual LED matrix using the Matrix Generator or Patch Editor. 4] Activating Art-Net § Go to the menu Preferences > Device Manager... > Art-Net [Keyboard shortcut: F4 >...
- Page 33 MADRIX 5 can automatically add your MADRIX NEBULA devices. § Click [MADRIX 5 will automatically search the network for connected devices. Devices that are found will appear in the list. Eight entries will be created in the list for each NEBULA device, one for each universe.] www.madrix.com...
- Page 34 MADRIX NEBULA User Manual [Part 3] Using MADRIX 5 Software 6] Activating Devices Each of your MADRIX NEBULA devices and its ports need to be activated. By default, they are still deactivated. www.madrix.com //34...
- Page 35 Right Mouse Click on the column State to set from Off to On [indicated by green light.] § [In the screenshot above, one NEBULA is connected. If more devices are connected, please use the different IP addresses of different devices and device details [i] to identify them in the Device Manager.] 7] Configuration Of DMX Output §...
- Page 36 Make sure to assign the correct universe according to your requirements. Learn more » Glossary § By default, DMX universe 1 - 8 are assigned when using one MADRIX NEBULA. NEBULA Output Universe Device Manager... > DMX Devices > Device Name...
- Page 37 Large LED projects require dependable data distribution. The MADRIX 5 Software and NEBULA hardware allow you to fully synchronize data output for all output DMX ports and even across multiple NEBULA devices to get an optimal image on the LEDs.
- Page 38 MADRIX NEBULA User Manual [Part 3] Using MADRIX 5 Software § When Art-Net sync mode is activated, MADRIX 5 and MADRIX NEBULA will automatically handle the synchronization of data. Art-Net Sync Mode is highly recommended for MADRIX NEBULA! ArtSync - Allows you to activate or deactivate the usage of synchronization commands/packages for Art-Net.
- Page 39 Regarding sending ArtAddress commands to nodes, make sure that your nodes fully support this Art-Net feature. You will also get notified by a message box. Confirm the message with OK or abort via Cancel § MADRIX LUNA, MADRIX NEBULA, MADRIX PLEXUS, MADRIX STELLA, MADRIX ORION, and MADRIX AURA support ArtAddress. www.madrix.com...
- Page 40 § AcLedLocate will enable the identification of MADRIX 5. - As long as Identify is enabled or set via protocol commands, the MADRIX 5 user interface [GUI] will repeatedly change every second from the currently selected theme to the opposite theme, either from dark to light or vice versa.
-
Page 41: Output [Sacn]
Data Output Over Ethernet Network [Streaming ACN / sACN] You can connect the NEBULA over Ethernet network to the network card of your computer that runs the MADRIX 5 Software. Data is distributed to the device over network cabling [Ethernet] and sent to the output ports [Port 1 and Port 2]. - Page 42 2] Windows Network Settings § MADRIX 5 automatically sets up Streaming ACN network settings for you. [MADRIX 5 supports multicast Streaming ACN. Data is automatically sent to all corresponding sACN devices in the network. Unicast is also supported.] § You only need a computer with a network card and a valid IP address.
- Page 43 [Part 3] Using MADRIX 5 Software § ACN Device Count - Set up how many you are going to use. MADRIX NEBULA requires 8 sACN devices per unit. [This is the total amount of devices. Please set the exact number of devices you are using. If the count is higher, this creates unnecessary network traffic.]...
- Page 44 Right Mouse Click on the column State to set from Off to On [indicated by green light]. By default, the devices are already activated. § [In the screenshot above, one NEBULA is connected. If more devices are connected, please use the different universes of different devices to identify them in the Device Manager.] §...
- Page 45 MADRIX NEBULA User Manual [Part 3] Using MADRIX 5 Software 6A] Configuration Of Single Devices § Select a device in the list and click § A new window will open. Set up the following settings for your devices: www.madrix.com //45...
- Page 46 - For example, you may have set up two MADRIX PCs. One gets a priority of 100. The second PC gets a priority of 50. If the first PC fails and only if it malfunctions, data will be automatically received from PC #2.
- Page 47 For ACN Universe, you have now additional options for Numbering: Click the button and MADRIX 5 will automatically increase the ACN Universe number for all the selected devices [which can be seen in the DMX Devices tab of the Device Manager], starting with the value you have entered.
-
Page 48: Output [Usb]
Full Frames - Activating is recommended if problems with the data output of your devices occur. § In addition, you can activate Full Frames for the device and each MADRIX NEBULA output universe separately. Output [USB] This topic includes: §... - Page 49 Data Output Over USB You can connect the NEBULA directly via USB to the computer that runs the MADRIX 5 Software. Data is distributed to the MADRIX NEBULA over USB and sent to the two output ports [Port 1 and Port 2].
- Page 50 Go to the menu Preferences > Device Manager... > DMX Devices [Keyboard shortcut: F4] § Your NEBULA devices and all of their output universes will appear in the list. § If your devices are not in the list, click [In the screenshot below, one NEBULA is connected.] §...
- Page 51 MADRIX NEBULA User Manual [Part 3] Using MADRIX 5 Software § If your device and ports are not activated, do the following: § Select the device/port in the list. § Right Mouse Click on the column State to set from Off to On [indicated by green light].
- Page 52 [even when you are using less than 512 channels on the universe]. Full Frames - Activating is recommended if problems with the data output of your devices occur. § In addition, you can activate Full Frames for the device and each MADRIX NEBULA output universe separately. www.madrix.com //52...
-
Page 53: Part 4 Technical Support
//PART Technical Support... -
Page 54: Firmware Updates
MADRIX NEBULA User Manual [Part 4] Technical Support Technical Support Topics Of This Chapter § Firmware Updates § Troubleshooting Firmware Updates This topic includes: § Overview § Available Firmware Updates Overview It is highly recommended to update the firmware should a new firmware version become available. - Page 55 Sensor data: Devices can now report back which voltage is used for Power, Port 1, and Port 2 [Voltage Power, Voltage Port 1, Voltage Port 2]. § Sensor data: For NEBULA models V1.1 and higher, devices can now report back the ambient temperature [Temperature]. §...
- Page 56 'Automatic'. § Fixed an issue that did not set Channels Per Universe for Port 2 if USB as well as Ethernet were connected and the settings was changed for both ports in the MADRIX Device Configuration. §...
- Page 57 Release Date June 2019 § Fixed an issue that could freeze the device, when quitting the MADRIX 5 Software while using LPD6803 and having Channels Per Universe set to a value that could not be divided by 3. §...
- Page 58 MADRIX NEBULA User Manual [Part 4] Technical Support Release Date May 2020 § NEBULA Firmware Added new supported LEDs: GS8208. 2.03.7291 § Added new supported LEDs: MY9291. § Fixed minor issues. MADRIX Version MADRIX 5.4 Release Date December 2020 §...
- Page 59 Release Date kHz] (#7870). January 2022 § Web configuration page: ArtRdm is now supported. [NEBULA acts on commands and replies to requests with its own status and sensor data as RDM Responder.] (#7131). § Supports the RDM flag to the latest Art-Net 4 protocol revision 1.4dd2 (#7904).
-
Page 60: Troubleshooting
MADRIX NEBULA User Manual [Part 4] Technical Support § MADRIX 5.4g Fixed a minor issue with the LPD6803 protocol (#8095). § Fixed an issue that showed the available frequency of LPD1882S at 1.2 MHz instead Release Date of the correct 1 MHz (#8098). - Page 61 LEDs due to the power loss from power input to data output. § If power is supplied separately, to NEBULA at 5 V and to WS2815 at 12 V, then it is recommended to supply power of more than 5 V to the NEBULA (> 5 V) in order to counteract the power loss and avoid data signal issues, which can result in flickering on the LEDs.
-
Page 62: Part 5 General
//PART General... -
Page 63: Glossary
Glossary MADRIX 5 makes it possible to control numerous LED fixtures, also of different kinds, and to position them according to your needs in nearly any form or shape. This could be LED walls, arch shapes, ceilings, stripes, tiles, dance floors, etc. - Page 64 DVI is another way to output a video signal for your LEDs. Certain LED products use this type of communication. MADRIX 5 features 2 DVI outputs, which are 1-to-1 output windows. You can then send the DVI outputs to any www.madrix.com...
- Page 65 Input MADRIX 5 can send data out, but at the same time data can be sent to the software. That means data is sent to the MADRIX PC through various means [mostly USB or network]. MADRIX 5 can then be controlled remotely by you, or you can merge or use incoming signals, etc.
- Page 66 MIDI is short for Musical Instrument Digital Interface, a well-known technical standard that provides standardized ways for equipment to communicate. In case of MADRIX 5, MIDI can be used for MIDI Time Code, MIDI notes, or other MIDI hardware, such as DJ/VJ controllers.
- Page 67 Virtual LED Matrix MADRIX 5 needs to know how your LED installation looks like and which fixtures you want to use. [You can use the Matrix Generator or the Patch for this task.] In the end you will have configured the virtual LED matrix with its total pixel count in X, Y, and Z set up as the Matrix Size as well as the position and location of each pixel or fixture.
-
Page 68: Pc Power Management
Voxel Voxel is short for volumetric pixel. In addition to its pixel mapping features [2D], MADRIX 5 can control 3D LED matrices, which is called voxel mapping. Lighting effects are correctly mapped to each voxel of a 3D LED matrix. - Page 69 Especially for notebooks, we recommend to activate the High performance power plan. Activate High Performance This setting will make sure that your notebook or laptop will have all its potential performance available for MADRIX 5. § In Windows 10, select Start > Windows System > Control Panel > Power Options, and change the power plan to High performance [You might need to click on Show additional plans].
- Page 70 MADRIX NEBULA User Manual [Part 5] General How To Change USB Power Settings § In Windows 10, select Start > Windows System > Control Panel > Power Options > Change plan settings www.madrix.com //70...
- Page 71 MADRIX NEBULA User Manual [Part 5] General § Click Change advanced power settings www.madrix.com //71...
-
Page 72: Tips [Microsoft Windows / Networks / Usb]
MADRIX NEBULA User Manual [Part 5] General § Especially the USB settings are important. Disable the suspend settings! § Change any other settings that might interrupt the operation as required. Tips [Microsoft Windows / Networks / USB] This topic includes: §... - Page 73 - To circumvent such issues, you can run the MADRIX Software as administrative computer user, the so-called administrator. - Perform a right mouse click on the MADRIX.exe [or a shortcut to the MADRIX 5 Software] and choose Run as administrator - Note: You need to have access to the administrator account (i.e., password).
- Page 74 But this can lead to problems, when data that should go through is automatically blocked. MADRIX 5 will automatically set the correct firewall settings for you during the installation process. Please follow the steps below if this Windows message appears when you start the MADRIX 5 Software for the first time.
- Page 75 Not selecting both options can cause problems with network communication. Resetting The Settings If you have already chosen the wrong options MADRIX 5, you can delete the settings and choose again. § In Windows 10, go to Start > Windows System > Control Panel > Windows Defender Firewall >...
- Page 76 MADRIX NEBULA User Manual [Part 5] General § Select and delete any entries relating to MADRIX 5 [e.g., madrix.exe, MADRIX - music makes the light, MADRIX - LIGHTING CONTROL]. § With your next start of MADRIX 5, select both options as described above.
- Page 77 Configuration Of Network Settings When working with network-based products and MADRIX 5 [for example, Art-Net, KiNET, sACN, etc.], you will have to set up the IP address of your network card in Windows. Learn how to set it up here.
- Page 78 MADRIX NEBULA User Manual [Part 5] General www.madrix.com //78...
- Page 79 MADRIX NEBULA User Manual [Part 5] General www.madrix.com //79...
- Page 80 - [Make also sure to close the Local Area Connection Settings with OK and close the Local Area Connection Status window with Close.] § Restart the MADRIX 5 Software if you have changed any network settings! Learn more below. www.madrix.com...
- Page 81 Using Several Devices In A Network Usually, you will use at least 2 devices in a network [for example, 1 MADRIX PC and 1 Art-Net node or 1 MADRIX PC and 1 console]. As explained above, you will need to configure various network settings not only for your MADRIX PC but also for the other devices.
- Page 82 MADRIX NEBULA User Manual [Part 5] General www.madrix.com //82...
- Page 83 MADRIX NEBULA User Manual [Part 5] General § 2] Press Alt on your keyboard. - A menu appears at the top, which is otherwise hidden. § 3] Go to Advanced > Advanced Settings... - A new window opens. www.madrix.com //83...
- Page 84 MADRIX 5. § to make backup copies of your show files from time to time [MADRIX 5 Setup files] § to make backup copies to different or external storage mediums [e.g., USB stick/thumbdrive].
- Page 85 According to the requirements of Windows, MADRIX 5 will behave in the following way: § MADRIX 5 will be closed instantly, when you trigger a Restart or Shut Down of Windows. § If you have not saved any changes yet, you may be provided the chance and a short time frame [30 seconds] to react and save your progress before the MADRIX 5 Software is forcefully closed by Windows itself.
- Page 86 [German shortcut: Strg + Alt + Entf] § A new window opens [Task Manager]. § Go to Performance § You can now monitor the CPU Usage as well as the Memory usage. § MADRIX 5 has its own monitoring tools. www.madrix.com //86...
-
Page 87: Web Links
MADRIX NEBULA User Manual [Part 5] General Web Links This topic includes: § Overview Overview You can find a selection of useful internet links here: § MADRIX Website » www.madrix.com § Drivers » www.madrix.com/support/download § User Guides [Online And Downloadable PDF] »... -
Page 88: Part 6 Legal
//PART Legal... -
Page 89: Imprint And Copyright
MADRIX NEBULA User Manual [Part 6] Legal Legal This topic includes: § Introduction § Topics Of This Chapter Introduction Legal includes all legal documents and information, including copyright and more. Topics Of This Chapter § Imprint And Copyright Imprint And Copyright This topic includes: §... - Page 90 MADRIX NEBULA User Manual [Part 6] Legal Company And Address inoage GmbH Wiener Straße 56 01219 Dresden Germany Managing Directors: Christian Hertel, Sebastian Pinzer, Sebastian Wissmann Phone: +49 351 862 6869 0 Fax: +49 351 862 6869 68 Web: »...
- Page 91 MADRIX NEBULA User Manual [Part 6] Legal Under no circumstances does inoage GmbH take on the responsibility for liabilities for faults for losses in sales volume or profits, that occur through the usage of the product, through the serviceability, through abuse, happenings, circumstances or actions, that we have no influence on.
Need help?
Do you have a question about the NEBULA and is the answer not in the manual?
Questions and answers