Table of Contents
Advertisement
Quick Links
Advertisement
Table of Contents

Subscribe to Our Youtube Channel
Related Manuals for SKYLUX iDome

Summary of Contents for SKYLUX iDome
- Page 1 & iWindow Flex 2.0 Mounting instructions 01-10-2021 Art.N° 82671...
- Page 2 Safety Take the necessary and required safety precautions, such as safety nets and lifelines when installing from the outside, safety goggles, gloves, hard hat, etc. Do not step on the glass. Falling from height • When using ladders to go on the roof: - Ladder in good condition? - Set up correctly at an angle of 75°? - Secured below and on top against moving?
-
Page 3: Safety
Sharp objects • Make sure your fingers/hands are not pinched and watch out for cuts while handling skylights or barrel vaults. • Be careful where you put your hands during the installation. • Wearing cut-resistant gloves is mandatory. Ergonomics • Always lift loads correctly: bend your knees, move your feet instead of forcing your spine, lift as close to your body as possible. -
Page 4: Table Of Contents
9 PITCHED ROOF & LOCATION OF THE HINGES p. 8 9.1 PITCHED ROOF: LOCATION OF THE HINGES p. 8 9.2 MINIMUM ROOF INCLINATION: IDOME p. 8 9.3 MINIMUM ROOF INCLINATION: IWINDOW2 & IWINDOW3 p. 8 10 MOUNTING THE HINGES ON THE CURB p. -
Page 5: General
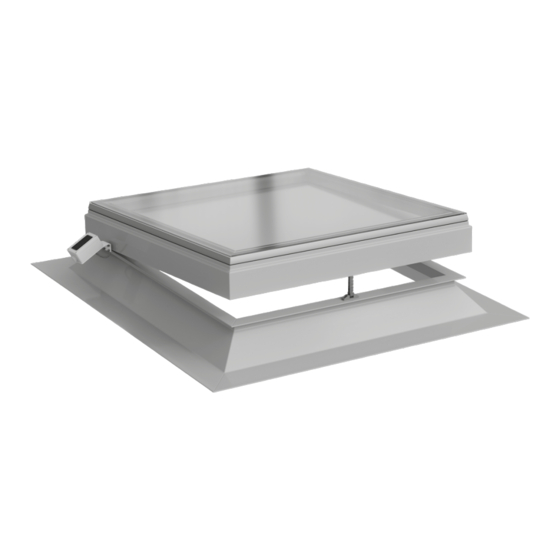
3 General The iDome Flex 2.0 or iWindow2-3 Flex 2.0 is the openable hybrid/flat glass skylight for applications in flat roofs with integrated 230 V chain actuator in the frame. Rain detection is included as standard, which closes the skylight automatically in case of precipitation. -
Page 6: Contents Of Delivery
6 Contents of delivery PVC iOra frame with glass cover (iDome / iWindow) and rain sensor Chain bracket screw M6x30 Cross recessed screw with raised countersunk Bottom hinge stainless head Phillips DIN966 A-H steel Stainless steel A2 M5x20 Prevailing hexagon nut... -
Page 7: Required Tools
7 Required tools Utility knife Drill bit diameter 12mm Tape measure Wrench SW 7 Square Wrench SW 8 Marker Allen wrench SW 5 for chain bracket SW 5 screw M6x30 Electric drill Allen wrench SW 3 for button head SW 3 screw M4 Drill bit diameter 4.5 mm Phillips screwdriver PH2... -
Page 8: Pitched Roof & Location Of The Hinges
Location hinges Pitched roof > 0° 9.2 Minimum roof inclination: iDome Pitched roof: iDome: roof inclination between 0° & max. 25° Hinges always on low side. min. 0° - max. 25° 9.3 Minimum roof inclination: iWindow2 & iWindow3 Pitched roof: iWindow: roof inclination between min. 5° & max. 25°... -
Page 9: Mounting The Hinges On The Curb
10 Mounting the hinges on the curb 10.1 Location of the hinges Install the bottom hinges on the curb. Measure the distance from the daylight size to the middle of the hinges. It’s important the hinges are positioned correctly! distance daylight size to hinge distance daylight size to hinge daylight size (longest side) Daylight size of the longest side (centre of the hinges) (mm) -
Page 10: Polyester Curb
10.2.1 Polyester curb Use the supplied rivets. Pre-drill the holes with a 5.5 mm drill bit. Curb flange dimensions: 4 x Ø 5.5 mm max.: 60 mm min.: 55 mm max.: 6 mm min.: 2 mm min.: 30 mm Daylight size polyester 10.2.2 Metal curb Use the supplied self-drilling hexagon washer head screws 4.8 x 25. -
Page 11: Pvc Curb
10.2.3 PVC curb Use the included HILO screws mushroom head/PH. Curb dimensions: max.: 60 mm min.: 55 mm Daylight size 11 Mounting the chain bracket on the curb 11.1 Location of the bracket Important notice: The middle of the chain bracket must be placed 32 mm from the daylight size (longest side). Inside curb Your Flex 2.0 product includes a “chain bracket positioning tool”... -
Page 12: Single Actuator: The Chain Bracket Is Positioned In The Middle Of The Curb
11.1.1 Single actuator: the chain bracket is positioned in the middle of the curb Accurately mark the position with a marker: Daylight size / 2 Daylight size 11.1.2 Double actuator: the middle of the chain bracket is positioned 322 mm from the middle of the curb Accurately mark the 2 positions with a marker: 322 mm... -
Page 13: Mounting The Chain Bracket On The Curb
11.2 Mounting the chain bracket to the curb Press the positioning tool against the inside of the curb. Align the slot in the positioning tool with the marking on the curb. Inside curb Use the appropriate hardware to mount the hinges on the curb! Your Flex 2.0-product includes mounting hardware for polyester, metal or PVC curbs. -
Page 14: Pvc Curb
11.2.2 PVC curb Position the bracket correctly using the positioning tool. Use the included hilo screws to fix the bracket. 12 Preparation of the curb for cable Your Flex 2.0 product is equipped with 1 electrical cable containing 6 cores. This cable serves 2 purposes: - Providing 230 V AC power - Connection to a switch to operate your Flex 2.0 product... -
Page 15: Pre-Installing The Rain Sensor On Skylight
13 Pre-installing the rain sensor on skylight For transport, the rain sensor is stowed inside the skylight. 13.1 Mounting rain sensor on bracket Before removing the skylight from the packaging: Open up the side where the rain sensor is located in order to have easy access to the rain sensor bracket. Use the 4 included hexagon domed cap nuts. -
Page 16: Assembly Window With Curb
Slide excess cable into sensor. Do not place the skylight with mounted rain sensor on the ground! This can cause damage to the bracket and or rain sensor! Keep the skylight with mounted rain sensor in the box until mounting on curb. 14 Assembly window with curb max. -
Page 17: Electrical Cable Through The Curb
Lift and open the frame with glass cover at max. Turning over without support 90° and hold the frame in this position. can cause damage! > 90° max. 90° The hinge brackets are then permanently secured with the supplied threaded rod and two cap nuts. These can be made burglar-proof by adding a drop of Loctite to the cap nuts. - Page 18 Polyester or metal curb? Use the cable routing as a guide Use the included M4 bolts and nuts to drill 2 holes in the curb. to fix the cable routing. Ø 4.5 mm polyester or metal polyester or metal PVC curb? No pre-drilling needed.
-
Page 19: Actuator Connection To Chain Bracket
16 Actuator connection to chain bracket Right out of the box, the chain length of your Flex 2.0 product sticks out approximately 10 cm. This is done so you do not need to have mains power to mount the chain to the bracket. +/- 10 cm Remove any protection foam from the chain. -
Page 20: Electrical Connection With Rain Sensor
16.1 Electrical connection WITH rain sensor Wiring diagram for connection of single or double actuator. Both versions have the same cable output. Use this diagram if your Flex 2.0 product is equipped with a rain sensor: GY (grey) 230V AC RAIN SENSOR BU (blue) GN/YE (green/yellow) -
Page 21: Electrical Connection Without Rain Sensor
16.2 Electrical connection WITHOUT rain sensor Only if your Flex 2.0 is delivered WITHOUT rain sensor. GY (grey) 230V AC RAIN SENSOR BU (blue) GN/YE (green/yellow) BN (brown) OPEN OPEN FLEX 2.0 BK (black) CLOSE CLOSE WH (white) SWITCH (*) Not connected (*) WARNING Only use a switch which automatically returns (spring loaded) -
Page 22: Dissasembly
Remove all protective foil and stickers with tips (maintenance tips and tips for the installer). When finished, the product is ready to use. iDome Flex hybrid skylight The hybrid skylight must always immediately be provided with a single- or double-walled plastic skylight of choice. -
Page 23: Technical Information
18 Technical information Version Voltage Pushing force Pulling force Stroke Velocity Single actuator 230 V AC 600 N 600 N 250 mm 12.5 mm/s Second actuator (*) 24 V DC 600 N 600 N 250 mm 12.5 mm/s (*) For Flex 2.0 with 2 actuators •... - Page 24 Mounting_instructions_Flex_2.0 24/24 01/10/2021...
Need help?
Do you have a question about the iDome and is the answer not in the manual?
Questions and answers