Advertisement
Advertisement
Table of Contents

Related Manuals for Home HME030524N


Summary of Contents for Home HME030524N
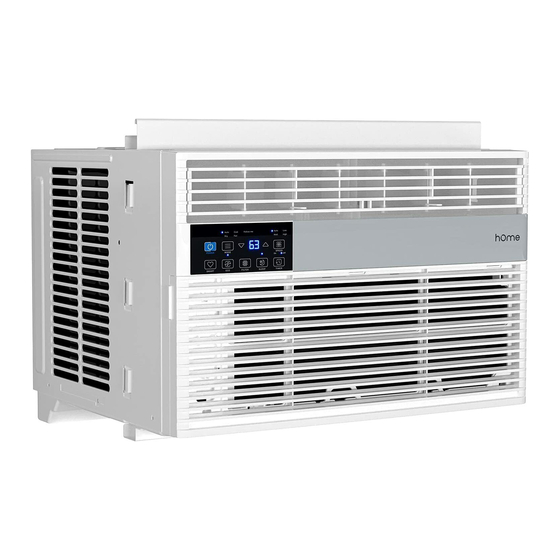
- Page 1 Window Air Conditioner HME030524N HME030525N HME030526N HME030527N HME030528N...
- Page 2 Failure to keep the product in its original quality from the time of receipt may impede hOme™’s ability to correct any legitimate problem and may limit the extent to...
-
Page 3: Table Of Contents
TABLE OF CONTENTS Important Safety Instructions ....6 Installation ..........15 Operating Instructions......22 Cleaning and Maintenance ....27 Troubleshooting ........28 Warranty ........... 30 Manufacturing Information ....30 Warning ............ 30 Contact Us ..........30... - Page 5 Congratulations on bringing home your new appliance! Don’t forget to register your product at homelabs.com/reg for updates, coupons, and other relevant information. Although greatly appreciated, product registration is not required to activate any warranty.
-
Page 6: Important Safety Instructions
• Stop using the unit during a storm or hurricane. Close the windows when operating this unit. Open windows may cause the unit to become wet and could even lead to your home furniture becoming wet or soaked. When cleaning the unit, switch off and turn off the circuit breaker. Do not clean the unit when its power is turned on as it may cause fire, electric shock, and injury. - Page 7 Important Safety Instructions • Always insert the filters securely. Clean the filter once every two weeks. Operating the unit without filters may cause it to fail. • Hold the power cord by the head when unplugging it. Not doing so may cause electric shock and could damage the appliance.
- Page 8 Important Safety Instructions Avoid Accidents To reduce the risk of fire, electrical shock, or injury when using your air conditioner, follow these basic precautions: • Ensure that the electrical service is adequate for the model you have. This information can be found on the rating label, which is located on the side of the cabinet and behind the grille.
- Page 9 Important Safety Instructions – The appliance shall not be stored in a room where there are ignition sources continuously operated (e.g.: open flames or a running gas appliance). – Do not pierce or burn this unit. – Be aware that the refrigerants of this appliance may be odorless. –...
- Page 10 Important Safety Instructions 4. Storage of Equipment The storage of this equipment should be in accordance with the manufacturer's instructions. 5. Information on Servicing 1) Checks to the area Before working on systems containing flammable refrigerants, it is necessary to ensure that the risk of ignition is minimized.
- Page 11 Important Safety Instructions 9) Checks to electrical devices Repair and maintenance to electrical components shall include initial safety checks and component inspection procedures. If a fault exists that could compromise safety, then no electrical supply shall be connected to the circuit until it is satisfactorily dealt with. If the fault cannot be corrected immediately, but it is necessary to continue operation, an adequate temporary solution shall be used.
- Page 12 Important Safety Instructions found (which requires brazing), all refrigerants shall be recovered from the system, or isolated (by means of shut off valves) in a part of the system that is situated remotely from the leak. Oxygen free nitrogen (OFN) shall then be purged from the system both before and during the brazing process. 12.
- Page 13 Important Safety Instructions e) If a vacuum is not possible, make a manifold so that refrigerants can be removed from various parts of the system. f) Make sure that the cylinder is situated on the scales before recovery takes place. g) Start the recovery machine and operate in accordance with the manufacturer's instructions.
- Page 14 Important Safety Instructions FCC STATEMENT This device complies with part 15 of the FCC Rules. Operation is subject to the following two conditions: (1) this device may not cause harmful interference, and (2) this device must accept any interference received, including interference that may cause undesired operation.
-
Page 15: Installation
Installation PACKING LIST IMAGE PART QUANTITY Main Unit Remote Control Top Mounting Rail (With sponge) Lock Frame (For Wooden windows) Lock Frame (For Vinyl - Clad windows) Sash Lock (Two holes) Filler Panels (With “Left” & “Right” marks on the front) Window Sash Seal (Sponge) - Page 16 Installation TOOLS NEEDED (NOT SUPPLIED) IMAGE PART Screwdriver Screwdriver Level Pencil Ruler or Tape Measure Scissors or Knife...
- Page 17 Installation PRIOR TO INSTALLING THE AIR CONDITIONER 1. Check for anything that could block the airflow. Check the area outside the window for things such as shrubs, trees, or awnings. Check the area inside the window to make sure curtains, drapes, or blinds will not block proper airflow.
- Page 18 Installation Offset Exterior Wall Inner Window Sill Interior Wall The lower sash must open sufficiently to allow a clear vertical opening of 13 inches (330mm). The side louvers and the rear of the AC must have clear air space to allow enough airflow through the condenser for heat removal.
- Page 19 Installation 2. PREPARE THE AIR CONDITIONER The top rail must be assembled prior to installing the air conditioner in the window. Tools Needed: Phillips Screw Driver Top Rail Hardware 3/8" Screw Top Rail Packaging Top Rail Weather Stripping Fig. A (10 ×...
- Page 20 Installation 3. INSTALL THE ACCORDION PANELS NOTE: The top rail and sliding panels on each side are there to provide the proper pitch to the rear of (5/16") this unit. This is necessary for proper condensed water utilization and drainage. If you are not using the side panels for any reason, this pitch to the rear should also be maintained.
- Page 21 Installation NOTE: Before driving the screws, drill 5 holes 6. INSTALL THE WEATHER STRIPPING through the holes in the frame lock and frame (ONLY APPLICABLE TO MODELS WITH extensions into the window sash as shown. THE ENERGY STAR RATING) 1/2" Screw In order to minimize air leaks between the air conditioner and the window opening, trim the weather stripping to a proper length, peel the...
-
Page 22: Operating Instructions
Operating Instructions CONTROL PANEL 1. Power Button: Press to turn the air conditioner on or off. 2. Smart Button (Some models): Press to pair the unit with your mobile phone, then you can operate the unit through an APP on your mobile phone. 3. - Page 23 Operating Instructions REMOTE CONTROL 1. TEMP Use these buttons to set the temperature or timer. The temperature range is 62°F-86°F (17°C-30°C). If the room temperature is too high or too low, “HI” or “LO” will be displayed on the screen. 2.
- Page 24 Operating Instructions HOW TO USE THE BASIC FUNCTIONS POWER ON/OFF Press the POWER button to turn the unit on or off. The unit will activate the Energy Saver function automatically under the Cool, Dry, and Auto modes. MODE SETTING Press the MODE button to select the operating mode in the following options: Auto, Cool, Dry, and Fan. The indicator will light up and remain on once the corresponding mode is selected.
- Page 25 Operating Instructions TIMER SETTING (When using the Remote control) You can set the timer to Auto-on, Auto-off, or both. Follow the instructions below to set the timer. Programming Startup 1. Press the TIMER ON button to activate this feature. The ON indicator (above the TIMER button) on the control panel will light up.
- Page 26 Operating Instructions FOLLOW ME SETTING This feature can be activated through the remote control ONLY. When the Follow Me feature is activated, the remote will then act as the thermostat instead of the unit, helping the unit to more accurately cool to your desired temperature by sensing the ambient temperature of the area where the remote is located.
-
Page 27: Cleaning And Maintenance
Cleaning and Maintenance Clean your air conditioner to keep it looking new and to minimize dust buildup. Always disconnect the appliance before doing any cleaning or maintenance. AIR FILTER CLEANING The air filter should be checked at least once every month to see if it needs cleaning. -
Page 28: Troubleshooting
Troubleshooting PROBLEM POSSIBLE CAUSES SOLUTIONS The unit does not The unit is unplugged • Make sure the power plug is inserted start completely into the outlet The fuse is blown or the circuit • Replace the fuse or reset the circuit breaker is tripped breaker Power failure... - Page 29 Troubleshooting The unit doesn't work The unit is preset with ECO on • Press the ECO button to deactivate the continuously for energy saving. It will shut off energy saving mode the compressor and fan when the preset temperature reaches The room temperature The temperature displayed on the •...
-
Page 30: Warranty
These are our general terms for warranty service, but we always urge our customers to reach out to us with any issue, regardless of warranty terms. If you have an issue with a hOme™ product, please contact us at 1 (800) 898-3002, and we will do our best to resolve it for you. - Page 32 For Household 1 (800) 898-3002 © 2020 hOmeLabs LLC help@homelabs.com 37 East 18 Street, 7th Floor Use Only homelabs.com/help New York, NY 10003...
Need help?
Do you have a question about the HME030524N and is the answer not in the manual?
Questions and answers