Dell Inspiron 3662 Service Manual
Hide thumbs
Also See for Inspiron 3662:
- Service manual (82 pages) ,
- Setup and specifications (18 pages) ,
- Service manual (81 pages)

Related Manuals for Dell Inspiron 3662


Summary of Contents for Dell Inspiron 3662
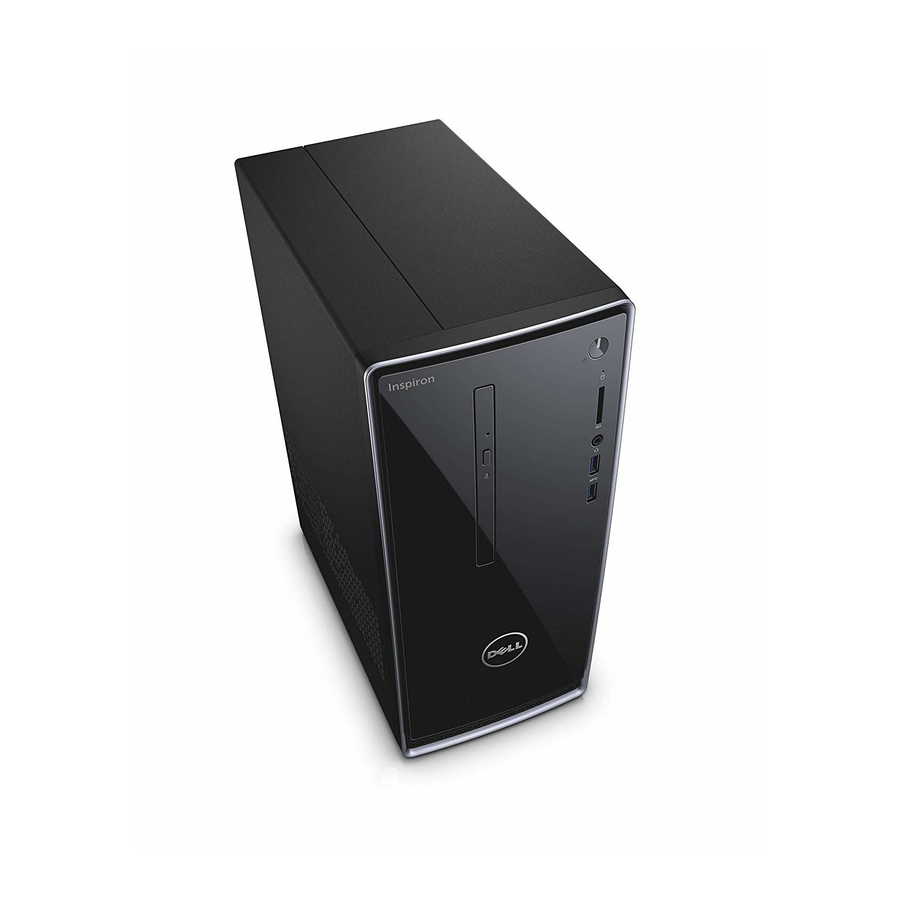
- Page 1 Inspiron 3662 Service Manual Bilgisayar Modeli: Inspiron 3662 Resmi Model: D20M Resmi Tip: D20M002...
- Page 2 UYARI: UYARI, meydana gelebilecek olası maddi hasar, kişisel yaralanma veya ölüm tehlikesi anlamına gelir. Telif Hakkı © 2016 Dell Inc. veya yan kuruluşlarının. Tüm hakları saklıdır. Dell, EMC, ve diğer ticari markalar, Dell Inc. veya yan kuruluşlarının. Diğer ticari markalar ilgili sahiplerinin mülkiyetindedir.
-
Page 3: Table Of Contents
İçindekiler Bilgisayarınızın içinde çalışmaya başlamadan önce....8 ..................8 Before you begin Bilgisayarınızın içinde çalıştıktan sonra........9 Güvenlik talimatları..............10 Önerilen araçlar.................11 Screw list.................. 12 Inside view of your computer..........13 System board components............ 14 Bilgisayar kapağını çıkarma ............ 16 ....................16 Procedure Bilgisayar kapağını... - Page 4 Bellek modüllerini çıkarma............23 ................... 23 Prerequisites ....................23 Procedure Bellek modüllerinin değiştirilmesi........... 26 ....................26 Procedure ..................27 Post-requisites 3,5 inç sabit sürücüyü çıkarma..........28 ................... 28 Prerequisites ....................28 Procedure 3,5 inç sabit sürücüyü takma..........33 ....................33 Procedure ..................
- Page 5 Kablosuz kartı çıkarma............44 ................... 44 Prerequisites ....................44 Procedure Kablosuz kartı takma.............. 47 ....................47 Procedure ..................48 Post-requisites Anten modüllerini çıkarma............49 ................... 49 Prerequisites ....................49 Procedure Anten modüllerini takma............52 ....................52 Procedure ..................52 Post-requisites Güç düğmesi modülünü çıkarma........... 53 ...................
- Page 6 İşlemci ısı emicisini çıkarmak........... 61 .................... 61 Prerequisites ....................61 Procedure İşlemci ısı emicisini yerine takma........... 63 ....................63 Procedure ..................63 Post-requisites Removing the front I/O-panel..........64 ................... 64 Prerequisites ....................64 Procedure Replacing the front I/O-panel..........67 ....................67 Procedure ..................
- Page 7 ..................75 Prerequisites ..................75 Procedure .................. 76 Post-requisites BIOS'u Sıfırlama...............77 Yardım alma ve Dell'e başvurma..........78 .............. 78 Kendi kendine yardım kaynakları ..................78 Dell'e Başvurma...
-
Page 8: Bilgisayarınızın Içinde Çalışmaya Başlamadan Önce
Bilgisayarınızın içinde çalışmaya başlamadan önce NOT: Sipariş ettiğiniz yapılandırmaya bağlı olarak bu belgedeki resimler sizin bilgisayarınızdan farklı olabilir. Before you begin Save and close all open files and exit all open applications. Shut down your computer. Click Start → Power → Shut down. NOT: If you are using a different operating system, see the documentation of your operating system for shut-down instructions. -
Page 9: Bilgisayarınızın Içinde Çalıştıktan Sonra
Bilgisayarınızın içinde çalıştıktan sonra DİKKAT: Serbest kalmış veya gevşemiş vidaları bilgisayarınızın içinde bırakmak bilgisayarınıza ciddi şekilde zarar verebilir. Tüm vidaları yerlerine takın ve bilgisayarınızın içine kaçmış vida kalmadığından emin olun. Bilgisayarınızda çalışmadan önce çıkardığınız tüm harici cihazları, çevre birimlerini veya kabloları yerlerine takın. Bilgisayarınızda çalışmadan önce çıkardığınız tüm ortam kartlarını, diskleri veya diğer parçaları... -
Page 10: Güvenlik Talimatları
DİKKAT: Bileşenlere ve kartlara zarar gelmesini önlemek için, bunları kenarlarından tutun ve pimlere ve kontaklara dokunmaktan kaçının. DİKKAT: Yalnızca sorun giderme ve onarım tarafından yetkilendirilmeniz veya Dell teknik destek ekibi. Dell tarafından yetkilendirilmemiş servislerden kaynaklanan zararlar garantinizin kapsamında değildir. Güvenlik talimatlarına bakın. ile birlikte gönderilen ürün veya www.dell.com/regulatory_compliance. -
Page 11: Önerilen Araçlar
Önerilen araçlar Bu belgedeki prosedürler için aşağıdaki araçlar gerekebilir: • Phillips tornavida • Plastik çubuk... -
Page 12: Screw List
Screw list The following table provides the list of screws that are used for securing different components to the computer. Tablo 1. Screw list Component Secured to Screw type Quantity Computer cover Chassis #6–32 UNC 1/4'' Hard drive Side-chassis #6–32 UNC 1/4'' Hard drive Hard-drive bracket #6–32 UNC 3.6 Side-chassis... -
Page 13: Inside View Of Your Computer
Inside view of your computer system board processor fan and heat-sink assembly memory module I/O board optical drive hard-drive assembly side chassis wireless card... -
Page 14: System Board Components
System board components power-button cable connector coin-cell battery I/O-cable connector memory-module (slot 2) hard-drive and optical drive power- wireless-card slot cable connector hard-drive data cable connector optical-drive data cable connector processor-fan cable connector service mode jumper password clear jumper CMOS clear jumper... - Page 15 memory-module (slot 1)
-
Page 16: Bilgisayar Kapağını Çıkarma
UYARI: Bilgisayarınızın içerisinde çalışmadan önce, bilgisayarınızla birlikte gönderilen emniyet bilgilerini okuyun ve içerisinde belirtilen adımları izleyin. Sisteminizin içinde çalıştıktan sonra, bölümündeki talimatları i̇ ç inde çalıştıktan sonra. Ek güvenlik en iyi uygulama bilgileri için www.dell.com/ regulatory_compliance adresindeki Regulatory Compliance (Yasal Uygunluk) Ana Sayfasına bakın. Procedure Remove the two screws (#6–32 UNC 1/4'') that secure the cover to the... - Page 17 Release the computer cover by sliding it towards the back of the computer and lift the cover off the chassis.
-
Page 18: Bilgisayar Kapağını Takma
UYARI: Bilgisayarınızın içerisinde çalışmadan önce, bilgisayarınızla birlikte gönderilen emniyet bilgilerini okuyun ve içerisinde belirtilen adımları izleyin. Sisteminizin içinde çalıştıktan sonra, bölümündeki talimatları i̇ ç inde çalıştıktan sonra. Ek güvenlik en iyi uygulama bilgileri için www.dell.com/ regulatory_compliance adresindeki Regulatory Compliance (Yasal Uygunluk) Ana Sayfasına bakın. Procedure Align the tabs on the computer cover with the slots on the chassis and slide it towards the front of the computer. -
Page 19: Ön Çerçeveyi Çıkarma
UYARI: Bilgisayarınızın içerisinde çalışmadan önce, bilgisayarınızla birlikte gönderilen emniyet bilgilerini okuyun ve içerisinde belirtilen adımları izleyin. Sisteminizin içinde çalıştıktan sonra, bölümündeki talimatları i̇ ç inde çalıştıktan sonra. Ek güvenlik en iyi uygulama bilgileri için www.dell.com/ regulatory_compliance adresindeki Regulatory Compliance (Yasal Uygunluk) Ana Sayfasına bakın. Prerequisites... - Page 20 Grasp and release the front bezel tabs sequentially from the top, by moving them outward from the chassis.
- Page 21 Rotate and pull the front bezel away from the front of the computer to release the front bezel clamps from the front panel slots.
-
Page 22: Ön Çerçeveyi Takma
UYARI: Bilgisayarınızın içerisinde çalışmadan önce, bilgisayarınızla birlikte gönderilen emniyet bilgilerini okuyun ve içerisinde belirtilen adımları izleyin. Sisteminizin içinde çalıştıktan sonra, bölümündeki talimatları i̇ ç inde çalıştıktan sonra. Ek güvenlik en iyi uygulama bilgileri için www.dell.com/ regulatory_compliance adresindeki Regulatory Compliance (Yasal Uygunluk) Ana Sayfasına bakın. Procedure Align and insert the front bezel clamps into the front panel slots. -
Page 23: Bellek Modüllerini Çıkarma
UYARI: Bilgisayarınızın içerisinde çalışmadan önce, bilgisayarınızla birlikte gönderilen emniyet bilgilerini okuyun ve içerisinde belirtilen adımları izleyin. Sisteminizin içinde çalıştıktan sonra, bölümündeki talimatları i̇ ç inde çalıştıktan sonra. Ek güvenlik en iyi uygulama bilgileri için www.dell.com/ regulatory_compliance adresindeki Regulatory Compliance (Yasal Uygunluk) Ana Sayfasına bakın. Prerequisites... - Page 24 Lift and rotate the side-chassis away from the computer. Using your fingertips, spread apart the securing clip at each end of the memory- module slot until the memory module pops up.
- Page 25 Slide and remove the memory module from the memory-module slot. NOT: If the memory module is difficult to remove, gently ease the memory module back and forth to remove it from the slot. DİKKAT: To prevent damage to the memory module, hold the memory module by the edges.
-
Page 26: Bellek Modüllerinin Değiştirilmesi
UYARI: Bilgisayarınızın içerisinde çalışmadan önce, bilgisayarınızla birlikte gönderilen emniyet bilgilerini okuyun ve içerisinde belirtilen adımları izleyin. Sisteminizin içinde çalıştıktan sonra, bölümündeki talimatları i̇ ç inde çalıştıktan sonra. Ek güvenlik en iyi uygulama bilgileri için www.dell.com/ regulatory_compliance adresindeki Regulatory Compliance (Yasal Uygunluk) Ana Sayfasına bakın. Procedure Ensure that the securing clips are extended away from the memory-module slot. -
Page 27: Post-Requisites
Insert the memory module into the memory-module slot and press the memory module down until it clicks into place. Rotate the side-chassis towards the computer until it snaps into place. Post-requisites Replace the front bezel. Replace the computer cover. -
Page 28: 3,5 Inç Sabit Sürücüyü Çıkarma
UYARI: Bilgisayarınızın içerisinde çalışmadan önce, bilgisayarınızla birlikte gönderilen emniyet bilgilerini okuyun ve içerisinde belirtilen adımları izleyin. Sisteminizin içinde çalıştıktan sonra, bölümündeki talimatları i̇ ç inde çalıştıktan sonra. Ek güvenlik en iyi uygulama bilgileri için www.dell.com/ regulatory_compliance adresindeki Regulatory Compliance (Yasal Uygunluk) Ana Sayfasına bakın. Prerequisites... - Page 29 Disconnect the power cable from the hard drive.
- Page 30 Lift and rotate the side-chassis away from the computer.
- Page 31 Using the release tabs on the hard-drive assembly, slide the hard-drive assembly out of the slot on the side-chassis. Remove the four screws (#6–32 UNC 3.6 mm) that secure the hard-drive bracket to the hard drive.
- Page 32 Lift the hard drive off the hard-drive bracket.
-
Page 33: 3,5 Inç Sabit Sürücüyü Takma
UYARI: Bilgisayarınızın içerisinde çalışmadan önce, bilgisayarınızla birlikte gönderilen emniyet bilgilerini okuyun ve içerisinde belirtilen adımları izleyin. Sisteminizin içinde çalıştıktan sonra, bölümündeki talimatları i̇ ç inde çalıştıktan sonra. Ek güvenlik en iyi uygulama bilgileri için www.dell.com/ regulatory_compliance adresindeki Regulatory Compliance (Yasal Uygunluk) Ana Sayfasına bakın. Procedure Place the hard drive in the hard-drive bracket. -
Page 34: Optik Sürücüyü Çıkarma
UYARI: Bilgisayarınızın içerisinde çalışmadan önce, bilgisayarınızla birlikte gönderilen emniyet bilgilerini okuyun ve içerisinde belirtilen adımları izleyin. Sisteminizin içinde çalıştıktan sonra, bölümündeki talimatları i̇ ç inde çalıştıktan sonra. Ek güvenlik en iyi uygulama bilgileri için www.dell.com/ regulatory_compliance adresindeki Regulatory Compliance (Yasal Uygunluk) Ana Sayfasına bakın. Prerequisites... - Page 35 Lift and rotate the side-chassis away from the computer. Disconnect the power cable from the optical drive.
- Page 36 Disconnect the data cable from the optical drive. Rotate the side-chassis towards the computer until it snaps into place. Remove the screw (#6–32 UNC 3.6 mm) that secures the optical-drive assembly to the side-chassis.
- Page 37 Gently slide the optical-drive assembly out of the optical-drive bay through the front of the computer. Remove the three screws (M2xL2) that secure the optical-drive bracket to the optical drive.
- Page 38 Lift the optical-drive bracket off the optical drive. Gently pull and disconnect the optical-drive bezel from the optical drive.
-
Page 39: Optik Sürücüyü Yerine Takma
UYARI: Bilgisayarınızın içerisinde çalışmadan önce, bilgisayarınızla birlikte gönderilen emniyet bilgilerini okuyun ve içerisinde belirtilen adımları izleyin. Sisteminizin içinde çalıştıktan sonra, bölümündeki talimatları i̇ ç inde çalıştıktan sonra. Ek güvenlik en iyi uygulama bilgileri için www.dell.com/ regulatory_compliance adresindeki Regulatory Compliance (Yasal Uygunluk) Ana Sayfasına bakın. Procedure Align and snap the optical-drive bezel to the optical drive. -
Page 40: Düğme Pili Çıkarma
Sisteminizin içinde çalıştıktan sonra, bölümündeki talimatları i̇ ç inde çalıştıktan sonra. Ek güvenlik en iyi uygulama bilgileri için www.dell.com/ regulatory_compliance adresindeki Regulatory Compliance (Yasal Uygunluk) Ana Sayfasına bakın. DİKKAT: Düğme pilin çıkarılması, BIOS ayarlarını varsayılana sıfırlar. Düğme pili çıkarmadan önce, BIOS ayarlarını... - Page 41 Lift and rotate the side-chassis away from the computer.
- Page 42 Using a plastic scribe, pry the coin-cell battery out of its socket.
-
Page 43: Düğme Pili Yerine Takma
UYARI: Bilgisayarınızın içerisinde çalışmadan önce, bilgisayarınızla birlikte gönderilen emniyet bilgilerini okuyun ve içerisinde belirtilen adımları izleyin. Sisteminizin içinde çalıştıktan sonra, bölümündeki talimatları i̇ ç inde çalıştıktan sonra. Ek güvenlik en iyi uygulama bilgileri için www.dell.com/ regulatory_compliance adresindeki Regulatory Compliance (Yasal Uygunluk) Ana Sayfasına bakın. Procedure Insert a new coin-cell battery (CR2032) into the battery socket with the positive side facing up, and snap the battery into place. -
Page 44: Kablosuz Kartı Çıkarma
UYARI: Bilgisayarınızın içerisinde çalışmadan önce, bilgisayarınızla birlikte gönderilen emniyet bilgilerini okuyun ve içerisinde belirtilen adımları izleyin. Sisteminizin içinde çalıştıktan sonra, bölümündeki talimatları i̇ ç inde çalıştıktan sonra. Ek güvenlik en iyi uygulama bilgileri için www.dell.com/ regulatory_compliance adresindeki Regulatory Compliance (Yasal Uygunluk) Ana Sayfasına bakın. Prerequisites... - Page 45 Lift and rotate the side-chassis away from the computer. Remove the screw (M2xL3.5) that secures the wireless card to the system board. Lift the wireless-card bracket off the wireless card. Disconnect the antenna cables from the wireless card.
- Page 46 Slide and remove the wireless card from the wireless-card slot.
-
Page 47: Kablosuz Kartı Takma
UYARI: Bilgisayarınızın içerisinde çalışmadan önce, bilgisayarınızla birlikte gönderilen emniyet bilgilerini okuyun ve içerisinde belirtilen adımları izleyin. Sisteminizin içinde çalıştıktan sonra, bölümündeki talimatları i̇ ç inde çalıştıktan sonra. Ek güvenlik en iyi uygulama bilgileri için www.dell.com/ regulatory_compliance adresindeki Regulatory Compliance (Yasal Uygunluk) Ana Sayfasına bakın. Procedure Align the notch on the wireless card with the tab on the wireless-card slot. -
Page 48: Post-Requisites
Replace the screw (M2xL3.5) that secures the wireless card to the system board. Rotate the side-chassis towards the computer until it snaps into place. Post-requisites Replace the front bezel. Replace the computer cover. -
Page 49: Anten Modüllerini Çıkarma
UYARI: Bilgisayarınızın içerisinde çalışmadan önce, bilgisayarınızla birlikte gönderilen emniyet bilgilerini okuyun ve içerisinde belirtilen adımları izleyin. Sisteminizin içinde çalıştıktan sonra, bölümündeki talimatları i̇ ç inde çalıştıktan sonra. Ek güvenlik en iyi uygulama bilgileri için www.dell.com/ regulatory_compliance adresindeki Regulatory Compliance (Yasal Uygunluk) Ana Sayfasına bakın. Prerequisites... - Page 50 Push down the antenna cables through the cable-routing slots on the side- chassis. Rotate the side-chassis towards the computer until it snaps into place. Note the antenna-cable routing and remove the antenna cables from the routing guides on the side-chassis.
- Page 51 Using a plastic scribe, gently pry the antenna modules off the side-chassis.
-
Page 52: Anten Modüllerini Takma
UYARI: Bilgisayarınızın içerisinde çalışmadan önce, bilgisayarınızla birlikte gönderilen emniyet bilgilerini okuyun ve içerisinde belirtilen adımları izleyin. Sisteminizin içinde çalıştıktan sonra, bölümündeki talimatları i̇ ç inde çalıştıktan sonra. Ek güvenlik en iyi uygulama bilgileri için www.dell.com/ regulatory_compliance adresindeki Regulatory Compliance (Yasal Uygunluk) Ana Sayfasına bakın. Procedure Adhere the antenna modules to the side-chassis. -
Page 53: Güç Düğmesi Modülünü Çıkarma
UYARI: Bilgisayarınızın içerisinde çalışmadan önce, bilgisayarınızla birlikte gönderilen emniyet bilgilerini okuyun ve içerisinde belirtilen adımları izleyin. Sisteminizin içinde çalıştıktan sonra, bölümündeki talimatları i̇ ç inde çalıştıktan sonra. Ek güvenlik en iyi uygulama bilgileri için www.dell.com/ regulatory_compliance adresindeki Regulatory Compliance (Yasal Uygunluk) Ana Sayfasına bakın. Prerequisites... - Page 54 Lift and rotate the side-chassis away from the computer. Disconnect the power-button cable from the system board. Press the tab on the power-button module to release the module from the front panel.
- Page 55 Remove the power-button module along with its cable through the slot on the front panel.
-
Page 56: Güç Düğmesi Modülünü Yerine Takma
UYARI: Bilgisayarınızın içerisinde çalışmadan önce, bilgisayarınızla birlikte gönderilen emniyet bilgilerini okuyun ve içerisinde belirtilen adımları izleyin. Sisteminizin içinde çalıştıktan sonra, bölümündeki talimatları i̇ ç inde çalıştıktan sonra. Ek güvenlik en iyi uygulama bilgileri için www.dell.com/ regulatory_compliance adresindeki Regulatory Compliance (Yasal Uygunluk) Ana Sayfasına bakın. Procedure Route the power-button board cable through the slot on the front panel. -
Page 57: Removing The Processor Fan
UYARI: Bilgisayarınızın içerisinde çalışmadan önce, bilgisayarınızla birlikte gönderilen emniyet bilgilerini okuyun ve içerisinde belirtilen adımları izleyin. Sisteminizin içinde çalıştıktan sonra, bölümündeki talimatları i̇ ç inde çalıştıktan sonra. Ek güvenlik en iyi uygulama bilgileri için www.dell.com/ regulatory_compliance adresindeki Regulatory Compliance (Yasal Uygunluk) Ana Sayfasına bakın. Prerequisites... - Page 58 Lift and rotate the side-chassis away from the computer. Disconnect the processor-fan cable from the system board. Note the location of the fan on the heat sink assembly. Remove the four screws (M6xL10) that secure the processor fan to the heat sink.
- Page 59 Lift the processor fan off the heat sink.
-
Page 60: Replacing The Processor Fan
UYARI: Bilgisayarınızın içerisinde çalışmadan önce, bilgisayarınızla birlikte gönderilen emniyet bilgilerini okuyun ve içerisinde belirtilen adımları izleyin. Sisteminizin içinde çalıştıktan sonra, bölümündeki talimatları i̇ ç inde çalıştıktan sonra. Ek güvenlik en iyi uygulama bilgileri için www.dell.com/ regulatory_compliance adresindeki Regulatory Compliance (Yasal Uygunluk) Ana Sayfasına bakın. Procedure Align the screw holes on the processor fan with the screw holes on the heat sink. -
Page 61: İşlemci Isı Emicisini Çıkarmak
Sisteminizin içinde çalıştıktan sonra, bölümündeki talimatları i̇ ç inde çalıştıktan sonra. Ek güvenlik en iyi uygulama bilgileri için www.dell.com/ regulatory_compliance adresindeki Regulatory Compliance (Yasal Uygunluk) Ana Sayfasına bakın. DİKKAT: İşlemci için maksimum soğutma sağlamak üzere işlemci termal soğutma aksamının ısı... - Page 62 Lift the processor heat sink off system board.
-
Page 63: İşlemci Isı Emicisini Yerine Takma
Sisteminizin içinde çalıştıktan sonra, bölümündeki talimatları i̇ ç inde çalıştıktan sonra. Ek güvenlik en iyi uygulama bilgileri için www.dell.com/ regulatory_compliance adresindeki Regulatory Compliance (Yasal Uygunluk) Ana Sayfasına bakın. DİKKAT: İşlemci için maksimum soğutma sağlamak üzere işlemci termal soğutma aksamının ısı... -
Page 64: Removing The Front I/O-Panel
UYARI: Bilgisayarınızın içerisinde çalışmadan önce, bilgisayarınızla birlikte gönderilen emniyet bilgilerini okuyun ve içerisinde belirtilen adımları izleyin. Sisteminizin içinde çalıştıktan sonra, bölümündeki talimatları i̇ ç inde çalıştıktan sonra. Ek güvenlik en iyi uygulama bilgileri için www.dell.com/ regulatory_compliance adresindeki Regulatory Compliance (Yasal Uygunluk) Ana Sayfasına bakın. Prerequisites... - Page 65 Lift and rotate the side-chassis away from the computer. Disconnect the I/O-board cable from the I/O board. Remove the two screws (#6–32 UNC 1/4'') that secure the I/O board to the chassis.
- Page 66 Lift the I/O board off the chassis.
-
Page 67: Replacing The Front I/O-Panel
UYARI: Bilgisayarınızın içerisinde çalışmadan önce, bilgisayarınızla birlikte gönderilen emniyet bilgilerini okuyun ve içerisinde belirtilen adımları izleyin. Sisteminizin içinde çalıştıktan sonra, bölümündeki talimatları i̇ ç inde çalıştıktan sonra. Ek güvenlik en iyi uygulama bilgileri için www.dell.com/ regulatory_compliance adresindeki Regulatory Compliance (Yasal Uygunluk) Ana Sayfasına bakın. Procedure Place the I/O board in the slot on the chassis. -
Page 68: Sistem Kartını Çıkarma
Sisteminizin içinde çalıştıktan sonra, bölümündeki talimatları i̇ ç inde çalıştıktan sonra. Ek güvenlik en iyi uygulama bilgileri için www.dell.com/ regulatory_compliance adresindeki Regulatory Compliance (Yasal Uygunluk) Ana Sayfasına bakın. NOT: Bilgisayarınızın Servis Etiketi sistem kartında yer alır. Sistem kartını yerine taktıktan sonra Servis Etiketini sistem kurulumuna girmelisiniz. - Page 69 Disconnect the hard-drive and optical-drive power cable from the system board. Disconnect the I/O-board cable from the system board. Disconnect the power-button cable from the system board. Remove the four screws (#6–32 UNC 1/4'') that secure the system board to the chassis.
- Page 70 Lift the system board at an angle and remove it from the chassis.
-
Page 71: Sistem Kartını Yerine Takma
Sisteminizin içinde çalıştıktan sonra, bölümündeki talimatları i̇ ç inde çalıştıktan sonra. Ek güvenlik en iyi uygulama bilgileri için www.dell.com/ regulatory_compliance adresindeki Regulatory Compliance (Yasal Uygunluk) Ana Sayfasına bakın. NOT: Bilgisayarınızın Servis Etiketi sistem kartında yer alır. Sistem kartını yerine taktıktan sonra Servis Etiketini sistem kurulumuna girmelisiniz. -
Page 72: Bios Kurulum Programı
BIOS kurulum programına girme Bilgisayarınızı açın (veya yeniden başlatın). POST sırasında DELL logosu görüntülendiğinde, F2 isteminin görünmesini bekleyin ve sonra hemen F2'ye basın. NOT: F2 istemi klavyenin başlatıldığını belirtir. Bu istem çok hızlı... - Page 73 Lift and rotate the side-chassis away from the computer. Locate the password jumper (PSWD) on the system board. NOT: For more information on the location of the jumper, see “System- board components”. Remove the jumper plug from the password jumper-pins.
-
Page 74: Post-Requisites
UYARI: Bilgisayarınızın içerisinde çalışmadan önce, bilgisayarınızla birlikte gönderilen emniyet bilgilerini okuyun ve içerisinde belirtilen adımları izleyin. Sisteminizin içinde çalıştıktan sonra, bölümündeki talimatları i̇ ç inde çalıştıktan sonra. Ek güvenlik en iyi uygulama bilgileri için www.dell.com/ regulatory_compliance adresindeki Regulatory Compliance (Yasal Uygunluk) Ana Sayfasına bakın. -
Page 75: Prerequisites
Prerequisites Remove the computer cover. Remove the front bezel. Procedure Place the computer with the side-chassis facing up. Lift and rotate the side-chassis away from the computer. Locate the CMOS jumper (CMCL R2) on the system board. NOT: For more information on the location of the jumper, see “System- board components”. -
Page 76: Post-Requisites
Wait for 5 seconds and then replace the jumper plug to its original location. Rotate the side-chassis towards the computer until it snaps into place. Post-requisites Replace the front bezel. Replace the computer cover. -
Page 77: Bios'u Sıfırlama
BIOS'u Sıfırlama Bir güncelleştirme kullanılabilir olduğunda veya sistem kartını değiştirdikten sonra BIOS'u sıfırlamanız (güncellemeniz) gerekebilir: Bilgisayarınızı açın. www.dell.com/support adresine gidin. Product support (Ürün desteği) seçeneğine tıklayın, bilgisayarınızın Servis Etiketini girin ve ardından Submit (Gönder) düğmesine tıklayın. NOT: Servis Etiketiniz yoksa, otomatik algılama özelliği veya manuel olarak bilgisayar modelinize gözatma seçeneğini kullanın. -
Page 78: Yardım Alma Ve Dell'e Başvurma
Ben ve Dell Bilgisayarım tanılama vb. ile ilgili bilgi edinin. bölümüne bakın. Dell'e Başvurma Satış, teknik destek veya müşteri hizmetleri ile ilgili konularda Dell ile irtibat kurmak için www.dell.com/contactdell adresini ziyaret edin. NOT: Bu hizmetlerin kullanılabilirliği ülkeye ve ürüne göre değişir ve bölgenizde... - Page 79 NOT: Etkin bir İnternet bağlantınız yoksa, iletişim bilgilerini satın alım faturanızda, irsaliyede, fişte veya Dell ürün kataloğunda bulabilirsiniz.
Need help?
Do you have a question about the Inspiron 3662 and is the answer not in the manual?
Questions and answers