Table of Contents
Advertisement
Advertisement
Table of Contents

Subscribe to Our Youtube Channel
Related Manuals for Core Health & Fitness Schwinn Z Bike


Summary of Contents for Core Health & Fitness Schwinn Z Bike
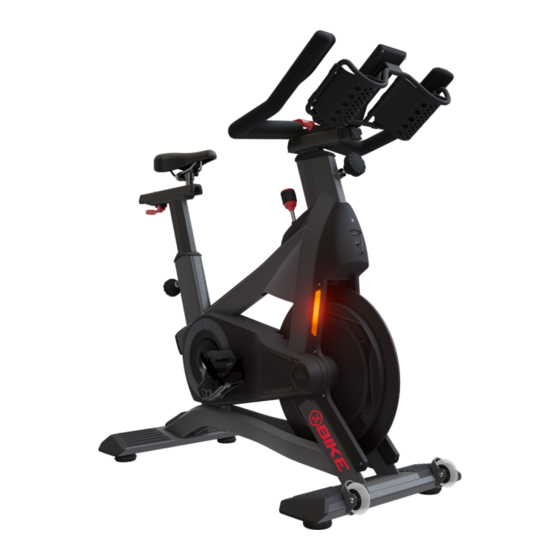
- Page 1 CORE HEALTH & FITNESS Z/X BIKES OWNER'S MANUAL CONTACT SUPPORT NOW...
-
Page 2: Table Of Contents
TABLE OF CONTENTS IMPORTANT SAFETY INSTRUCTIONS ........................2 IMPORTANT LABEL LOCATIONS ........................4 FORK DECALS ..............7 PRODUCT SPECIFICATIONS ........................8 OPERATIONS ..............10 TRANSPORT/STORAGE ..............13 ASSEMBLY ........................14 REQUIRED TOOLS ..............14 ASSEMBLY PARTS ..............15 PROCEDURE ..............16 FIRST TIME SETUP ........................28 Z CONSOLE ........................29... -
Page 3: Important Safety Instructions
IMPORTANT SAFETY INSTRUCTIONS WARNING! Before using this product, it is essential to read the ENTIRE Owner’s Manual and ALL installation instructions. The Owner’s Manual describes equipment operation and instructs members on how to use correctly and safely. Read all warnings posted on the machine. Health related injuries may result from incorrect or excessive use of exercise equipment. - Page 4 Keep the top surface of the pedals clean and dry. WARNING: Do not open the generator chain guard unless instructed. This unit is not equipped with a free-wheel. Pedal speed should be reduced in a controlled manner. WARNING: Heart rate monitoring systems may be inaccurate.
-
Page 5: Important Label Locations
IMPORTANT LABEL LOCATIONS This page shows the location of the warning labels and communication stickers placed on the equipment as part of the manufacturing process. It is critical that owners maintain the integrity and placement of these stickers. If you find any stickers missing or damaged the replacement numbers are shown on the support site and following pages. - Page 6 050-5821 050-5822 050-5823 050-5824 050-5825 050-5826 STICKER, SEAT POST, STICKER, SEAT POST, STICKER, HBAR POST, STICKER, HBAR POST, STICKER, FORE/AFT, SEAT STICKER, FORE/AFT, SEAT PLACEMENT, RIGHT, UGC PLACEMENT, LEFT, UGC PLACEMENT, RIGHT, UGC PLACEMENT, LEFT, UGC SLIDER, RIGHT, UGC SLIDER, LEFT, UGC 050-5735 050-5724 050-5847...
- Page 7 050-5828 050-5829 050-5827 LABEL, WARNING, ENGLISH, UGC LABEL, WARNING, FRENCH, UNIVERSAL CYCLE STICKER, FORE/AFT, HBAR SLIDER, UGC 050-5727 700-9686 002-2444 LABEL, BELT IDLER TORQUE, TIMING SIDE BADGE, SCHWINN, 65MM Seal, Quality, Schwinn, Ø30mm Notice: images are not to scale Page 6...
-
Page 8: Fork Decals
FORK DECALS 050-5794 *(9-7510 Only) DECAL, FORK, Zs, V2 050-5795 *(9-7520 Only) DECAL, FORK, Za, V2 050-5796 *(9-7480 Only) DECAL, FORK, Xs, V2 050-5797 *(9-7470 Only) DECAL, FORK, Xa, V2 Notice: images are not to scale Page 7... -
Page 9: Product Specifications
PRODUCT SPECIFICATIONS # Part Console (Schwinn Z Only) Handlebar Wear Strip Height Adjustment Pop-Pin Same for Seat Post & Handlebar Post Handlebar Post Generator (Schwinn Z Only) Flywheel Stabilizer Transport Wheels Resistance Knob / Emergency Brake Seat / Saddle Seat Slider Fore/Aft Cam Lever Adjustment Leveling Foot 4iiii Powermeter Crank... - Page 10 The Schwinn X Bike SKU: 9-7470 Desc: 9-7480 The Schwinn X Bike Max User Unit Weight Width Length Height Weight 20.7 42.4 47.7 52.5 Fig. 5 9-7470 Shown Page 9...
-
Page 11: Operations
OPERATIONS Fig. 6 Seat Post adjustment (Schwinn Za Shown) Adjusting Seat Post or Handlebar Post height with Locking Pop Pin Turn pop-pin counterclockwise and pull to loosen. While having the pop-pin pulled out, adjust the seat or handlebar tube to desired height. WARNING: Do not lift the Seatpost or Handlebar posts above the STOP mark on the tube. - Page 12 Fig. 7 Seat Post adjustment (Schwinn Za Shown) Emergency Stop Press down on the emergency stop handle. Adjusting the Resistance Turn handle clockwise to add resistance. Turn handle counter-clockwise to reduce resistance. Page 11...
- Page 13 Fig. 8 Slider adjustment (Schwinn Za Shown) Adjusting the Handlebar or Seat Slider Raise the slider cam lever (handlebar) or seat cam lever (seat) to adjust slider. Adjust slider to desired position. Return lever to original position to lock. Ensure cam lever is secure before using the unit. Page 12...
-
Page 14: Transport/Storage
TRANSPORT/STORAGE It is recommended to apply the brake to lock the flywheel and unplug the console during transport and storage to prevent inadvertent console activation and battery drain. Page 13... -
Page 15: Assembly
ASSEMBLY REQUIRED TOOLS Required Tools: • 12mm Open-Ended Wrench • Torque Wrench • 4mm Allen Key • 5mm Allen Key • 8mm Allen Socket • #2 Phillips Screwdriver PACKAGING REMOVAL: Unit is heavy and requires two people for assembly. Carefully remove all packaging materials that wrap the equipment. DO NOT USE A KNIFE OR BOX CUTTER AS YOU MAY DAMAGE THE EQUIPMENT. -
Page 16: Assembly Parts
ASSEMBLY PARTS 718-6247 120-3476 SCREW, M2.2, 9.5, PHP, TF SS 740-8145 SCREW, M8X1.25, BB AXLE 730-0900 SCREW,M6X15,FHM,SS 110-4332 SCREW, M8x1.25, 18mm, HHC, HE, AS, ZP, SF, NP, Grd-10.9 740-8247 740-9571 718-6110 THREADED PLATE, FEET, BLADE CAP, LOWER, BAR SLIDER STOPPER, F/A, HBAR, ACPU AA Batteries 740-8607 CALIBRATION TOOL, ZERO POINT, ACPP... -
Page 17: Procedure
PROCEDURE Fig. 10 1. Lift the cam lever then slide the handlebars into the handlebar post. Page 16... - Page 18 718-6110 110-3507 Fig. 11 2. Install the handlebar stopper into the handlebar post, then use a 4mm allen key to secure it using the M6 x 15mm flat head machine screw. Page 17...
- Page 19 740-9571 110-4343 Fig. 12 3. Use a #2 phillip screwdriver to secure the slider cap to the handlebar post using four (4) M2.2 x 9.5mm pan head screws. Page 18...
- Page 20 Fig. 13 If assembling the X Bike Skip this Step 4. Plug the console cable into the back of the console. Page 19...
- Page 21 Fig. 14 5. Tip the bike forward so the handlebars are resting on the ground, then slide threaded foot plates into the frame. Page 20...
- Page 22 740-8247 120-3385 120-3388 110-4076 Fig. 15 6. Use a 12mm open-ended wrench to secure the rear stabilizer to the frame using two (2) of the M8 flat washers, M8 split lock washers, and M8 x 20mm flange bolts. Page 21...
- Page 23 740-8247 120-3385 120-3388 110-4076 Fig. 16 7. Use a 12mm open-ended wrench to secure the front stabilizer to the frame using two (2) of the M8 flat washers, M8 split lock washers, and M8 x 20mm flange bolts. Page 22...
- Page 24 Fig. 17 8. Return the bike to standing. 9. Loosen the seat slider tension lever, then slide the seat assembly onto the seat post. Page 23...
- Page 25 110-3682 Fig. 18 10. Use a 5mm allen key to tighten the M6 x 26mm socket head cap screw located underneath the seat post to lock the seat slider assembly into place, then tighten the seat slider tension lever. Page 24...
- Page 26 Fig. 19 11. Install the left pedal into the left crank arm, then hand- thread the M8 pedal bolt through the crank arm and into the pedal. 12. Use a torque wrench with a 8mm allen socket to torque the pedal bolt to 37 Ft-Lbs (50 Nm). 13.
- Page 27 2x BATTERY, AA SIZE, 1.5V Found in Blister Pack Fig. 20 If assembling the X Bike Skip this Step 14. Use a #2 phillips screwdriver to remove the battery cover on the powermeter and install two AA batteries. 15. After installing the batteries, tap any button on the console to wake it up, then spin the crank arms and ensure that the console is displaying RPMs.
- Page 28 Fig. 21 16. Once the bike is fully assembled, move it into the ride location, then adjust the four (4) leveling feet located on the front and rear stabilizers to level the bike and ensure it does not move or wobble during the ride. NOTE: If the bike is physically moved, the leveling feet may need to be readjusted.
-
Page 29: First Time Setup
FIRST TIME SETUP Calibrate the Power Tap the buttons simultaneously then tap the button to enter Maintenance Mode. Press the button until 4iiii CAL is shown in the message center then press the button to begin the pairing process. Spin the crank to activate it for the pairing process then turn it so that the left crank is at the 6 o’clock position (pedal down) then press the button If calibration is successful the message center will show CAL COMPLETE, otherwise it will display... -
Page 30: Z Console
Z CONSOLE CONSOLE FEATURES Fig. 23 To turn on console, press any button or start pedaling. Console enters PAUSE mode when pedaling stops, and the message center shows the option to END? Either press the corresponding button above or wait the TIMEOUT duration selected in MAINTENANCE mode to enter SUMMARY mode, or continue pedaling to resume workout. - Page 31 Description Function The zone meter displays one of four ways: ZONE METER Reduced Mode Cadence %FTP Shown at 73RPM Tap the button in ACTIVE mode to toggle between active display. By default the zone meter shows cadence. In ACTIVE mode used to display average and maximum values of ride metrics. AVG/MAX Button In MAINTENANCE mode used to scroll forward through menus or increase a value.
- Page 32 Description Function Shows vital stats for power, distance, time, and calories. Tap the button to start STAGE TIMER a stage. Each new stages pushes the Current data to the Previous data column, and new stage data is accumulated in current. Battery Illuminates when the 4iiii powermeter battery is at or below 25% Indicator...
-
Page 33: Datalink Pairing
DATALINK PAIRING Pairing Priority The console can connect to multiple devices and apps. The following connections are possible via Bluetooth and when connected the icon on the console will stay illuminated: • Apple Watch • Galaxy Watch • Bluetooth HR Devices •... -
Page 34: Before Each Ride
BEFORE EACH RIDE PAIRING HEART RATE AND APPS, SETTING PERSONAL FTP AND MAX HR The console will automatically scan for a HR monitor for the first 30 seconds of waking up (illustrated by a flashing heart icon in the message center) or until paired by tapping a compatible NFC device to the icon. - Page 35 AFTER EACH RIDE Upload data from the console to your USB drive The ride data file is a great tool for people to track their rides and see their progress. After ride is complete you may save ride data from the console to a USB stick.
-
Page 36: Maintenance Mode
MAINTENANCE MODE Maintenance Mode allows access to service and diagnostic information, as well as provides the ability to adjust certain program default parameters. To enter Maintenance Mode: Tap the buttons simultaneously then tap the button to enter Maintenance Mode. While in MAINTENANCE MODE pressing the button navigates between top menu choices. -
Page 37: Console Procedures
CONSOLE PROCEDURES RESETTING THE CONSOLE Console resets to values in MAINTENANCE mode when it enters IDLE mode. Button can be pressed to immediately reset the console. PAIRING A NEW 4iiii POWERMETER Fig. 26 Reset Button Location In the event a new crank needs to be paired with the console the below procedure will pair a new crank. Once the pairing procedure is complete, a calibration must be performed. - Page 38 CALIBRATING THE GEAR This procedure requires the Zero Point Calibration tool PN 740-8607. If lost, replacements can be ordered from Core Connect, see Support & Service for contact information. Tap the buttons simultaneously then tap the button to enter Maintenance Mode. Press the button until GEAR is shown in the message center then press the...
-
Page 39: Troubleshooting
TROUBLESHOOTING CONSOLE ERROR MESSAGES During normal operation the following errors may be shown on the console: ERROR On Menu Cause Resolution PASSCODE has been turned on in maintenance WRONG PASS! MM Password mode and wrong Enter correct passcode password has been entered. -
Page 40: Maintenance
MAINTENANCE TOOLS Working on this product will require basic and/or sometimes specialty tools based on the type of service that will be performed at any time. To assist, we recommend having the tools listed available when performing maintenance. Tool Metric Allen Key Set Screwdriver Set, Phillips Metric Open-Ended Wrench Set Screwdriver Set, Flat... - Page 41 MAINTENANCE SCHEDULE With durable, high performance components, this equipment is designed for heavy usage with minimal mainte- nance required. To keep it in top condition, perform regular daily, weekly and monthly preventive maintenance routines outlined below. Daily Weekly Monthly Bi-Annually Cleaning Wipe down and clean Bike and Frame Clean Console...
- Page 42 Daily Weekly Monthly Bi-Annually Check Powermeter battery level Calibration Perform Powermeter Calibration Cleaning Keeping your units clean is an important component of preventative maintenance and the overall aesthetics of your product. While your clients will appreciate clean equipment free of sweat, dirt and other contaminants proper care and cleaning will extend the life of your product and reduce premature aging and wear.
-
Page 43: Adjusting The Handlebar Tension
ADJUSTING THE HANDLEBAR TENSION Required Tools: • #2 Phillips Screwdriver • Torque Wrench • 10mm Deep Socket NOTE: While the images below show a Schwinn Z cycle, this procedure is also applicable for the Schwinn X cycle. 1. Flip the fore/aft adjustment lever up. 2. -
Page 44: Support & Service
SUPPORT & SERVICE CORE CONNECT Core Connect is your portal to all things service! Whether you need to order parts or register your warranty, Core Connect is the most effective way to get what you need fast and keep your facility operating smoothly. OFFERS 24-HOUR SELF SERVICE ACCESS TO: •... - Page 45 © 2022 CORE HEALTH & FITNESS LLC PART NUMBER 620-8787, REV A All rights reserved. Star Trac, the Star Trac logo and StairMaster are registered trademarks of Core Health & Fitness, LLC. Schwinn and Nautilus are registered trademarks of Nautilus Inc. used under license to Core Health & Fitness LLC. Throwdown is a registered trademark of Throwdown Industries, LLC.
Need help?
Do you have a question about the Schwinn Z Bike and is the answer not in the manual?
Questions and answers