Table of Contents
Advertisement
Quick Links
Echoflex Installation Guide
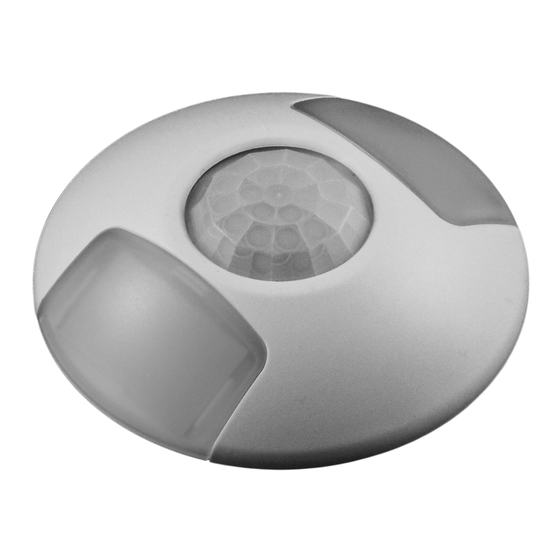
Ceiling Vacancy-Occupancy Sensor RVS RCS
Overview
The wireless Ceiling Vacancy-Occupancy
Sensor is available as a vacancy (RVS) or
occupancy (RCS) model, both of which
offer two detection ranges, two radio
frequencies, and can operate using
standard passive infrared (PIR) or Dual
Technology.
The Dual Technology sensor uses PIR and
passive microphone technology to provide
full coverage of audible human activity.
Innovative noise filtering prevents false
triggers that could keep lights on in empty
spaces.
The vacancy ceiling sensor (RVS) has two solar cells to harvest energy
when the lights are ON, while the occupancy ceiling sensor (RCS) is
battery powered to support auto-ON occupancy sensor applications.
Model
RVS-A-xW*
RCS-A-xW*
RVS-B-xW*
RCS-B-xW*
RVS-DA-xW*
RCS-DA-xW*
RVS-DB-xW*
RCS-DB-xW*
*Where x is the radio frequency: U=902 MHz and Y=868 MHz.
When used with an Echoflex lighting controller, the sensor is well suited
to meet all energy code requirements for occupancy or vacancy-based
general lighting applications.
This document covers installation, testing, and settings that apply to all
RVS RCS models. The product package includes the sensor, lens mask
stickers, two wire staples, and battery (RCS models only).
Corporate Headquarters n Middleton, WI, USA | +1 608 831 4116
Web
echoflexsolutions.com
©2022 Echoflex Solutions, Inc. Trademark and patent
Product information and specifications subject to change.
Echoflex intends this document to be provided in its entirety.
8188M2102 Rev B Released 2022-04
Detection
Lens A: small motion,
short range
Lens B: large motion,
broad range
Lens A: small motion,
short range, and audio
Lens B: large motion,
broad range, and audio
| Email
info@echoflexsolutions.com
2
42 m
at 2.4 m (450 ft
2
74 m
at 3.6 m (800 ft
2
167 m
at 2.4 m (1800 ft
2
279 m
at 3.6 m (3000 ft
2
42 m
at 2.4 m (450 ft
2
74 m
at 3.6 m (800 ft
2
167 m
at 2.4 m (1800 ft
2
279 m
at 3.6 m(3000 ft
| Support
service@echoflexsolutions.com
info: echoflexsolutions.com/ip
Dual-tech model shown
Coverage
2
at 8 ft)
2
at 12 ft)
2
at 8 ft)
2
at 12 ft)
2
at 8 ft)
2
at 12 ft)
2
at 8 ft)
2
at 12 ft)
Advertisement
Table of Contents

Related Manuals for echoflex RVS-A-xW Series


Summary of Contents for echoflex RVS-A-xW Series
- Page 1 3.6 m(3000 ft at 12 ft) *Where x is the radio frequency: U=902 MHz and Y=868 MHz. When used with an Echoflex lighting controller, the sensor is well suited to meet all energy code requirements for occupancy or vacancy-based general lighting applications.
-
Page 2: Prepare For Installation
Echoflex Installation Guide Ceiling Vacancy-Occupancy Sensor Prepare for Installation To ensure optimal function, consider the installation environment and the following guidelines: For indoor use only. Operating temperature -10°C to 45°C • (14°F to 113°F), 5%–92% relative humidity (non-condensing). High density construction materials and large metal appliances or •... -
Page 3: Sensing Technology
Echoflex Installation Guide Ceiling Vacancy-Occupancy Sensor 3. Remove the ceiling tile from the T-bar frame. 4. Insert the wire staples through the pinholes on the sensor, one set located on each side near the keyholes. 5. Poke the tines through the ceiling tile, then bend each tine over in opposite directions for a secure fit. - Page 4 Immediately when a change to the occupied state is detected • Echoflex controllers also have a configurable occupancy timer that controls when the lights shut off after a period of vacancy. See the controller’s Configuration Guide for details on setting up timers and occupancy or vacancy modes of control.
-
Page 5: Lens Masking
Echoflex Installation Guide Ceiling Vacancy-Occupancy Sensor Lens Masking Lens mask stickers are provided to block a section of the lens from detecting occupancy. To attach, remove the backing and stick the mask on the sensor lens to cover the target section. Cut to size, if required. - Page 6 Echoflex Installation Guide Ceiling Vacancy-Occupancy Sensor To replace the battery: 1. Use your fingers to remove the cover, flexing it gently to release the tabs that hold it in place. If you have difficulty, consider inserting a small flatblade screwdriver under a release tab.
- Page 7 Echoflex Installation Guide Ceiling Vacancy-Occupancy Sensor Range Confirmation The Range Confirmation test quantifies the wireless signal strength with a linked controller that has range confirmation capability. Note: Only one controller can be linked to the RVS RCS to run the test properly. Disable repeaters in range.
-
Page 8: Sensor Setting
Two red blinks - Occupancy Timer (DT model only) • Note: Echoflex dual-tech sensors have a configurable Occupancy Timer that sends a vacancy message when expired. If using another controller brand with a DT model, you may want to adjust the Occupancy Timer on the sensor to control vacancy messaging. -
Page 9: Led Display
Echoflex Installation Guide Ceiling Vacancy-Occupancy Sensor LED Display The LED Display setting enables or disables the LEDs. Blinking LEDs are informative but not suitable for every location. Disabling the LEDs eliminates distractions as well as conserves battery power. If disabled, the LEDs still operate to run tests and indicate low battery. -
Page 10: Fcc Compliance
Echoflex Installation Guide Ceiling Vacancy-Occupancy Sensor Compliance For complete regulatory compliance information, see the Echoflex Ceiling Vacancy-Occupancy Sensor datasheet at echoflexsolutions.com. FCC Compliance Echoflex Ceiling Vacancy-Occupancy Sensor (For any FCC matters): Echoflex Solutions, Inc. 3031 Pleasant View Road Middleton, WI 53562 +1 (608) 831-4116 echoflexsolutions.com... - Page 11 Echoflex Installation Guide Ceiling Vacancy-Occupancy Sensor Ceiling Vacancy-Occupancy Sensor Page 11 of 12 Echoflex...
- Page 12 Echoflex Installation Guide Ceiling Vacancy-Occupancy Sensor Ceiling Vacancy-Occupancy Sensor Page 12 of 12 Echoflex...
Need help?
Do you have a question about the RVS-A-xW Series and is the answer not in the manual?
Questions and answers