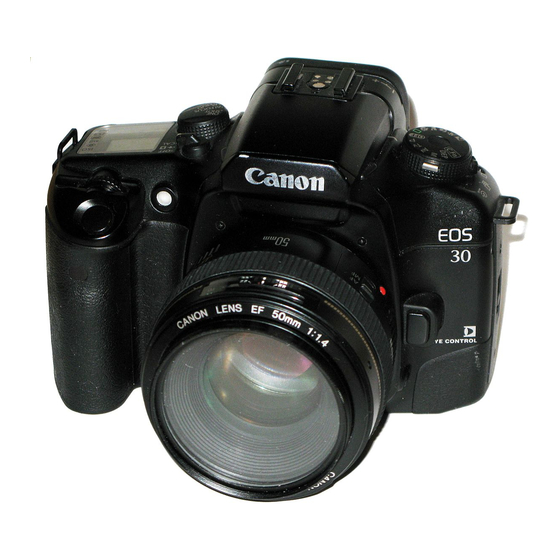
Canon EOS 7 Service Manual
Hide thumbs Also See for EOS 7:
Table of Contents

Advertisement

EOS 7
EOS ELAN 7E / DATE
EOS 30 DATE
EOS ELAN 7 / DATE
EOS 33 / DATE
SERVICE
MANUAL
C12-8451
C12-8453 / 8454
C12-8456 / 8457
C12-8463 / 8464
C12-8466 / 8467

Advertisement

Table of Contents
loading

Summary of Contents for Canon EOS 7

  • Page 1 EOS 7 C12-8451 EOS ELAN 7E / DATE C12-8453 / 8454 C12-8456 / 8457 EOS 30 DATE C12-8463 / 8464 EOS ELAN 7 / DATE C12-8466 / 8467 EOS 33 / DATE SERVICE MANUAL...
  • Page 2 When changes occur in applicable products or in the content of this manual, Canon will release service manual report as the need arises. In the event of major changes in the contents of this manual over a long or short period, Canon may issue new editions of this manual.
  • Page 3 PREFACE 1. SERVICE MANUAL COMPOSITION This manual contains information on servicing the product. It has the following sections. Part 1 General Information Provides the basic information needed to understand the product. Operating instructions are not included. Refer to the product's instruction book if necessary.
  • Page 4: Table Of Contents

    CONTENTS Part 1. General Information ____________________________ 1. FEATURES................1-1 1.1 High-Performance Eye Control with 7-Point AF ....1-1 1.2 Easy-to-Read Viewfinder ............1-1 1.3 Easy-to-Read Controls............1-1 1.4 Quick and Snappy Shooting..........1-1 1.5 Attractive Appearance ............1-1 1.6 Top-Notch Basic Features ...........1-2 1.7 Custom Functions ...............1-2 2.
  • Page 5 1.10 Custom Functions .............2-22 2. SWITCHES AND THEIR FUNCTIONS ........2-23 2.1 Operation Switches .............2-23 2.2 Sensor Switches ..............2-24 3. ELECTRICAL COMPONENTS AND THEIR FUNCTIONS ..2-25 4. ERROR CODE DISPLAY ............2-32 Part 3. Repair Information __________________________ 1. REPAIR PREPARATIONS ............3-1 1.1 Bleed the Main Capacitor...........3-1 1.2 Flash Charging Inhibit Mode ..........3-1 1.3 Cautions for Disassembly and Reassembly.......3-2 1.4 Operation in No Top Cover Ass’y State......3-2...
  • Page 6 Part 4. ELECTRICAL ADJUSTMENTS ________________ 1. ELECTRICAL ADJUSTMENTS..........4-1 1.1 Precaution when Making Electrical Adjustments ....4-1 1.2 Electrical Adjustments............4-1 1.3 Adjustments after Parts Replacement.........4-2 1.4 Adjustments Software for This Camera.......4-3 1.5 Shutter Adjustment..............4-7 1.6 Checking the X-SYNC Time Lag.........4-9 1.7 SPC Positioning ..............4-10 1.8 AE Accuracy Adjustment.............4-13 1.9 AE Shift ................4-15 1.10 Exposure Program Rewriting ..........4-17...
  • Page 7 Part 1 General Information...
  • Page 8: Features

    Part 1: General Information 1. FEATURES M: Superior to the EOS ELAN II E / 50 E. ¤: Same as the EOS ELAN II E / 50 E. 1.1 H ERFORMANCE ONTROL WITH OINT M High-precision, top-speed Eye Control • Response time: Approx. 15% shorter than with the EOS-3 M High-speed, 7-point wide AF ¤...
  • Page 9: Top-Notch Basic Features

    Part 1: General Information 1.6 T OTCH ASIC EATURES M 35-zone evaluative metering linked to the focusing points, partial metering, and centerweighted averaging metering M Full Auto, ten AE modes, and manual exposure ¤ Shutter speeds: 30”-1/4000 sec., bulb, X-sync at 1/125 sec. ¤...
  • Page 10: Overview

    Part 1: General Information 2. OVERVIEW The EOS ELAN 7 E / EOS 30 is a 35mm AF SLR camera succeeding the EOS ELAN II E / EOS 50 E. Two configurations will be offered: The QD (Quartz Date) model and non-QD model.
  • Page 11 Part 1: General Information Enhanced User Interface (1) Focusing point selection keys The new focusing point selection keys within the Quick Control Dial enable quick-and-easy selection of the seven focusing points. Also new is the separate Eye Control switch. The top cover now has three dials serving as the user interface.
  • Page 12 Part 1: General Information Fig. 1-2 Three External Views...
  • Page 13 Part 1: General Information (2) AF The AF features are as follows: 7-point AF The EOS ELAN 7 E / EOS 30 has the CMOS sensor (for 7 focusing points) that was developed for the EOS 300/Rebel 2000/EOS REBEL 2000 / EOS 300 (hereinafter referred to as the EOS REBEL 2000 / EOS 300).
  • Page 14 Part 1: General Information AF speed and predictive AF performance The AF speed and precision in the One-Shot AF mode are the same as the EOS-3’s. As for predictive AF, the camera coupled with an EF 300mm f/2.8L IS USM lens can track a moving subject approaching at a speed of 50 kph up to as close as 8 meters.
  • Page 15 Part 1: General Information (4) Viewfinder The basic viewfinder specifications are similar to the EOS ELAN II E / EOS 50 E’s with a pentaprism, fixed focusing screen, 90% vertical coverage and 92% hori- ELAN 7 E zontal coverage, 0.70x magnification (with 50mm lens / EOS 30 at infinity), 19.5mm eye relief, the information display, etc.
  • Page 16 Part 1: General Information (7) Built-in Flash The retractable, built-in flash (serial control) in the pentaprism has Guide No. 13 (at ISO 100), 2-sec. recycling time, and 28mm flash coverage. The flash exposure control uses 3-zone TTL autoflash metering linked to the focusing points. In the Full Auto and Programmed Image Control modes, the built-in flash pops up and fires automatically in low-light or backlit conditions.
  • Page 17 Part 1: General Information Item / Camera EOS ELAN 7 E / EOS 30 EOS ELAN II E / EOS 50 E Focusing Points 7-point Area 3 horizontal points Eye Control Selection Automatic Modes Manual One-Shot AI Servo AF Modes AI Focus Working Range (EV at ISO 100) 1-18...
  • Page 18: Nomenclature

    Part 1: General Information 3. NOMENCLATURE X-sync contact Hot shoe Eye Control switch • OFF/ON/CAL Dioptric adjustment knob • -2.5 - +0.5 dpt Red-eye reduction/self-timer/ Command Dial lock release button wireless remote control operation lamp Main Dial Command Dial • OFF/Full Auto/Portrait/ Landscape/Closeup/Sports/ Shutter button Night Scene...
  • Page 19: Design Specifications

    1-2 Picture size: 24 mm 36 mm * No panorama mode. 1-3 Compatible lenses: Canon EF lenses (Max. aperture metering. No stop-down metering.) 1-4 Lens mount: Canon EF mount 1-5 Standard lens: Canon EF 28-105mm f/3.5-4.5 II USM Canon EF 28-90mm f/4-5.6 (USM) 2.
  • Page 20 Part 1: General Information 3) AI Focus AF: Switches between One-Shot AF and Predictive AF/AI Servo AF automatically. For a still subject: AF operation stops (AF lock) when focus is achieved. For a moving subject: Tracks subject movement continuously up to the start of exposure. * When a USM lens is used, manual focusing with the electronic focusing ring is enabled after autofocus is achieved with One-Shot AF or when focus fails to be achieved.
  • Page 21 Part 1: General Information Eye Control Calibration Calibration is enabled when the Eye Control switch is set to CAL. Up to five sets (CAL-1 to CAL-5) of calibration settings can be saved. [Calibration Procedure] • Horizontal orientation Set the Command Dial to CAL. The extreme-right focusing point blinks.
  • Page 22 Part 1: General Information (3) Manual focusing point selection AF is executed with the manually selected focusing point. (Selection Procedure (Horizontal orientation)] (Symbols: < > Main Dial < > Quick Control Dial <+> Focusing point selection keys) • C.Fn-11-0 Pressing the focusing point selector enables the <+> keys. •...
  • Page 23 Part 1: General Information 2-12 AF-assist: (1) Method: Intermittent burst fired by built-in flash (no patterned beam). Fired automatically when necessary and linked to all seven focusing points. Effective range: Approx. 4.5 meters at center and 4 m at periphery. Coverage: 28mm lenses.
  • Page 24 Part 1: General Information 3-8 Viewfinder information: (1) On the screen 1. Focusing points with superimposed display (2) Below the screen: Numeric and textual information with 7-segment LCD (yellow-green) 2. Shutter speed (If unsuitable, blinks at 2 Hz as a warning.) 3.
  • Page 25 Part 1: General Information Exposure Control 5-1 Type: TTL max. aperture metering with a 35-zone silicon photocell. The following three metering modes are provided. Selectable with metering mode button on the back. (1) Evaluative: (2) Partial metering at center (Approx. 10% of viewfinder): (Metering zones: S13, S14, S15, S24, S34) * C.Fn-8-1 enables partial metering to be linked to the active focusing point.
  • Page 26 Part 1: General Information 5-7 Exposure compensation: (1) AEB (Autoexposure bracketing) 1)Availability: AEB is enabled with the Func. setting and settable in the modes listed in the table below. 2)Bracketing range: 0 to ±2 stops in 1/2-stop increments. 3)Bracketing sequence: Correct exposure, underexposure, and overexposure.
  • Page 27 Part 1: General Information 5-8 AE lock: (1) Automatic AE lock * With One-Shot AF and evaluative metering, AE lock is applied when focus is achieved. (2) AE lock button * Enables AE lock anytime. * AE lock button is disabled in Full Auto and Programmed Image Control modes.
  • Page 28 Part 1: General Information 6-6 Self-timer indicator: Red-eye reduction lamp (Blinks at 2 Hz for first 8 sec., then lights for the remaining 2 sec.). LCD panel (Frame counter counts down from 10 to 1 in seconds) Beeper (Beeping at 2 Hz for first 8 sec., then at 8 Hz for the remaining 2 sec.).
  • Page 29 Part 1: General Information 7-10 Film rewind indicator: The frame counter counts down. * The exposure level scale on the LCD panel also indicates film rewind is in progress. (The scale bars turn off from right to left, then all the bars are displayed again.) 7-11 Film rewind time: (1) Silent mode (C.Fn-1-0): Approx.
  • Page 30 Part 1: General Information 8-8 Sync speed: Max. X-sync speed at 1/125 sec. (1) Full Auto, Program AE, DEP, Portrait, Closeup modes: Automatically set between 1/60 sec. and 1/125 sec. (2) Night Scene mode: Automatically set between 2 sec. and 1/125 sec. (in 1/2-stop increments).
  • Page 31 Part 1: General Information 8-13 Effective range: (Unit: meters) With EF 28-105mm f/3.5-4.5 II USM At 28mm (f/3.5) At 105mm (f/4.5) Neg. Film Slide Film Neg. Film Slide Film 1 - 5.2 1 - 3.7 1 - 4.0 1 - 2.8 1 - 7.4 1 - 5.2 1 - 5.7...
  • Page 32 Part 1: General Information 9-5 Imprinting color: Orange 9-6 Imprinting confirmation: None 9-7 Imprinting brightness: Automatically set to suit DX-coded film speed. 9-8 QD power source: One CR2025 lithium battery (3 V) housed on the inside of the QD back. * The date is reset when the battery is replaced.
  • Page 33 Part 1: General Information 11-5 Auto flash operation: In Program AE Mode (1) With EX-series Speedlites: E-TTL autoflash 1) Normal flash When the flash is ready, the sync speed (1/60 to 1/125 sec.) is set automatically and the flash aperture is set automatically by the camera’s E-TTL program.
  • Page 34 Part 1: General Information (6) With a non-Canon flash unit For compact flash units: Set the sync speed to 1/125 sec. or slower. For studio flash: Set the sync speed to 1/60 sec. or slower (test required). 11-6 Wireless flash: Enabled with 550EX or MR-14EX, or ST-E2 (master unit).
  • Page 35 Part 1: General Information 12-6 Effective range: Transmission Angle Effective Range (Official) 1. Front and center Approx. 5 m 2. 25º angle from the film plane Approx. 3.5 m 12-7 Reception setting Film advance lever set to Self-timer/Remote control. method: 12-8 Operation indicator: (1) Immediate shutter release signal reception: The red-eye reduction lamp blinks once when the picture...
  • Page 36 Part 1: General Information 10. Shooting conditions 1) No flash and 100% AE The following operations were executed for each frame in accordance with the test procedure described below: AF search (infinity to near focus and back to infinity), AF achieved, shutter button pressed halfway for 5 sec., and shutter release.
  • Page 37 Part 1: General Information Fig. 1-13 Viewfinder Infomation 1-30...
  • Page 38 Part 1: General Information Fig. 1-14 LCD Panel Information 1-31...
  • Page 39 Part 1: General Information Fig. 1-15 External Dimensions 1-32...
  • Page 40 Part 1: General Information EF50mm F1.4 USM EF28-105mm F3.5-4.5II USM WIDE28mm EF28-105mm F3.5-4.5II USM TELE105mm q Program AE FNo. 250 500 1000 2000 4000 w PIC Portrait e PIC Landscape FNo. FNo. 250 500 1000 2000 4000 250 500 1000 2000 4000 r PIC Closeup...
  • Page 41 Part 1: General Information EF50mm F1.4 USM EF28-105mm F3.5-4.5 USM WIDE28mm EF24-105mm F3.5-4.5 USM TELE105mm FNo. 1" 2" 4" Fig. 1-17 y y PIC Night Scene FNo. 4000 2000 1000 Fig. 1-18 E-TTL Autoflash Program Lines 1-34...
  • Page 42 Part 1: General Information FNo. Fig. 1-19 TTL Autoflash Program Lines FNo. Fig. 1-20 A-TTL Autoflash Program Lines 1-35...
  • Page 43 Part 1: General Information Table 1-3 Feature Availablity Table 1-36...
  • Page 44 Part 1: General Information Table 1-4 Custom Functions 1-37...
  • Page 45: Accessory Compatibility Tables

    Part 1: General Information 5. ACCESSORY COMPATIBILITY TABLES : Compatible. : Compatible under certain conditions. : Not compatible. 1. Interchangeable Lenses Accessory Status Remarks Accessory Status Remarks EF14mm f/2.8 L EF28-80mm f/3.5-5.6 IV USM EF15mm f/2.8 FE EF28-80mm f/3.5-5.6 V USM EF20mm f/2.8 USM EF28-90mm f/4-5.6 EF24mm f/1.4 L USM...
  • Page 46 Part 1: General Information 2. Speedlites 6. Viewfinder Accessories Accessory Status Remarks Accessory Status Remarks SPEEDLITE 420EX Eyecup E 220EX Eyecup Eb 380EX Eyecup Ec 550EX Eyecup Ec-II ST-E2 Eyecup Ed 480EG Eyecup Ed-E 540EZ Eyecup Ee 430EZ Anti-fog Eyepiece Ec 420EZ Anti-fog Eyepiece Ed 300EZ...
  • Page 47: Operation Cautions

    Part 1: General Information 6. OPERATION CAUTIONS : Items to be mentioned in the Instructions. S: Indicates countermeasures. Caution Explanation and Remarks 1. When the built-in flash is used, any lens hood An attached lens hood will obstruct part of the built-in flash coverage.
  • Page 48 Part 1: General Information 10. When the Command Dial is turned to the P, Tv, Indicates AEB of ±1 stop. Av, or DEP mode (which executes automatic film advance to frame 1) and AEB has been set Indicates ±1-stop AEB and -1-stop together with exposure compensation exceeding exposure compensation.
  • Page 49: Ef Lens Compatibility With The Built-In Flash

    Part 1: General Information 7. EF LENS COMPATIBILITY WITH THE BUILT-IN FLASH 7.1 S INGLE : No problem even with the designated hood attached. : Flash coverage is obstructed by the attached hood, but no problem without the hood. : Incompatible. Flash coverage is obstructed with or without a hood attached. : Not applicable.
  • Page 50: Zoom Lens

    Part 1: General Information 7.2 Z : No problem even with the designated hood attached. : Flash coverage is obstructed by the attached hood, but no problem without the hood. : Incompatible. Flash coverage is obstructed with or without a hood attached. : Not applicable.
  • Page 51: Comparison With Competingmodels

    Part 1: General Information 8. COMPARISON WITH COMPETINGMODELS Manufacturer → Canon Nikon Minolta Pentax ↓ Item Camera → EOS ELAN 7 E / EOS 30 QD F 70D 507si MZ-3 Focusing Points [ + ] wide [ | - | ]...
  • Page 52: Outline Of Model With No Eye Control Input

    Part 1: General Information 9. OUTLINE OF MODEL WITH NO EYE CONTROL INPUT The EOS ELAN 7 / EOS 33 has been planned and developed to expand this camera series. The only difference with the EOS ELAN 7 / EOS 33 is that it has no Eye Control-related controls, displays, etc.
  • Page 53 Part 1: General Information Fig. 1-23 Three External Views 1-46...
  • Page 54: New Accessories

    Part 1: General Information 10. NEW ACCESSORIES The following system accessories have been developed at the same time as the camera. (1) SPEEDLITE 420EX (Shoe-mounted Speedlite) Developed as the successor to the 380EX, the SPEEDLITE 420EX has an autozoom head, maximum Guide No. 42 (with 105mm lens at ISO 100 in meters), and E-TTL aut- oflash metering.
  • Page 55 Part 1: General Information 10.1 BATTERY PACK BP-300 10.1.1 Overview Developed at the same time as the EOS ELAN 7 E / EOS 30, this EOS ELAN 7 E / EOS 30-dedicated battery pack features a shutter button and AE lock button on the vertical grip.
  • Page 56 Part 1: General Information 10.1.3 Nomenclature Fig. 1-30 1-49...
  • Page 57 Part 1: General Information 10.1.4 Design Specifications 1. Type 1-1 Type: Camera bottom-attached power pack with vertical-grip shutter button and AE/FE lock button. 2. Configuration 2-1 Compatible Camera: EOS ELAN 7 E / EOS 30 2-2 Components: Battery magazine, battery chamber cover, battery chamber spacer, electrical contacts, electrical contact cover, shutter button, shutter button ON/OFF switch, AE lock button, attachment screw and knob, hand strap...
  • Page 58 Part 1: General Information 4-3 Shooting Capacity: Refer to the table below. (Figures based on a new set of batteries with and without Eye Control use.) (1) With size-AA alkaline batteries [24-ex. rolls] Shooting Conditions Temperature AE 100% : FA 0% AE 50% : FA 50% AE 0% : FA 100% At 20º...
  • Page 59 Part 1: General Information 6-2 Spacer: The battery chamber spacer enables four size-AA batteries or two CR123A batteries to be loaded. (See Fig. 1-33.) * When spacer is down, four size-AA batteries can fit inside. When the spacer is up, two CR123A batteries can fit inside. 6-3 Battery check: Battery check executed and displayed with the camera.
  • Page 60 Part 1: General Information 10.1.5 BATTERY PACK BP-300 External Dimensions Fig. 1-31 1-53...
  • Page 61 Part 1: General Information 10.1.5 EOS ELAN 7 E / EOS 30 + BATTERY PACK BP-300 External Dimensions Fig. 1-32 1-54...
  • Page 62 Part 1: General Information 10.1.6 Battery Chamber Four size-AA batteries Battery spacer (down position) Battery spacer (up position) Two CR123A lithium batteries Spacer down Spacer up Battery Loading Procedure 1. Slide the battery chamber cover lever to OPEN and remove the battery chamber cover. 2.
  • Page 63: Semi Hard Case & Strap

    The other sides have an outer covering and inner lining only. 1-5 Markings: Body case: Bottom: Case designation (EH14) embossed. Front case: Top: Canon nameplate made of ABS resin + Gold hot stamp Bottom: Case designation (EH14-L) embossed. 158.2 (W) × 119 (H) × 164 (D) mm, 185 g 1-6 Dimensions &...
  • Page 64 Part 1: General Information (2) Wide Strap 2-1 Type: Wide-type neck strap 2-2 Material and Color: Wide strap:Acrylic + nylon belt with herringbone weave Eyepiece cover:Polyethylene (black) Attachment strap:Polypropylene plain-weave belt (black). 2-3 Dimensions: Wide strap + eyepiece cover 610 (W) × 38 (H) × 2 (D) mm 24.02 (W) ×...
  • Page 65 Part 1: General Information Accommodable Items: 1. Camera body, 2. Lens, 3. Front lens cap, 4. Hood, 5. Filter Symbols: : Accommodable. : Accommodable on condition (A: Slightly loose fit, B: Slightly tight fit). : Accommodable without any filter and hood (1+2+3). : Not accommodable.
  • Page 66 Part 1: General Information Accommodable Items: 1. Camera body, 2. Lens, 3. Front lens cap, 4. Hood, 5. Filter Symbols: : Accommodable. : Accommodable on condition (A: Slightly loose fit, B: Slightly tight fit). : Accommodable without any filter and hood (1+2+3). : Not accommodable.
  • Page 67: Part 2. Technical Information

    Part 2 Technical Information...
  • Page 68: Technical Description

    Part 2: Technical Information 1. TECHNICAL DESCRIPTION 1.1 E ONTROL (1) Basic Configuration of Eye Control Optics The basic configuration of the Eye Control optics is shown in Fig. 2-1. The infrared- emitting diodes (IRED) are integrated in the eyepiece frame. They illuminate the photographer's eye, and the light reflecting off the eye enters the camera to reach the dichroic mirror.
  • Page 69 Part 2: Technical Information (2) Eye Control Precision Previous EOS Eye Control cameras use the IR-8 IR-4 IR-3 IR-7 illumination of two IREDs on the bottom of the eyepiece frame to detect the eye. With the EOS ELAN 7 E / EOS 30, two IREDs on the top of the eyepiece frame also illuminate the eye.
  • Page 70 Part 2: Technical Information (5) Eye Control Response Time The 32-bit RISC microcomputer improves the processing performance and the improved Eye Control algorithm increases the processing speed. The EOS ELAN 7 E / EOS 30's Eye Control response time is less than half the EOS Elan II E/50 E/55's. The response time during the calibration procedure is also shorter.
  • Page 71: Af System

    Part 2: Technical Information 1.2 AF S YSTEM (1) Basic Configuration of Focusing Optics The basic configuration of the focusing optics, AF sensor, and AF unit are the same as the EOS 300/Rebel 2000/EOS Kiss III's. The actual focusing optics are shown in Fig.
  • Page 72 Part 2: Technical Information 2) Processing The algorithm for automatic focusing point selection is based on the EOS 300/Rebel 2000/EOS Kiss III's. The algorithm increases the chances of selecting the focusing point that the user wants. For details on the algorithm, see the EOS 300/Rebel 2000/EOS Kiss III's Service Manual.
  • Page 73 Part 2: Technical Information 2) AI Servo AF control from the second frame As with the EOS-1V, the EOS ELAN 7 E / EOS 30 executes predictive AF by using statistical calculation and analysis. Also, during continuous shooting, focusing is executed twice while the mirror goes down once. This improves the focusing efficiency.
  • Page 74 Part 2: Technical Information (7) AF-assist light Like the EOS 300/Rebel 2000/EOS Automatic Manual Selection Camera Kiss III, the EOS ELAN 7 E / EOS 30 Extreme Selection Center Top/Bottom Left/Right Left/Right uses the built-in flash to fire an ⁄ ⁄...
  • Page 75: Viewfinder

    Part 2: Technical Information 1.3 V IEWFINDER The EOS ELAN 7 E / EOS 30 is the first EOS camera to have a viewfinder incorporating three optical systems: Eye Control, dioptric correction, and SI display. The viewfinder's basic optical system is similar to the EOS ELAN II E / EOS 50 E's viewfinder.
  • Page 76 Part 2: Technical Information Metering sensor Pentaprism Metering lens Eye Control BASIS Built-in flash Xe tube Image-formation lens Built-in flash panel Dichroic mirror Eyepiece lens 1 Five horizontal SI-LEDs Eyepiece lens 2 Protective glass Focusing screen IREDs (8) SI prism Viewfinder LCD LCD prism Film plane...
  • Page 77: Exposure Control

    Part 2: Technical Information 1.4 E XPOSURE ONTROL (1) Metering 1) Metering optics and AE sensor The EOS ELAN 7 E / EOS 30's metering optics (see Fig. 2-12) are directly behind the pentaprism toward the top. This is to prevent it from obstructing the Eye Control optics.
  • Page 78 Part 2: Technical Information (2) Exposure control 1) Automatic exposure control Item Specification 1. Type Vertical-travel, focal-plane shutter In addition to all the picture-taking modes that 2. Shutter Blade Type Parallel, four-sided link type the EOS ELAN II E / EOS 50 3.
  • Page 79: Film Transport

    Part 2: Technical Information 1.5 F RANSPORT (1) Overview As shown in Fig. 2-16, the film Motor Direction Function transport system consists of the Forward Film advance (High or Low) main motor (M1) and secondary Film rewind motor (M2). By running forward (ø12.5-L31mm) Reverse Mirror movement...
  • Page 80 Part 2: Technical Information (2) Silent film transport The following measures have been taken for a silent film transport. 1) Coreless motor for M1 The M1 motor runs smoothly with little vibration and noise (especially at high frequencies). The coreless motor is quieter than ever. 2) Timing belt for the first gear and film rewind transmission The film transport and rewind noise (M1 motor noise) is reduced with vibration- resistant rubber.
  • Page 81 Part 2: Technical Information (3) Key points for high-speed continuous shooting The EOS ELAN 7 E / EOS 30 has the following features to attain high-speed continuous shooting. (A few of them have been mentioned previously.) 1) M2 motor for M1 driving transmission switchover The EOS ELAN II E / EOS 50 E uses the one and only motor for the driving transmission switchover.
  • Page 82: Built-In Flash

    Part 2: Technical Information 1.6 B UILT LASH In the Full Auto and Programmed Image Control modes, the Absorption spring ST up lever built-in flash's automatic pop-up movement (retraction is ST up/down spring done manually) is driven by the M2 motor. In Creative Zone Reflector modes, manual pop-up is required.
  • Page 83 Part 2: Technical Information Fig. 2-19 Overall Operation and Basic Time Chart 2-16...
  • Page 84 Part 2: Technical Information Batteries loaded Initialization Standby SW-1 ON or metering active? AE metering calculation SW-2 SW-1 AF calculation Lens driven Mg3-1 OFF Mirror goes up Exposure time controlled M1 powered Mg3-1 & Mg3-2 powered Mg3-2 OFF EMD stopped down Mirror up? Mirror down M1 powered...
  • Page 85 Part 2: Technical Information 1.8 E LECTRONIC IRCUITRY OWER OURCE (1) Overview LSI, IC Centering on two CPUs, the electronic circuitry consists Motors of twenty-four LSIs and ICs, a quartz oscillator, display Magnets elements, and other components. Calculations and the Display Elements camera sequence control are executed with 33.554 MHz Light-emitting Elements...
  • Page 86 Part 2: Technical Information Fig. 2-21 Electronic Circuit Block Diagram 2-19...
  • Page 87: Internal Construction

    Part 2: Technical Information 1.9 I NTERNAL ONSTRUCTION (1) Covers The camera’s covers consist mainly of the top Flash cover cover, bottom cover, front cover, camera back, and grip. The top, front, and flash head covers have a double-walled construction with 0.8mm-thick aluminum on the outside and an inner cover made of engineering plastic.
  • Page 88 Part 2: Technical Information (3) Electrical components The EOS ELAN 7 E / EOS 30’s electrical system is in the same class as the EOS A2/A2E/5’s, but it has a higher integration with 19 flexible printed circuit boards (FPC) and 7 hard printed circuit boards (PCB). The major features of the electrical components are described below.
  • Page 89: Custom Functions

    Part 2: Technical Information 1.10 C USTOM UNCTIONS The new Custom Functions provided by the EOS ELAN 7 E / EOS 30 are described below. [C.Fn-7: AF-assist light emission / Main flash firing] This enables/disables the AF-assist light emitted by the built-in flash or external, EOS-dedicated Speedlite.
  • Page 90: Switches And Their Functions

    Part 2: Technical Information 2. SWITCHES AND THEIR FUNCTIONS 2.1 O PERATION WITCHES Code Name Function Focusing/metering Focusing and metering starts at SW-1. Shutter release Picture-taking starts at SW-2. MAIN1,2,3,4SW Picture-taking mode Selects the picture-taking mode. selector (Command Dial) SPDN SW Depth-of-field preview Stops down the aperture in the button...
  • Page 91: Sensor Switches

    Part 2: Technical Information 2.2 S ENSOR WITCHES Code Name Function BP SW Camera back Becomes Low when the camera back is open/close switch open. CMSP1,,2,3SW Shutter-cocking phase Detects the shutter cocking, mirror switch up/down operations. MIF SW Lens switch Detects the attachment/detachment of the lens.
  • Page 92: Electrical Components And Their Functions

    Part 2: Technical Information 3. ELECTRICAL COMPONENTS AND THEIR FUNCTIONS Code Applicable Unit Function MAIN Microcomputer for camera control OSCM MAIN Microcomputer’s oscillator CMPU1 MAIN MPU power source (VDD) smoothing capacitor CMPU2 MAIN MPU power source (VDD3) smoothing capacitor CMPU5 MAIN MPU power source (VDD) smoothing capacitor CMPU6...
  • Page 93 Part 2: Technical Information Code Applicable Unit Function RFLED2 MAIN FLED drive control circuit standard voltage-dividing resistor RFLED3 MAIN FLED drive control circuit standard voltage-dividing resistor RFLED4 MAIN FLED drive control circuit resistor MAIN Orientation detection sensor MAIN Orientation detection sensor TRHVON MAIN Orientation detection sensor-driving transistor...
  • Page 94 Part 2: Technical Information Code Applicable Unit Function AEIC AE sensor CAEVC1 AE sensor’s internal power source-stabilizing capacitor CAEVCC AE sensor’s power source-stabilizing capacitor Display/switch-detecting CPU VREF Liquid-crystal-driving power source IC DLCD Liquid-crystal drive voltage-generating diode OSCL1 LPU clock oscillator OSCL2 LPU secondary clock crystal CLPU1...
  • Page 95 Part 2: Technical Information Code Applicable Unit Function 124 DCDC1 DCDC converter IC for control system power source 125 DCDC2 VDD3 DCDC converter IC 126 REGPS1 VDD power source regulator 127 REGPS2 E1, E2 power source regulator 128 REGPS3 VDD3 power source regulator 129 TRPS1 DCDC converter transistor 130 TRPS2...
  • Page 96 Part 2: Technical Information Code Applicable Unit Function 172 YBASIS FINDER(EYE) Eye Control AF sensor 173 CYE2 FINDER(EYE) YBASIS power source-stabilizing capacitor 174 CYVC1 FINDER(EYE) YBASIS standard voltage-stabilizing capacitor 175 RY1 FINDER(EYE) BCLK noise-control resistor 176 YIRED0 FINDER(EYE) Eye Control illumination LED 177 YIRED1 FINDER(EYE) Eye Control illumination LED...
  • Page 97 Part 2: Technical Information Code Applicable Unit Function 210 EFIC Flash metering and external flash transmission IC 211 CEF1 EFIC power source-stabilizing capacitor 212 CEF2 EFIC power source-stabilizing capacitor 213 CEF3 EFIC power source-stabilizing capacitor 214 CEFVC EFIC internal power source-stabilizing capacitor 215 CVRH1 EFIC standard power source-stabilizing capacitor 216 REF...
  • Page 98 Part 2: Technical Information Code Applicable Unit Function 254 DATE BACK COVER Dateback module 255 M1 FILM DRIVE Film transport motor 256 M2 FRONT PANEL Mirror-driving motor 257 BATT1 Power source battery 258 BATT2 Power source battery 259 BAT_DATE Dateback battery 2-31...
  • Page 99: Error Code Display

    Part 2: Technical Information 4. ERROR CODE DISPLAY When the camera is inoperative (bc blinks), normally the battery level icon will blink. When you select "Error Code Display" with the repair adjustment software program, the error code will appear on the LCD panel as shown on the right. It indicates the camera's error condition.
  • Page 100 Part 2: Technical Information <Mechanical-Related Errors> Error No. Error Condition Probable Cause Mirror-up q The mirror-up completion signal (CMSP) is not Faulty front plate. operation error established within the stipulated time after the start of mirror-up operation (M1 motor runs in reverse). w The mirror-up completion signal (CMSP) is not Faulty front plate (overrun).
  • Page 101 Part 2: Technical Information <Mechanical-Related Errors> Error No. Error Condition Probable Cause Failed phase q During the phase switching operation (Lo-wind) Faulty phase switching (faulty switch in the drive before autoloading, the Lo-wind phase (POCH) is POCH signal). transmission not established within 300 ms after the phase switching operation starts (M2 motor runs in system.
  • Page 102 Part 2: Technical Information <Inter-Task Communication Errors> Error No. Error Condition Probable Cause Timeout of af_task The AF stop process does not end within the Faulty task status cancel process. stipulated time. transition. Timeout of af_task The stop-down process does not end within the Faulty task status EMDACT process.
  • Page 103: Part 3. Repair Information

    Part 3 Repair Information...
  • Page 104 This page intentionally left blank...
  • Page 105: Repair Preparations

    Part 3: Repair Information 1. REPAIR PREPARATIONS IMPORTANT! R EAD THIS BEFORE STARTING REPAIR 1.1 B LEED THE APACITOR • As soon as you remove the front cover, be sure to drain the main capacitor with a bleeder resistor of around 500 ohms, 10 W. •...
  • Page 106 Part 3: Repair Information 1.3 C AUTIONS FOR ISASSEMBLY AND EASSEMBLY • After removing the top cover unit, do not apply pressure against the flexible boards. • Before disassembly, see how the lead wires are routed. • As a general rule, reassemble by following the disassembly procedure in reverse. •...
  • Page 107: Current Consumption Standards

    Part 3: Repair Information 1.6 C URRENT ONSUMPTION TANDARDS Regarding the power current consumption, the product standard and the product’s actual consumption are shown below. Measure all the items that can be measured and check that they match the product’s actual consumption.
  • Page 108: Tools And Consumables

    Part 3: Repair Information 1.7 T OOLS AND ONSUMABLES • Procure the following tools and consumables required for reassembly and adjustments. 1) Tools Tool Part No. Application Multiple Tool II CY9-7099-000 Electrical adjustment (HS-I/F unit + expended memory) As above Additional memory) DC power source As above...
  • Page 109 Part 3: Repair Information 2) Consumables Consumable Part No. Application Aron Alpha 201 CY9-8007-000 SPC fixing Three Bond 1401C CY9-8011-000 Screw fixing GE-C9 CY9-8043-000 Back Cover Dial friction parts Silicon KE347B CY9-8064-000 Pentaprism fixing PL-015JG CY9-8073-000 Unlock button Spool friction parts Mirror shaft IF-10 CY9-8088-000...
  • Page 110: Locally Fabricated Tools

    Part 3: Repair Information 1.8 L OCALLY ABRICATED OOLS 1) Charts (1) AF standard chart (Included in tool list. CY9-7113-000) As shown in the figure, paste two strips of 90% reflectance paper on an A1-size (594 x 840mm) 2% reflectance paper. A1 Size 15mm 19mm...
  • Page 111 Part 3: Repair Information 2) SPD positioning adjustment mask As shown in the figure below, open holes in a low-reflectance black sheet of paper. ø57mm ø4~6mm ø2~3mm Fig. 3-9 SPD positioning adjustment mask 3) X time lag checking tool • Used for measuring the X time lag. •...
  • Page 112: Disassembly And Reassembly

    Part 3: Repair Information 2. DISASSEMBLY AND REASSEMBLY 2.1 D ISASSEMBLY OF XTERNAL OVERS 4.0mm x2 4.5mm x2 4.5mm CAUTION High voltage #Fasten with cel- lophane tape 8 x 20mm #PL-015JG None in E ring 5.2mm x2 groove 4.5mm 4.5mm x2 4.5mm 4.5mm 5.5mm...
  • Page 113 Part 3: Repair Information <D > ISASSEMBLY ROCEDURE (1) Removing the front cover 1. Remove the five screws on the front cover. 2. Loosen the two screws on the camera back latch cover. (2) Removing the grip 1. Remove the remote control cap. 2.
  • Page 114: Front Panel Unit Removal

    Part 3: Repair Information 2.2 F RONT ANEL EMOVAL No need to remove the back cover hinge except when disassembling back cover ass’y 8.0mm x2 5.0mm 5.5mm 8.0mm 9.0mm x2 CAUTION The film drive unit lever and a gear in the bottom of front panel unit need alignment Ferrite core Do not remove except...
  • Page 115 Part 3: Repair Information <D > ISASSEMBLY ROCEDURE (1) Removing the DSP flex unit 1. On the MD flex, desolder the five lead Red-eye reduction lamp wires, lamp prongs, and flex prongs. (See Fig. 3-14.) 2. On the right of the body, desolder the dial Prongs contact plate and camera back flex.
  • Page 116 Part 3: Repair Information (7) Desoldering the DX flex 1. Seven through-holes on DX contact plate Through-holes (7) 2. BP flex prongs BP flex prongs Fig. 3-18 DX flex (8) Removing the viewfinder unit 1. Disconnect only the EYE viewfinder unit flex from the connector. For a NON-EYE viewfinder unit, there is no connector because the VIA flex is soldered onto the main board.
  • Page 117 Part 3: Repair Information <MEMO> 3-13...
  • Page 118: Main Flex Unit Removal

    Part 3: Repair Information 2.3 M EMOVAL 4.5mm x2 #Bond 1663G Black 4.5mm x2 For AE flex replacement #Aron Alpha 201 For SPC position adjustment VIA flex Remove for replacement in NON-EYE models. Otherwise, removal is unnecessary. #Bond 1663G Black 3.0mm 3.0mm x2 No rising nor shifting...
  • Page 119 Part 3: Repair Information <D > ISASSEMBLY ROCEDURE (1) Removing the shutter unit 1. Remove the shutter flex from the positioning dowels. 2. Remove the two screws. Shutter flex positioning dowels Fig. 3-22 Shutter flex (2) Removing the MD flex unit 1.
  • Page 120 Part 3: Repair Information 2.4 F RONT ANEL ISASSEMBLY 4.5mm x2 NOTE #Bond 1663G Black Apply only on the 4.0mm x2 top and bottom 4.5mm NOTE 4.0mm x2 #Bond 1663G Black 3.7mm x2 Fix the lead wires in place NOTE Variable size for viewfinder focusing #Bond 1663G Black...
  • Page 121 Part 3: Repair Information <D > ISASSEMBLY AND EASSEMBLY OTES NOTE : AF unit • When the AF unit is removed, the position relative to the focusing screen must be adjusted. NOTE : Gluing TTL flex and TTL lens in place •...
  • Page 122: Front Panel Unit Disassembly 1

    Part 3: Repair Information 2.5 F RONT ANEL ISASSEMBLY #NK-74C Apply a light coat on all gears and gear shafts #M2 lead wire qBlack (Front panel) wred (Outside) #Bond 1401C Apply on screw head 2.0mm x2 3.0mm x2 #Fix with Bond 1663G Black #NK-74C Apply on cam surface 4.5mm...
  • Page 123 Part 3: Repair Information <MEMO> 3-19...
  • Page 124: Front Panel Unit Disassembly 2

    Part 3: Repair Information 2.6 F RONT ANEL ISASSEMBLY #Fix with Silicon Bond KE347B. Wait 12 H. #Fix with Bond 1663G Black #Adjustable size to elimi- nate pentaprism play #Fix with Bond 3.5mm 1663G Black 3.5mm #NK-74C #NK-74C Shaft Apply on cam surface and gear shaft #Bond 1663G Black To affix on front...
  • Page 125 Part 3: Repair Information <D > ISASSEMBLY AND EASSEMBLY OTES CAUTION : Gear Arrangement • The mirror cam gear and the charge gear must be installed in proper arrangement. For your reference, when you set as shown in Fig. 3-32 before disassembling gears, check the position of the hole on the charge gear when conduction ceases.
  • Page 126: Body Unit Disassembly 1

    Part 3: Repair Information 2.7 B ISASSEMBLY 4.5mm x2 5.5mm x2 #NK-74C Latch lever friction parts and lug Check the polarity before installing. The + terminal is to be toward the camera back. 4.5mm x2 Use after cutting with a nipper 4.5mm x2 3.0mm x2 4.5mm...
  • Page 127 Part 3: Repair Information 2.8 B ISASSEMBLY #NK-74C Roller shaft 4.5mm 4.0mm 3.5mm #PL-015JG Spool’s friction surface 2.5mm 3.0mm 3.0mm 3.0mm 5.5mm x4 #PL-015JG Spool’s friction surface 4.0mm x3 Fig. 3-35 Body unit disassembly 2 3-23...
  • Page 128: Top Cover Unit Disassembly 1

    Part 3: Repair Information 2.9 T OVER ISASSEMBLY #Bond 1663G Black Apply on hot shoe spring. No seepage outside. #Bond 1401C Apply on screw head 5.0mm x4 #Glue with Bond 1663G Black #Aron Alpha 201 (Temporary fix) + Bond 1663G Black Fix POP-UP switch 4.6mm NOTE...
  • Page 129 Part 3: Repair Information <D > ISASSEMBLY AND EASSEMBLY OTES NOTE : Installing the dioptric adjustment dial 1) Install the dioptric adjustment gear and turn it until it stops toward the Command Dial. 2) Install so that the dioptric adjustment dial’s index is positioned as shown in the figure.
  • Page 130: Top Cover Unit Disassembly 2

    Part 3: Repair Information 2.10 T OVER ISASSEMBLY 4.5mm #NK-74C Friction surface #NK-74C Shaft None in screw hole #NK-74C Dial’s friction surface None in screw hole 4.5mm x2 #Black pen marker (tentative) #Bond 1663G Black Make it less noticeable from Glue lug plate the external cover gap (Should not peel off easily and...
  • Page 131 Part 3: Repair Information <D > ISASSEMBLY AND EASSEMBLY OTES NOTE : Installing the dial contact plate • With the Command Dial set to OFF, install so that the contact plate mold’s notch is toward the dioptric adjustment gear. Notch position (With the dial set to OFF) Fig.
  • Page 132: Dsp Flex Unit Disassembly

    Part 3: Repair Information 2.11 DSP F ISASSEMBLY * When installing the LCD, eliminate play by shifting it in the direction of the arrow. 4.5mm Fig. 3-42 DSP flex unit disassembly 3-28...
  • Page 133: Viewfinder Unit Disassembly

    Part 3: Repair Information 2.12 V IEWFINDER ISASSEMBLY #Bond 1663G Black Glue the eyepiece glass. No seepage outside. * Disassemble carefully without tearing the flex or shifting the Eye Control sensors. Fig. 3-43 Viewfinder unit disassembly 3-29...
  • Page 134: Camera Back Unit Disassembly

    Part 3: Repair Information 2.13 C AMERA ISASSEMBLY #NK-74C Shaft’s friction surface #NK-74C Inner cover positioning shaft (light coat) #GE-C9 Dial’s friction surface 3.0mm x2 3.0mm 3.0mm 2.5mm 3.0mm #NK-74C Entire ball 3.5mm 3.0mm x4 2.5mm #NK-74C Click-stop 4.5mm 4.0mm x5 4.0mm #NK-74C Shaft’s friction...
  • Page 135: Shutter Unit Disassembly

    Part 3: Repair Information 2.14 S HUTTER ISASSEMBLY 4.5mm x2 * After replacing or disassembling the shutter curtain, check and adjust the curtain speed and shutter speeds. Fig. 3-45 Shutter unit disassembly 3-31...
  • Page 136: Film Transport Unit Disassembly

    Part 3: Repair Information 2.15 F RANSPORT ISASSEMBLY #NK-74C Inner friction surface #Bond 1401C Screw head 4.5mm x2 3.0mm x3 * Logenest Lambda A-74 Apply light coat on gears, gear shafts, and springs. Fig. 3-46 Film transport unit disassembly 3-32...
  • Page 137 Part 3: Repair Information <MEMO> 3-33...
  • Page 138: Mechanical Adjustments

    Part 3: Repair Information 3. MECHANICAL ADJUSTMENTS 3.1 S 40.5 ECONDARY IRROR NGLE DJUSTMENT CAUTION • Carry out when the front panel unit is disassembled, or when the mirror unit is replaced. • Angle (45 deg.) adjustment of the main mirror is unnecessary. <P >...
  • Page 139 Part 3: Repair Information 2. Attach the 40.5 deg. secondary mirror gauge to the mirror angle checking tool. Front panel unit attachment position CY9-7098-007 Fig. 3-48 Mirror angle checking tool <A > DJUSTMENT 1. Rotate the gear so that the mirror goes down completely. If you rotate the gear too much, rotate the gear again in the same direction so that the mirror is at the down position.
  • Page 140 Part 3: Repair Information 4. For the vertical adjustment, use an alien key wrench to turn the eccentric dowel in the mirror box as shown below. Mirror driving spring Eccentric dowel Turn the gear toward the mount (direction of the arrow) so that the mirror goes to the down position.
  • Page 141: Af Sensor Positioning (Horizontal)

    Part 3: Repair Information 3.2 AF S ENSOR OSITIONING ORIZONTAL CAUTION • Do this after replacing the AF sensor unit. • The adjustment procedure is basically the same as with previous EOS cameras. <P > URPOSE • To align the AF sensor’s center with the optical axis. (Horizontal adjustment only) <S >...
  • Page 142 Part 3: Repair Information <A > DJUSTMENT Front panel 1. With the mirror unit, focusing screen, and AF unit (attached temporarily) attached to the front panel unit, attach EF50mm/f1.8 an EF 50mm f/1.8 lens to the front panel unit. 2. With the mirror down, use a penlight to shine the light at the AF unit.
  • Page 143 Part 3: Repair Information 3.3 F LANGE OCAL ISTANCE DJUSTMENT CAUTION • Do this adjustment after replacing the front panel unit, mount, or body unit. • Before measuring the flange focal distance, use a parallel glass to check that there are no gross distortions on the rail surface. •...
  • Page 144 Part 3: Repair Information <P > REPARATION 1. Insert a 2mm reinforcement ring between the dial gauge’s prong and contact element. (This is necessary because the dial gauge is designed for a flange focal distance of 42.14 mm.) 2. Use the flange focal distance gauge (44.14mm or 42.14mm) and the optical flat, and set the dial gauge to 0.
  • Page 145: Flange Focal Distance Adjustment

    Part 3: Repair Information <A > DJUSTMENT 1) Flange focal distance 1. Place the parallel glass against the outer rail surface, and set the camera to bulb. 2. Place the dial gauge on the mount, and measure the aperture’s center and four corners.
  • Page 146: Viewfinder Focusing Adjustment

    Part 3: Repair Information 3.4 V IEWFINDER OCUSING DJUSTMENT CAUTION • Be sure to do this adjustment after adjusting the flange focal distance. <P > URPOSE To match the film plane’s focusing position and the viewfinder’s focusing position. <S > TANDARD As shown in the figure below, the focusing must be within 1.5 lines to the left or right of the index mark at infinity.
  • Page 147 Part 3: Repair Information EPLACING THE FOCUSING WASHER While pushing in the focusing screen presser’s left and right round holes with a pair of tweezers, unhook the hook on the inner side. The focusing screen and focusing washer will come off. Do not push in the holes too hard or bend them toward the inside.
  • Page 148 Part 4 Electrical Adjustment...
  • Page 149: Part 4. Electrical Adjustments

    Part 4: Electrical Adjustment 1. ELECTRICAL ADJUSTMENTS 1.1 P RECAUTION WHEN AKING LECTRICAL DJUSTMENTS • The adjustment software supports the Multiple Tool II and the HS-I/F. You can, however, double or triple the data transfer speed when the HS-I/F is used compared with when memory is not expanded by using the expanded memory (CY9-7082-002).
  • Page 150: Adjustments After Parts Replacement

    Part 4: Electrical Adjustment 1.3 A DJUSTMENTS AFTER ARTS EPLACEMENT Table 4-1 Adjustments After Parts Replacement Replacement Part Main Board MD Flex TTL Flex AF Unit Shutter Unit Shutter Unit Sensor Unit (Data not redable) (AE Sensor) (A-TTL Sensor) Adjustment Initialization General Temperature...
  • Page 151: Adjustments Software For This Camera

    Part 4: Electrical Adjustment 1.4 A DJUSTMENTS OFTWARE FOR AMERA 1) Starting the Adjustment Software The filename for this software is ELAN 7.EXE or EOS30.BAT, EOS33.BAT, After a work disk has been made, the software will be started automatically from the AUTOEXE.BAT file.
  • Page 152 ON, turn it OFF and then back ON Turn the Maltiple Tool II or Hs-I/F Power on. again. Press a ESC Key to exit software program. (C) Copyright Canon Inc. 10,1,2000 After communication has been established between the computer, Multiple Tool II and HS-I/F, the screen shown at right appears.
  • Page 153 If a camera other than the EOS 7. has an unsupported ROM, this message will appear. The camera is not an EOS 7 2000/ 300. This software is for the EOS 2000/ 300 only. Press any key to exit software program.
  • Page 154 Part 4: Electrical Adjustment 7) Adjustment Software Menu Structure MAIN MENU Shutter Adjustment AE Adjustment menu SPC Positioning AE Adjustment AE Shift Exposure Program Rewriting AF Adjustment menu Basic AF Adjustments AF Focus Adjustment AF Sensor Image Focus data output AF Focus Shift Basic TTL Adjustment Flash Adjustment...
  • Page 155: Shutter Adjustment

    Part 4: Electrical Adjustment 1.5 S HUTTER DJUSTMENT URPOSE To adjust shutter speeds. If the maximum shutter speed is within the limits, all shutter speeds have been adjusted. CAUTION • Check the shutter curtain speed. If it is not within the limits, the curtain speed must be adjusted.
  • Page 156 Part 4: Electrical Adjustment DJUSTMENT SHU1 Limit: 1) Measure the shutter speed and Shutter 0.210 Adjustment move the cursor to enter the - 0.410mS measured value, then press 0.290 RETURN key. 0.072 0.145 0.580 1.160ms The program writes the shutter correction value to the camera.
  • Page 157: Checking The X-Sync Time Lag

    Part 4: Electrical Adjustment 1.6 C X-SYNC T HECKING THE URPOSE To check that the shutter curtains are fully open when the flash is fired. The time lag cannot be adjusted. If the user complains about vignetting by shutter curtains, etc., check the time lag.
  • Page 158: Spc Positioning

    Part 4: Electrical Adjustment 1.7 SPC P OSITIONING URPOSE To align the center of the SPC sensor with the center of the camera’s optical axis. To do the adjustment, you can either use Multiple Tool II and HS-I/F or not use them at all. If you do not use these tools, you will need a bright penlight and expert skill.
  • Page 159 Part 4: Electrical Adjustment • Adjustment With Multiple Tool II and HS-I/F CAUTION • Carry out approximate AE Accuracy Adjustment [F2] before SPC positioning. Then, after finishing SPC positioning, carry out the final AE Accuracy Adjustment [F2]. OOLS BF-8000/5000 EF 50 mm f/1.8 lens SPC positoning mark (same as EOS Kiss) Aron Alpha REPARATIONS...
  • Page 160 Part 4: Electrical Adjustment DJUSTMENT 1) Select [F1] SPC Positioning in the AESPC AE Adjustment menu. The nearest SPD Positioning Adjustment Unit: EV EV values of the individual photometric sensors of the SPC will 00.0 00.0 00.0 00.0 00.0 00.0 00.0 be displayed.
  • Page 161: Ae Accuracy Adjustment

    Part 4: Electrical Adjustment 1.8 AE A CCURACY DJUSTMENT CAUTION • Before carrying out this adjustment, the AE temperature compensation must already have been carried out. This adjustment doubles as the E-TTL basic metering adjustment, so check E-TTL accuracy after adjustment. URPOSE To adjust the gain and output level of the SPC sensor TANDARD...
  • Page 162 Part 4: Electrical Adjustment DJUSTMENT 1) Select [F2] AE Accuracy Adjustment AEM1 in the AE Adjustment menu. AE Accuracy Adjustment 2) Set the brightness to LV9 and press the RETURN key. 12.5 Set EU Tester as follows: ISO: K value: 12.5 ISO : 100 After setting, press RETURN.
  • Page 163: Ae Shift

    Part 4: Electrical Adjustment 1.9 AE S HIFT URPOSE Shifting exposure level to + or - at user’s request. This adjustment shifts the offset resulting from adjusting the level in AE accuracy adjustment. OOLS EF-8000/5000, AE sensor EF 50 mm f/1.8 lens REPARATIONS 1) Start the adjustment software, connect the camera to the Multiple Tool II or HS-I/F, and select [F2] AE Adjustment in the MAIN MENU.
  • Page 164 Part 4: Electrical Adjustment DJUSTMENT 1) Select [F3] AE Shift in the AE AEF1 Limit: Adjustment menu. AE SHIFT EV9,12:0 0.5 EV EV15:0.5 0.5 EV 2) Move the cursor key to select the desired amount of shift. Exposure can be adjusted in approximately 0.25 f/stop steps.
  • Page 165: Exposure Program Rewriting

    Part 4: Electrical Adjustment 1.10 E XPOSURE ROGRAM EWRITING CAUTION • Before rewriting the exposure program, execute the basic AE Adjustments. For normal servicing, select “Normal (0).” Or set the compensation amount (+ or -) according to the user’s preference. (Initialization will set it to “Normal [0].”) URPOSE As with the EOS-3 and EOS-1V, the EOS-7 has compensation data for each maximum...
  • Page 166 Part 4: Electrical Adjustment DJUSTMENT 1) 1) Select the EV difference between AE_PROG1 the EF 50mm f/1.8 lens and the Exposure Compensation Program Rewriting user's lens or EF 28-135mm Exposure compensation program 00 is being written. f/3.5-5.6 IS lens. 0: Standard (0) 0 1: +0.3 EV Shift 2: -0.8 EV Shift Example:...
  • Page 167: Basic Af Adjustment

    Part 4: Electrical Adjustment 1.11 B AF A ASIC DJUSTMENT This adjustment must be carried out if the AF unit has been replaced. It must also be carried out if the Main Flex Unit has been replaced, and the existing data cannot be stored or transferred.
  • Page 168 Part 4: Electrical Adjustment DJUSTMENT AFB1 1) The screen on the right appears Basic AF when you select Basic AF Adjustment Adjustment. Set up the camera, Set the chart 1.0 meter away from the camera. and press RETURN key to start Manually adjust the focus, and press RETURN key.
  • Page 169 Part 4: Electrical Adjustment 4) The screen on the right appears AFB3 Basic AF when dark adjustment is completed. Adjustment Shading adjustment setting is carried Shading out. Mount the lens on the camera LV12 and set the camera on the light source stand.
  • Page 170: Af Focus Adjustment

    Part 4: Electrical Adjustment 1.12 AF F OCUS DJUSTMENT URPOSE To store the AF reference distance to memory. CAUTION • Before carrying out this adjustment, the AF temperature compensation, AF basic adjustment and flange back adjustments must already have been carried out.
  • Page 171 Part 4: Electrical Adjustment DJUSTMENT AFPINT1 1) Select [F5] AF Focus Adjustment in the AF focus menu. The screen on the AF Focus Adjustment right appears. Move the center value (44.17mm) of the flange back using the cursor keys, and press RETURN key. +40µm Move cursor to necessary correction.
  • Page 172 Part 4: Electrical Adjustment NOTE If you use a tool lens with a focus AFPINT1 variation label, the AF focus can be AF Focus Adjustment adjusted by adding the amount of deviation during the flange back (44.17mm) adjustment. +40µm Example: If the amount of deviation is +0.03, and the flange back correction amount is “0”, compensate the AF...
  • Page 173: Af Sensor Dust Check

    Part 4: Electrical Adjustment 1.13 AF S ENSOR HECK URPOSE To check the AF sensor output waveform (image data output).This waveform can show if there is any dirt in the AF sensor light path. OOLS EF-8000/5000 HECK ROCEDURE 1) Position the camera at the light source with a lens mounted to it. Set the brightness of the light source to LV12.
  • Page 174 Part 4: Electrical Adjustment 2) Select [F3] AF sensor image in the AF menu. Make sure that the output waveform is almost flat. 3) If the output waveform has changed greatly, the AF Unit may be defective, so replace the AF unit. AFIMG8 Image data Output Center...
  • Page 175 Part 4: Electrical Adjustment 1.14 AF F OCUS HECK URPOSE To check the AF focus adjustment. OOLS EF 50 mm f/1.8 tool lens Video Light Tripod Charts HECK ROCEDURE 1) Set up the charts and camera as AFDEF indicated for focus adjustment. Focus data output 2) Start the adjustment software, and select [F3] AF Adjustment menu in...
  • Page 176: Af Focus Data Check

    Part 4: Electrical Adjustment 1.15 AF S HIFT REPARATIONS AFSHIFT1 1) First do the AF Focus Data Check to AF Focus Shift see how much adjustment is needed. DJUSTMENT Select compensation with cursor keys. 1) On the AF Adjustment menu, select 0.000 [F5] AF Shift.
  • Page 177: Flash Adjustment

    Part 4: Electrical Adjustment 1.16 F LASH DJUSTMENT URPOSE To adjust the level of the flash sensors for correct flash control. CAUTION • Use the standard reflective board (or white wall with less spectral reflection) in a dark place (EV3 max. or a darkroom) to obtain the average for several cameras.
  • Page 178 Part 4: Electrical Adjustment • Basic TTL Adjustment CAUTION • Be sure to use the TTL flash (540 EZ, 300 EZ, etc.) URPOSE To adjust the gain level of the flash sensor. TANDARD Average ±1 EV REPARATIONS None DJUSTMENT 1) The screen on the right appears. If ATTL1 OK, press the RETURN key.
  • Page 179 Part 4: Electrical Adjustment • TTL Level Shift CAUTION • Be sure to use the TTL flash (540 EZ, 300 EZ, etc.) • If the adjustment value is changed, the shutter may no longer fully close. So, when the adjustment value has been changed, the flash must be turned OFF then ON again.
  • Page 180 Part 4: Electrical Adjustment • E-TTL Level Shift CAUTION Be sure to use the E-TTL flash (550 EX, 380 EX, etc.) There is no E-TTL basic adjustment. This is determined by AE basic adjust- ment. • If the adjustment value is changed, the shutter may no longer fully close. So, when the adjustment value has been changed, the flash must be turned OFF then ON again.
  • Page 181 Part 4: Electrical Adjustment E-TTL ACCURACY ADJUSTMENT CAUTION • The following adjustment procedure is a simple check. For users with high accuracy requirements, conduct the check using the regular E-TTL flash. URPOSE To conduct a simple check on E-TTL accuracy TANDARD Average +/- 1EV REPARATIONS...
  • Page 182: Inhibit Voltage Adjustment

    Part 4: Electrical Adjustment 1.17 I NHIBIT OLTAGE DJUSTMENT This adjustment must be carried out if the main flex unit has been replaced. URPOSE To ensure the operational accuracy of individual parts of the camera by setting the minimum voltage for camera operation. TANDARD Full display 5.25 V ±...
  • Page 183: Self Check

    Part 4: Electrical Adjustment 1.18 S HECK The self check can be classified into the following checks and settings: 1. LCD Check: Display the all indications in viewfinder and LCD panel, and check that no segment is missing. 2. Flash Charge Inhibit mode Inhibits flash charging and prevents discharge.
  • Page 184 Part 4: Electrical Adjustment LASH HARGE NHIBIT FLASH_D This item sets the camera to the flash Flash Charge Inhibit inhibit mode. When [F2] is selected in the Self Check Flash charge inhibit will be set menu, the screen on the right appears, When the setting is completed, the adjustment software program will be the flash inhibit mode is set, and the...
  • Page 185 Part 4: Electrical Adjustment OFF M RROR ISPLAY If an error occurs in the normal camera ERRORON mode battery mark only flashes and you Error Cord Display cannot tell which error has occurred. If the “error code display ON and OFF mode”...
  • Page 186: Ecf (Eye Control) Adjustment Menu

    Part 4: Electrical Adjustment 1.19 ECF (E ONTROL DJUSTMENT ECF sensor unit adjustments: 1. ECF sensor unit adjustment: Execute when the ECF sensor unit is replaced or readjusted. 2. ECF sensor check (IREDs off): Inspection for irregular ECF sensors. 3. ECF sensor check (IREDs on): Inspection to see if the ECF sensor's IRED is lit. 4.
  • Page 187 Part 4: Electrical Adjustment 2) After the communication, the screen NAC2 on the right appears. Set the camera ECF Adjustment and EF 8000, 5000 to EV9. Then BASIS Gain press Return. Attach the Mask Holder to the eyepice and set the light souce to LV9 (Remove the diffusing plate from the Mask Holder) After setting, press RETURN Press SPACE bar to return to ECF menu.
  • Page 188 Part 4: Electrical Adjustment ECF S ENSOR HECK URPOSE This is for checking the ECF sensor unit. Select this item if the user complains about Eye Control focusing problems. Items to be checked: • ECF sensor output • IRED illumination position and output •...
  • Page 189 Part 4: Electrical Adjustment • ECF Sensor Check (IREDs on) REPARATIONS 1) Attach the IRED positioning tool to the eyepiece. 2) On the ECF Adjustment menu, select [F3] ECF Sensor Check (IREDs on). HECK ROCEDURE NAC_C4 1) After a few moments, the waveforms as shown on the right will appear.
  • Page 190: Data Transfer

    Part 4: Electrical Adjustment 1.20 D RANSFER The Data Transfer menu consists of five operations: 1. Initialization: This is divided into initialization of all data, AF data or settings. Select the required item to initialize as required. 2. Data storage: All data, AF data and settings can be selected.
  • Page 191 1) When you select Initialization, the screen on the right appears. Select Initialization Menu the item to suit the camera you are using or the Main Flex Unit. EOS 7,ELAN 7,EOS 7E(DATE),30(DATE) (with ECF) EOS7(DATE),33(DATE) (without ECF) Select with cursor keys and press RETURN.
  • Page 192 Part 4: Electrical Adjustment • Data Storage Like initialization, you can select all data, AF data or settings when storing data. Tip: Before you start repair, note down the camera’s current settings. This will make it easier to return the settings to the user settings after repair DATC_T 1) In the Data Storage menu, select the data to save with the up and down...
  • Page 193 Part 4: Electrical Adjustment Temperature Compensation Up till now there was only one type of temperature compensation. On the EOS REBEL 2000/300, however, additional temperature compensation must be carried out on the AE sensor, TTL (A-TTL) sensor and AF sensor. In all, the following compensations are available: General compensation: Compensates all sensors.
  • Page 194 Part 4: Electrical Adjustment 4) Press the RETURN key. When TEMP3 communications ends, the screen on Temperature the right is displayed. Check that the Compensation Room room temperature (measured by the 00.0˚C Multiple Tool II, HS-I/F) and the temperature measured by the camera are within 5°C, then press AE sensor TTL sensor...
  • Page 195: Part 5 Parts Catalog

    Part 5 Parts Catalog...
  • Page 196 This page intentionally left blank...
  • Page 197 EOS 7 REF.No.C12-8451 EOS ELAN 7E / DATE C12-8453 / 8454 EOS 30 / DATE C12-8456 / 8457 EOS ELAN 7 / DATE C12-8463 / 8464 EOS 33 / DATE C12-8466 / 8467 PARTS CATALOG...
  • Page 199 P A R T S L I S T REF.No. C12-8451 C12-8453/8454 C12-8456/8457 C12-8463/8464 C12-8466/8467 PARTS No. CLASS QTY DESCRIPTION...
  • Page 201 P A R T S L I S T Pg. 2 REF.No. C12-8451 C12-8453/8454 C12-8456/8457 C12-8463/8464 C12-8466/8467 PARTS No. CLASS QTY DESCRIPTION...
  • Page 203 P A R T S L I S T Pg. 3 REF.No. C12-8451 C12-8453/8454 C12-8456/8457 C12-8463/8464 C12-8466/8467 PARTS No. CLASS QTY DESCRIPTION...
  • Page 205 P A R T S L I S T Pg. 4 REF.No. C12-8451 C12-8453/8454 C12-8456/8457 C12-8463/8464 C12-8466/8467 PARTS No. CLASS QTY DESCRIPTION...
  • Page 207 P A R T S L I S T Pg. 5 REF.No. C12-8451 C12-8453/8454 C12-8456/8457 C12-8463/8464 C12-8466/8467 PARTS No. CLASS QTY DESCRIPTION...
  • Page 209 P A R T S L I S T Pg. 6 REF.No. C12-8451 C12-8453/8454 C12-8456/8457 C12-8463/8464 C12-8466/8467 PARTS No. CLASS QTY DESCRIPTION...
  • Page 211 P A R T S L I S T Pg. 7 REF.No. C12-8451 C12-8453/8454 C12-8456/8457 C12-8463/8464 C12-8466/8467 PARTS No. CLASS QTY DESCRIPTION...
  • Page 213 P A R T S L I S T Pg. 8 REF.No. C12-8451 C12-8453/8454 C12-8456/8457 C12-8463/8464 C12-8466/8467 PARTS No. CLASS QTY DESCRIPTION...
  • Page 215 P A R T S L I S T Pg. 9 REF.No. C12-8451 C12-8453/8454 C12-8456/8457 C12-8463/8464 C12-8466/8467 PARTS No. CLASS QTY DESCRIPTION...
  • Page 217 P A R T S L I S T Pg.10 REF.No. C12-8451 C12-8453/8454 C12-8456/8457 C12-8463/8464 C12-8466/8467 PARTS No. CLASS QTY DESCRIPTION...
  • Page 219 P A R T S L I S T Pg.11 REF.No. C12-8451 C12-8454 C12-8457 C12-8464 C12-8467 PARTS No. CLASS QTY DESCRIPTION...
  • Page 221 P A R T S L I S T Pg.12 REF.No. C12-8453 C12-8456 C12-8463 C12-8466 PARTS No. CLASS QTY DESCRIPTION...
  • Page 223 P A R T S L I S T Pg.13 REF.No. C12-8451 C12-8453/8454 C12-8456/8457 C12-8463/8464 C12-8466/8467 PARTS No. CLASS QTY DESCRIPTION...
  • Page 225 P A R T S L I S T Pg.14 REF.No. C12-8451 C12-8453/8454 C12-8456/8457 C12-8463/8464 C12-8466/8467 PARTS No. CLASS QTY DESCRIPTION...
  • Page 227 P A R T S L I S T Pg.15 REF.No. C12-8451 C12-8453/8454 C12-8456/8457 C12-8463/8464 C12-8466/8467 PARTS No. CLASS QTY DESCRIPTION...
  • Page 229 P A R T S L I S T Pg.16 REF.No. C12-8451 C12-8453/8454 C12-8456/8457 C12-8463/8464 C12-8466/8467 PARTS No. CLASS QTY DESCRIPTION...
  • Page 231 P A R T S L I S T Pg.17 SEMI HARD CASE EH14-L REF.No. C46-2121 WIDESTRAP EW-100BK C56-1712 PARTS No. CLASS QTY DESCRIPTION BATTERY PACK BP-300 REF.No. C50-8021 PARTS No. CLASS QTY DESCRIPTION...
  • Page 232 Pg.18 E L E C T R I C P A R T S L I S T REF.No. C12-8451 C12-8453/8454 C12-8456/8457 C12-8463/8464 C12-8466/8467 NEW SYMBOL PARTS No. DESCRIPTION REMARK PAGE...
  • Page 233 I N D E X O F P A R T S L I S T Pg.19 REF.No. C12-8451 C12-8453/8454 C12-8456/8457 C12-8463/8464 C12-8466/8467 PARTS No. PAGE PARTS No. PAGE...
  • Page 234 I N D E X O F P A R T S L I S T Pg.20 REF.No. C12-8451 C12-8453/8454 C12-8456/8457 C12-8463/8464 C12-8466/8467 PARTS No. PAGE PARTS No. PAGE...
  • Page 235 I N D E X O F P A R T S L I S T Pg.21 REF.No. C12-8451 C12-8453/8454 C12-8456/8457 C12-8463/8464 C12-8466/8467 PARTS No. PAGE PARTS No. PAGE...
  • Page 236 I N D E X O F P A R T S L I S T Pg.22 REF.No. C12-8451 C12-8453/8454 C12-8456/8457 C12-8463/8464 C12-8466/8467 PARTS No. PAGE PARTS No. PAGE...
  • Page 237: Part 6. Electrical Diagrams

    Part 6 Electrical Diagrams...
  • Page 238 READ MOSI AFIC VDD2 0.1u RLOUT VDD2 EMI1 CMPU1 CMPU3 CMPU5 PGND 3.3u/10V 0.1u 0.1u IMX1 PGND AGND AGND VBAT VDD3 VRES EMI2 CMPU2 CMPU4 RVRH CVRH2 RFLED4 FLED 3.3F/6.3V 0.1u 3.3F/4V TRPR RPR2 01 Nov., 2000 CANON INC., 2000...
  • Page 239 11 Y11-3911 RLS FPC 4 Y11-3901 12 Y11-3912 4 TRIG-C(White) 5 Y11-3902 13 Y11-3913 7 PGND(Pink) 3 XE-P(Red) 6 Y11-3903 14 Y11-3914 2 XE-M(Black) 7 Y11-3904 15 Y11-4402 8 Y11-3906 16 Y11-4403 11 TRIG-G(Blue) 01 Nov., 2000 CANON INC., 2000...
  • Page 240 CN_DSP CN_DX CMPU3 CVDD CN_TTL RBC2 RDX1 CN_TOP RDX2 CN_AF RPTIN DXON (Only Eye Type) CYL2 RLREQ CN_MD CFLED2 TRBC (Only Eye Type) CN_NAC CMPU6 EMI1 RMIF RBC1 RTGND EMI2 TRMIF SPLIC RVRH CVRH2 01 Nov., 2000 CANON INC., 2000...
  • Page 241 MOSI IRED2 /RES LREQ CSGE IRED0 IRED3 MREQ LRDY /EXR IRED7 LCLK DGND DGND DGND SPCR REYE PGND VBAT3 VB2ON AFYCLK YMOSI YSCLK CMSP2 SCLK DRIVE0 SCLK1 CMSP1 POPCTR IRED6 POCH2 SHBUSY IRED1 POCH1 01 Nov., 2000 CANON INC., 2000...
  • Page 242 RDA7 RDA5 RDA4 COMPIC OPAMP1 CFLED1 RDA6 RDA3 CDA1 RVSS RRESMPU RDA1 CDA2 OSCM RDA2 RFLED2 RSPL2 CMPU5 CAMP RSPL1 RFLED3 RYL5 (Only Eye Type) RFLED1 IREDDR (Only Eye Type) GATE IC TRFLED RFLED4 01 Nov., 2000 CANON INC., 2000...
  • Page 243 3.1.4. MAIN PCB-B REF. No. C12-8451/ 3/ 4/ 6/ 7 C12-8463/ 4/ 6/ 7 IRAD CSEF0 PRAD CSEF1 DATE CLK0 CLK1 MG32 MG31 READ CSAF1 CSAF0 CSAF2 TINTE RESM EFAD AFAD RES2 FLED 01 Nov., 2000 CANON INC., 2000...
  • Page 244 RRED RVB1 CPS5 CPS8 TRRED ZDMIF2 TRVB1 RVB2 CVB2 CPS6 CPS4 REGPS3 TRPS1 DPS4 DCDC2 TRPS2 FUSE DPS2 LPS1 ZDM1 CMD13 RAID CMD23 MD11 CMD12 CMD25 CMD15 MD21 ZDM2 CMD11 RMD1 CMD14 CMD24 RMD2 01 Nov., 2000 CANON INC., 2000...
  • Page 245 3.2.2. MD FPC-A REF. No. C12-8451/ 3/ 4/ 6/ 7 C12-8463/ 4/ 6/ 7 PRAD VBAT3 RED EYE VBAT MG31 PGND SPADE1ON SPADDCDCON PGND VBAT2 VDD3 VBAT FSRD1 BATT.+ RSFD1 PGND BATT.- PGND 01 Nov., 2000 CANON INC., 2000...
  • Page 246 3.2.3. MD FPC-B REF. No. C12-8451/ 3/ 4/ 6/ 7 C12-8463/ 4/ 6/ 7 CPS2 LAMP VBAT3 CPS7 LPS2 CPS1 CAID 01 Nov., 2000 CANON INC., 2000...
  • Page 247 REF. No. C12-8451/ 3/ 4/ 6/ 7 C12-8463/ 4/ 6/ 7 CSDI2 CSDI1 RVREF CVREF VREF CMDI1 TRREM CMDI2 RSDI CPUC2 RESIC1 CPUC1 RREMJG RPUC1 CLPU2 RREMJ2 CLPU1 OSCL1 RREMJ1 EMI4 DLCD COL2 RCNVSS COL1 CN_ILC 01 Nov., 2000 CANON INC., 2000...
  • Page 248 3.3.2. DSP FPC-A REF. No. C12-8451/ 3/ 4/ 6/ 7 C12-8463/ 4/ 6/ 7 DIAL1 DIAL0 DGND COMO /EXTREQ SEG2 RESET PDGND PGND PGND AELK FPSEL SEG36 SEG37 01 Nov., 2000 CANON INC., 2000...
  • Page 249 3.3.3. DSP FPC-B REF. No. C12-8451/ 3/ 4/ 6/ 7 C12-8463/ 4/ 6/ 7 LFLED OSCL2 01 Nov., 2000 CANON INC., 2000...
  • Page 250 3.4. RD FPC REF. No. C12-8451/ 3/ 4/ 6/ 7 C12-8463/ 4/ 6/ 7 AFMD1 AFMD2 NAC2 NAC1 01 Nov., 2000 CANON INC., 2000...
  • Page 251 3.5.1. FLASH PCB-A REF. No. C12-8451/ 3/ 4/ 6/ 7 C12-8463/ 4/ 6/ 7 RS10 PGND XE-M XE-P VBAT PGND PK TRIG-G BU TRIG-C TR1S IGBTDR RS11 SENSE SPCR 01 Nov., 2000 CANON INC., 2000...
  • Page 252 3.5.2. FLASH PCB-B REF. No. C12-8451/ 3/ 4/ 6/ 7 C12-8463/ 4/ 6/ 7 CSM1 IGBT TR2S 01 Nov., 2000 CANON INC., 2000...
  • Page 253 REF. No. C12-8451/ 3/ 4/ 6/ 7 C12-8463/ 4/ 6/ 7 DGND DGND POPEND STSP PGND AVEF XGND BR EFID POPCTR DGND FCCC FEFID SHBUSY DGND POPEND SHBUSY STSP EFID SYNC AVEF POPCTR MODE0 MODE3 SELF MODE2 DRIV0 MODE1 01 Nov., 2000 CANON INC., 2000...
  • Page 254 3.7. POPCTR FPC REF. No. C12-8451/ 3/ 4/ 6/ 7 C12-8463/ 4/ 6/ 7 POPCTR DGND DGND POPCTR 01 Nov., 2000 CANON INC., 2000...
  • Page 255 3.8. POPEND FPC REF. No. C12-8451/ 3/ 4/ 6/ 7 C12-8463/ 4/ 6/ 7 DGND BL DGND POPEND DGND DGND POPEND POPEND 01 Nov., 2000 CANON INC., 2000...
  • Page 256 3.9.1. FINDER FPC-A (Eye) REF. No. C12-8451/ 3/ 4/ 6/ 7 CYVC1 CYE2 SPLED7 SPLED3 SPLED6 SPLED2 SPLED5 LED7 SPLED1 IRAD SPLED4 Y-BASIS SPLED0 LED3 CSYB YSCLK YMOSI LED2 YCLK YOUT LED6 LED5 LED1 LED0 LED4 01 Nov., 2000 CANON INC., 2000...
  • Page 257 3.9.2. FINDER FPC-A (Eye) REF. No. C12-8451/ 3/ 4/ 6/ 7 XE-M XE-P X-GND BR PGND TRG-G BU TRG-C 01 Nov., 2000 CANON INC., 2000...
  • Page 258 3.10. VIA FPC (Non-Eye) REF. No. C12-8463/ 4/ 6/ 7 XE-P PGND TRG-C XE-M BL TRG-G X-GND BR 01 Nov., 2000 CANON INC., 2000...
  • Page 259 CVCAF MOSI SCLK CVRES AFCLK CLK0 CVGR CLK1 CVDDAF READ DGND /TINTE MISO CVCCAF CSAF0 CSAF1 CSAF2 AFAD AGND CSAF1 CSAF2 CLK1 READ CLK0 /TINTE ACLK SCLK CSAF0 MISO AFAD DGND AGND MOSI AFMON 01 Nov., 2000 CANON INC., 2000...
  • Page 260 3.12. RLS FPC REF. No. C12-8451/ 3/ 4/ 6/ 7 C12-8463/ 4/ 6/ 7 DGND RELEASE SWITCH DGND REMIN DGND DGND DGND BPMON AELK BATSW REMU CREM BPMON AELK BATSW 01 Nov., 2000 CANON INC., 2000...
  • Page 261 3.13. TTL FPC REF. No. C12-8451/ 3/ 4/ 6/ 7 C12-8463/ 4/ 6/ 7 CEF3 CEF2 CVRH1 CEFVC EFIC CEF1 01 Nov., 2000 CANON INC., 2000...
  • Page 262 3.14. SI FPC REF. No. C12-8451/ 3/ 4/ 6/ 7 C12-8463/ 4/ 6/ 7 VBAT3 SPLED-RC VBAT3 SPLED-R SPLED-L SPLED-LC SPLED-C VBAT3 SPLED-C VBAT3 SPLED-RC SPLED-L SPLED-R SPLED-T VBAT3 VBAT3 SPLED-B SPLED-LC SPLED-B VBAT3 SPLED-T VBAT3 01 Nov., 2000 CANON INC., 2000...
  • Page 263 3.15. SH FPC REF. No. C12-8451/ 3/ 4/ 6/ 7 C12-8463/ 4/ 6/ 7 MG3-2 DGND MG3-1 PGND MG3-2 DGND PGND MG3-1 X XGND 01 Nov., 2000 CANON INC., 2000...
  • Page 264 C12-8463/ 4/ 6/ 7 VBAT3 VDD3 MOS1 PCBUSY CSGE VDD3 MISO VBAT3 MOS1 MISO SCLK SCLK PCBUSY CSGE PGND /RESET RESMPU PGND /EXREQ /RESET RESMPU /EXREQ PTIN DGND BACKP PTIN STPDN DGND BACKP DGND DGND SPDN SWITCH 01 Nov., 2000 CANON INC., 2000...
  • Page 265 3.17. BP FPC REF. No. C12-8451/ 3/ 4/ 6/ 7 C12-8463/ 4/ 6/ 7 DGND BACKP DGND BACKP DGND 01 Nov., 2000 CANON INC., 2000...
  • Page 266 REF. No. C12-8451/ 3/ 4/ 6/ 7 C12-8463/ 4/ 6/ 7 VBAT3 SEG21 SEG20 SEG19 SEG18 SEG17 SEG16 SEG15 SEG14 SEG13 SEG12 SEG11 SEG10 SEG9 SEG8 SEG7 SEG6 SEG5 SEG4 SEG3 SEG2 FLED SEG1 COM1 COM2 COM3 F-LED VBAT3 FLED 01 Nov., 2000 CANON INC., 2000...
  • Page 267 3.19. AE FPC REF. No. C12-8451/ 3/ 4/ 6/ 7 C12-8463/ 4/ 6/ 7 AEIC CACVCC CAEVC1 01 Nov., 2000 CANON INC., 2000...
  • Page 268 3.20. MIF FPC REF. No. C12-8451/ 3/ 4/ 6/ 7 C12-8463/ 4/ 6/ 7 DGND LCLK VDD2 LCLK VDD2 DGND 01 Nov., 2000 CANON INC., 2000...
  • Page 269 3.21. BKP FPC REF. No. C12-8451/ 3/ 4/ 6/ 7 C12-8463/ 4/ 6/ 7 DGND SDIAL2 SDIAL1 DGND DATE LMES FUNC 01 Nov., 2000 CANON INC., 2000...
  • Page 270 3.22. CRD FPC REF. No. C12-8451/ 3/ 4/ 6/ 7 C12-8463/ 4/ 6/ 7 FPSEL-L FPSEL-D FPSEL-U FPSEL-R 01 Nov., 2000 CANON INC., 2000...

Table of Contents