
Related Manuals for Tone NITRO


Summary of Contents for Tone NITRO
- Page 1 AUGUST 2021 VERSION 2.0 DIGITAL MANUAL I N STA L LAT ION AND US ER INST RU CT ION S...
- Page 2 TONE product, or damage to other objects in the vicinity. This document and all other collateral documents are subject to change at the sole discretion of TONE.
-
Page 3: Table Of Contents
Scope of delivery INSTALLATION Assembly of the PERLATOR-UNIT Assembly of the TAP-UNIT First time installation Connection of the SUCTION HOSE Switching on the device / Ready for operation Setting the NITRO effect / foaming NITRO or PURE-mode Setting the cooling... - Page 4 6. HYGIENE AND CLEANING Hygienic handling Cleaning schedule Equipment areas to be cleaned Approved cleaning agents Preparation / Switch off machine and remove TAP UNIT Cleaning of the TAP UNIT Cleaning the PERLATOR UNIT and the MIXER HOUSING Preparation of the cleaning liquid Dry cleaning 6.10 Empty liquid from device MAINTENANCE...
-
Page 5: Introduction / General
1. INTRODUCTION / GENERAL MANDATORY SIGN! 1.1 GENERAL PLEASE READ IT. This manual provides essential information for safe operation of your NITRO dispensing system / cold beverage processing system. Please therefore read the enclosed safety instructions carefully. INFORMATION SIGN! INFORMATION. -
Page 6: Mode Of Operation
Beverage preparation system forbidden. It is essential to note that Typ / Type: TONE NITRO Baujahr / Date of manufacture: 2021 the liquids must be filtered to a filtration Klimaklasse / Climate class: grade of at least 100 µm (100 microns) -
Page 7: Declarations
4. Food hygiene regulation – LMHV We declare under its sole responsibility 5. Beverage Dispensing Systems Ordinance that the product „NITRO 2.0“ to which - SchankV (until 30.06.2005) this declaration refers, complies with the 6. Technical rules for beverage dispensing... -
Page 8: Operating Overpressure
OPERATING OVERPRESSURE 2.6 DANGER FROM SHEET EDGES The device is supplied with a moulded safety plug and may only be connected to a grounded safety socket. If there is no There is a residual risk of corresponding socket outlet with earthing injury at sheet edges and contact, the connection may only be carried corners despite constructive... -
Page 9: Location Of Operation
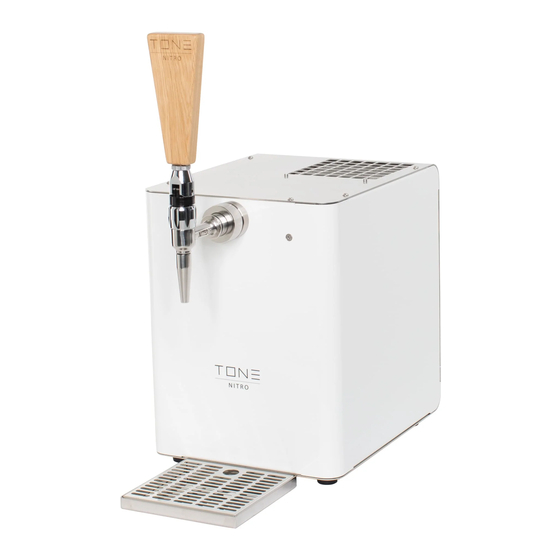
NITRO 2.0 NITRO-SWITCH ON/OFF NITRO CONTROL DIAL 4. DESCRIPTION OF THE DEVICE COOLING CONTROL DIAL DEVICE SWITCH ON /OFF 4.1 GRAPHIC ILLUSTRATION OF THE DEVICE These instructions are valid for all variantes of the NITRO 2.0 Series. NITRO 2.0... -
Page 10: Graphic Illustration "Suction Hose
4.3 GRAPHIC ILLUSTRATION “SUCTION HOSE” NC PLUG-IN CONNECTOR SCREW CONNECTION WITH WING NUT 4.4 GRAPHIC ILLUSTRATION “CLEANING SET” CLEANING CANISTER CONNECTOR UNION NUT CLEANING POWDER CLEANING BALL CLEANING BRUSH 4.5 GRAPHIC ILLUSTRATION “DRIP TRAY” DRIP TRAY “SMALL”... -
Page 11: Scope Of Delivery
(ALL) 4X O-RING PERLAOT UNIT (RED) 2X O-RAING PERLAOT UNIT (BLACK) TO-104014 HANDLE HANDLE SUCTION HOSE SUCTION HOSE FOR NITRO WITH NC/CMB CONNECTION, TO-105010 WITH NC/CMB - 2M LENGHT CONNECTION DRIP TRAY TO 106018 DRIP TRAY FOR NITRO DISPENSING SYSTEM, SMALL “NITRO”... -
Page 12: Installation
INSTALLATION 5. INSTALLATION (STEP BY STEP) Perlator - B „green“, Perlator - C „green“) must be cleaned after use. In addition, the inserts (103019 Perlator spare part „green“) should be replaced at regular intervals. Read 5.1 LOCATION OF OPERATION „MAINTENANCE“ for information on cleaning In the front piece Perlator - A „green“... -
Page 13: Connection Of The Suction Hose
CONNECTION OF THE SUCTION HOSE Attention: Keep ventilation exhaust air slots free and Attention: do not block them under Under circumstances circumstances! When should pliers be used for installing the device at a new tightening! location for the first time, it must be left to stand quietly for at least 30 min. -
Page 14: Switching On The Device/Ready For Operation
DEVICE/READY FOR OPERATION Press the NITRO SWITCH in the NITRO CONTROL PANEL so that it locks into place and lights up. The NITRO function is now activated. Now the NITRO settings can be made to adjust the foaming. More information under „5.6 Setting the foaming“. -
Page 15: Nitro Or Pure-Mode
CONTROL PANEL so that it no longer handle upwards again). engages and stops glowing. The NITRO 2. Turn rotary switch „NITRO“ at least half a function is now deactivated. turn (180°) to the left. 3. Place a glass underneath and pull the tap Attention: handle forward by 90°. -
Page 16: Hygiene And Cleaning
HYGIENE AND CLEANING for cold brew and tea. From 5-7 the cooling fittings must be cleaned. block can freeze!!! ▪Parts that come into contact with drink must cleaned daily (especially tap outlets). 6. HYGIENE AND CLEANING ▪Follow the instructions of the detergent 6.1 HYGIENIC HANDLING manufacturer. -
Page 17: Equipment Areas To Be Cleaned
EQUIPMENT AREAS TO BE CLEANED 6.3 EQUIPMENT AREAS TO BE CLEANED In general, the appliance must always be cleaned after use with freshly prepared drinks, i.e. with a chemical cleaner and subsequent water rinse. This prevents the appliance from being contaminated and the beverage lines from taking on a different taste. -
Page 18: Preparation / Switch Off Machine And Remove Tap Unit
MIXER HOUSING. Attention: We recommend keeping a cleaning towel underneath Press the DEVICE SWITCH in the NITRO to catch any liquid that may CONTROL PANEL so that it is no longer leak out. engaged and stops glowing. The device is now switched off. -
Page 19: Cleaning The Perlator Unit And The Mixer Housing
CLEANING OF THE PERLATOR Attention: 6.7 CLEANING OF THE Depending on the order, PERLATOR UNIT AND THE a different tap model is MIXER HOUSING included. illustration may differ. Unscrew the TAP HANDLE UNIT from the CHECK PIPE and flush with water. external thread of the MIXER HOUSING. -
Page 20: Preparation Of The Cleaning Liquid
PREPARATION OF THE CLEANING LIQUID handle and pull it apart slightly so that the volume is increased. Clean the MIXER HOUSING mechanically using the supplied CLEANING BRUSH and then rinse with CLEANING BOTTLE. Fill the CLEANING POWDER into the CLEANING CANISTER. Attention: We recommend keeping a Afterwards pour lukewarm water into the... -
Page 21: Dry Cleaning
Attention: Before serving to guests: Perform taste control! Press the NITRO SWITCH in the NITRO CONTROL PANEL so that it no longer engages and stops glowing. The NITRO function is now deactivated. 6.10 EMPTY LIQUID FROM... -
Page 22: Maintenance
The compressor inside is oil- and maintance-free. NAME DESCRIPTION Press the NITRO SWITCH in the NITRO TO-108012 O-RING The O-rings of the CONTROL PANEL so that it no longer SET “RED”, perlator unit should be engages and stops glowing. -
Page 23: Air Filter
Thermostat knob The device must be switched off for this Thermometer (optional) procedure. The radiator grille must have Nitro regulator knob cooled down! Device switch On /Off The fins of the condenser should be vacuumed every 3 months, as any dust that... -
Page 24: Flow Diagram
FLOW DIAGRAM 8.2 FLOW DIAGRAM Air filter Compressor Check valve Pressure switch Syrup pump Cooling (heat exchanger) Solenoid switch valve (2/2 way) Pressure regulator Check valve Throttle valve Check valve 8.3 CIRCUIT DIAGRAM 8.4 ELECTRICAL ASSEMBLY COMPRESSOR... -
Page 25: Troubleshooting
PERLATOR-UNIT and rinse individual rings with warm water. YES! NITRO setting too Turn for less NITRO to YES! SUCTION HOSE high? the left / counter- Replace SUCTION damaged? clockwise... - Page 26 „fight“ against the high direct sunlight? outside temperatures or cool down the too YES! warm drink first. Have NITRO setting too Turn for less NITRO to patience, the filling high? the left /counter- system just needs a clockwise. little more time.
-
Page 27: Eg Declaration Of Conformity
EG DECLARATION OF CONFORMITY Schultes Maschinenbau GmbH Am Beetacker 5 63856 Bessenbach declares that the following devices: NITRO 2.0 fulfill the following community harmonization legislation: • Richtlinie 2006/42 / EG - Maschinenrichtlinie • Richtlinie 2014/30 / EU - Elektromagnetische Verträglichkeit (EMV) •... - Page 28 TONE Kaffeemaschinen AG Kasernenstraße 5 3600 Thun Switzerland +41 52 620 06 06 contact@tone-swiss.com www.tone-swiss.com Follow us, tag us and share your experience with us on social media. @tone.swiss...
Need help?
Do you have a question about the NITRO and is the answer not in the manual?
Questions and answers