
Related Manuals for Insignia NS-AC8WU3


Summary of Contents for Insignia NS-AC8WU3
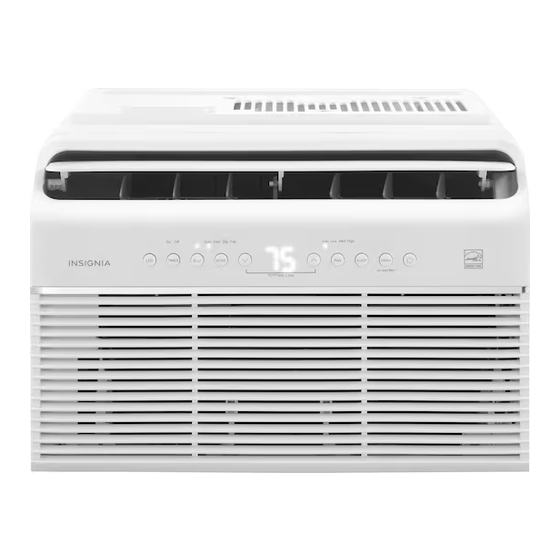
- Page 1 USER GUIDE 8,000 BTU Window Air Conditioner NS-AC8WU3 Before using your new product, please read these instructions to prevent any damage.
-
Page 2: Table Of Contents
Contents Introduction ..................3 IMPORTANT SAFEGUARDS . -
Page 3: Introduction
8,000 BTU Window Air Conditioner 8,000 BTU Window Air Conditioner Introduction Congratulations on your purchase of a high-quality Insignia product. Your NS-AC8WU3 represents the state of the art in air conditioner design and is designed for reliable and trouble-free performance. IMPORTANT SAFEGUARDS Read this manual carefully before installing or operating your new air conditioning unit. - Page 4 • Do not place obstacles around air-inlets or inside of air-outlet. It may cause failure of appliance or accident. • Use caution when unpacking and installing. Sharp edges could cause injury. • Do not put a pet or house plant where it will be exposed to direct air flow. This could injure the pet or plant. •...
- Page 5 8,000 BTU Window Air Conditioner • The power supply must be replaced if it fails reset when either the TEST button is pushed, or it cannot be reset. A new one can be obtained from the product manufacturer. If power supply cord is damaged, it cannot be repaired. It MUST be replaced by one obtained from the product manufacturer.
- Page 6 • Please follow the instruction carefully to handle, install, clear, and service your air conditioner to avoid any damage or hazard. Flammable Refrigerant R32 is used within air conditioner. When maintaining or disposing of the air conditioner, the refrigerant (R32 or R290) shall be recovered properly and shall not discharge to air directly. •...
- Page 7 8,000 BTU Window Air Conditioner 6 Information on servicing A Checks to the area Prior to beginning work on systems containing flammable refrigerants, safety checks are necessary to ensure that the risk of ignition is minimized. For repair to the refrigerating system, the following precautions shall be complied with prior to conducting work on the system.
- Page 8 • This shall include damage to cables, excessive number of connections, terminals not made to original specification, damage to seals, incorrect fitting of glands, etc. • Ensure that apparatus is mounted securely. • Ensure that seals or sealing materials have not degraded such that they no longer serve the purpose of preventing the ingress of flammable atmospheres.
- Page 9 8,000 BTU Window Air Conditioner 14 Decommissioning Before carrying out this procedure, it is essential that the technician is completely familiar with the equipment and all its detail. It is recommended good practice that all refrigerants are recovered safely. Prior to the task being carried out, an oil and refrigerant sample shall be taken in case analysis is required prior to re-use of reclaimed refrigerant.
-
Page 10: Features
Features • 8,000 BTU is ideal for rooms up to 350 sq. ft. (32.5 sq. m) of living space • Three unique fan speeds and a temperature range of 60° F-86° F(16° C-30° C) keep you cool and comfortable • Specially designed to fit vertical sliding windows •... -
Page 11: Air Conditioner
8,000 BTU Window Air Conditioner Side Arm Foam Block Window Sash Lock Window Sash Foam Window Sealing Foam Bracket Sealing Foam Additional Side Arm Foam * Indicates extra hardware provided in a separate bag. Note: Save the carton and these instructions for future reference. The carton is the best way to store your air conditioner during the winter or when not in use. -
Page 12: Control Panel
Control panel Item Description Display Shows the set temperature in °F or °C (to switch, press and hold the (up) and (down) buttons at the same time for three seconds) and the Auto-timer settings. In Fan mode, it shows the room temperature. If the room temperature is too high or low, it displays “HI" or "LO". Error codes: If an error code appears on the display, wait for about 10 minutes and the problem may resolve itself. -
Page 13: Remote Control
8,000 BTU Window Air Conditioner Item Description FAN button and Press to change the fan speed. The LEDs indicate the speed selected. Fan speed is adjusted in indicator LEDs four steps - Auto > Low > Med > High. Each time the button is pressed, the next speed is selected. -
Page 14: Remote Control Display Screen
ITEM DESCRIPTION SLEEP button Press to turn on sleep mode. FAN speed indicator Indicates the current fan mode. FAN SPEED button Press to cycle through the available fan speeds, including HIGH>MED>LOW. TIMER ON button Press to turn the timer on. If your air conditioner is on, sets the amount of time your air conditioner runs before it turns off. -
Page 15: Using The Remote Control
8,000 BTU Window Air Conditioner ITEM DESCRIPTION SET TEMP indicator Lights when the display shows the set temperature. (temperature/time) Displays the room temperature or set temperature. indicator In Timer mode, displays the time. Remote control on Lights when the remote control is on. indicator Using the remote control Notes:... -
Page 16: Before You Mount Your Air Conditioner
Before you mount your air conditioner BEFORE YOU BEGIN • Read these instructions completely and carefully. • IMPORTANT: Save these instructions for local inspector’s use. • IMPORTANT: Observe all governing codes and ordinances. • Note to Consumer: Keep these instructions for future reference. •... -
Page 17: Installing Your Air Conditioner
8,000 BTU Window Air Conditioner Dealing with storm windows If a storm window blocks your air conditioner, remove it before installing your air conditioner. If the storm window cannot be removed: • Make sure that the storm window’s drain holes or slots are not caulked or painted shut. Accumulated rain water or condensation must be able to drain out. -
Page 18: Step 2: Installing The Support Bracket
6 Cut bracket sealing foam strips to length and apply to the bottom of the bracket. Bottom view Apply bracket Apply bracket Apply bracket sealing foam sealing foam sealing foam Step 2: Installing the support bracket CAUTION: Maintain control of the bracket until the installation is complete. 1 Open the window where your air conditioner is being installed. - Page 19 8,000 BTU Window Air Conditioner 3 Lower the bracket until it rests on the windowsill. Wooden window Outside Inside Vinyl window Inside Outside 4 For wooden windows with a flat sill, secure the bracket to the windowsill by drilling 1/8 in. pilot holes and securing the bracket to the window with the 1/2”...
- Page 20 5 Move the angled support arms toward the exterior wall until the feet touch the wall. Place a level on the bracket and adjust the support arms so that it is level or tilted 1/4 bubble downward and towards the outside. 1/4 bubble on the level Angled...
-
Page 21: Step 3: Installing Your Air Conditioner On The Support Bracket
8,000 BTU Window Air Conditioner 9 After making any final adjustments, insert the two cotter pins into the main support pin on both support brackets. 10 If necessary, cover the holes on the front of the bracket with bracket sealing foam. Bracket sealing foam Bracket sealing foam Step 3: Installing your air conditioner on the support bracket... - Page 22 2 Set your air conditioner on top of the support bracket, making sure that the grooves on the bottom of your air conditioner align with the main supports. Using a level, check for proper tilt towards the outside. 3 Pull the window down into the slot on top of your air conditioner to help align it correctly. Keep the window partially inserted into the slot to help support your air conditioner during installation.
-
Page 23: Step 4: Installing The Sealing Foam And Anti-Tip Brackets
8,000 BTU Window Air Conditioner 5 Using 1/4 in. and 1/2 in. type B screws, install the open window brackets with an “L” shaped screwdriver, if needed. WARNING: Failure to install the open window brackets could cause injury or property damage. 1/2 in. - Page 24 2 Apply window sealing foam to the side arm foam block as shown. Note that the window sealing foam attaches to the side next to your air conditioner. Wooden window with flat sill Air conditioner Side arm foam block Additional side arm foam Window sealing foam Vinyl window with lipped sill...
- Page 25 8,000 BTU Window Air Conditioner 6 Extend the anti-tip brackets (one on each side of your air conditioner) into the window tracks (the vertical track in which your window slides up and down) until they stop. Extended anti-tip bracket in the window track The side arm foam block has been remove for clarity.
- Page 26 12 Cut strips of window sash foam and insert them in the space between the upper and lower sashes. 13 As a final check, review the installation and check for any gaps or openings. Seal any gaps with additional sealing foam (provided), to make sure that there are no leaks.
-
Page 27: Using Your Air Conditioner
8,000 BTU Window Air Conditioner Using your air conditioner Notes: • If your air conditioner turns off unexpectedly due to a power outage, it will automatically restart with the previous settings when the power resumes. • The cooling circuit has an automatic three minute delay if your air conditioner is turned off and on quickly. This prevents overheating of the compressor and possibly tripping the circuit breaker. -
Page 28: Using The Remote As A Thermostat (I Sense)
• Using the control panel, the setting is automatically saved after five seconds. • Point the remote control at your air conditioner unit and the setting is saved after one second. Note: To cancel the timer program, set the timer to 0:0 hours on the control panel. Your air conditioner turns off. Timer Off Set the timer to automatically turn off your air conditioner after a set time. -
Page 29: Using Sleep Mode
8,000 BTU Window Air Conditioner Using sleep mode During Sleep mode, the temperature will increase by 2° F (1–2° C) 30 minutes after the mode is selected, then increase by another 2° F (1–2° C) after an additional 30 minutes. This new temperature is maintained for 6–7 hours, then Sleep mode turns off. -
Page 30: Cleaning And Maintaining Your Air Conditioner
Cleaning and maintaining your air conditioner CAUTION: Unplug your air conditioner before cleaning to prevent shock or fire hazards. Cleaning the cabinet • Dust the cabinet and front with an oil-free cloth, or wash with a cloth dampened in a solution of warm water and mild liquid dish-washing detergent. -
Page 31: Troubleshooting
8,000 BTU Window Air Conditioner Troubleshooting PROBLEM POSSIBLE CAUSE POSSIBLE SOLUTION My air conditioner does The wall plug is Push the plug firmly into a wall outlet. not start. disconnected. The house fuse is blown or Replace the fuse with a time-delay-type fuse or reset the circuit circuit breaker is tripped. -
Page 32: Specifications
PROBLEM POSSIBLE CAUSE POSSIBLE SOLUTION The room is too cold. The set temperature is too Raise the set temperature. low. There is a chemical smell New unit. This is normal during initial use and will go away after some when it’s first started. time. -
Page 33: One-Year Limited Warranty
During the Warranty Period, if the original manufacture of the material or workmanship of the Product is determined to be defective by an authorized Insignia repair center or store personnel, Insignia will (at its sole option): (1) repair the Product with new or rebuilt parts; or (2) replace the Product at no charge with new or rebuilt comparable products or parts. - Page 34 For product inquiries, please contact us with the information below: 1-877-467-4289 www.insigniaproducts.com INSIGNIA is a trademark of Best Buy and its affiliated companies. Distributed by Best Buy Purchasing, LLC 7601 Penn Ave South, Richfield, MN 55423 U.S.A. ©2022 Best Buy. All rights reserved.
Need help?
Do you have a question about the NS-AC8WU3 and is the answer not in the manual?
Questions and answers