Advertisement

USER GUIDE
Portable
Air Conditioner
NS-AC10PWH9 / NS-AC12PWH9 / NS-AC10PWH9-C / NS-AC12PWH9-C
Before using your new product, please read these instructions to prevent any damage.

Advertisement

Table of Contents
loading
Need help?

Need help?

Do you have a question about the NS-AC10PWH9 and is the answer not in the manual?

Questions and answers

Lusso
May 1, 2025

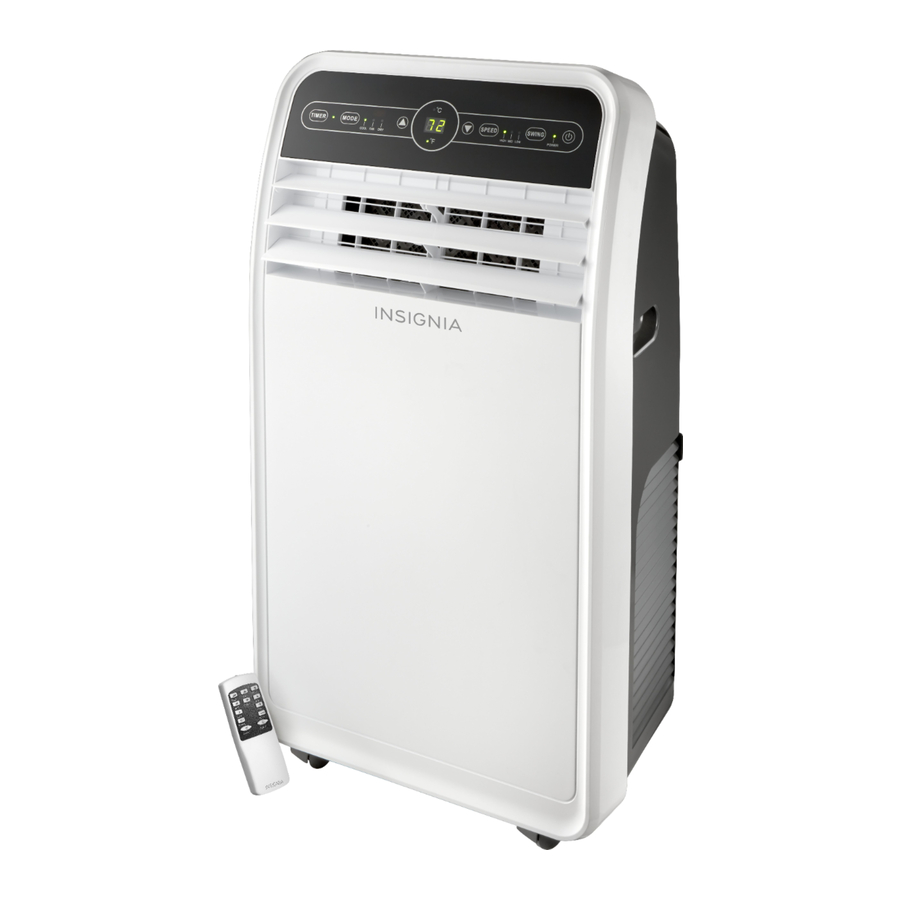
where is the water discharge

1 comments:
Mr. Anderson
May 16, 2025

The water discharge on the Insignia NS-AC10PWH9 is located at the drain outlet on the back of the unit, which is accessed by removing the rubber plug.

This answer is automatically generated

Sue
July 8, 2025

What does flashing FL mean? My AC is not working

Phil Burns
June 25, 2025

what is the size of the hole to attaché the plastic hose to drain out from ac ?

Marvin
June 22, 2025

I have water dripping out of the back of it

Mike lerner
June 12, 2025

FL shows will not start

Subscribe to Our Youtube Channel

Summary of Contents for Insignia NS-AC10PWH9

  • Page 1 USER GUIDE Portable Air Conditioner NS-AC10PWH9 / NS-AC12PWH9 / NS-AC10PWH9-C / NS-AC12PWH9-C Before using your new product, please read these instructions to prevent any damage.
  • Page 2: Table Of Contents

    NS-AC10PWH9/NS-AC10PWH9-C ........
  • Page 3: Introduction

    Portable Air Conditioner Introduction Congratulations on your purchase of a high-quality Insignia product. Your NS-AC10PWH9 / NS-AC12PWH9 / NS-AC10PWH9-C / NS-AC12PWH9-C represents state of the art design in portable air conditioning, designed for reliable and trouble-free performance. IMPORTANT SAFETY INSTRUCTIONS...
  • Page 4 The circuit breaker should be tested periodically by pressing the TEST button then the RESET button. If the TEST button does not cause the circuit breaker to trip, or if the RESET button will not stay engaged, unplug the air conditioner immediately and contact an Insignia technician. www.insigniaproducts.com...
  • Page 5: Features

    NS-AC10PWH9 / NS-AC12PWH9 / NS-AC10PWH9-C / NS-AC12PWH9-C Preferred grounding method Make sure that a proper ground exists before use. Temporary grounding Due to potential safety hazards, we strongly discourage the use of an adapter plug. If an adapter plug must be used for a temporary connection, use only a UL-listed adapter with a minimum capacity of 120V~60Hz, 13A, and 1560W.
  • Page 6: Package Contents

    Portable Air Conditioner Package contents • Portable air conditioner • Exhaust hose with adapter • Window sealing plate assembly (window sealing plates [2], security bracket, and four screws [two type A, one type B, and one type C]) • Remote control (with two AAA batteries) •...
  • Page 7 NS-AC10PWH9 / NS-AC12PWH9 / NS-AC10PWH9-C / NS-AC12PWH9-C Back ITEM DESCRIPTION Drain outlet Use to drain the condensation from the air conditioner. Remove the filter from this case to clean it at least every two weeks. Filter and filter case “Cleaning the air filter”...
  • Page 8 Portable Air Conditioner Accessories ITEM DESCRIPTION Exhaust hose and Connects the air conditioner to the window installation kit to vent adapter exhaust air outside. Lets you route the air conditioner exhaust through a vertical or Window sealing plate horizontal window opening and seal your window at the correct assembly height/width.
  • Page 9: Remote Control

    NS-AC10PWH9 / NS-AC12PWH9 / NS-AC10PWH9-C / NS-AC12PWH9-C Remote control ITEM DESCRIPTION Speed settings Press to raise or lower the fan speed. Swing button Press to turn oscillation on or off. Timer Press to set the air conditioner to turn on or off automatically.
  • Page 10: Setting Up Your Portable Air Conditioner

    Portable Air Conditioner Setting up your portable air conditioner Remove and store (optional) packing materials for reuse. Remove any shipping tape before using the air conditioner. Remove tape residue with liquid dish soap and a damp cloth. Do not use sharp tools, alcohol, thinners, or abrasive cleaners to remove adhesive, which could damage the finish.
  • Page 11 NS-AC10PWH9 / NS-AC12PWH9 / NS-AC10PWH9-C / NS-AC12PWH9-C 3 Install the window sealing plate in the window opening, adjusting the length to fit the window opening and securing it with screw A (provided). Note: • The window sealing kit works with casement, sliding, and vertical, double-hung windows.
  • Page 12 Portable Air Conditioner 5 (Optional) Secure the hose adapter to the vent panel with the type B screw (provided). Type B screw • For optimum performance, do not twist the venting hose. For better efficiency, shorten the hose by squeezing its sections together.
  • Page 13: Using Your Portable Air Conditioner

    NS-AC10PWH9 / NS-AC12PWH9 / NS-AC10PWH9-C / NS-AC12PWH9-C Using your portable air conditioner Inserting the batteries in the remote control 1 Press down on the arrow on the back of the remote control, then slide the battery cover from the battery compartment.
  • Page 14: Using The Air Conditioner

    Portable Air Conditioner Using the air conditioner You can control your air conditioner by using the control panel on the front of the unit, or by using the remote control. If using the remote control, always point it at the air conditioner. BUTTON DESCRIPTION Press to turn your air conditioner on or off: •...
  • Page 15: Cleaning And Maintaining Your Air Conditioner

    NS-AC10PWH9 / NS-AC12PWH9 / NS-AC10PWH9-C / NS-AC12PWH9-C Cleaning and maintaining your air conditioner Your air conditioner is designed for year-round use with only minimal cleaning and maintenance. For maximum efficiency, we recommend that you have the cooling coils inspected and cleaned annually by a professional technician.
  • Page 16: Emptying The Water Collection Tank

    Portable Air Conditioner Emptying the water collection tank When the internal water collection tank is full, “FL” appears on the LED display and your air conditioner turns off until the tank is emptied. Notes: • When operating or draining water from your air conditioner, always protect carpeting and floors from possible water spillage. •...
  • Page 17: Storing Your Air Conditioner

    NS-AC10PWH9 / NS-AC12PWH9 / NS-AC10PWH9-C / NS-AC12PWH9-C 3 Remove the filter case. 4 Install a 0.47 in. (12 mm) inside diameter drain hose (not provided) on the back of the unit where you removed the water plug. Use a hose clamp (not provided) to make sure that there are no leaks.
  • Page 18: Troubleshooting

    Set freezing up over. the mode control to High Fan or High Cool. Contact Insignia Customer Care for the air The area to be cooled is too conditioner capacity required to cool the desired The air conditioner runs large for the air conditioner.
  • Page 19: Intelligent Error Indication

    NS-AC10PWH9 / NS-AC12PWH9 / NS-AC10PWH9-C / NS-AC12PWH9-C Intelligent error indication If an E1, E2, or E4 error appears on the LED display, turn off your air conditioner and call a professional maintenance technician or service center. ERROR CODE DESCRIPTION Coil temperature sensor error.
  • Page 20: One-Year Limited Warranty

    During the Warranty Period, if the original manufacture of the material or workmanship of the Product is determined to be defective by an authorized Insignia repair center or store personnel, Insignia will (at its sole option): (1) repair the Product with new or rebuilt parts; or (2) replace the Product at no charge with new or rebuilt comparable products or parts.
  • Page 21 For product inquiries, please contact us with the information below: 1-877-467-4289 www.insigniaproducts.com INSIGNIA is a trademark of Best Buy and its affiliated companies. Distributed by Best Buy Purchasing, LLC 7601 Penn Ave South, Richfield, MN 55423 U.S.A. ©2018 Best Buy. All rights reserved.

This manual is also suitable for:

Ns-ac12pwh9Ns-ac10pwh9-cNs-ac12pwh9-c

Table of Contents

Save PDF