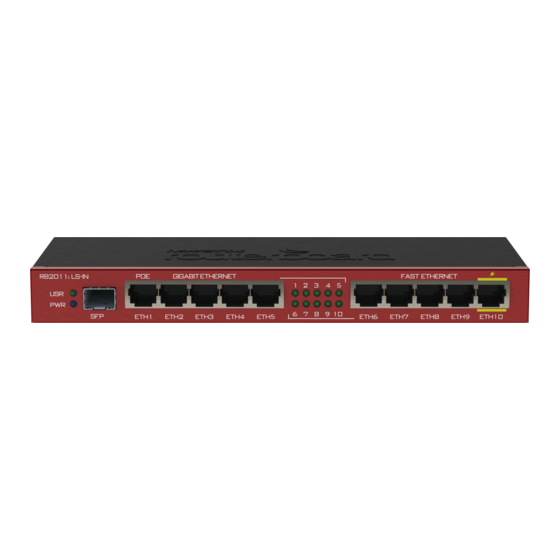
MikroTik RB2011iLS-IN Manual
Hide thumbs
Also See for RB2011iLS-IN:
- Quick start manual (53 pages) ,
- Quick manual (21 pages) ,
- Manual (5 pages)
Table of Contents
Advertisement
Quick Links
RB2011iLS-IN
RB2011iLS-IN
Safety Warnings
Before you work on any equipment, be aware of the hazards involved with electrical circuitry, and be familiar with standard practices for preventing
accidents.
Ultimate disposal of this product should be handled according to all national laws and regulations.
The Installation of the equipment must comply with local and national electrical codes.
This unit is intended to be installed in the rackmount. Please read the mounting instructions carefully before beginning installation. Failure to use the
correct hardware or to follow the correct procedures could result in a hazardous situation to people and damage to the system.
This product is intended to be installed indoors. Keep this product away from water, fire, humidity or hot environments.
Use only the power supply and accessories approved by the manufacturer, and which can be found in the original packaging of this product.
Read the installation instructions before connecting the system to the power source.
We cannot guarantee that no accidents or damage will occur due to the improper use of the device. Please use this product with care and operate at your
own risk!
In the case of device failure, please disconnect it from power. The fastest way to do so is by unplugging the power plug from the power outlet.
It is the customer's responsibility to follow local country regulations, including operation within legal frequency channels, output power, cabling
requirements, and Dynamic Frequency Selection (DFS) requirements. All Mikrotik devices must be professionally installed.
First use
1.
Choose your powering solution, please see the
2.
Connect your Internet cable to port 1 (labeled "Internet"), and local network computers to other ports.
3.
Connect your direct input power jack if not using POE, to start up the device.
4.
If using POE please see section
5.
The device will boot up and after short beep, the network will be available for connecting.
6.
Set your computer IP configuration to automatic (DHCP).
7.
Once connected to the network, open
will be logged in automatically.
8.
We recommend clicking the "Check for updates" button and updating your RouterOS software to the latest version to ensure the best
performance and stability.
9.
Set up your password in the screen that loads.
Powering
The device accepts powering from either the power jack, or from the LAN1 Ethernet port:
Direct-input power jack (5.5 mm outside and 2 mm inside diameter, female, pin positive plug) accepts 8-30 V DC (overvoltage protection starts at
30 V).
Eth1 port accepts 8-30 V DC input (at the board; higher voltage needed to compensate for power loss on long cables) from non-standard
(passive) Power over Ethernet injectors. The board does not work with IEEE802.3af compliant 48 V power injectors.
Maximumm power consumption 6 W, with attachments 18 W.
Connecting to a POE Adapter:
1.
Connect the Ethernet cable from the device to the POE port of the POE adapter.
2.
Connect an Ethernet cable from your LAN to the LAN port of the POE adapter, please mind arrows for data and power flow.
3.
Connect the power cord to the adapter, and then plug the power cord into a power outlet.
Power output
Powering
section for possibilities.
POE Adapter
on how to connect.
https://192.168.88.1
in your web browser to start configuration, since there is no password by default, you
Advertisement
Table of Contents

Subscribe to Our Youtube Channel
Summary of Contents for MikroTik RB2011iLS-IN
- Page 1 In the case of device failure, please disconnect it from power. The fastest way to do so is by unplugging the power plug from the power outlet. It is the customer's responsibility to follow local country regulations, including operation within legal frequency channels, output power, cabling requirements, and Dynamic Frequency Selection (DFS) requirements. All Mikrotik devices must be professionally installed. First use Choose your powering solution, please see the ...
- Page 2 Five 10/100 (Fast) Ethernet ports (Auto MDI/X) Ether10 supports 500 mA output power, ~2 V below input voltage. Power out support auto-detect to protect non PoE devices. 1G SFP port. Please visit wiki pages for MikroTik SFP module compatibility table: https://wiki.mikrotik.com/wiki/MikroTik_SFP_module_compatibility_table Buttons and Jumpers The RouterBOOT reset button has the following functions.
- Page 3 Operating System Support The device supports RouterOS software version 6. The specific factory-installed version number is indicated in the RouterOS menu /system resource. Other operating systems have not been tested. To avoid pollution of the environment, please separate the device from household waste and dispose of it in a safe manner, such as in designated waste disposal sites.
- Page 4 . Сделано в Китае, Латвии или Литве. Cм. на упаковке. Для получения подробных сведений о гарантийном обслуживании обратитесь к продавцу. Информация об импортерах продукции MikroTik в Российскую Федерацию: https://mikrotik.com/buy/europe/russia Продукты MikroTik, которые поставляются в Евразийский таможенный союз, оцениваются с учетом соответствующих требований и помечены...


Need help?
Do you have a question about the RB2011iLS-IN and is the answer not in the manual?
Questions and answers