Table of Contents
Advertisement
Quick Links
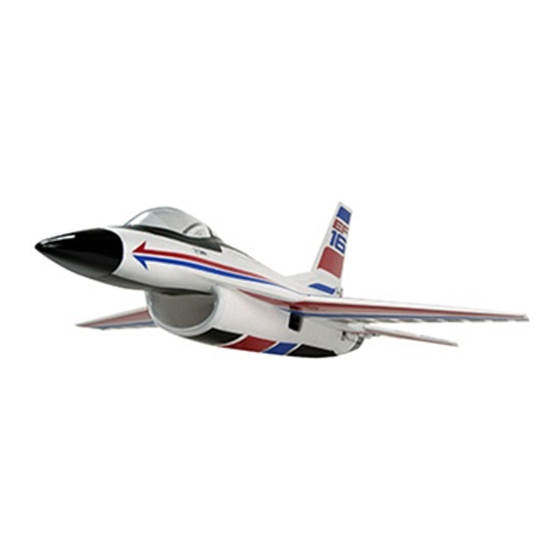
Fly your next sortie with the EF-16 from Phase 3 Models. This amazing EDF aircraft is fast, fun and shockingly easy to fly. Its
comparatively light wing loading, efficient wing and smooth lines make it fast on those full-throttle runs, yet is still a pussycat at low
throttle and glide settings. A modern jet model is usually not so easy to fly! The included EF (Electric Fan) system is impressive
and will fly your new jet at exciting speeds! We know you'll enjoy flying your next sortie and combating bogies at your local flying field
with the Phase 3 Models EF-16.
CAUTION The Phase 3 Models EF-16 EDF is designed for intermediate pilots. It is not intended for beginners. It is not a trainer!
Includes High-Performance
Brushless Motor, Ducted Fan Assembly
and Brushless Electronic Speed Controller!
Phase 3 Models
P.O. Box No. 402
Texaco Road PO
New Territories, Hong Kong
© 2007, Phase 3 Models - All Rights Reserved
Version 1 March 2007
IMPORTANT Before beginning assembly, please read and understand the warnings listed on the next page. Failure to read and
understand these warnings could lead to bodily harm and/or injury. The Phase 3 Models EF-16 EDF is not intended for those under
14 years of age, unless closely supervised by an adult.
Made in Taiwan
ASSEMBLY INSTRUCTIONS
l
l
l
l
l
l
l
l
l
l
l
l
l
l
l
l
l
l
SPeciFicATiONS ANd FeATuReS
Wing Span:
660mm
2
Wing Area:
12.58dm
Length:
914mm
Weight RTF:
570g
2
Wing Loading:
45g/dm
Functions:
Stabilators (tailerons) with Elevon Mixing and Throttle
Radio Required:
3-Channel or More w/2 Micro Servos, Micro Rx & Elevon Mixing
Battery Required: 3 Cell 2100mAh Li-Po
Moulded foam airframe
Stabilator mixed controls (only requires 2 servos and elevon mixing)
No ailerons to impede smooth airflow over the wing
Exceptionally stable flyer, especially for a modern jet design
High-efficiency ducted fan included
High-RPM brushless motor included
30 amp brushless electronic speed controller included
Extensive decal sheet included
High-quality hardware
Fast and easy assembly - over 50 high-resolution colour photos to guide you
Page
(26 Inches)
(195 Square Inches)
(36 Inches)
(20 Ounces)
(15 Ounces/Square Foot)
Kit Product Number PH015
Advertisement
Table of Contents

Subscribe to Our Youtube Channel
Related Manuals for Phase 3 EF-16


Summary of Contents for Phase 3 EF-16
- Page 1 Fly your next sortie with the EF-16 from Phase 3 Models. This amazing EDF aircraft is fast, fun and shockingly easy to fly. Its comparatively light wing loading, efficient wing and smooth lines make it fast on those full-throttle runs, yet is still a pussycat at low throttle and glide settings.
-
Page 2: General Warnings
FOR YOuR SAFeTY - PLeASe ReAd ANd uNdeRSTANd THeSe WARNiNGS GeNeRAL WARNiNGS Always complete a successful range check of the radio control equipment prior to each new day of flying, or prior to the first Do not fly this aircraft if another aircraft is on the same flight of a new or repaired aircraft. -
Page 3: Kit Contents
Thank you for purchasing the Phase 3 Models eF-16 edF. Before completing the assembly of your new model, please carefully read through this assembly manual in its entirety. Doing so will ensure success the first time around. As can be... -
Page 4: Tips From The Pros
TOOLS Needed FOR FiNAL ASSeMBLY This section lists the items needed to help assemble your new aircraft. Scissors Phillips Z-Bend Pliers Wire Cutters Pencil Head Screwdrivers Straight Edge Ruler Sanding Block with 220 Grit Sandpaper Drill with Modelling Knife Assorted Drill Bits Needle Nose Pliers *In addition to the tools shown, you will also need basic modeling supplies, such as 5 minute epoxy, paper towels, rubbing alcohol, masking tape, etc. - Page 5 ASSeMBLiNG THe eF-16 edF WARNING It is very important to avoid the use of solvents or Cyanoacrylate (C/A) glue, which can damage foam. If any of these chemicals comes into contact with the foam parts, the parts will be destroyed. Use only epoxy to assemble the parts.
- Page 6 o The weight of the Li-Po battery will determine the exact mounting location of the ducted fan assembly. If the Li-Po battery weighs 150 grams or 161~ Up to 151~ 170g 150g 160g less, the ducted fan assembly should be installed in alignment with the moulded mounting lip in the fuselage top.
- Page 7 STeP 3: iNSTALLiNG THe FuSeLAGe BOTTOM o Using 5 minute epoxy, glue the plastic intake support onto the front of the fuselage bottom, making sure to push the intake support firmly into place. IMPORTANT If necessary, trim the bottom edges of the intake support flush with the base of the fuselage bottom.
-
Page 8: Step 4: Installing The Wing Panels
STeP 4: iNSTALLiNG THe WiNG PANeLS IMPORTANT When installing the wing panels in the next two procedures, make sure to use plenty of 5 minute epoxy, and coat all of the gluing surfaces thoroughly to ensure a strong bond. o Glue one wing panel onto the fuselage, using a generous amount of 5 minute epoxy. -
Page 9: Step 6: Installing The Stabilators
o Carefully cut out and apply the decals to the right and left sides of the fin. o Carefully cut out and apply the decals to both the bottom of the fuselage and to the bottom of the wing panels. IMPORTANT Any wrinkles or creases in the decals applied to the fuselage bottom can be removed by making short cuts in the decal. - Page 10 o Slide the pivot rod of the right-side stabilator/taileron partially into the pivot tube in the fuselage. IMPORTANT Make sure that the top of the stabilator/taileron is towards the top of the fuselage. When installed, notice that it is angled down. This is normal and by design.
- Page 11 o Snap the ball-end onto the end of one stabilator/taileron control arm. o Connect the radio control system and Li-Po battery, then centre both servos using the Sub-Trim or Centre function on the transmitter. o Pivot the stabilator/taileron so that its control arm is aligned straight up and down when viewed from the side.
- Page 12 STeP 8: iNSTALLiNG THe veRTicAL FiN o Test-fit and glue the fin to the top of the fuselage, using a generous amount of 5 minute epoxy. IMPORTANT Before the epoxy cures, double-check that the vertical fin is aligned straight up and down when viewed from the front. STeP 9: FiNAL ASSeMBLY o Test-fit and glue the exhaust cone onto the back of the fuselage, using a thin layer of 5 minute epoxy.
- Page 13 o Secure the receiver aerial along the underside of the fuselage, next to the fuselage bottom. Use pieces of clear tape to hold the aerial securely in place. IMPORTANT The receiver aerial must be prevented from accidentally being sucked into the rotor. o Secure the receiver aerial along the entire length of the underside of the fuselage, using several pieces of clear tape.
- Page 14 160mm to 190mm (6-1/4" to 7-1/2") in front of the trailing edge of each wing panel, measured at the wing panel glue joints. o The EF-16 EDF must be correctly balanced before flying. The aircraft should sit level or slightly nose down when supporting it on a balancer or with your finger tips at the balance point.
-
Page 15: Fixing Minor Crash Damage
The EF-16 EDF is a high-performance jet that yields its best performance when flown smoothly and fast. The aircraft is perfect for high-speed low passes down the runway and large, open aerobatics. -
Page 16: Our Guarantee
In that Phase 3 Models has no control over the final assembly or material used for final assembly, no liability shall be assumed for any damage resulting from the use by the user of the final user-assembled product. By the act of using the final user-assembled product, the user accepts all resulting liability.
Need help?
Do you have a question about the EF-16 and is the answer not in the manual?
Questions and answers