Table of Contents
Advertisement
Available languages
Available languages
Quick Links
hatcocorp.com
Register Online!
(see page 2)
S'inscrire en ligne !
(voir page 20)
Plaques à induction doubles
IRNGCD and IRNGBD Series/Série,
Installation and Operating Manual
Manuel d'installation et d'utilisation
WARNING
Do not operate this equipment unless you
have read and understood the contents
of this manual! Failure to follow the
instructions contained in this manual
may result in serious injury or death.
This manual contains important safety
information concerning the maintenance,
use, and operation of this product. If
you're unable to understand the contents
of this manual, please bring it to the
attention of your supervisor. Keep this
manual in a safe location for future
reference.
English = p 2
P/N 07.04.935.00
Rapide Cuisine
Dual Induction Ranges
P Type/Type P
No opere este equipo al menos que haya
leído y comprendido el contenido de este
manual! Cualquier falla en el seguimiento
de las instrucciones contenidas en
este manual puede resultar en un serio
lesión o muerte. Este manual contiene
importante información sobre seguridad
concerniente al mantenimiento, uso y
operación de este producto. Si usted
no puede entender el contenido de
este manual por favor pregunte a su
supervisor. Almacenar este manual en
una localización segura para la referencia
futura.
ADVERTENCIA
®
AVERTISSEMENT
Ne pas utiliser cet équipement sans avoir
lu et compris le contenu de ce manuel ! Le
non-respect des instructions contenues
dans ce manuel peut entraîner de
graves blessures ou la mort. Ce manuel
contient des informations importantes
concernant l'entretien, l'utilisation et le
fonctionnement de ce produit. Si vous ne
comprenez pas le contenu de ce manuel,
veuillez le signaler à votre supérieur.
Conservez ce manuel dans un endroit
sûr pour pouvoir vous y référer plus tard.
Français = p 20
© 2022 Hatco Corporation
Advertisement
Chapters
Table of Contents

Subscribe to Our Youtube Channel
Related Manuals for Hatco Rapide Cuisine IRNGCD Series


Summary of Contents for Hatco Rapide Cuisine IRNGCD Series
- Page 1 Almacenar este manual en sûr pour pouvoir vous y référer plus tard. reference. una localización segura para la referencia Français = p 20 futura. English = p 2 P/N 07.04.935.00 © 2022 Hatco Corporation...
-
Page 2: Table Of Contents
This device complies with Part 18 of the FCC Rules. INTRODUCTION This manual provides the installation, safety, and operating Hatco Dual Induction Ranges offer a safe, quick, efficient, instructions for Hatco Dual Induction Ranges. Hatco and attractive way to prepare foods in commercial kitchens as recommends all installation, operating, and safety instructions well as display cooking locations (omelet bars, buffets, etc...). -
Page 3: Important Safety Information
• Do not attempt to repair or replace a damaged power Make sure all operators have been instructed on the safe cord. Cord must be replaced by an Authorized Hatco and proper use of the unit. Service Agent or a person with similar qualifications. -
Page 4: Model Designation
IMPORTANT SAFETY INFORMATION English NOTICE NOTICE Plug unit into a dedicated circuit. Do not use multiple Use non-abrasive cleaners and cloths only. Abrasive appliances on same circuit. cleaners and cloths could scratch finish of unit, marring its appearance and making it susceptible to soil accumulation. Never use aluminum foil on induction range. -
Page 5: Model Description
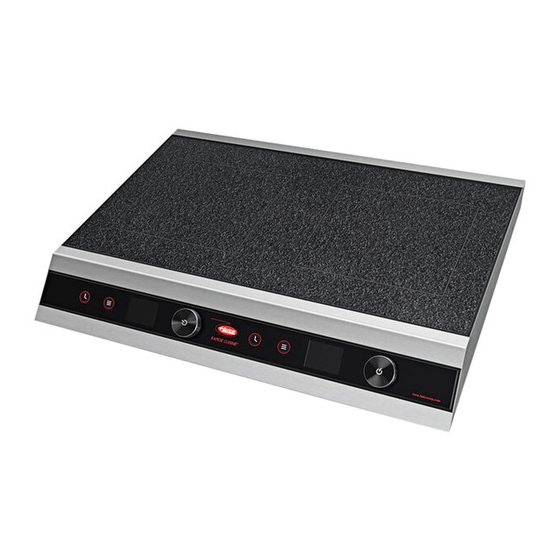
All Models IRNG-PC2F-xx Models IRNG-PC2S-xx models are front-to-back dual induction ranges. Hatco P Type Dual Induction Ranges are equipped with two The induction coils are designated as the front coil and the back induction coils underneath a single ceramic glass cooking coil. -
Page 6: Specifications
NOTE: The specification label is located on the bottom of the NEMA 6-50P unit. See label for serial number and verification of unit Plug Configurations electrical information. NOTE: Receptacle not supplied by Hatco. All units must be connected to a dedicated circuit. Electrical Rating Chart—Countertop Models Model Voltage... -
Page 7: Dimensions
SPECIFICATIONS English Dimensions—IRNG-PC2S-xx Models Footprint Footprint Cooking Surface Cooking Surface Model Width (A) Depth (B) Height (C) Width (D) Depth (E) Width (F) Depth (G) IRNG-PC2S-24-IA, IRNG-PC2S-36-IA, 24-13/16″ 19-1/16ʺ 4-13/16ʺ 23-3/8ʺ 14-3/16ʺ 24-1/2ʺ 13-3/4ʺ IRNG-PC2S-29, (630 mm) (484 mm) (122 mm) (593 mm) (361 mm) (622 mm) -
Page 8: Installation
SPECIFICATIONS English Dimensions—IRNG-PB2-xx Models Cooking Surface Cooking Surface Unit Under-Counter Under-Counter Model Width (A) Depth (B) Height (C) Height (D) Width (F) Depth (G) IRNG-PB2-24-IA, IRNG-PB2-36-IA, 13-3/4″ 27-1/2″ 6-3/16ʺ 4-9/16ʺ 12-5/8ʺ 26-3/4ʺ IRNG-PB2-29, (356 mm) (699 mm) (157 mm) (116 mm) (320 mm) (679 mm) IRNG-PB2-36... -
Page 9: Installing Built-In Models
INSTALLATION English Installing Built-In Models Ventilation Requirements Proper ventilation of the cabinet below a built-in unit is required Built-In models require installation into a countertop before to prevent over-heating the electronics in the unit. Proper operation. Two types of built-in installation are available, flush ventilation provides cool, intake air to the front of the unit and mount and trim ring. - Page 10 INSTALLATION English Flush Mount Installation 5. Carefully lower the unit into the opening, making sure the power cord and control cable do not get pinched. Flush mount installation requires a prepared, solid material countertop and provides a seamless transition between the Silicone countertop and the induction range.
-
Page 11: Installing The Control Panel
INSTALLATION English Installing the Control Panel 2. Cut and drill the appropriate holes in the vertical surface where the control enclosure will be installed. Refer to Use the following procedure to install the control panel. the “Installing the Control Panel” procedure for cutout dimensions. -
Page 12: Operation
OPERATION English General NOTE: T h e I n d u c t i o n R a n g e Use the following information and procedures to operate automatically detects if a pan both countertop and built-in P Type Dual Induction Ranges. is induction-ready. -
Page 13: Changing Cooking Control Method
General Setting Information Power Control—Standard now operating in Power Control. Hatco recommends adjusting the Power or Temperature See “Changing Cooking Control Method” for information settings up or down while cooking to find the best setting for on cooking in Temperature Control. -
Page 14: Using The Timer
Power/Temperature setting. of the food being cooked. 3. Adjust the Power/Temperature by turning the Control Knob. NOTE: Use only Hatco-supplied Remote Temperature Probes with Hatco induction units. • When the timer reaches zero, the timer flashes between “DONE” and “0:00:00”. The Power/Temperature setting To use a Remote Temperature Probe: drops to “0”... -
Page 15: Programming Menu Items
OPERATION English Programming Menu Items c. Turn the Control Knob until the TIME field is highlighted in red. Push the Control Knob to select TIME. Use the following procedure to program custom one, two, or d. Turn the Control knob until the desired value appears for three-stage menu items in Advanced Programming Mode. -
Page 16: Changing Between Fahrenheit And Celsius
Knob to select SETTING. NOTE: For the latest firmware updates, cooking tips, and Setting • A password screen will appear. more, go to the Hatco Induction Range website: www.hatcocorp.com/rapide_cuisine • To enter the 3-digit password Temp Unit “248”, turn the Control Knob to... -
Page 17: Maintenance
• Do not attempt to repair or replace a damaged power cord. Cord must be replaced by an Authorized Hatco • For water and scale marks, use a few drops of white Service Agent or a person with similar qualifications. -
Page 18: Troubleshooting Guide
Troubleshooting Questions? If you continue to have problems resolving an issue, please contact the nearest Authorized Hatco Service Agency or Hatco for assistance. To locate the nearest Service Agency, log onto the Hatco website at www.hatcocorp.com, select the Support pull- down menu, and click on “Find A Service Agent”;... -
Page 19: Limited Warranty
Notwithstanding anything herein to the contrary, the limited warranty herein will not cover components in Seller’s sole Hatco Corporation (Seller) warrants that the products it discretion such as, but not limited to, the following: coated manufactures (Products) will be free from defects in materials... -
Page 20: Informations Importantes Pour Le Propriétaire
États-Unis et au Canada en composant Remplissez la garantie en ligne pour éviter les retards le 800-558-0607. pour faire jouer la garantie. Accédez au site Web Hatco Des renseignements supplémentaires sont disponibles sur www.hatcocorp.com, sélectionnez le menu déroulant notre site Web à www.hatcocorp.com. -
Page 21: Consignes De Sécurité Importantes
Les d’alimentation. Celui-ci devra être remplacé par Hatco, éléments situés à proximité de l’appareil ou sur celui-ci un agent de service agréé par Hatco ou une personne peuvent prendre feu et provoquer des blessures et/ou possédant des qualifications similaires. -
Page 22: Désignation Du Modèle
F = Avant-arrière DESCRIPTION DU MODÈLE Tous les modèles Les plaques à induction doubles de type P Hatco disposent de plusieurs dispositifs de sécurité encastrés qui permettent de Les plaques à induction doubles de type P Hatco sont équipées protéger les appareils ainsi que les utilisateurs. - Page 23 Modèle à poser double avant-arrière Modèles à poser Modèles encastrés Les modèles des plaques à induction doubles de type P Hatco sont portables et se posent sur un plan de travail. Les plaques à induction encastrées de type P sont conçues pour être installées dans un grand nombre de matériaux...
-
Page 24: Caractéristiques Techniques
électricien qualifié pour déterminer et installer une prise de courant de taille et de tension correctes. NEMA 6-50P NOTA: La prise murale n’est pas fournie par Hatco. L’appareil Configuration des fiches doit être connecté à un circuit dédié. NOTA: La plaque signalétique est située sur la partie inférieure de l’appareil. -
Page 25: Dimensions
CARACTÉRISTIQUES TECHNIQUES Français Dimensions — Modèles IRNG-PC2S-xx Largeur Profondeur Largeur de Profondeur de Largeur Profundeur Hauteur d’encombrement d’encombrement surface de la surface de Modèle cuisson (F) cuisson (G) IRNG-PC2S-24-IA, IRNG-PC2S-36-IA, 630 mm 484 mm 122 mm 593 mm 361 mm 622 mm 348 mm IRNG-PC2S-29,... -
Page 26: Installation
CARACTÉRISTIQUES TECHNIQUES Français Dimensions— Modèles IRNG-PB2-xx Largeur de Profondeur de Largeur Profondeur la surface de la surface de Hauteur de sous plan de sous plan de Modèle cuisson (A) cuisson (B) Hauteur (C) l’appareil (D) travail (F) travail (G) IRNG-PB2-24-IA, IRNG-PB2-36-IA, 356 mm 699 mm... -
Page 27: Installation Des Modèles Encastrés
INSTALLATION Français • Assurez-vous qu’une prise électrique mise à la terre adaptée NOTA: Pour éviter des retards dans l’obtention de la couverture à la tension, aux dimensions et à la configuration prévus se de la garantie, complétez l’enregistrement en ligne de votre garantie. - Page 28 INSTALLATION Français • En cas d’installation du meuble contre un mur ou si aucune ventilation arrière n’est possible, laissez le côté du panneau de commande de l’habillage ouvert. Si la façade avant ne peut pas rester ouverte, installez deux orifices de ventilation dans le panneau avant de l’habillage, l’un dans 327 mm le bas et l’autre en haut près du panneau de commande.
- Page 29 INSTALLATION Français d. Lissez rapidement la surface du joint. 4. Si nécessaire, modifiez la structure du meuble ou ajoutez des renforts sous le comptoir pour vous assurer qu’il e. Retirez le ruban de masquage avec précaution avant supportera le poids de l’appareil et de son contenu.. que le produit d’étanchéité...
-
Page 30: Installation Du Panneau De Commande
INSTALLATION Français Installation du panneau de commande 4. Placez le panneau de commande dans l’ouverture par l’avant du meuble. Assurez-vous quele cadre sur le Appliquez la procédure suivante pour installer le panneau de panneau de commande est bien enfoncée dans le joint en commande. -
Page 31: Mode D'emploi
MODE D’EMPLOI Français Généralités Les récipients suivants ne sont pas compatibles avec une cuisinière à induction : Utilisez les informations et procédures suivantes pour faire fonctionner les plaques à induction doubles de type P posées • Récipients en verre ou encastrées. AVIS: Ne déplacez pas l’appareil lorsqu’il •... -
Page 32: Modification De La Méthode De Commande De Cuisson
MODE D’EMPLOI Français 4. Appuyez bouton commande approprié pour démarrer la plaque à induction. • L’écran bleu de réglage de la Écran réglage Écran contrôle Écran contrôle Écran puissance affiche un graphique de puissance de température de température paramètres en barres et un pourcentage °F °C Réglage puissance—Standard... - Page 33 à côté du port Informations générales sur les réglages USB. Hatco recommande d’ajuster les réglages de la puissance et • Pour les appareils à poser de la température vers les niveaux supérieurs ou inférieurs avec configuration avant- en cours de cuisson de manière à...
-
Page 34: Utilisation Du Minuteur
MODE D’EMPLOI Français Utilisation du minuteur Programmation des rubriques de menu Un minuteur est disponible pour les deux modes de Respectez la procédure suivante pour programmer les fonctionnement de la cuisinière à induction. rubriques de menu en une, deux ou trois étapes dans le mode Programmation avancée. -
Page 35: Modification Du Mode De Fonctionnement
MODE D’EMPLOI Français 4. Tournez le bouton de commande pour mettre soit 10. Programmez la rubrique de menu. SAUCE SAVE MODE S, soit MODE A-ß en surbrillance en rouge, puis a. Tournez le bouton de commande appuyez sur le bouton pour sélectionner le mode souhaité. pour placer soit le champ PWR Stage 1 •... -
Page 36: Réinitialiser Le Logiciel
NOTA: Pour obtenir les dernières mises à jour du micrologiciel, des conseils de cuisine et bien d’autres informations, rendez-vous sur le site Internet des cuisinières à induction Hatco: www.hatcocorp.com/rapide_cuisine 1. Poussez le bouton de commande Settings pour démarrer la cuisinière à... -
Page 37: Maintenance
Nettoyage quotidien Généralités Pour maintenir la performance et préserver le revêtement de la Les plaques à induction double Hatco ont été conçues pour cuisinière à induction, nettoyez cette dernière quotidiennement. offrir une durabilité et des performances maximales avec un Utilisez uniquement des chiffons, lingettes et produits minimum d’entretien. -
Page 38: Guide De Dépannage
Vous avez des questions en ce qui concerne les pannes? Si le problème persiste, veuillez contacter l’agence d’entretien agréée Hatco la plus proche ou Hatco pour obtenir une assistance. Pour trouver l’agence d’entretien la plus proche, rendez-vous sur le site Internet de Hatco (www.hatcocorp.com) et sélectionnez le menu déroulant Support (Assistance), puis cliquez sur «... -
Page 39: Garantie Limitée
GARANTIE, RECOURS EXCLUSIF : Garantie d’un (1) an pour les pièces et la main-d’œuvre, PLUS garantie de quatre (4) ans pour les pièces Hatco Corporation (le Vendeur) garantit que les produits uniquement : qu’elle fabrique (les Produits) seront exempts de défauts de Cuves 3CS et FR matériaux et de fabrication dans des conditions d’utilisation et... - Page 40 515-262-9308 Duffy’s - AIS Sauquoit 800-836-1014 J.B. Brady, Inc. Syracuse 315-422-9271 Register your unit online! HATCO CORPORATION See IMPORTANT OWNER INFORMATION P.O. Box 340500 section for details. Milwaukee, WI 53234-0500 U.S.A. 800-558-0607 414-671-6350 support@hatcocorp.com Enregistrez votre appareil en ligne ! www.hatcocorp.com...
Need help?
Do you have a question about the Rapide Cuisine IRNGCD Series and is the answer not in the manual?
Questions and answers