Table of Contents
Advertisement
Quick Links
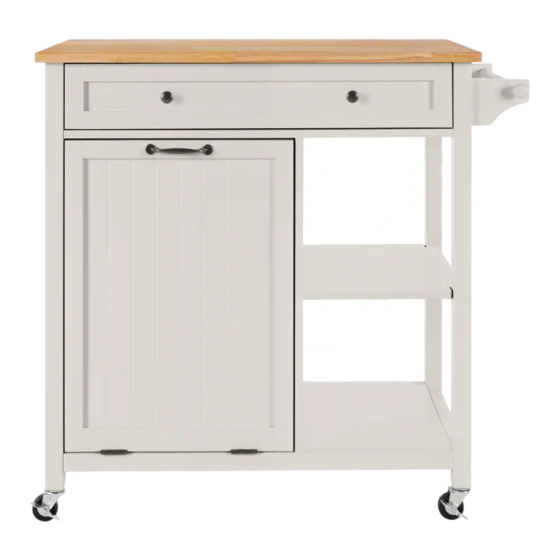
Item # ************
Model # SK19458A
USE AND CARE GUIDE
************
Questions, problems, missing parts?
Before returning to the store, call Customer Service.
8 a.m. – 7 p.m., EST, Monday – Friday, 9 a.m. – 6 p.m., EST, Saturday
1-877-527-0313
HOMEDEPOT.COM
THANK YOU
We appreciate the trust and confidence you have placed in StyleWell through the purchase of this *******. We strive to continually create quality
products designed to enhance your home. Visit us online to see our full line of products available for your home improvement needs. Thank you for
choosing StyleWell!
Advertisement
Table of Contents

Subscribe to Our Youtube Channel
Related Manuals for Home Depot StyleWell SK19458A


Summary of Contents for Home Depot StyleWell SK19458A
- Page 1 Item # ************ Model # SK19458A USE AND CARE GUIDE ************ Questions, problems, missing parts? Before returning to the store, call Customer Service. 8 a.m. – 7 p.m., EST, Monday – Friday, 9 a.m. – 6 p.m., EST, Saturday 1-877-527-0313 HOMEDEPOT.COM THANK YOU We appreciate the trust and confidence you have placed in StyleWell through the purchase of this *******.
-
Page 2: Table Of Contents
THIS MANUAL. parts that may have come loose inside the carton during □ Adult assembly required. shipment. If parts are missing, contact THE HOME DEPOT to □ Small parts may present choking hazard prior to assembly. obtain any missing parts. -
Page 3: Warranty
Warranty 1 YEAR WARRANTY WHAT IS COVERED We guarantee this product to be free of manufacturing defects to the original purchaser for one year. WHAT IS NOT COVERED This warranty does not cover commercial use, acts of nature, and abusive use. HOMEDEPOT.COM Please contact 1-877-527-0313 for further assistance. -
Page 4: Pre-Assembly
Pre-assembly PLANNING ASSEMBLY Keep children and pets away from build area. Make sure your area is large enough to unpack, sort and assemble the unit. TOOLS REQUIRED Large head Small head Phillips Phillips screwdriver screwdriver HARDWARE INCLUDED NOTE: Hardware not shown to actual size. Part Description Quantity... -
Page 5: Pre-Assembly (Continued)
Pre-assembly (continued) PACKAGE CONTENTS Part Description Quantity Part Description Quantity Top panel Top drawer front panel Left side panel Top drawer left side panel Right side panel Top drawer right side panel Fixed panel Top drawer back panel Partition Top drawer bottom panel Adjustable shelf Support bar Up back panel... -
Page 6: Assembly Note
Pre-assembly (continued) ASSEMBLY NOTE Upon opening, thoroughly clean all wood surfaces to remove dust and dirt that may have settled onto the finish during shipment. In order to prevent damage during assembly, Please assemble this item with at least two people. NOTE: Turn the cam-bolt screws until they are tight, the shoulder should be against the surface of the part. -
Page 7: Assembly
Assembly Attaching the partition to the bottom panel □ □ a) Install bolt (BB) into panel (I). d) Join partition (E) to the panel (I) with dowel (AA). □ e) Tighten bolt (BB) with lock (CC) in the pre-drilled holes. □... - Page 8 Assembly (continued) Attaching the bottom back panel □ □ a) Install bolt (BB) into partition (E). c) Join panel (H) to the partition (E) with dowel (AA). □ d) Tighten bolt (BB) with lock (CC) in the pre-drilled holes. □ b) Insert lock (CC) into panel (H).
- Page 9 Assembly (continued) Attaching the fixed panel □ □ a) Install bolt (BB) into panel (D). c) Join panel (D) to the partition (E) with dowel (AA). □ d) Tighten bolt (BB) with lock (CC) in the pre-drilled holes. □ b) Insert lock (CC) into partition (E). HOMEDEPOT.COM Please contact 1-877-527-0313 for further assistance.
- Page 10 Assembly (continued) Attaching the up back panel □ □ a) Install bolt (BB) into panel (D). c) Join panel (G) to the panel (D) with bolt (BB). □ d) Tighten bolt (BB) with lock (CC) in the pre-drilled holes. □ b) Insert lock (CC) into panel (G).
- Page 11 Assembly (continued) Attaching the left side panel □ □ a) Install bolt (BB) into panel (B). d) Join panel (B) to the assembled body with dowel (AA). □ b)Attach support member (OO-3) to panel (B) with screw (OO-4) as shown. □...
- Page 12 Assembly (continued) Attaching the towel rack □ a) Join towel rack side panels (L) and (K) to the towel bar (M). □ b) Attach towel rack side panels (L) and (K) to the panel (C) with bolt (LL). Turn and tighten bolt (LL) with wrench (MM).
- Page 13 Assembly (continued) Attaching the right side panel □ □ a) Install bolt (BB) into panel (C). c) Join panel (C) to the assembled body with dowel (AA). □ □ d) Tighten bolt (BB) with lock (CC) in the pre-drilled holes. b) Insert lock (CC) into panels (D), (G), and (I).
- Page 14 Assembly (continued) Assembling the universal wheel □ Insert wheels (T) and (U) into panels (B) and (C) as shown.
- Page 15 Assembly (continued) Attaching the top panel □ □ a) Install bolt (BB) into panel (A). c) Join panel (A) to the assembled body with dowel (AA). □ d) Tighten bolt (BB) with lock (CC) in the pre-drilled holes. □ c) Insert lock (CC) into panels (B), (C) and (G). HOMEDEPOT.COM Please contact 1-877-527-0313 for further assistance.
- Page 16 Assembly (continued) Assembling the adjustable shelf □ a) Turn and tighten knob (KK) to the towel rack side panels. □ b) Insert shelf supports (NN) in desired positions and place shelf (F) on the supports.
- Page 17 Assembly (continued) Attaching the bottom drawer front panel □ □ a) Install bolt (BB) into panel (J). d) Insert lock (CC) into panels (V), (W) and (X). □ b)Attach support member (OO-2) to panel (J) with screw (OO-4) as shown. □...
- Page 18 Assembly (continued) Attaching the support □ □ a) Slide panel (Z) into the grooves on panels (V) and (W). d) Join the both ends with the middle part of the support □ (OO-1). b) Tighten handle (HH) to panel (J) with bolt (JJ). □...
- Page 19 Assembly (continued) Assembling the drawer □ d) Tighten bolt (BB) with lock (CC) in the pre-drilled holes. □ a) Install bolt (BB) into panel (N). Slide panel (R) into the grooves on panels (O) and (P). □ b) Insert lock (CC) into panels (O), (P) and bar (S). □...
- Page 20 Assembly (continued) Finalizing the assembly □ Insert the drawer into the assembled body as shown. NOTE: Make sure the slide piece is at the front end of the glide when installing the drawer into the body. NOTE: When removing the drawer, tip-up the safety release tab to remove the drawer from the body.
- Page 21 Questions, problems, missing parts? Before returning to the store, call Customer Service 8 a.m. – 7 p.m., EST, Monday – Friday, 9 a.m. – 6 p.m., EST, Saturday 1-877-527-0313 HOMEDEPOT.COM Retain this manual for future use.
Need help?
Do you have a question about the StyleWell SK19458A and is the answer not in the manual?
Questions and answers