Advertisement
Quick Links
Advertisement

Related Manuals for Liliput RM-7029S


Summary of Contents for Liliput RM-7029S
- Page 2 IMPORTANT SAFETY INSTRUCTIONS: Please read User Guide before using this product. Please keep User Guide for future reference. FEATURES: 160° Wide viewing angles; High resolution: 1920×1200; High brightness: 400cd/m High contrast: 2000:1; Faster response time; ...
-
Page 3: Table Of Contents
Contents 1. PRODUCT DESCRIPTION ................4 2. MENU SETTING ..................5 3. PARAMETERS...................15 4. ACCESSORIES ..................16 5. 3D LUT Loading Demo ............... 17 6. Remote Terminal Instructions ............... 20 7. TROUBLE SHOOTING ................22... -
Page 4: Product Description
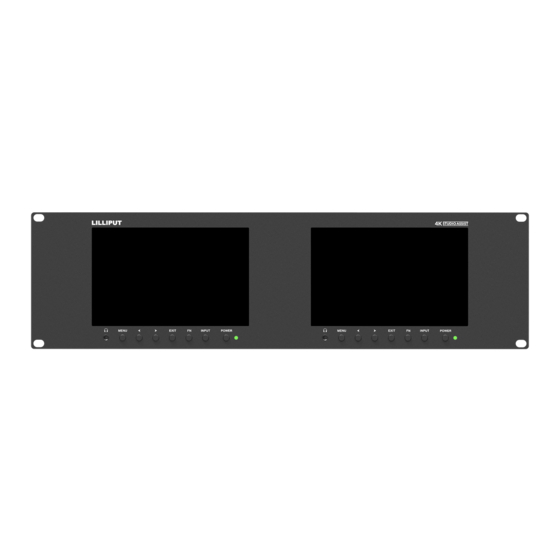
1. PRODUCT DESCRIPTION Front Housing 1. Earphone 2. MENU: To activate OSD (on-screen display) menu. Press “◄ / ►” button to switch among the picture, marker, function, waveform, audio, system. 3. ◄ Left selection button: to select item on OSD menu and adjust its value; Press to decrease the value of brightness, sharpness, contrast, saturation and Tint. -
Page 5: Menu Setting
Note: The interfaces within DISPLAY 1 provide signal source for left monitor. The interfaces within DISPLAY 2 provide signal source for right monitor. TALLY interface and interface definition. LAN port. (Connected to PC network interface for function adjustment.) USB input (Only used for program upgrades and LUT load, do NOT use if non-professionals). - Page 6 shown in right Figure (default menu is displayed in white font). Use “◄ / ►” buttons to select the desired item. Functions of FN button can be customized: Center Marker, Aspect Marker, Safety Marker, Overscan, scan, Aspect, Camera Log, Check field, H/V delay, Freeze, Color Bar, Peaking, False color, Exposure, Histogram, TimeCode, Mute, Level Meter.
- Page 7 Use this item to choose the RGB range of the HDMI input: [Full], [Limited]. HDMI EDID Select the HDMI EDID from between [4K] and [2K]. This item enables PC or other devices to recognize the property of this monitor and makes the images look excellent on the screen. ...
- Page 8 Adjust the R/G/B Gain of the current Color Temperature from 0 to 255. Default value: 128. - R/G/B Offset Adjust the R/G/B Offset of the current Color Temperature from 0 to 511. Default value: 256. 2.2.2 MARKER Center Marker Select [On] to display the center marker “+”...
- Page 9 Thickness Adjust the thickness of all the marker lines from 1-7 (Step value is 1). 2.2.3 FUNCTION Scan Adjust the scan mode among [Aspect], [Pixel To Pixel], [Zoom]. Note: Aspect and Overscan functions only can be adjusted under [Aspect] mode. Both of them cannot be adjusted in [Zoom] and [Pixel To Pixel] modes.
- Page 10 Overscan Use this item to activate or deactivate overscan. H/V Delay Select one of the H/V modes: [OFF], [H], [V], [H/V]. When H/V Delay on, the blanking portions of the input signal will be displayed horizontally and vertically. ...
- Page 11 - [Off] : The background of waveform is shown at black. - [25%]: The background of waveform is shown at 25% intensity. - [50%]: The background of waveform is shown at 50% intensity. Peaking Use this item to activate or deactivate the peaking function. ...
- Page 12 Exposure Use this item to activate or deactivate the exposure function. When activated, exposure works if the input signal exceeds the designated exposure level. Exposure Level Use this item to adjust the level of exposure between 50-100 IRE. ...
- Page 13 2.2.5 AUDIO Volume Adjust the volume among 0-100. Level Meter Select whether to activate or deactivate level meter. Audio Ch In HDMI mode, select one of the audio channel from among 1-8. 2.2.6. SYSTEM Language Option: [English], [Chinese] . ...
- Page 14 Option: 0-100. Default: 50. OSD V Position Option: 0-100. Default: 50. DHCP - [On]: The monitor will automatically get an IP address from network for remote control via various programs. - [Off]: Manually configure IP address. IP Address Manually configure IP address: 0.0.0.0 Note: When [DHCP] on, IP address cannot be manually set .
-
Page 15: Parameters
3. PARAMETERS Panel 2×7” Physical Resolution 1920×1200 Brightness 400 cd/m Contrast 2000: 1 Viewing Angle 160°/ 160°(H/V) Input Voltage DC 12V Input Signal HDMI, SDI, LAN, TALLY, USB Power Consumption ≤18W Operating Temperature -20°C ~ 60°C Storage Temperature -30°C ~ 70°C Dimension (LWD) 480×131.6×29.3mm Weight... -
Page 16: Accessories
4. ACCESSORIES 1. DC 12V Power Adapter 1 piece 2. TALLY Connector 1 piece 3. User Manual Card 1 piece... -
Page 17: D Lut Loading Demo
5. 3D LUT Loading Demo 5.1. Format Requirement LUT format Type: .cube 3D Size: 17x17x17 Data Order: Table Order: USB flash disk version USB: System: FAT32 Size: <16G Color calibration document: lcd.cube User Log: User1.cube ~User6.cube 5.2. - Page 18 One individual Product ID for one computer. Please send the ID number to Sales to get an Enter Key. Then the computer gets the permission of the Lut Tool after input the Enter Key. 5.3.2. Enter the LUT Converter interface after input the Enter Key. 5.3.3.
- Page 19 5.3.5. Click Generate Lut button to finish. 5.4. USB Loading Copy the needed files to the root directory of the USB flash disk. Note! LUT files after conversion must be named "User1", "User2", “User3”, “User4”, “User5” or “User6”. Plug the USB flash disk into USB port of the device after power on. Click “Yes” on the pop-up prompt window (If the device doesn’t pop-up the prompt window, please check if the LUT document name or the USB flash disk version meets monitor’s requirement.), then press Menu button to update automatically.
-
Page 20: Remote Terminal Instructions
6.Remote Terminal Instructions Remotely control the device by Remote Terminal application. Home Screen Picture: The home screen of the application Input: Display the signal format of the connected device. For example, there is “No Signal” when no device is connected or no signal is input. ... - Page 21 Function Port Selection: Select the specific connection port according to the device interface and click “LAN” to switch. Device Search: Click “Refresh” button to search devices after configuring the port. There are all of the found devices in the device list after a successful search. ...
-
Page 22: Trouble Shooting
7. TROUBLE SHOOTING 1. Only black-and-white display: Check whether the color saturation is properly set up or not. 2. Power on but no pictures: Check whether the cables of HDMI, SDI are correctly connected or not. Please use the standard power adapter equipped with the product package.
Need help?
Do you have a question about the RM-7029S and is the answer not in the manual?
Questions and answers