
Related Manuals for LabelMill LM1012


Summary of Contents for LabelMill LM1012
- Page 1 LM1012 TABLE-TOP LABEL APPLICATOR SYSTEM OPERATIONS MANUAL Manufactured in USA by: LabelMill, Inc. 2416 Jackson St. Savanna, IL 61074 (800) 273-4707 info@labelmill.com www.labelmill.com...
-
Page 2: Table Of Contents
Valve Pack Module Air Connections Peeler Plate Adjustment External Printer Interface Connection 5. TROUBLESHOOTING & MAINTENANCE Troubleshooting Fault Codes Storage Spool Brake Adjustment Replacing the Main Power Fuse Made in the U.S.A. © 2022 LABELMILL 01/01/2022 Model LM1012TTS Page 2... -
Page 3: System Overview
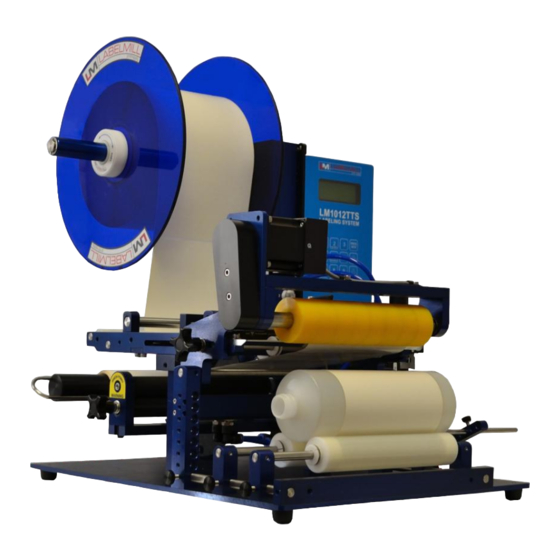
LM1012TTS Table-Top Label Applicator System USER'S MANUAL SECTION 1 SYSTEM OVERVIEW Introduction General System Specifications Inventory List User Responsibility & Safety Made in the U.S.A. © 2022 LABELMILL 01/01/2022 Model LM1012TTS Page 3... - Page 4 USER'S MANUAL INTRODUCTION The LabelMill LM1012TTS is a microprocessor controlled, variable speed, heavy-duty industrial table- top label application system. Label dispensing speeds up to 1400 linear inches of label web per minute is combined with exceptional label position repeatability. Automatic feed on label removal. Outboard- supported drive roller to minimize vibration induced label misplacement.
- Page 5 AIR REQUIREMENT 80p.s.i. / 3 cfm SIZE 26"H x 20"W x 24"D WEIGHT 40 lb. ENVIRONMENT Operating Temp. 50-95 F. (10-15 C.) - 15-85% RH. non-condensing *Options Available Made in the U.S.A. © 2022 LABELMILL 01/01/2022 Model LM1012TTS Page 5...
- Page 6 LM1012TTS Table-Top Label Applicator System USER'S MANUAL INVENTORY LIST Standard Equipment - LM1012 QTY. Description Dispenser Assembly 12" Diameter Blue Plastic Spools w/ Quick Release Collar 12' Power Cord Adjustable Electronic Label Sensor Take-Up Spool Clip Module Mounting Knobs Model LM1012 Operators Manual Optional Tamp Module - LM1012TM QTY.
- Page 7 This equipment or any of its parts should not be altered without the prior written approval of LABELMILL. The user of this equipment shall have the sole responsibility for any malfunctions which results from improper use, faulty maintenance, damage, improper repair or alteration by anyone other than LABELMILL or a service facility designated by LABELMILL.
- Page 8 SECTION 2 SETUP & OPERATION LM1012TTS Component Description Web Routing Label Sensor Adjustment Label Sensor Calibration Mechanical Label Detector Setup Electronic Clear Label Detector Setup Drive Motor Pack Made in the U.S.A. © 2022 LABELMILL 01/01/2022 Model LM1012TTS Page 8...
-
Page 9: Lm1012Tts Component Description
Spool Lock Tamp Slide Assembly Tamp Pad Push Button Start Device Spool Clip Web Take-Up Pinch Roller Release Knob Custom Nest Inserts Pinch Roller Valve Pack Custom Product Fixture Made in the U.S.A. © 2022 LABELMILL 01/01/2022 Model LM1012TTS Page 9... -
Page 10: Web Routing
** To remove the label storage spool (A), turn the spool lock counter-clockwise (approx. 15 deg.) until you reach a stop. The spool will now slide off. To secure the spool, simply turn the spool lock clockwise until snug. DO NOT over tighten the spool lock! Made in the U.S.A. © 2022 LABELMILL 01/01/2022 Model LM1012TTS Page 10... -
Page 11: Label Sensor Adjustment
Loosen the lock screw on the photo eye rail assembly and slide it forward or backward on the rails to achieve placement of the label with the peeler plate nose (+/- 1/32). After adjustment, cycle the labeler to verify new label placement. Made in the U.S.A. © 2022 LABELMILL 01/01/2022 Model LM1012TTS Page 11... -
Page 12: Label Sensor Calibration
Press and hold the [+] and [-] buttons for six seconds. When the mode is changed, the red LED will begin to flash slowly until the buttons are released. Made in the U.S.A. © 2022 LABELMILL 01/01/2022 Model LM1012TTS Page 12... -
Page 13: Mechanical Clear Label Detector
Loosen the lock screw on the Mechanical Label Sensor Assembly and slide it forward or backward on the adjustment rails to achieve placement of the label with the peeler plate nose (+/- 1/32). After adjustment, cycle the labeler to verify new label placement. Made in the U.S.A. © 2022 LABELMILL 01/01/2022 Model LM1012TTS Page 13... -
Page 14: Electronic Clear Label Detector
AutoGap as above. Move labels slowly through the sensor. Use manual adjustments if necessary to ensure the light bar is in the LABEL area during labels and GAP area during gaps. Made in the U.S.A. © 2022 LABELMILL 01/01/2022 Model LM1012TTS Page 14... -
Page 15: Drive Motor Pack
To reduce waste web tension, move the lock collar 1/32" away from the take-up spool. To increase web tension, move the lock collar 1/32" toward the take-up spool. CAUTION! Too much web tension may cause web breakage, label drifting, or premature failure of the take-up spool assembly. Made in the U.S.A. © 2022 LABELMILL 01/01/2022 Model LM1012TTS Page 15... - Page 16 PROGRAMMING AND CONTROL OPERATION System Controls / Operator Interface Control Accessory Connections System Programming Programming Flow Charts Key Definitions Set Up of Key Features Input & Output Description Made in the U.S.A. © 2022 LABELMILL 01/01/2022 Model LM1012TTS Page 16...
-
Page 17: System Controls / Operator Interface
LM1012TTS Table-Top Label Applicator System USER'S MANUAL SYSTEM CONTROLS / OPERATOR INTERFACE LCD DISPLAY ENTER OPERATOR PROGRAMMING KEYPAD MENU INTERFACE MANUAL TRIGGER ENABLE SYSTEM DISABLE SYSTEM Made in the U.S.A. © 2022 LABELMILL 01/01/2022 Model LM1012TTS Page 17... -
Page 18: Control Accessory Connections
INPUT EXTERNAL SOLENOIDS PRINTER INTERFACE LABEL SENSOR OPTIONAL LOW LABEL KEYPAD LIGHT KIT / AUXILIARY #2 LOW LABEL LIGHT KIT / AUXILIARY #1 MAIN DRIVE MOTOR ROUND MODULE Made in the U.S.A. © 2022 LABELMILL 01/01/2022 Model LM1012TTS Page 18... -
Page 19: Programming
Disable key will “Disable” the drive if it is currently enabled. CLEAR KEY: Clear key will delete stored values while in the edit mode. ESC (escape) KEY: Will back out of the sub programming menu without saving changes. Made in the U.S.A. © 2022 LABELMILL 01/01/2022 Model LM1012TTS Page 19... - Page 20 Label Speed – Used to control the speed that the label is fed through the system Label Acceleration - Used to control how fast the motor reaches the programmed feed speed. Made in the U.S.A. © 2022 LABELMILL 01/01/2022 Model LM1012TTS Page 20...
- Page 21 Delete a Job - Deletes the saved job file (1-6) Delete All Jobs - Deletes all saved job files DEFAULT SETTINGS Selecting this option will return the controller to the factory default settings. Made in the U.S.A. © 2022 LABELMILL 01/01/2022 Model LM1012TTS Page 21...
-
Page 22: Quick Programming Flow Chart
LM1012TTS Table-Top Label Applicator System USER'S MANUAL PROGRAMMING FLOW CHART LABELMILL MODEL LM1012TTS UP & DOWN ARROW KEYS WILL SCROLL THROUGH THE PROGRAM BLOCKS & SUB MENUS Made in the U.S.A. © 2022 LABELMILL 01/01/2022 Model LM1012TTS Page 22... - Page 23 LM1012TTS Table-Top Label Applicator System USER'S MANUAL Made in the U.S.A. © 2022 LABELMILL 01/01/2022 Model LM1012TTS Page 23...
- Page 24 USER'S MANUAL MAIN DISPLAYS *Auto Setup is no longer used with the new style label sensor. Do not use this feature with any system built after year 2020. Made in the U.S.A. © 2022 LABELMILL 01/01/2022 Model LM1012TTS Page 24...
- Page 25 LM1012TTS Table-Top Label Applicator System USER'S MANUAL Made in the U.S.A. © 2022 LABELMILL 01/01/2022 Model LM1012TTS Page 25...
- Page 26 LM1012TTS Table-Top Label Applicator System USER'S MANUAL Made in the U.S.A. © 2022 LABELMILL 01/01/2022 Model LM1012TTS Page 26...
- Page 27 LM1012TTS Table-Top Label Applicator System USER'S MANUAL Made in the U.S.A. © 2022 LABELMILL 01/01/2022 Model LM1012TTS Page 27...
- Page 28 LM1012TTS Table-Top Label Applicator System USER'S MANUAL Made in the U.S.A. © 2022 LABELMILL 01/01/2022 Model LM1012TTS Page 28...
- Page 29 LM1012TTS Table-Top Label Applicator System USER'S MANUAL Made in the U.S.A. © 2022 LABELMILL 01/01/2022 Model LM1012TTS Page 29...
- Page 30 LM1012TTS Table-Top Label Applicator System USER'S MANUAL Made in the U.S.A. © 2022 LABELMILL 01/01/2022 Model LM1012TTS Page 30...
- Page 31 LM1012TTS Table-Top Label Applicator System USER'S MANUAL Made in the U.S.A. © 2022 LABELMILL 01/01/2022 Model LM1012TTS Page 31...
-
Page 32: Key Definitions
Manually move the label sensor if needed so that the label stops flush with the peeler plate tip. System is now ready for set up of advanced features & options. Made in the U.S.A. © 2022 LABELMILL 01/01/2022 Model LM1012TTS Page 32... -
Page 33: Setup Of Key Features
Note: The LABEL STOP POSITION distance CANNOT be greater than half the length of the label. If the STOP POSITION distance is too large, inconsistent and double label feeding may occur. Made in the U.S.A. © 2022 LABELMILL 01/01/2022 Model LM1012TTS Page 33... - Page 34 Set head up limit switch, normally open is standard - MENU "TAMP SETUP" Set Label Speed to appropriate value - MENU "LABEL SPEED" Adjust position of Label Sensor so that label stops at edge of peeler plate. Made in the U.S.A. © 2022 LABELMILL 01/01/2022 Model LM1012TTS Page 34...
-
Page 35: Input & Output Description
#2 & #8 on the “Light Bar/Aux.” Connector. System I/O status can be viewed through the "I/O Monitor" menu on the system control (shown below). X=On 0=Off Made in the U.S.A. © 2022 LABELMILL 01/01/2022 Model LM1012TTS Page 35... - Page 36 Clear / Digital Label Detector Input 24v Common (+5dvc) LED / Anode Take up output Logic Gnd (Led Cathode) Black Sensor Emitter (+) White Sensor Collector (-) Green +24vdc Shield Made in the U.S.A. © 2022 LABELMILL 01/01/2022 Model LM1012TTS Page 36...
- Page 37 Ready) Ribbon Near End Input X1.0 +5vdc From Printer Shield DRIVE MOTOR CONNECTOR PIN # 7 pin 24vdc High Power ENC A ENC B +5vdc 24vdc High Power Made in the U.S.A. © 2022 LABELMILL 01/01/2022 Model LM1012TTS Page 37...
-
Page 38: Optional Application Modules
Round Product Applicator Module Installation Round Product Applicator Module Setup Auto Round System Module Installation Remote Start Module Valve Pack Module Air Connections Peeler Plate Adjustment External Printer Interface Made in the U.S.A. © 2022 LABELMILL 01/01/2022 Model LM1012TTS Page 38... -
Page 39: Tamp Applicator Module Installation
12. Program the Tamp Duration in the Tamp Setup Menu. 13. Program the Head Up Switch to N.O. in the Tamp Setup Menu. 14. Adjust the label sensor, and label speed until both are functioning properly. Made in the U.S.A. © 2022 LABELMILL 01/01/2022 Model LM1012TTS Page 39... -
Page 40: Tamp Module Setup
2. Once the above adjustments are made, adjust the vacuum regulator, the air assist regulator, and the flow controls as needed. Note: Too much pressure on the air assist will cause the label to flutter and/or blow off of the vacuum platen. Made in the U.S.A. © 2022 LABELMILL 01/01/2022 Model LM1012TTS Page 40... -
Page 41: Flag Applicator Module Installation
NOTE: Low pressure will not close the jaws, and high pressure will not label consistently or may cause product breakage. Made in the U.S.A. © 2022 LABELMILL 01/01/2022 Model LM1012TTS Page 41... -
Page 42: Flag Module Setup
2. Once the above adjustments are made, adjust the vacuum regulator, the air assist regulator, and the flow controls as needed. Note: Too much pressure on the air assist will cause the label to flutter and/or blow off of the vacuum platen. Made in the U.S.A. © 2022 LABELMILL 01/01/2022 Model LM1012TTS Page 42... -
Page 43: Round Product Applicator Module Installation
LM1012TTS Table-Top Label Applicator System USER'S MANUAL Round Product Applicator Module Installation The Round Product Applicator Module shown below can be installed in a few minutes to the existing LM1012 system dispenser unit. ACTIONS TO INSTALL ROUND PRODUCT MODULE 1. Set the main power switch to the OFF position. -
Page 44: Round Product Applicator Module Setup
4. Adjust the flow controls as described on page 4-6. Flow controls in this configuration will control the speed at which the carriage moves the product up and down. Made in the U.S.A. © 2022 LABELMILL 01/01/2022 Model LM1012TTS Page 44... -
Page 45: Auto Round System Module Installation
LM1012TTS Table-Top Label Applicator System USER'S MANUAL Auto Round System Module Installation The Auto Round System Module shown below can be installed in a few minutes to the existing LM1012 system dispenser unit. ACTIONS TO INSTALL AUTO ROUND SYSTEM 1. Set the main power switch to the OFF position. -
Page 46: Remote Start Module
LM1012TTS Table-Top Label Applicator System USER'S MANUAL Remote Start Module The LM1012 Remote Start Module shown below can be connected to the LM1012. PB-32 FS-42 Push Button Foot Switch (Remote start trigger) (Remote start trigger) ACTIONS TO INSTALL REMOTE START MODULE 1. -
Page 47: Valve Pack
Control A: This is used to adjust the speed that the tamp cylinder moves in the upward direction. Control B: This is used to adjust the speed that the tamp cylinder moves in the downward direction. Made in the U.S.A. © 2022 LABELMILL 01/01/2022 Model LM1012TTS Page 47... -
Page 48: Module Air Connections
2) Air Assist 3) Tamp Cylinder Down / Bottle Roller Carriage Up 4) Tamp Cylinder Up / Bottle Roller Carriage Down 5) Flag Jaws Open 6) Flag Jaws Closed Made in the U.S.A. © 2022 LABELMILL 01/01/2022 Model LM1012TTS Page 48... -
Page 49: Peeler Plate Adjustment
NOTE: If the web tracks towards the main control console, adjust the end of the peeler plate (P) away from the console or the opposite end toward the console. Adjust the peeler plate (P) in the opposite direction if the web tracks away from the control console. Made in the U.S.A. © 2022 LABELMILL 01/01/2022 Model LM1012TTS Page 49... -
Page 50: External Printer Interface Connection
Printer Interface Cable The LabelMill Printer Interface Cable is used to interface an external printer to the LABELMILL 1012TTS to configured the system as a Loose-Loop Print & Apply System. When this is done, the printer will print a label every time the LM1012TTS is cycled. -
Page 51: Troubleshooting & Maintenance
LM1012TTS Table-Top Label Applicator System USER'S MANUAL SECTION 5 TROUBLESHOOTING & MAINTENANCE Troubleshooting Fault Codes Spool Brake Adjustment Replacing the Main Power Fuse Made in the U.S.A. © 2022 LABELMILL 01/01/2022 Model LM1012TTS Page 51... -
Page 52: Troubleshooting
Refer to #6. unit will not cycle B. Reed Switch out of adjustment Adjust Switch up or down. C. Incorrect Cycle Type Set correct Cycle Type in control. Made in the U.S.A. © 2022 LABELMILL 01/01/2022 Model LM1012TTS Page 52... -
Page 53: Fault Codes
End of Print Signal was not received Turn off Printer setting (if external with "Printer" setting enabled printer is not being used). Check Printer Settings. Inspect / Replace Interface Cable. Made in the U.S.A. © 2022 LABELMILL 01/01/2022 Model LM1012TTS Page 53... -
Page 54: Storage Spool Brake Adjustment
If it spins freely, adjust as shown in “A” above. If it does not spin freely, consult the factory. 4. After adjusting the tension bolt (B), retighten the lock nut (A), re-web the machine and test the unit. Made in the U.S.A. © 2022 LABELMILL 01/01/2022 Model LM1012TTS Page 54... -
Page 55: Replacing The Main Power Fuse
4. Gently press down the fuse holder cover while pulling away from the console. 5. Replace with the spare fuse provided in the holder. Fuse / Spare Fuse Drawer Made in the U.S.A. © 2022 LABELMILL 01/01/2022 Model LM1012TTS Page 55... - Page 56 LM1012 TABLE-TOP LABEL APPLICATOR SYSTEM OPERATIONS MANUAL Copyright and Trademarks Copyright ©2022 LabelMill, Inc. All rights reserved. All trademarks and brand names are the property of their respective owners. LabelMill 2416 Jackson St. Savanna, IL 61074 Phone: (800) 273-4707; Fax (815) 273-7074 www.labelmill.com...
Need help?
Do you have a question about the LM1012 and is the answer not in the manual?
Questions and answers