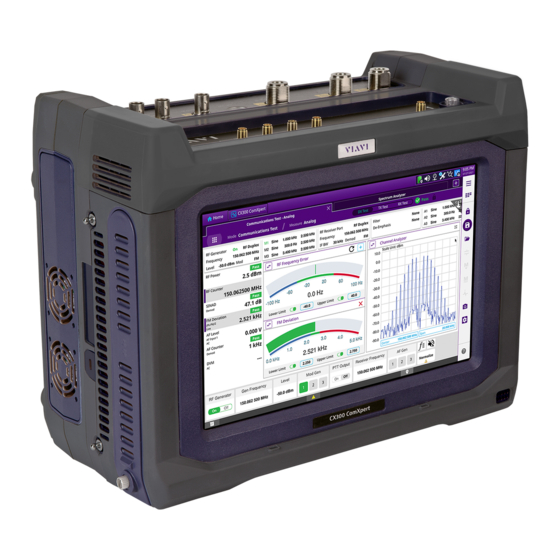
Viavi CX300 ComXpert Quick Start Manual
Hide thumbs
Also See for CX300 ComXpert:
- Operation manual (256 pages) ,
- Manual (48 pages) ,
- Manual (47 pages)
Table of Contents
Advertisement
Quick Links
CX300 ComXpert Quick Start Guide
This guide contains basic operating and safety information for the CX300
ComXpert Communications Service Monitor. Refer to the CX300 ComXpert
Operation Manual on the test set for detailed information about the device's
functions and capabilities and for complete product safety information.
DECLARATION OF CONFORMITY
VIAVI recommends keeping a copy of the Declaration of Conformity that
shipped with the unit with the device at all times.
WARRANTY INFORMATION
Warranty information for this product is available on the VIAVI website at
https://www.viavisolutions.com/en-us/warranty-information.
SAFETY INFORMATION
Refer to the CX300 ComXpert Operation Manual for complete product safety
information.
CAUTION
• Only use the AC Adapter/Charger provided with the product to
charge the battery.
• Do not use the AC Adapter/Charger outdoors or in a wet or
damp location.
• Only connect the AC Adapter/Charger to the correct mains
voltage indicated on the ratings label.
• Do not overload input connectors. Refer to product
specifications, or product labeling for maximum input ratings.
SAFETY SPECIFICATIONS
Refer to the CX300 ComXpert Operation Manual for complete product
specifications.
Table 1 Power Ratings
Parameter
Power Input
Input Current
AC/DC Power Adapter
Input
Output
Battery
Table 2 Maximum Input Ratings
Connector
Specification
RF Duplex
+45 dBm (50 W continuous, < 35°C ambient)
+51 dBm (125 W, 30 seconds on, 90 seconds off or
until temperature alarm)
RF Input
+27 dBm (preamp off, > 1 MHz)
+13 dBm (preamp on or <1 MHz), ±50 Vdc
Audio Input 1
200 Vpk max, CAT 1
Audio Input 2
200 Vpk max, CAT 1
Trigger Input
Minimum logic high > 2.4
maximum logic high < 3.3 V
REF Input
-10 dBm to +10 dBm
CONTROL AND OPERATION
The CX300 User Interface (UI) can be operated locally using the touch-based
display or a USB mouse and keyboard. The CX300 can also be controlled remotely
using a VNC viewing application.
TECHNICAL ASSISTANCE
Contact the Technical Assistance Center (TAC) for technical support or with any
questions regarding this or other VIAVI products.
–
Phone: 1-844-GO-VIAVI
For the latest TAC information, go to:
http://www.viavisolutions.com/en/services-and-support/support/technical-assistan
ce
22130635 REV. 000 November 2020
Copyright © VIAVI Solutions 2020
Specification
VAC, 50/60 Hz, Switch Selectable
5 A @ 115 VAC, 3 A @ 230 VAC
100-240V, ~50-60 Hz, 2.2A max
19-27 V, 15A Max
14.4 V, 6.7 A-h, 96 Wh, Lithium Ion
CX300 CONTROLS AND CONNECTORS
2
3
1
8
9
Figure 1
#
Connector
1
AF INPUT 1 HIGH
2
AF INPUT 2 LOW
3
AF OUTPUT
4
MIC/ACC
5
RF DUPLEX
6
RF INPUT / PORT 2
7
RF OUTPUT / PORT 1
8
Trigger INPUT
9
Trigger OUTPUT
10
REF OUTPUT
11
REF INPUT
12
USB
13
Reserved
14
GNSS ANT
15
Audio Connector
16
Power Button/LED
17
Reserved
1
2
3
4
Figure 2
#
Connector
1
Micro SD Port
2
LAN Connector
4
5
6
7
10
11
12
13
14
CX300 I/O Connectors
Description
High power audio input connector.
Low power audio input connector.
Audio output for the AF Generators.
Microphone and accessory connector.
Provides low level output and high level
input detection.
RF Input connector.
RF Output connector.
Connector for synchronizing signals from
an external timing reference.
Connector allows the CX300 internal
timing reference to be used as trigger
source.
Output port for 10 MHz reference signal.
External frequency reference input
connector.
USB connectors allow for the use of an
external USB memory to extend storage
capacity or to upgrade software.
Reserved for future development.
The Global Navigation Satellite System
(GNSS) Antenna is used to connect a
GNSS antenna for acquisition of location
and timing data.
Input jack for the use of headphones.
Turns the test set on and off.
Reserved for future development.
Side Panel Connectors
Description
Allows a Micro SD card to be used as
storage location for instrument data.
Used to connect the CX300 to a network.
*22130635*
17
15
16
Advertisement
Table of Contents

Summary of Contents for Viavi CX300 ComXpert
- Page 1 VIAVI recommends keeping a copy of the Declaration of Conformity that shipped with the unit with the device at all times. WARRANTY INFORMATION Warranty information for this product is available on the VIAVI website at https://www.viavisolutions.com/en-us/warranty-information. SAFETY INFORMATION Refer to the CX300 ComXpert Operation Manual for complete product safety...
- Page 2 2 Verify the Power Button/LED is illuminated during the boot-up process. 2 Unscrew the battery door thumb screw and slide the battery door off. 3 When the display loads, select CX300 ComXpert button to display the Test Home Screen. 4 Select the AutoTest function.


Need help?
Do you have a question about the CX300 ComXpert and is the answer not in the manual?
Questions and answers