Table of Contents

Related Manuals for OPTIKON HiScan


Summary of Contents for OPTIKON HiScan
- Page 1 Cod 14101XEN 2014-09-02 Rev.B HiScan A/BSCAN ECHOGRAPH INSTALLATION AND OPERATION MANUAL OPTIKON 2000 S.p.A. Via del Casale di Settebagni, 13 - 00138 Rome Tel. +39 06 8888355 - Fax. +39 06 8888440 E-mail sales@optikon.com - www.optikon.com...
- Page 2 ì OPTIKON 2000 S.p.A. is an ISO 9001 and ISO 13485 certified company that manufactures surgical and diagnostic devices for ophthalmology. All OPTIKON 2000 products are manufactured in compliance with the requirements of Directive 93/42/EEC concerning medical devices.
-
Page 3: Table Of Contents
GUIDANCE AND MANUFACTURER’S DECLARATION – ELECTROMAGNETIC EMISSIONS ..5-10 5.3.2 GUIDANCE AND MANUFACTURER’S DECLARATION – ELECTROMAGNETIC IMMUNITY ..5-11 5.3.3 RECOMMENDED SEPARATION DISTANCES BETWEEN PORTABLE AND MOBILE RF COMMUNICATION EQUIPMENT AND HISCAN .............. 5-12 CIRCUIT DIAGRAMS .............. 5-13 6 INSTALLATION ................6-1 INTRODUCTION ..............6-1 UNPACKING AND INITIAL INSPECTION .......... - Page 4 8.3.10 Delay ..................... 8-10 8.3.11 Image size ..................8-10 8.3.12 Scan Rate ..................8-10 8.3.13 Pulse ....................8-11 8.3.14 Velocity ..................8-11 8.3.15 Image ..................... 8-11 8.3.16 Filters .................... 8-12 8.3.17 Search Function ................8-12 8.3.18 DB (DATABASE) ................. 8-13 Using the device ..............
-
Page 5: Disclaimer
OPTIKON 2000 DISCLAIMER OPTIKON 2000 S.p.A. requires the user of this device to carefully read the specific warnings contained in this manual. It is responsibility of the user to ensure that all the operators are familiar with the operation of the device before use. In no event shall Optikon 2000 S.p.A. - Page 6 HiScan Touch Installation and Operation Manual OPTIKON 2000 THIS PAGE HAS BEEN INTENTIONALLY LEFT BLANK Code 14101XEN 2014-09-02 Rev.B...
-
Page 7: Limited Warranty Conditions
OPTIKON S.p.A. technical support. OPTIKON 2000 S.p.A. reserves the right to verify, in case of failures, if the device and/or its accessories have been modified or tampered with in any way, or if they have been damaged by improper use. - Page 8 HiScan Touch Installation and Operation Manual OPTIKON 2000 THIS PAGE HAS BEEN INTENTIONALLY LEFT BLANK Code 14101XEN 2014-09-02 Rev.B...
-
Page 9: Warnings
Do not attempt to use the device if it fails to perform as described in this manual. • The use of this device is a matter of professional judgement in all cases. Optikon 2000 s.p.a. is not responsible for any clinical problem resulting from mishandling this device and makes no medical recommendations. - Page 10 Increase the distance between the units Connect the device to a power outlet that is different from the one to which the other units are connected Contact the distributor or authorized OPTIKON 2000 Technical Support Department Electrical warnings • To avoid the risk of electrical shocks, always connect the device to a power supply with appropriate grounding.
- Page 11 HiScan Touch Installation and Operation Manual OPTIKON 2000 • In case of doubt on the size, perform a calibration test on the probe. If the test fails or the probe is not working correctly, do not use the device and contact the technical support.
- Page 12 HiScan Touch Installation and Operation Manual OPTIKON 2000 THIS PAGE HAS BEEN INTENTIONALLY LEFT BLANK Code 14101XEN 2014-09-02 Rev.B...
-
Page 13: Symbols
At times two or more symbols are combined together in order to highlight a specific hazard or instruction. These are the symbols used on the HiScan label. Before using the device, familiarize yourself with the symbols and definitions provided in the table. - Page 14 HiScan Touch Installation and Operation Manual OPTIKON 2000 THIS PAGE HAS BEEN INTENTIONALLY LEFT BLANK Code 14101XEN 2014-09-02 Rev.B...
-
Page 15: General Information
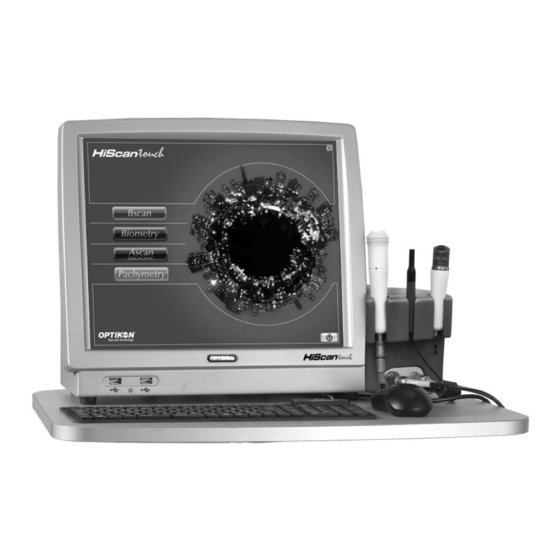
(automatic acquisition). 5.1 SYSTEM DESCRIPTION Echograph A/Bscan HiScan - OPTIKON 2000 - is a device is designed to be used to perform echographies of the eyeball, measure the axial length of the eye and calculate the IOL that is more appropriate to restore emmetropy after cataract removal. - Page 16 HiScan Touch Installation and Operation Manual OPTIKON 2000 Figure 5-1 – Description of the device components Code 14101XEN 2014-09-02 Rev.B...
- Page 17 HiScan Touch Installation and Operation Manual OPTIKON 2000 1: LED that indicates that the device is on; 2: probe support; 3: Bscan connector; 4: biometry connector; 5: USB ports; 6: additional equipotential grounding terminal; 7: serial port (RS-232); 8: video output; 9: fuse compartment; 10: main switch; 11: power connector The main features of the echograph are the following: •...
-
Page 18: Technical Specifications
5.2 TECHNICAL SPECIFICATIONS PARAMETER SPECIFICATIONS Manufacturer: OPTIKON 2000 S.p.A. Via del Casale di Settebagni 13 00138 Rome - Italy Model: A/BScan HiScan Echograph Regulatory conformity: 93/42/EEC concerning medical devices Technical standards: EN 60601-1 ; EN 60601-1-1 ; EN 60601-1-2 ENVIRONMENTAL SPECIFICATIONS Storage: temperature range: from –10°C to +70°C, Humidity 10-... - Page 19 HiScan Touch Installation and Operation Manual OPTIKON 2000 ELECTRICAL SPECIFICATIONS Input voltage: 100V~ - 240V~ Frequency: 50/60 Hz Maximum load: 100VA Fuses: T1.5AH Code 14101XEN 2014-09-02 Rev.B...
- Page 20 HiScan Touch Installation and Operation Manual OPTIKON 2000 PARAMETER SPECIFICATION TECHNICAL SPECIFICATIONS • B-MODE Gain Variable, from 0 to 115 dB Software, from 0 to -30 dB Signal dynamics on “frozen” image from 10 to 80 dB Contact probes 12 MHz , 20 MHz...
- Page 21 SRK/T, Post-refractive (Camellin- Calossi) • DEVICES AND CONNECTIVITY HiScan is a PC-based standalone device with Windows operating system and supports therefore all the devices that can be connected to state-of-the-art PCs, that printers, modems, video projectors, burners, video printers, backup units, local networks, etc.
- Page 22 HiScan Touch Installation and Operation Manual OPTIKON 2000 B mode B mode B mode B mode Unit of Transducer: Transducer: Transducer: Transducer: Parameter measurement 12 MHz probe, 20 MHz probe, 35 MHz probe, 50 MHz probe, ref.143002/143200 ref.143003/143300 ref.143004/143600 ref.143005/143500...
- Page 23 HiScan Touch Installation and Operation Manual OPTIKON 2000 60601-1 CLASSIFICATION OF THE DEVICE ACCORDING TO EN • Type of protection against electric shocks: class I • Level of safety of the application in the presence of a mixture of inflammable anaesthetics: not suitable APPLIED PARTS •...
-
Page 24: Electromagnetic Compatibility Tables
MANUFACTURER’S DECLARATION – ELECTROMAGNETIC EMISSIONS HiScan is intended to be used in the electromagnetic environment specified below. The customer or user of HiScan should assure that it is used in such environment. Electromagnetic Environment – Emissions test Compliance Guidance RF emissions HiScan uses RF energy for its internal functions only. - Page 25 DECLARATION – ELECTROMAGNETIC IMMUNITY HiScan is intended to be used in the electromagnetic environment specified below. The customer or user of HiScan should assure that it is used in such environment. Immunity test EN 60601 test level Compliance level Electromagnetic Environment – Guidance Electrostatic discharge Floors should be wood, concrete or ceramic tile.
-
Page 26: Recommended Separation Distances Between Portable And Mobile Rf Communication Equipment And Hiscan
RF transmitters, an electromagnetic site survey should be considered. If the measured field strength in the location in which HiScan is used exceeds the applicable RF compliance level above, the device should be observed to verify normal operation. If abnormal performance is observed, additional measures may be necessary, such as re-orienting or relocating HiScan. -
Page 27: Circuit Diagrams
Installation and Operation Manual OPTIKON 2000 CIRCUIT DIAGRAMS On request, OPTIKON 2000 S.p.A. may supply circuit diagrams, list of components, descriptions, calibration instructions or other information to assist the user's qualified technical personnel to repair any part that can be repaired. -
Page 28: Installation
When cutting the packing material, be careful not to damage the contents. If the package or contents are damaged, notify the carrier (post office, railway or shipping agent) and Optikon 2000 as soon as possible. Check that the contents correspond to those indicated in the attached shipping documents. -
Page 29: Installation Procedure
Before unpacking the device, verify that the packing and its content are undamaged. If visible transport damages are present, notify them to the carrier, reseller or the sales office of OPTIKON 2000 in order to request the immediate reparation or replacement of the device or its components. - Page 30 HiScan Touch Installation and Operation Manual OPTIKON 2000 Figure 6-1 – Connections on the device Code 14101XEN 2014-09-02 Rev.B...
-
Page 31: Audible Signals
HiScan Touch Installation and Operation Manual OPTIKON 2000 AUDIBLE SIGNALS The device issues an audible sign ("beep") when: • The initial test is in progress • The probes are automatically detected • A BSCAN image is stored in the database •... -
Page 32: Leakage Currents In Presence Of Single Points Of Failure
In this case, it is advisable to connect an insulation transformer to the HiScan device and to the devices to which it is connected during the installation phase. -
Page 33: Updating The Device Software
"XPInstall" which contains the required drivers. Wait until the hardware installation procedure automatically finishes. • Only at this point, it is possible to install the HiScan software by launching the program Setup.exe in the installation CD-Rom's main folder (for example, “D:\setup”... - Page 34 HiScan Touch Installation and Operation Manual OPTIKON 2000 To view the version of HiScan installed in the echograph, select “Help” + “About Optikon …..” as shown in the figure. Fig. 6.2 – Displaying the HiScan version Code 14101XEN 2014-09-02 Rev.B...
- Page 35 HiScan Touch Installation and Operation Manual OPTIKON 2000 THIS PAGE HAS BEEN INTENTIONALLY LEFT BLANK Code 14101XEN 2014-09-02 Rev.B...
-
Page 36: Using The Device
HiScan Touch Installation and Operation Manual OPTIKON 2000 7 USING THE DEVICE 7.1 USER INTERFACE 7.1.1 MAIN MENU After the start-up operations have been completed, the device displays an interface similar to the one shown in the following figure. Figure 7-1 The UI of the echograph consists of a "Main"... -
Page 37: Bscan
HiScan Touch Installation and Operation Manual OPTIKON 2000 • BSCAN BScan echography • BIOMETRY Biometric measurements and IOL calculation • DIAGNOSTIC ASCAN AScan measurements • PACHYMETRY Measurements of the cornea thickness (inactive) To switch between the different functions, it is necessary to return to the "Main"... - Page 38 HiScan Touch Installation and Operation Manual OPTIKON 2000 No further operation is required to use this function, because the device is able to automatically detect the probes. If the device fails to detect the probe, it is necessary to select it manually using the dropdown menu: Select menu "File", option "Choose Probe"...
-
Page 39: Dropdown Menu
HiScan Touch Installation and Operation Manual OPTIKON 2000 • The buttons of the main operating modes and functions • The Zoom”, “Delay” and “Image size” options • The tree containing the patients' demographic data in alphabetical order • The “tabbed controls” with the patients' demographic data, exam data and biometry, if available 7.1.2.1... - Page 40 HiScan Touch Installation and Operation Manual OPTIKON 2000 “File” The options of menu “File” are the following: New Patient – Opens the window in which it is possible to insert the demographic data of a new patient in the patients' database.
- Page 41 HiScan Touch Installation and Operation Manual OPTIKON 2000 Show bang (Hide bang) – Activates/deactivates the display of the ultrasound probe "bang". The "bang" is always displayed in mode A. Colors (Gray scale) – Activates/deactivates the display of fake colours in the echo image in mode B.
-
Page 42: Biometry
HiScan Touch Installation and Operation Manual OPTIKON 2000 As the “Save” button of the footswitch, it allows to the operator to memorize the actual test in the database. 7.1.3 BIOMETRY Press button BIOMETRY to access the Biometry function and display the window shown in Figure 7.6. - Page 43 HiScan Touch Installation and Operation Manual OPTIKON 2000 All the biometry functions (calculation of intraocular lenses, measurements, etc.) can be selected from the following modules: • Biometry data • Biometry Settings • IOL Calculation • Keratometric Constants • IOL Database “Biometry Data”...
- Page 44 HiScan Touch Installation and Operation Manual OPTIKON 2000 Figure 7-7 - “Biometry Data” module Code 14101XEN 2014-09-02 Rev.B...
- Page 45 HiScan Touch Installation and Operation Manual OPTIKON 2000 “Biometry settings” module This module displays the "tabbed page" of the routine settings used to calculate biometry. The module can also be used to recall, edit and save the data related to the sound propagation speed through the materials of the intraocular lens and in the eye, and the sampling and noise thresholds.
- Page 46 HiScan Touch Installation and Operation Manual OPTIKON 2000 “IOL Calculation” module It is possible to display this module in Biometry mode by simply touching button "IOL". This module can be used to display the form used to calculate the intraocular lenses using the measured biometry parameters (axial length), the data stored in the lens database, the keratometric constants and the formulas available in the module.
- Page 47 HiScan Touch Installation and Operation Manual OPTIKON 2000 Figure 7-9- “IOL Calculation” Module Code 14101XEN 7-12 2014-09-02 Rev.B...
- Page 48 HiScan Touch Installation and Operation Manual OPTIKON 2000 “Keratometric constants”module This module can be used to display the box where it is possible to determine the K and R keratometric constants used to calculate intraocular constants. Figura 7-10- “Keratometric constants” module “IOL Database"...
-
Page 49: Diagnostic Ascan
HiScan Touch Installation and Operation Manual OPTIKON 2000 7.1.4 DIAGNOSTIC ASCAN Press button AScan diagnostic on the touchscreen to access the Diagnostic Ascan function and the window shown in Figure 7.12. Figure 7-12 – Ascan diagnostic window In this case, it is necessary to select the connected diagnostic Ascan by means of the appropriate connector on the lateral supporting block. -
Page 50: Pachymetry
HiScan Touch Installation and Operation Manual OPTIKON 2000 7.1.5 PACHYMETRY 7.1.5.1 WARNING Apply the probe gently to the patient’s cornea using the minimum pressure necessary to keep the tip in contact. The probe tip must be perpendicular to the cornea surface. - Page 51 HiScan Touch Installation and Operation Manual OPTIKON 2000 If the unit is correctly working (the small circle bottom right of the screen is green), the operator can carry out the following functions: • Button <DB> : access the patient and tests database.
-
Page 52: How To Operate The Device In A Pachymetry Environment
HiScan Touch Installation and Operation Manual OPTIKON 2000 By clicking the left button of the mouse (or touching the touchscreen) on one of the maps between Map1 to Map10 or User1 to User8, the operator can select that map for the operation. In order to go to the main pachymetry window, just click on the <Image>... - Page 53 HiScan Touch Installation and Operation Manual OPTIKON 2000 The relevant point of the eye on which the operator needs to carry out the pachymetry scan is highlighted on the map. When the value has been acquired, the next point is automatically displayed, and continues in this way until the map is finally completed.
-
Page 54: Settings Of The Parameters
HiScan Touch Installation and Operation Manual OPTIKON 2000 By selecting one of the points on the map, the operator can subsequently display the signal that produced the measurement. When working in manual mode, the operations are more or less the same except that the signal peaks are not intercepted automatically. - Page 55 HiScan Touch Installation and Operation Manual OPTIKON 2000 Figure 7.16: Pachymetry environment settings window Code 14101XEN 7-20 2014-09-02 Rev.B...
- Page 56 HiScan Touch Installation and Operation Manual OPTIKON 2000 From the Settings window it’s possible to change the follows pachymetry parameters: • “Corneal velocity”: Ultrasound corneal velocity • “Avg Corneal Thickness” : Parameter utilized in the Delta IOP correction formulae • “K-Constant” :...
-
Page 57: Calibrating The Pachymeter
HiScan Touch Installation and Operation Manual OPTIKON 2000 7.1.5.5 CALIBRATING THE PACHYMETER The first time the operator accesses the pachymetry environment, he or she is asked to calibrate the instrument. Figure 7.17: How to calibrate the pachymetry This is done by placing the pachymetry probe in a glass of water, vertically and not touching the bottom, as shown in the above diagram, and confirming on the monitor that he or she wants to continue with the test (or push the <Calibrate>... - Page 58 Should this occur, try shaking the probe in water to remove any micro-bubbles from its sensitive surface and repeat the calibration procedure pressing <Calibrate> button. If the problem persists, contact the Optikon 2000 service department. The operator is strongly advised to calibrate the instrument every time the pachymetry probe is changed, and in any event, at regular intervals, in order to guarantee the proper functioning of the pachymeter.
- Page 59 HiScan Touch Installation and Operation Manual OPTIKON 2000 THIS PAGE HAS BEEN INTENTIONALLY LEFT BLANK Code 14101XEN 7-24 2014-09-02 Rev.B...
-
Page 60: Operation
(see Fig.8-1). If the test fails a red indicator displays. In this case, it is necessary to switch HiScan off and check the cable connections. Switch the device back on and wait for the indicator to switch from red to green (approximately 5 seconds). -
Page 61: Biometry Probe Test
HiScan Touch Installation and Operation Manual OPTIKON 2000 8.2 BIOMETRY PROBE TEST It is possible to run a test in order to check the operation of the probe and the accuracy of the biometric measurement. This can be done using the small clear cylinder in plastic (code 149001) showing the test measurement value in millimetres and the tolerance (+/-0.1 mm.). -
Page 62: Features
HiScan Touch Installation and Operation Manual OPTIKON 2000 8.3 FEATURES The following sections describe in detail the procedures that have to be followed to activate the functions described above along with the sub-menu windows that display when these features are activated. -
Page 63: Operator
HiScan Touch Installation and Operation Manual OPTIKON 2000 • Image – Measurements and Ascan on BScan (only BScan) • Filters – Enables the filters on the Bscan images 8.3.1 OPERATOR This option can be used to enter the operator's name. - Page 64 HiScan Touch Installation and Operation Manual OPTIKON 2000 Touch button “Print” or select “Print” from the dropdown menu (see Fig. 7.4) to print the current Bscan image, the biometry, the pachymetry or the Ascan image, depending on the selected operating mode (see fig. 8.3a).
- Page 65 HiScan Touch Installation and Operation Manual OPTIKON 2000 the diagnosis, “Import” and modify an existing text, save a diagnosis and proceed to the print. Figure 8-3b – Multiple images printout Code 14101XEN 2014-09-02 Rev.B...
- Page 66 HiScan Touch Installation and Operation Manual OPTIKON 2000 Figure 8-4 – Inputting of a diagnosis Figure 8-5 – Printout header modification Code 14101XEN 2014-09-02 Rev.B...
-
Page 67: Reset
HiScan Touch Installation and Operation Manual OPTIKON 2000 8.3.3 RESET Resets the settings. By pressing “Reset” operators can reload all the default settings of the currently selected probe and cancel all the zoom, gain, delay pulse length and other settings modified by the operator. -
Page 68: Record
HiScan Touch Installation and Operation Manual OPTIKON 2000 8.3.5 RECORD Records a movie. By touching button “Rec”, operators can start recording a movie (this can also be done using the footswitch). The maximum recording length is fixed and generally equivalent to 20 seconds. -
Page 69: Gain
HiScan Touch Installation and Operation Manual OPTIKON 2000 8.3.9 GAIN Controls the amplification of the echographic signal. It is possible to change the saturation level of the image or the height of the echographic peaks by modifying the setting of "Gain". For BScan ecographic images, it is generally advisable to set a high "gain"... -
Page 70: Pulse
HiScan Touch Installation and Operation Manual OPTIKON 2000 8.3.13 PULSE Length of the stimulation pulse generated by the echographic transducer. It is possible to set any value ranging from approximately 20 nsec to 133 nsec. The optimum pulse length depends on the frequency of the transducer in the ecographic probe. Generally, the smaller the length of the puls and the greater the resolution. -
Page 71: Filters
HiScan Touch Installation and Operation Manual OPTIKON 2000 8.3.16 FILTERS Activates the filters on the echographic image (Bscan only). This option enables operators to activate two types of image filters. Depending on circumstances, it is possible to activate: • An interpolation filter that multiplies the number of lines that make the image from 256 actual lines to 1024 interpolated lines. -
Page 72: Db (Database)
HiScan Touch Installation and Operation Manual OPTIKON 2000 Figure 8-7 –Image classification data - Search parameters 8.3.18 DB (DATABASE) This function can be used to manage the database that contains information on exams and patients. Patients and exams database The Patients database comprises the following modules: •... - Page 73 HiScan Touch Installation and Operation Manual OPTIKON 2000 Select “New Patient” from the main menu to access this module. In this module operators can display the form in which it is possible to enter or edit the demographic data of patients in database Patients. This form displays additional features, although its layout is similar to the one where existing data can be edited.
- Page 74 HiScan Touch Installation and Operation Manual OPTIKON 2000 Patient” module This module can be used to display the data of the selected patient in the demographic data tree. “Test” module This module can be used to display the data of the selected exam in the demographic data tree.
-
Page 75: Using The Device
After start-up, the device can be used without configuring specific settings. ATTENTION • The use of some programs (like antivirus programs running continuously) with HiScan may influence the performance of the device (significantly reducing for example the scanning rate). 8.4.1. GENERAL INSTRUCTIONS 1) Select the desired operating mode from the main menu (Bscan, Biometry, etc.). -
Page 76: How To Use B-Scan
HiScan Touch Installation and Operation Manual OPTIKON 2000 8.4.2. HOW TO USE B-SCAN 1) The BSCAN function can be activated by selecting BScan from the main menu or by simply using button Freeze/Unfreeze (or the footswitch). 2) Move selector GAIN up or down to adjust the image gain (it is generally recommendable to increase the GAIN to view the vitreous). - Page 77 HiScan Touch Installation and Operation Manual OPTIKON 2000 previous 16 frames.That function is very usefull in order to visualize very small and hard to find lesions. After the selection of the best frame, the operator can store it in the database by means of the “Save” button. (see fig.
-
Page 78: How To Use The Ascan Function In Bscan Mode
HiScan Touch Installation and Operation Manual OPTIKON 2000 movie is saved in the database. It is also possible to end the recording by pressing once more <enter> on the front panel of the device. The file is saved in a standard AVI format and can therefore be displayed in Windows (Windows 2000, Windows XP, Vista, Windows 7 or Windows 8). - Page 79 HiScan Touch Installation and Operation Manual OPTIKON 2000 5) Select the type of eye (aphakic, phakic, pseudo-phakic, with cataract). 6) Select Immersion to use an immersion cup. 7) Select Silicone Oil if the eye is filled with silicone oil. 8) Perform the measurement of the eye. If you select Auto, the acquisition of values automatically ends after each measurement has been completed.
- Page 80 HiScan Touch Installation and Operation Manual OPTIKON 2000 (a1) and (a2) are constant values used to calculate the Haigis IOL. 10) The button IOL can be used to display the pane in which it is possible to select the intraocular lens.
-
Page 81: Using The Footswitch
HiScan Touch Installation and Operation Manual OPTIKON 2000 Figure 8.10- Biometry printout 8.4.5 USING THE FOOTSWITCH The footswitch has three buttons, “FREEZE”, “SAVE” and “MOVIE”, that can be used to activate the following features: FREEZE/UNFREEZE: press button “FREEZE” for a few seconds to start •... -
Page 82: Shutdown Procedure
HiScan Touch Installation and Operation Manual OPTIKON 2000 MOVIE REC : press this button to start recording a movie. The recording • ends after the preset interval of time or whenever the footswitch is pressed. 8.5 SHUTDOWN PROCEDURE NOTE Follow the procedure described below to shut the device down for long periods of time. - Page 83 HiScan Touch Installation and Operation Manual OPTIKON 2000 THIS PAGE HAS BEEN INTENTIONALLY LEFT BLANK. Code 14101XEN 8-24 2014-09-02 Rev.B...
-
Page 84: Cleaning, Sterilization And Maintenance
HiScan Touch Installation and Operation Manual OPTIKON 2000 CLEANING, STERILIZATION AND MAINTENANCE Medical personnel is responsible for keeping all the instrumentation and equipment in the best operating conditions. The simple steps described below constitute a practical guideline for defining a suitable care and maintenance program. -
Page 85: Maintenance
To keep the device safe, check the device's conformity with electric current leakage limits according to standard EN60601-1 at least once a year. Contact the bioengineering division of your facility or your Optikon 2000 authorised distributor/service centre. 9.4.2 ACCESSORIES 1) Avoid dropping or mishandling probes and accessories. It is critical that these components be handled with outmost care and inspected thoroughly after each use for any damage or wear. -
Page 86: Troubleshooting Guide
HiScan Toch Installation and Operation Manual OPTIKON 2000 10 TROUBLESHOOTING GUIDE PROBLEM CORRETIVE ACTION THE DEVICE DOES NOT SWITCH ON. Inspect the power cords. Move the rear switch to position ON. THE OPERATING SYSTEM DOES NOT START The hard disk is damaged or the start-up (THE WINDOWS SCREEN DOES NOT files are corrupt. - Page 87 HiScan Toch Installation and Operation Manual OPTIKON 2000 PROBLEM CORRETIVE ACTION THE SELF-TEST IS SUCCESSFUL, THE Try replacing the problem (damaged PROBE IS DETECTED AND THE DEVICE probe). STARTS (A TYPICAL MECHANICAL NOISE Replace the probe cable. CAN BE PERCEIVED WHEN APPROACHING THE PROBE TO THE EAR), BUT NO IMAGE Contact the technical support.
-
Page 88: Appendix 1 - 3D Imaging Software
11 APPENDIX 1 - 3D IMAGING SOFTWARE Figure 11-1 11.1 INTRODUCTION The 3D imaging software has now been integrated in the HiScan software. This software enables to acquire 3D VTK images and is fully compatible with most commercial 3D software applications. - Page 89 HiScan Touch Installation and Operation Manual OPTIKON 2000 Figure 11-2 - 3D image of a coroidal melanoma Code 14101XEN 11-2 2014-09-02 Rev.B...
-
Page 90: Description Of The 3D Software
HiScan Touch Installation and Operation Manual OPTIKON 2000 11.2 DESCRIPTION OF THE 3D SOFTWARE The main 3D window is illustrated in Figure 11-2. Figure 11-3 -Main window of a 3D reconstruction The following controls are available on the menu bar: •... - Page 91 HiScan Touch Installation and Operation Manual OPTIKON 2000 Figure 11-4 –"File" menu "Open”: enables operators to open an existing *.VTK 3D image. This window can be used to select the file to open. Figure 11-5 - Window “Open” The selected 3D image is opened in a new window, as shown in the following figure:...
- Page 92 It is also possible to use menu "Open" to open an *.AVI file e convert it to a 3D image. If the software is run from the main HiScan software, it is not necessary to open the movie because this operation is performed automatically. If an AVI file has been opened, it is automatically displayed as shown in the following figure.
- Page 93 HiScan Touch Installation and Operation Manual OPTIKON 2000 Figure 11-7 – Frame selection form The green arrow keys can be used to play a movie, to scroll the movie by frames or to go to the first or last frame. The current frame is displayed in the corresponding field.
- Page 94 In the example, the Italian version of Windows XP has been installed on the PC. "Exit” can be used to close the program and return to the operating system or the main HiScan program (depending on the 3D software settings). From menu "Edit" operators can select the following submenu:...
- Page 95 HiScan Touch Installation and Operation Manual OPTIKON 2000 Figure 11-9 – Menu "Edit” Option "Rendering Parameters” can be used to change the parameters for the 3D rendering. The available parameters are the following: Figure 11-10 – Window “Rendering Parameters” "Sampling Distances”: these are the distances between the sections on axis X, Y or The value of these parameters is dependant on the scan time of the object being rebuilt.
- Page 96 HiScan Touch Installation and Operation Manual OPTIKON 2000 Figure 11-11 – Scan results It is possible to use the axis Z adjustment function to correct the deformation of the 3D image (the length of the image is increased when the value of axis Z is increased or reduced).
- Page 97 HiScan Touch Installation and Operation Manual OPTIKON 2000 This transformation should be performed for "experimental purposes only" and is recommended to avoid changing the original image. The available transformations are "Translation” and "Affine”: the first option compares adjacent frames in order to reduce the "noise" resulting from the probe translation...
-
Page 98: How To Use The 3D Reconstructor
11.3 HOW TO USE THE 3D RECONSTRUCTOR Follow these steps to create a 3D image: • Create a movie with a single scan. Figure 11-15 • Select the movie in the HiScan database. Figure 11-16 Code 14101XEN 11-11 2014-09-02 Rev.B... - Page 99 HiScan Touch Installation and Operation Manual OPTIKON 2000 • Start 3D Reconstructor. Figure 11-17 • Drag (with the mouse cursor) the red window on the section of the image that has to be rebuilt and click button 3D. Figure 11-18...
-
Page 100: Troubleshooting And Correcting Image Adjustment Defects
HiScan Touch Installation and Operation Manual OPTIKON 2000 11.4 TROUBLESHOOTING AND CORRECTING IMAGE ADJUSTMENT DEFECTS The following figures illustrate some problems that may occur when acquiring 3D images along with the recommended corrective actions. Figure 11-19- Result of a multiple scan of the anterior eye segment... - Page 101 HiScan Touch Installation and Operation Manual OPTIKON 2000 Figure 11-21 - 3D image with incorrect axis Z parameter If an incorrect parameter of axis Z is used, the 3D image is elongated. To correct it, it is necessary to adjust the rendering of axis Z as shown in the figure above.
- Page 102 HiScan Touch Installation and Operation Manual OPTIKON 2000 Figure 11-23- 3D image with an excessively high noise threshold The image is too dark. To correct it, it is necessary to reduce the noise threshold. The recommended value is 30 (or a lower one).
Need help?
Do you have a question about the HiScan and is the answer not in the manual?
Questions and answers