Table of Contents
Advertisement
Quick Links
Advertisement
Table of Contents

Related Manuals for Vesta Rome VRH-ROME-30SS


Summary of Contents for Vesta Rome VRH-ROME-30SS
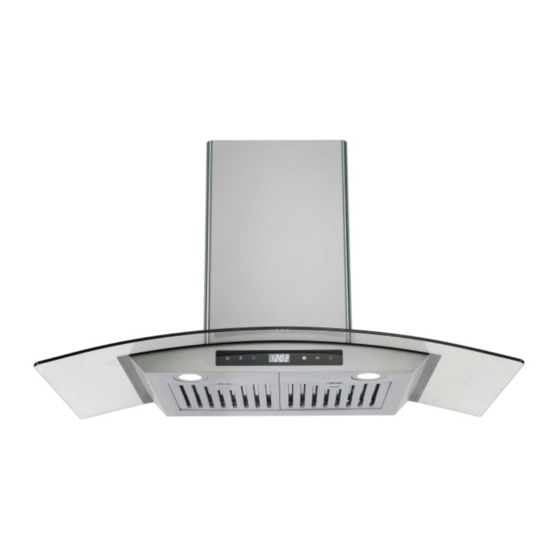
- Page 1 Rome User Manual VRH-ROME-30/36SS...
-
Page 2: Table Of Contents
Table of Contents Important Safety Notice Tools Needed Parts Supplied Venting Requirements Height & Clearance Calculating Vent System Length Venting Methods Electrical Requirements Preparation Installation Operations Troubleshooting & Wiring Diagram Specifications Use and Care Information Maintenance Warranty Disclaimer Contact Us... -
Page 3: Important Safety Notice
Important Safety Notice READ ALL INSTRUCTIONS BEFORE INSTALLING AND OPERATING THIS APPLIANCE • The installation in this manual is intended for qualifed installers, service technicians or persons with similar qualifed background. Installation and electrical wiring must be done by qualifed professionals and in accordance with all applicable codes and standards, including fire-rated construction. - Page 4 • Use only metal ductwork and this unit MUST be grounded. • Suficient air is needed for proper combustion and exhausting of gases through the duct to prevent back drafting. • When cutting or drilling into wall or ceiling, be careful not to damage electrical wiring or other hidden utilities.
- Page 5 • DO NOT USE WATER, including wet dishcloths or towels — a violent steam explosion will result. • Use an extinguisher ONLY if: • You know you have a Class A, B, C extinguisher,and you already know how to operate it. •...
-
Page 6: Tools Needed
Tools Needed Parts Supplied Range Hood×1 Lower Chimney×1 Upper Chimney×1 Baffe Filter×2 Flexible Duct Tube×1 Chimney Mounting Bracket ×1 A. 7pcs-ST5x40 screws B. 7pcs-Wall anchors C. 1pcs-ST5x16 screws D. 2pcs -M4x2 screws E. 2pcs- Rubber... -
Page 7: Venting Requirements
Venting Requirements Vent system must terminate to the outside (roof or side wall). DO NOT terminate the vent system in an attic or other enclosed area. DO NOT use 4” (10.2 cm) laundry-type wall caps. Use metal/aluminum vent only. Rigid metal/aluminum vent is recommended. DO NOT use plastic vent. -
Page 8: Height & Clearance
Height & Clearance Mounting Bracket Upper Chimney Lower Chimney Range Hood Min.: 28” Max.: 31” 36” Base Maximum ceiling clearance 110” at 31” hood mounting height above count ertop/stove (may vary with different model). Chimney extensions available for higher ceilings. - Page 9 Important A minimum of 6” round (standard for this range hood) or 3-1/4x 10” rectangular duct (purchased separately) must be used to maintain maximum airfow effciency. Flexible 6” round duct provided for convenience , always use rigid type metal /alumin um ducts if available to maximize airflow when connecting to provided duct.
-
Page 10: Calculating Vent System Length
Calculating Vent System Length To calculate the length of the system you need, deduct the equivalent feet for each vent piece used in the system from the recommended maximum duct run. DUCT RUN CALCULATION: Recommended maximum run 6” or 3-1/4 × 10” duct 50 ft Vent piece deduction Each 90°... -
Page 11: Venting Methods
Venting Methods This range hood is factory set for venting through the roof or wall. Vent work can terminate either through the roof or wall. To vent through a wall, a 90° elbow is needed. IMPORTANT: NEVER exhaust air or terminate duct work into spaces between walls, crawl spaces, ceiling, attics or garages. -
Page 12: Electrical Requirements
Electrical Requirements IMPORTANT: Observe all governing codes and or dinances. (Please consult with a qualifed electrician for 110-Volt 60 Hz voltage). IT IS THE CUSTOMER’S RESPONSIBILITY: To contact a qualifed electrical installer. To assure that the electrical installation is adequate and in conformance with National Electrical Code, ANSI/ NFPA 70 —latest edition*, or CSA Standar ds C22. -
Page 13: Preparation
Wire sizes (copper wire only) and connections must conform with the rating of the appliance as specified on the model/serial rating label. Wire sizes must conform to the requirements of the National Electrical Code ANSI/NFPA 70 — latest edition*, or CSA Standar ds C22. 1-94, Canadian Electrical Code Part 1 and C22.2 No. - Page 14 Preparations: NOTE: TO AVOID DAMAGE TO YOUR HOOD, PREVENT DEBRIS FROM ENTERING THE VENT OPENING. 1. Determine and mark the center line on the ceiling where the range hood will be installed. Make sure there is proper clearance within the ceiling or wall for exhaust vent.
- Page 15 WARNING Require three or more person to move and install this range hood. Spinal or other bodily injuries could occur if it is not followed. WARNING Hood may have very sharp edges. Please wear protective gloves if it is necessary to remove any parts for installing, cleaning or servicing.
-
Page 16: Installation
Installation DO NOT INSTALL THE RANGE HOOD BEFORE TESTING IT MECHANICAL DAMAGE. MIGHT HAVE OCCURRED DURING TRANSPORTATION. Plug in the range hood to the USA/Canada 120V standard outlet, test the blower and the lights before installing it. Installations (refer to Page 6 for parts): Figure 1 Measure the distance between stove top and the bottom of range hood. - Page 17 SAFETY WARNING: Risk of electrical shock. This range hood must be properly grounded. Make sure this is done by qualified electrician in accordance with all power applicable national and local electrical codes. Before connecting wires, switch off at service panel and lock service panel to prevent power from being switched on accidentally.
-
Page 18: Operations
Operations & Wiring Diagram Rome (3 Speed touch control) A. Light B. Time C. Speed down D. Speed up E. Max speed F. On /off This range hood is designed to remove smoke,cooking vapors and odors from the cook top area. For best results, start the range hood before cooking and allow it to operate several minutes after the cooking is completed to clear all smoke and odors from the kitchen. -
Page 19: Troubleshooting & Wiring Diagram
Trouble shooting If the range hood or LED light does not work after installation • Check if the range hood has been plugged in, make sure that all power has been turned back ON, fused not blown and all electrical wiring are properly connected. -
Page 20: Specifications
Wiring Diagram CIRCUIT DIAGRAM Black White Green Blue(N) Black(H) Grey(M) White(L) Motor Brown Yellow Capacitance LED light C( 18 F/250V) µ Specifications Body Stainless Steel / Tempered Glass Power Rating 200V/60Hz (USA & Canada standard) General Input Power 200W + # of Light x Voltage of Light 200 W Motor Input Power 1200 RPM (±10%) to 1500 RPM (±10%) -
Page 21: Use And Care Information
Use and Care Information Operations Read and understand all instructions and warnings in this manual before operating the appliance. Save these instructions for future reference. Always leave safety grills and filters in place. Without these components, operating blowers could catch on to hair, fingers and loose clothing. NEVER dispose cigarette ashes ignitable substances, or any foreign objects into blowers. -
Page 22: Maintenance
Maintenance SAFETY WARNING: Never put your hand into area housing the fan while the fan is operating! For optimal operation, clean range hood and all baffle/spacer/filter/grease tunnel/oil container regularly. Regular care will help preserve the appearance of the range hood. Cleaning Exterior surfaces Clean periodically with hot soapy water and clean cotton cloth. - Page 23 Cleaning Filters IMPORTANT: Drain oil from oil containers before oil and residue overflow! The metal filters fitted by the factory are intended to filter out residue and grease from cooking . It need not be replaced on a regular basis but are required to be kept clean.
-
Page 24: Warranty
Warranty TO OBTAIN SERVICE UNDER WARRANTY: You must present proof of original purchase date. Please provide an original dated proof of purchase (sales receipt / invoice) in order to obtain service under warranty. Lifetime Motor Warranty The motor, which is covered by lifetime warranty, should beprovided free of charge by your local reseller given it failed due to manufacturing defects. - Page 25 What is Not Covered: Consumable parts such as light bulbs, metal and charcoal filters. The natural wear of finish, and wear due to improper maintenance , use of corrosive and abrasive cleaning products, pads, and oven cleaner products. Chips, dents or cracks due to abuse , misuse, freight damage, or improper installation.
-
Page 26: Disclaimer
Disclaimer Carefully inspect all items for damages before accepting delivery. Note any damages on the freight bill or express receipt. Request name and signature of the carrier’s agent and keep copy to suppor t your claim. Upon acceptance of items, owner assumes responsibility for its safe arrival. Report damages to the carrier and file aclaim immediately. -
Page 27: Contact Us
Contact Us If you need any assistance, please contact us at +1 905-727-8688 or info@vesta.kitchen. Please have your order number and model of the range hood ready . This information will help us better respond to your request. If you need replacement parts, we recommend that you only use genuine parts. - Page 28 www.vesta.kitchen...
Need help?
Do you have a question about the Rome VRH-ROME-30SS and is the answer not in the manual?
Questions and answers