Table of Contents
Advertisement
Quick Links
Advertisement
Table of Contents

Related Manuals for Vesta Brussels VRH-BRUSSELS-30


Summary of Contents for Vesta Brussels VRH-BRUSSELS-30
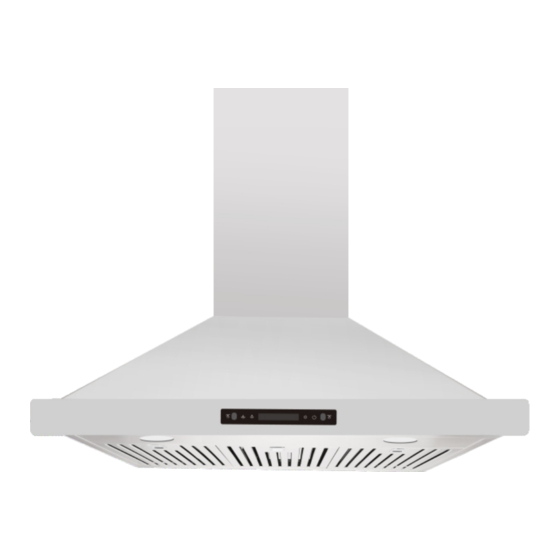
- Page 1 Brussels User Manual VRH-BRUSSELS-30/36SS...
-
Page 2: Table Of Contents
Table of Contents Important Safety Notice Tools Needed Parts Supplied V enting Requirements Height & Clearance Calculating V ent System Length V enting Methods Electrical Requirements Preparation Installation Operations Troubleshooting & Wiring Diagram Use and Care Information Speci cations Maintenance Warranty Disclaimer Contact Us... -
Page 3: Important Safety Notice
Important Safety Notice READ ALL INSTRUCTIONS BEFORE INSTALLING AND OPERATING THIS APPLIANCE • The installation in this manual is intended for quali ed installers, service technicians or persons with similar quali ed background. Installation and electrical wiring must be done by quali ed professionals and in accordance with all applicable codes and standards, including re-rated construction. - Page 4 Fire Protection Association (NFPA), and the American Society of Heating, Refrigeration and Air Conditioning Engineers (ASHRAE), and the local code authorities. • Before servicing or cleaning unit, switch power OFF at service panel and lock service panel to prevent power from being switched ON accidentally.
- Page 5 TO REDUCE THE RISK OF A STOVE TOP GREASE FIRE: • Keep all fan, baf e, spaces, lter, grease tunnel, oil container and grease-laden surfaces clean.G r ease should not be allowed to accumulate on fan, baf e, spaces, lter, grease tunnel and oil container.
- Page 6 • Use an extinguisher ONLY if: • Y ou know you have a Class A, B, C extinguisher, and you already know how to operate it. • The re is small and contained in the area where it is started. •...
- Page 7 The manufacturer and/or distributor/reseller declines all responsibility in the event of failure to observe the instructions given here for installation, maintenance and suitable use of the product. The manufacturer and/or distributor/reseller further declines all responsibility for injury due to negligence and the warranty of the unit automatically expires due to improper maintenance.
-
Page 8: Tools Needed
Tools Needed... -
Page 9: Parts Supplied
Parts Supplied Range Hood Lower Chimney Upper Chimney ×1 ×1 ×1 Baf e Filter Flexible Duct Tube Chimney Mounting ×3 ×1 Bracket ×1 Rubber x2 Gasket x10 ×4 ×4 ×6 Flappers Air Outlet x1 ×1... -
Page 10: Enting Requirements
Venting Requirements V ent system must terminate to the outside (roof or side wall). DO NOT terminate the vent system in an attic or other enclosed area. DO NOT use 4” (10.2 cm) laundry-type wall caps. Use metal/aluminum vent only. Rigid metal/aluminum vent is recommended. - Page 11 The size of the vent should be uniform. Use no more than three 90° elbows. Make sure there is a minimum of 24” (61 cm) of straight vent between the elbows if more than one elbow is used. DO NOT install two elbows together. The length of vent system and number of elbows should be kept to a minimum to provide ef cient performance.
-
Page 12: Height & Clearance
Height & Clearance Mounting Bracket Upper Chimney Lower Chimney Range Hood Min.: 28” Max.: 31” 36” Base Maximum ceiling clearance 110” at 31” hood mounting height above countertop/stove (may vary with different model). Chimney extensions available for higher ceilings. - Page 13 Important A minimum of 6” round (standard for this range hood) or 3-1/4 x 10” rectangular duct (purchased separately) must be used to maintain maximum air ow ef ciency. Flexible 6” round duct provided for convenience, always use rigid type metal/aluminum ducts if available to maximize air ow when connecting to provided duct.
- Page 14 * Due to different ceiling height con gurations, recommended height may not be applicable. Minimum Duct Size: Round - 6” minimum...
-
Page 15: Calculating Vent System Length
Calculating Vent System Length To calculate the length of the system you need, deduct the equivalent feet for each vent piece used in the system from the recommended maximum duct run. DUCT RUN CALCULATION: Recommended maximum run 6” or 3-1/4 × 10” duct 50 ft V ent piece deduction Each 90°... -
Page 16: Enting Methods
Venting Methods This range hood is factory set for venting through the roof or wall. V ent work can terminate either through the roof or wall. To vent through a wall, a 90° elbow is needed. IMPORTANT: NEVER exhaust air or terminate duct work into spaces between walls, crawl spaces, ceiling, attics or garages. -
Page 17: Electrical Requirements
Electrical Requirements IMPORTANT: Observe all governing codes and ordinances. (Please consult with a quali ed electrician for 220-V olt 50 Hz voltage) IT IS THE CUSTOMER’S RESPONSIBILITY: To contact a quali ed electrical installer. To assure that the electrical installation is adequate and in conformance with National Electrical Code, ANSI/ NFPA 70 —... - Page 18 The range hood must be connected with copper wire/plug only. Always use plug provided. If not possible, connect three wires according to its color (black to hot, white to neutral, and green to ground) to house wires and cap with wire connectors: Wire sizes (copper wire only) and connections must conform with the rating of the appliance as speci ed on the model/serial rating label.
-
Page 19: Preparation
Preparation Advanced Preparations: 1. Read the entire installation guide and user manual thoroughly, understand instructions and warnings. 2. Be familiar with the controls of the range hood by reading through Operations , Page 25. 3. Place the range hood on a at, stable surface. Connect the range hood to a designated standard outlet (please refer the product label for the suitable voltage of this unit) and verify no debris has entered the vent openings, then turn on... - Page 20 3. Put a thick, protective covering over counter top, cooktop or range to protect from damage or dirt. Remove any hazardous objects around the area when installing. 4. Mark the locations of the support mounting bracket holes, vent cutout (if used) and power supply cable cutout on the ceiling.
- Page 21 WARNING Require three or more person to move and install this range hood. Spinal or other bodily injuries could occur if it is not followed. WARNING Hood may have very sharp edges. Please wear protective gloves if it is necessary to remove any parts for installing, cleaning or servicing.
-
Page 22: Installation
Installation DO NOT INSTALL THE RANGE HOOD BEFORE TESTING IT. MECHANICAL DAMAGE MIGHT HA VE OCCURRED DURING TRANSPORTATION. Plug in the range hood to the USA/Canada 120V standard outlet, test the blower and the lights before installing it. Installations (refer to Page 9 for parts): Measure the distance between Figure 1 stove top and the bottom of range... - Page 23 before releasing! 4. Connect the venting duct between the hood and the exhaust opening either on the ceiling or wall. Use silver tape or duct tape to make all joints secure and air tight. 5. Connect the range hood to a designated standard outlet (please refer the product label for the suitable voltage of this unit) or cut off the plug and connect three wires (black, white and green) to house wires and cap with wire connectors.
- Page 24 7. Install both chimneys and tighten screws to secure the lower chimney to the range hood as shown in Figure 5. 8. To avoid scratching the chimney, extend the upper chimney slowly and carefully to the chimney-mounting bracket and tighten screws as shown in Figure 6. 9.
-
Page 25: Operations
Operations & Wiring Diagram Amsterdam (6 Speed Mechanical Control) Hand wave Hand wave Decrease/ Increase V alue lock AUTO TIMER Hand wave Light Power Digital Display Power-Off Delay This range hood is designed to remove smoke, cooking vapors and odors from the cook top area. For best results, start the range hood before cooking and allow it to operate several minutes after the cooking is completed to clear all smoke and odors from the kitchen. -
Page 26: Troubleshooting & Wiring Diagram
Troubleshooting If the range hood or halogen light does not work after installation • Check if the range hood has been plugged in, make sure that all power has been turned back ON, fused not blown and all electrical wiring are properly connected. •... -
Page 27: Use And Care Information
Use and Care Information Operations Read and understand all instructions and warnings in this manual before operating the appliance. Save these instructions for future reference. Always leave safety grills and lters in place. Without these components, operating blowers could catch on to hair, ngers and loose clothing. - Page 28 The hood is not venting out properly • Make sure the distance between the stove top and the bottom of the hood is within* 28” and 31” in distance. *Due to different ceiling height con gurations, recommended height may not be applicable. •...
-
Page 29: Speci Cations
Speci cations Body Stainless Steel Power Rating 120V/60Hz (USA & Canada standard) General Input Power 120W + # of Light x V oltage of Light Motor Input Power 220 W 1200 RPM (±10%) to 1300 RPM Motor Revolution (±10%) Levels Of Speed Control Maximum Air ow 800 CFM Air Pressure... -
Page 30: Maintenance
Maintenance SAFETY WARNING: Never put your hand into area housing the fan while the fan is operating! For optimal operation, clean range hood and all baf e/spacer/ lter/grease tunnel/oil container regularly. Regular care will help preserve the appearance of the range hood. Cleaning Exterior surfaces Clean periodically with hot soapy water and clean cotton cloth. - Page 31 DO NOT allow salt solutions, disinfectants, bleaches, or cleaning compounds to remain in contact with stainless steel for extended periods. Many of these compounds contain chemicals, which may be harmful. Rinse with water after exposure and wipe dry with a clean cloth. Cleaning Filters IMPORTANT: Drain oil from oil containers before oil and residue over ow!
- Page 32 Replacing LED Light Fixture This range hood uses LED light xture: 2W Max 12V LED Make sure the range hood is unplugged or turn OFF breaker and the lights are cool to touch. Place a at-head screwdriver between light housing and hood body, gently pry up the light housing and search for the metal clip.
-
Page 33: Warranty
Warranty TO OBTAIN SERVICE UNDER WARRANTY: Y ou must present proof of original purchase date. Please provide an original dated proof of purchase (sales receipt / invoice) in order to obtain service under warranty. Lifetime Motor Warranty The motor, which is covered by lifetime warranty, should be provided free of charge by your local reseller given it failed due to manufacturing defects. - Page 34 Who is Covered This warranty is extended to the original purchaser for products purchased for ordinary home use. This Warranty Will Be Voided When: Product damaged through negligence, improper installation, accident, abuse, misuse, natural disaster, insuf cient or excessive electrical supply, abnormal mechanical or environmental conditions, or any unauthorized disassembly, repair, modi cation, or failure to follow installation instructions.
- Page 35 purchaser and does not extend to subsequent owners of this product. Any applicable implied warranties, including the warranty of merchantability, are limited in duration to a period of express warranty as provided herein beginning with the date of original purchase at retail and, no warranties, whether express or implied, shall apply to this product thereafter.
-
Page 36: Disclaimer
Disclaimer Carefully inspect all items for damages before accepting delivery. Note any damages on the freight bill or express receipt. Request name and signature of the carrier’ s agent and keep copy to support your claim. Upon acceptance of items, owner assumes responsibility for its safe arrival. -
Page 37: Contact Us
Contact Us If you need any assistance, please contact us at +1 905-727- 8688 or info@vesta.kitchen . Please have your order number and model of the range hood ready. This information will help us better respond to your request. If you need replacement parts, we recommend that you only use genuine parts. - Page 38 www.vesta.kitchen...
Need help?
Do you have a question about the Brussels VRH-BRUSSELS-30 and is the answer not in the manual?
Questions and answers