Table of Contents
Advertisement
Advertisement
Table of Contents

Related Manuals for Bush NE-2722


Summary of Contents for Bush NE-2722
- Page 1 NE-2722 731/6900...
- Page 2 We’re here to help you get the most from your DAB/FM Radio. Should you require any guidance, a simple solution can often be found online at: www.bush-support.com If you still require further assistance, call one of our experts on 0345 604 0105.
-
Page 3: Table Of Contents
System settings Using earphones Auxiliary input Other information Maintenance Specification Product support Help and assistance Disposal Guarantee section of these instructions, or online at www.bush-support.com If you still require further assistance, call one of our experts on 0345 604 0105... - Page 5 Safety information...
-
Page 6: Safety Information
Safety information Important - Please read these instructions fully before installing or operating Safety precautions • Read all the instructions carefully before using the unit and keep them for future reference. • Check that the voltage marked on the rating label matches your mains voltage. - Page 7 Safety information Important - Please read these instructions fully before installing or operating Safety • Always disconnect the unit from the mains supply before connecting/disconnecting other devices or moving the unit. • Unplug the unit from the mains socket during a lightning storm. •...
- Page 8 Safety information Important - Please read these instructions fully before installing or operating • Ensure to unplug the unit from the mains socket before cleaning. • Do not use any type of abrasive pad or abrasive cleaning solutions as these may damage the unit's surface. •...
- Page 9 Safety information Important - Please read these instructions fully before installing or operating • Caution Risk of explosion if battery is replaced by an incorrect type • Warning To avoid replacement of a battery with an incorrect type Don't disposal of a battery into fire or a hot oven, or mechanically crushing or cutting of a Battery.
-
Page 11: Getting To Know Your Dab/Fm Digital Radio
Getting to know your DAB/FM Digital Radio... -
Page 12: Ready? Let's Begin
Getting to know your DAB/FM Digital Radio You’ll be up and running in no time Ready? Let’s begin... Please read these instructions carefully. They contain important information which will help you get the best from your product and ensure safe and correct installation and operation. If you require any further assistance, our technical experts are happy to help. -
Page 13: Product Overview
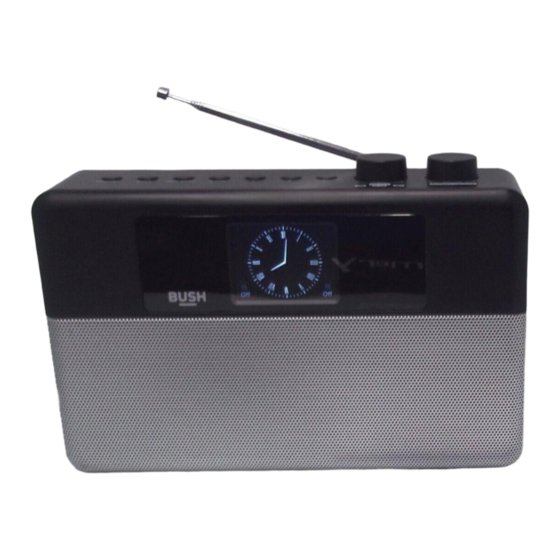
Getting to know your DAB/FM Digital Radio You’ll be up and running in no time Product overview Top view 1. STANDBY button 5. PRESET buttons 2. MODE button 6. SCROLL/SELECT dial 3. INFO/MENU button 7 1/2 8 4. ALARM button 7. - Page 14 Getting to know your DAB/FM Digital Radio You’ll be up and running in no time Front view 8. Speaker 9. Display...
- Page 15 Getting to know your DAB/FM Digital Radio You’ll be up and running in no time Rear view 10. Rod Antenna 13. Earphone Jack 11. Battery Compartment 14. DC IN Socket 12. AUX IN Socket...
-
Page 17: Using Your Dab/Fm Digital Radio
Using your DAB/FM Digital Radio... -
Page 18: Power Source
Using your DAB/FM Digital Radio Let’s get started Power source Mains power 1. Connecting the unit to any other power source may damage the unit. Unwind the mains adapter cable to its full length. Connect the end of the cable to the DC IN Socket at the rear of the unit and then connect the mains adapter to the mains socket. -
Page 19: Basic Operation
Using your DAB/FM Digital Radio Let’s get started Handling the Batteries • Improper or incorrect use of batteries may cause corrosion or battery leakage, which could cause personal injury or damage to property. • Install the batteries correctly by following the polarity (+ and –) indications in the battery compartment. -
Page 20: Dab Operation
Using your DAB/FM Digital Radio Let’s get started Adjusting the volume Turn the VOLUME/DIMMER/SNOOZE dial to adjust the volume. Automatically Setting the Clock The clock will be updated automatically if you can receive DAB/FM signal in your location. In order to synchronise to the current local time, you must leave the unit to receive signals from the DAB/FM station for a period of time. - Page 21 Using your DAB/FM Digital Radio Let’s get started Full scan The full scan will search for the entire DAB Band III channels. After the scan has finished, the first alphanumerically found station will be automatically selected. 1. To activate Full Scan, press and hold INFO/MENU button then turn the SCROLL/SELECT dial to select <Full scan>.
- Page 22 Using your DAB/FM Digital Radio Let’s get started Now playing information (Slideshow) While a station is playing, the screen shows its name and DLS (Dynamic Label Segment) information broadcast by the station such as programme name, track title and contact details. Press the SCROLL/SELECT dial to cycle through the following slideshow displays: 1.
-
Page 23: Fm Operation
Using your DAB/FM Digital Radio Let’s get started Ensemble name This displays the name of the multiplex that contains the station you are listening to. A multiplex is a collection of radio stations that are bundled and transmitted on one frequency. There are national and local multiplexes. - Page 24 Using your DAB/FM Digital Radio Let’s get started Manual scan To search for FM stations manually, turn SCROLL/SELECT dial until your desired frequency is reached. With FM radio, it may be necessary to fine tune each station by turning SCROLL/SELECT dial to your desired by adjusting the frequency by 0.05 MHz.
- Page 25 Using your DAB/FM Digital Radio Let’s get started The unit will automatically switch between stereo and mono when <Stereo allowed> is selected depending on the signal strength, but you can override this and switch this function manually. This is helpful when receiving poor signal reception. FM display modes Every time you press INFO/MENU button, the display will show the following display modes:...
-
Page 26: Bluetooth ® Operation
Using your DAB/FM Digital Radio Let’s get started Presets 1-2 To store a preset, you must first be listening to the station that you would like to save. If you want to store the station in preset positions 1 - 2, press and hold the Preset (1 or 2) buttons for 2 seconds. The words “Preset # saved”... - Page 27 3. Activate your Bluetooth device and select the search mode. 4. “BUSH NE-2722” will appear on your Bluetooth device list. 5. Select “BUSH NE-2722” and enter “0000” for the password if necessary. 6. When playing a soundtrack, press the SCROLL/SELECT dial 1/2 to pause the playback and press the SCROLL/SELECT dial 1/2 again to resume playback.
-
Page 28: Alarms And Snooze
Using your DAB/FM Digital Radio Let’s get started Alarms and snooze As well as a clock/calendar, there are two wake-up alarms with snooze facility. Your clock radio can be set to wake you to DAB, FM radio or buzzer alarm. Alarms (mains power only) 1. - Page 29 Using your DAB/FM Digital Radio Let’s get started Source Turn SCROLL/SELECT dial to select Buzzer, Digital Radio or FM, then press the SCROLL/SELECT dial to confirm. If DAB or FM is chosen as the audio source you will also be prompted to select the Last Listened or preset station (if set).
-
Page 30: System Settings
Using your DAB/FM Digital Radio Let’s get started Press STANDBY or ALARM button to fully cancel a sounding alarm and switch the radio to standby. Display Backlight (Mains Power Only) There are four backlight levels to choose. To set the backlight level, repeatedly press the VOLUME/DIMMER/ SNOOZE dial and the brightness of the display will change in sequence: OFF>High>Medium>Low In DC operation, the display will turn off when the radio is powered... - Page 31 Using your DAB/FM Digital Radio Let’s get started Time/date 1. To set the time & date, press and hold INFO/MENU to display the menu. 2. Turn SCROLL/SELECT dial to select <System Settings>, and then press the SCROLL/SELECT dial to confirm selection. Turn SCROLL/ SELECT dial to select <Time/Date>, then press the SCROLL/ SELECT dial to confirm.
-
Page 32: Using Earphones
Using your DAB/FM Digital Radio Let’s get started Factory reset 1. To perform factory reset, press and hold INFO/MENU to enter Menu. 2. Turn SCROLL/SELECT dial to select <System Settings> and press the SCROLL/SELECT dial to confirm 3. Turn SCROLL/SELECT dial button to select <Factory Reset> and press the SCROLL/SELECT dial to confirm. -
Page 33: Auxiliary Input
Using your DAB/FM Digital Radio Let’s get started Auxiliary input 4. There is an AUDIO IN socket located at the rear of the unit. Analogue audio sound signals from other audio sources can be input to the unit through this socket. 5. -
Page 35: Other Information
Other information... -
Page 36: Maintenance
• To clean the unit, wipe the case with a slightly moist, lint-free cloth. • Do not use any cleaning fluids containing alcohol, ammonia or abrasives. • Do not spray an aerosol at or near the unit. Specification Model NE-2722 Battery DC 1.5V R14/C size x 4 Power Supply Input: 100–240V ~50/60Hz, Max.400mA Output: DC 5.9V... - Page 37 Other information Helpful technical information Bluetooth information Bluetooth pairing ID : BUSH NE-2722 Bluetooth Profile: A2DP and AVRCP Bluetooth Range: Max. 8M Bluetooth Version: Frequency range: 2402 MHz - 2480 MHz Max RF power: ≤ 0dbm Power adapter information Manufacturer’s name and address: DONGGUAN BECKY ELECTRONICS TECH CO., LTD...
-
Page 39: Product Support
Product support... -
Page 40: Help And Assistance
Radio is not operating as intended, a simple solution can often be found in the Troubleshooting section of these instructions or online at www.bush-support.com If you still require further assistance, call one of our experts on 0345 604 0105*. To help give us give you a fast and efficient service please have the following information ready: Model Ref. -
Page 41: Disposal
Declaration of Conformance Hereby, Argos Ltd, declares that this Band II LPD device is in compliance with the essential requirements and other relevant provisions of Radio Equipment Directive 2014/53/EU. The complete declaration of conformity can be obtained by contacting http://www.bush-support.com/... -
Page 42: Guarantee
• Specifications are subject to change without notice. • Bush disclaim any liability for loss or damage arising from the breakdown of the product. • This guarantee is in addition to and does not diminish your statutory or legal rights. - Page 43 Product support Help is always at hand Important Data Protection Information To find out how we and Domestic & General Insurance Plc use your data please refer to the guarantee registration material or visit www.bushregistrations.co.uk. Guarantor: Argos Limited-489-499 Avebury Blvd. - Milton Keynes- NK9 2NW...
- Page 44 Contact: www.bush-support.com Helpline: 0345 604 0105...
Need help?
Do you have a question about the NE-2722 and is the answer not in the manual?
Questions and answers
What are the icons at bottom of display