
Related Manuals for KitchenAid 5K45SSC


Summary of Contents for KitchenAid 5K45SSC
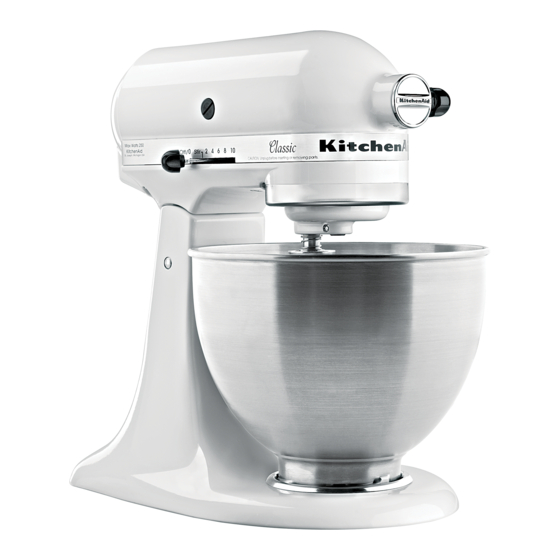
- Page 1 ® STAND MIXER USE AND CARE GUIDE GUIDE TO EXPERT RESULTS 台式搅拌机使用和保养指南 专业效果指南 Model 5K45SSC Model 5KSM150PSC 型号 5K45SSC 型号 5KSM150PSC 1 2 4 6 8 10 Model 5K5SSC 型号 5K5SSC...
-
Page 2: Table Of Contents
Assembling Your Tilt-Head Stand Mixer ...8 5K5SS Bowl-Lift Stand Mixer Features ...9 Assembling Your Bowl-Lift Stand Mixer ...10 Assembling Your Pouring Shield ...11 Using Your KitchenAid ® Flat Beater, Wire Whip and Dough Hook ...12 Beater to Bowl Clearance ...12 Care and Cleaning ...13... - Page 3 倾斜头台式搅拌机的结构 5K45SS 倾斜头台式搅拌机的结构 5KSM150PS 组装倾斜头台式搅拌机 ... 25 升降式台式搅拌机的结构 5K5SS 组装升降式台式搅拌机 ... 27 组装导流罩 ... 28 使用 平搅器、打蛋器和面团钩 ® KitchenAid 搅拌器与桶的间距 ... 29 保养和清洁 ... 30 行星式搅拌动作 ... 30 台式搅拌机的用法 ... 30 速度控制指南 - 速搅拌机 搅拌提示 ... 32 搅拌和揉搓发酵面团 ... 33 蛋白...
-
Page 4: Stand Mixer Safety
7. The use of accessories not recommended or sold by KitchenAid may cause fire, electrical shock or injury. 8. Do not use the Stand Mixer outdoors. 9. Do not let the cord hang over edge of table or counter. -
Page 5: Electrical Requirements
Your Stand Mixer operates on a regular 220-240 volt A.C., 50/60 hertz house current. The wattage rating for your Stand Mixer is printed on the trim band. This wattage is determined by using the accessories which draws the greatest power. Other recommended accessories may draw significantly less power. -
Page 6: 5K45Ss Tilt-Head Stand Mixer Features
5K45SS Tilt-Head Stand Mixer Features Motor Head Speed Control Lever Beater Height Adjustment Screw Wire Whip Accessory Hub Accessory Knob Bowl Clamping Plate Dough Hook Motor Head Locking Lever (not shown) Beater Shaft Flat Beater 4.25 liter (4.5 qt.) Stainless... -
Page 7: 5Ksm150Ps Tilt-Head Stand Mixer Features
5KSM150PS Tilt-Head Stand Mixer Features Motor Head Speed Control Lever Beater Height Adjustment Screw Wire Whip Accessory Hub Accessory Knob Bowl Clamping Plate Dough Hook Motor Head Locking Lever (not shown) Beater Shaft Flat Beater Pouring Shield 4.8 liter (5 qt.) -
Page 8: Assembling Your Tilt-Head Stand Mixer
Assembling Your Tilt-Head Stand Mixer To Attach Bowl 1. Turn speed control to “O”. 2. Unplug Stand Mixer or disconnect power. 3. Hold the locking lever in the UNLOCK position and tilt motor head back. 4. Place bowl on bowl clamping plate. -
Page 9: 5K5Ss Bowl-Lift Stand Mixer Features
5K5SS Bowl-Lift Stand Mixer Features Speed Control Knob Spring Latch, Bowl Pin and Bowl Height Adjustment Screw (not shown) Locating Pins Bowl Support Flat Beater Wire Whip Motor Head Accessory Hub 1 2 4 6 8 1 0 4.8 liter (5 qt.) -
Page 10: Assembling Your Bowl-Lift Stand Mixer
Assembling Your Bowl-Lift Mixer To Attach Bowl 1. Turn speed control to “O”. 2. Unplug Stand Mixer or disconnect power. 3. Place bowl-lift handle in down position. 4. Fit bowl supports over locating pins. 5. Press down on back of bowl until bowl pin snaps into spring latch. -
Page 11: Assembling Your Pouring Shield
(see page 8 for tilt-head models, see page 10 for bowl-lift models). 4. From the front of the Stand Mixer, slide the pouring shield over the bowl until the shield is centered. The bottom rim of the shield should fit within the bowl. -
Page 12: Using Your Kitchenaid ® Flat Beater, Wire Whip And Dough Hook
Beater to Bowl Clearance Your Stand Mixer is adjusted at the factory so the flat beater just clears the bottom of the bowl. If, for any reason, the flat beater hits the bottom of the bowl or is too far away from the bowl, you can correct clearance easily. -
Page 13: Care And Cleaning
Your KitchenAid Mixer will mix faster and more thoroughly than most other electric mixers. Therefore, the mixing time in most recipes must be adjusted to avoid overbeating. -
Page 14: Speed Control Guide - 10 Speed Mixers
FAST BEATING, WHIPPING FAST WHIPPING NOTE: Do not exceed Speed 2 when preparing yeast doughs as this may cause damage to the Stand Mixer. Description For slow stirring, combining, mashing or starting all mixing procedures. Use to add flour and dry ingredients to batter, and add liquids to dry ingredients. -
Page 15: Mixing Tips
Converting Your Recipe for the Stand Mixer The mixing instructions found in this book can be used to convert your favorite recipes for use with your KitchenAid Stand Mixer. To help determine a mixing procedure, your own observations and experience will be needed. -
Page 16: Mixing And Kneading Yeast Dough
7. Bowl-Lift Stand Mixers: Lower bowl on Stand Mixer and remove dough from the bowl and dough hook. Tilt-Head Stand Mixers: Unlock and tilt back Stand Mixer head and remove dough from the bowl and dough hook. 8. Follow directions in recipe for rising, shaping, and baking. -
Page 17: Egg Whites
2-4 egg whites ... GRADUALLY to 8 or more egg whites ... GRADUALLY to 8 Whipping Stages ® With your KitchenAid Stand Mixer, egg whites whip quickly. So, watch carefully to avoid overwhipping. This list tells you what to expect. -
Page 18: Accessories - General Instructions
The hub and shaft housing are tapered to assure a snug fit, even after prolonged use and wear. KitchenAid extra power unit to operate them; the power unit is built-in. -
Page 19: When You Need Service
When You Need Service Please read the following before calling your service center. 1. The Stand Mixer may warm up during use. Under heavy loads with extended mixing time periods, you may not be able to comfortably touch the top of the unit. -
Page 20: Kitchenaid ® Household Stand Mixer Warranty
KITCHENAID DOES NOT ASSUME ANY RESPONSIBILITY FOR INDIRECT DAMAGES. All service should be handled locally by an Authorized KitchenAid Service Center. Contact the dealer from whom the unit was purchased to obtain the name of the nearest Authorized KitchenAid Service Center. -
Page 21: 台式搅拌机安全注意事项
3. 如果无人监督,禁止小孩或体弱者使 用本电器。 4. 如果不再使用,请先从插座中拔出台 式搅拌机的插头,然后再装、卸部件 或进行清洁。 5. 避免接触运动部件。在操作期间,让 手、头发、衣服、刮铲及其他器皿远 离搅拌器,以降低人员受伤和/或台 式搅拌机受损的风险。 如果不严格遵守说明,您会受重伤或死 亡。 如果不遵守说明,您会受重伤或死亡。 重要安全措施 6. 如果台式搅拌机电源线或插头损坏, 或搅拌机出现故障,或搅拌机被摔落 或以其他方式被损坏,请勿使用搅拌 机。将电器拿到最近的授权服务中 心,进行检查、修理或电气/机械调 整。 7. 如果使用并非 KitchenAid 推荐或出售 的附件,可能会导致火灾、电击或受 伤。 8. 请勿在室外使用台式搅拌机。 9. 请勿将电源线挂在桌子或操作台的边 缘。 10. 清洗前,请从台式搅拌机上卸下平搅 器、打蛋器和面团钩。 11. 该产品仅适合家庭使用。 保存这些说明... -
Page 22: 电压要求
本台式搅拌机使用常见的 220-240 伏、 50/60 赫兹的住宅交流电源。本台式搅拌 机的额定瓦数印在调节带上。此瓦数是使 用最耗电的附件时的功率。其他推荐附件 的能耗可能小得多。 请勿使用延长电线。如果电源线过短,请 让合格的电工或维修员在电器附近安装一 个插座。 电压要求... -
Page 23: 5K45Ss 倾斜头台式搅拌机的结构
5K45SS 倾斜头台式搅拌机的结构 电动头 速度控 制杆 搅拌器高度调 整螺钉 打蛋器 附件套筒 附件旋钮 面团钩 电动头锁定杆 (未显示) 搅拌轴 平搅器 4.25 升 (4.5 夸脱) 不锈钢桶 桶夹板... -
Page 24: 5Ksm150Ps 倾斜头台式搅拌机的结构
5KSM150PS 倾斜头台式搅拌机的结构 电动头 速度控 制杆 搅拌器高度 调整螺钉 打蛋器 附件套筒 附件旋钮 面团钩 电动头锁定杆 (未显示) 搅拌轴 平搅器 导流罩 4.8 升 (5 夸脱) 不锈钢桶 桶夹板... -
Page 25: 组装倾斜头台式搅拌机
组装倾斜头台式搅拌机 安装桶 1. 将速度控制器旋转到 “O”。 2. 拔出台式搅拌机的插头,或断开电源。 3. 让锁定杆保持在 UNLOCK(解锁)位 置,然后让电动头后倾。 4. 将桶放在桶夹板上。 5. 以顺时针方向轻轻旋转桶。 拆卸桶 1. 将速度控制器旋转到 “O”。 2. 拔出台式搅拌机的插头,或断开电源。 3. 让锁定杆保持在 UNLOCK(解锁)位 置,然后让电动头后倾。 4. 逆时针旋转桶。 安装平搅器、打蛋器或面团钩 1. 将速度控制器旋转到 “O”。 2. 拔出台式搅拌机的插头,或断开电源。 3. 让锁定杆保持在 UNLOCK(解锁)位 置,然后抬起电动头。 4. 将搅拌器滑到搅拌轴上,然后向上压至 最大限度。 5. -
Page 26: 5K5Ss 升降式台式搅拌机的结构
5K5SS 升降式台式搅拌机的结构 速度控制旋钮 弹簧锁、桶销钉、桶高 度调整螺钉(未显示) 定位销 桶支架 平搅器 打蛋器 电动头 附件套筒 1 2 4 6 8 1 0 4.8 升(5 夸脱) 不锈钢桶 附件旋钮 桶升降柄 (未显示) 导流罩 搅拌轴 面团钩... -
Page 27: 组装升降式台式搅拌机
安装桶 1. 将速度控制器旋转到 “O”。 2. 拔出台式搅拌机的插头,或断开电 源。 3. 将桶升降柄置于低位。 4. 将桶支架放到定位销上。 5. 向下按桶背面,直到桶销钉卡入弹簧锁 为止。 6. 在搅拌前将桶向上抬一下。 7. 将搅拌机插入适当的电源插座。 组装升降式搅拌机 上抬桶 1. 将手柄旋转到直立位置。 2. 搅拌时,桶必须始终处于抬起的锁定 位置。 降低桶 1. 向后、向下旋转手柄。 拆卸桶 1. 将速度控制器旋转到 “O”。 2. 拔出台式搅拌机的插头,或断开电 源。 3. 将桶升降柄置于低位。 4. 卸下平搅器、打蛋器或面团钩。 5. 抓住桶柄,直接向上抬,使其脱离定 位销。... -
Page 28: 组装导流罩
销钉 拆卸平搅器、打蛋器或面团钩 1. 将速度控制器旋转到“O”。 2. 拔出台式搅拌机的插头,或断开电源。 3. 向下旋转桶升降柄,降低桶。 4. 向上压搅拌器,然后向右旋转。 5. 从搅拌轴上拿下搅拌器。 安装导流罩 1. 将速度控制器旋转到“O”。 2. 拔出台式搅拌机的插头,或断开电源。 3. 安装平搅器、面团钩或打蛋器和桶(若 是倾斜头型号,请参阅第 25 页;若是 升降式型号,请参阅第 27 页)。 4. 从台式搅拌机前部,在桶上方滑动导流 罩,直到导流罩居中为止。导流罩的底 边应当能装入桶中。 拆卸导流罩 1. 将速度控制器旋转到“O”。 2. 拔出台式搅拌机的插头,或断开电源。 3. 抬起导流罩前部,让它脱离桶边缘,然 后向前拉。 4. 拆卸附件和桶。 组装升降式搅拌机 台式搅拌机速度控制... -
Page 29: 使用 Kitchenaid ® 平搅器、打蛋器和面团钩
使用 KitchenAid 对于普通的稠混合物,使用平搅器: 蛋糕 速制面饼 曲奇 当混合物需要混合空气时,使用打蛋器: 鸡蛋 白蛋糕 熟炼糖霜 若是搅拌和揉搓发酵面团,使用面团钩: 面包 小圆面包 本台式搅拌机出厂时已调好,平搅器恰好不会接触桶底。如果由于某种原因,平搅器 接触了桶底或离桶过远,您可以轻松校正间距。 倾斜头台式搅拌机: 1. 将速度控制器旋转到“O”。 2. 拔出台式搅拌机的插头。 3. 抬起电动头。 4. 沿逆时针方向(左)略微旋转螺钉 (A),以升高平搅器;或沿顺时针方 向(右)略微旋转螺钉 (A),以降低平 搅器。 5. 调整平搅器,使其刚好离开桶表面。 如果螺钉过调,桶锁定杆可能无法锁 到位。 注意:如果调整恰当,平搅器不会碰到桶 底或桶壁。如果平搅器或打蛋器过于接近 桶,当它碰到桶底时,会磨掉/损平搅器 上的涂层或打蛋器上的金属丝。 平搅器、打蛋器和面团钩 ® 饼干 糖果... -
Page 30: 保养和清洁
可以使用自动洗碗机清洗桶、带涂层的平 搅器和带涂层的面团钩。也可以用起泡沫 的热水彻底清洁它们,然后用水彻底冲 洗,之后干燥。不用时请勿将平搅器留在 轴上。 注意:不能用洗碗机洗打蛋器 不安全! 搅拌机工作时,平搅器 不仅绕着固定的桶运 动,而且绕着自己的轴 反向旋转。该图为搅拌 器在桶中运动时形成的 完整覆盖轨迹。与多数 其他电动搅拌机相比, 台式搅拌 KitchenAid ® 注意:在台式搅拌机工作期间,请勿刮 擦桶。 保养和清洁 注意:始终记得先拔出台式搅拌机的插 头,然后再清洁。用柔软的湿布擦拭台式 搅拌机。请勿使用家用/工业清洁剂。请 勿浸入水中。经常擦拭搅拌轴,去掉上面 积聚的所有残渣。 行星式搅拌动作 机速度更快、搅拌更彻底。因此,对于多 数食谱而言,必须适当调整搅拌时间,以 免搅拌过多。 台式搅拌机的用法 桶和搅拌器设计独特,无需经常刮擦即可 实现彻底搅拌。一般情况下,搅拌期间将 桶刮擦一两次就足够了。先关掉搅拌机, 然后再刮擦。 台式搅拌机在使用过程中可能会发热。如 果负荷大,需要延长搅拌时间,搅拌机顶 部可能会发烫。这是正常现象。... -
Page 31: 速度控制指南 - 10 速搅拌机
速度控制指南 - 10 速搅拌机 编号 速度 搅动(STIR) 缓慢搅拌 搅拌、打浆 打浆、乳析 快速打浆、打发 快速打发 注意:准备发酵面团时请勿超过 2 档速度,否则会导致台式搅拌机损坏。 说明 适合于缓慢的搅动、混合、捣碎操作,或作 为所有搅拌过程的第一步。用于向糊浆中添 加面粉和干配料,以及向干配料中添加液 体。请勿使用 STIR(搅动)速度搅拌或揉搓 发酵面团。 适合于缓慢的搅拌、捣碎或较快的搅动操 作。用于搅拌和揉搓发酵面团、粘稠的糊浆 和糖果,启动土豆或其他蔬菜的捣碎过程, 将起酥油切到面粉中,搅拌稀薄或易溅的糊 浆。配合开罐器附件使用。 用于搅拌中等稠度的糊浆,如曲奇的糊。用于 混合糖与起酥油,以及在蛋白中加糖(用于制 作蛋白酥皮)。对蛋糕粉而言是中速。配合以 下工具使用:食品研磨机、旋转切片机/切丝 机、压面辊和水果/蔬菜滤网。 适合于中速打浆(乳析)或打发。作为蛋糕、 甜甜圈和其他糊浆的搅拌操作的最后一步。对 蛋糕粉而言是高速。配合柑橘榨汁机附件使 用。 适合于发泡鲜奶油、蛋白或熟炼糖霜。 适合于打发少量奶油、蛋白,或作为土豆泥 打发操作的最后一步。配合制浆机和谷物磨 粉机附件使用。 注意:负荷大时不能维持快速状态,如使用制... -
Page 32: 搅拌提示
适当改变食谱,以适合本台式搅拌机 可以根据本书中的搅拌说明改变您喜爱 KitchenAid 机。 您需要利用自己的观察和经验,来确定 搅拌过程。观察糊浆或面团,只要它具 有食谱中描述的外观(例如“光滑的像 奶一样”),就停止搅拌。利用第 31 页 的“速度控制指南”,确定适当的搅拌 速度。 添加配料 依照标准操作过程,在搅拌多数糊浆(尤 其是蛋糕和曲奇糊)时,需要添加: 干配料 ⁄ 液体配料 ⁄ 干配料 ⁄ 液体配料 ⁄ 干配料 ⁄ 使用 1 档速度,直到各种配料混匀。然后 逐渐提高到所需速度。 任何时候都应尽量贴近桶壁添加配料,不 要直接将配料倒在转动的搅拌器上。可 以使用导流罩简化添加配料的工作。 注意:如果桶最底部的配料搅拌不充分, 则表明搅拌器在桶中伸得不够深。请参阅 第 29 页的“搅拌器与桶的间距”。 搅拌提示 蛋糕粉 用带包装的蛋糕粉准备面糊时,中速使用... -
Page 33: 搅拌和揉搓发酵面团
搅拌和揉搓发酵面团 “ 快速搅拌”描述的是面包焙烤方法,该 方法要求先将干酵母与其他干配料混合, 然后再加液体。传统方法与之相反,要求 用温水溶解酵母。 1. 将包括酵母在内的所有干配料放入桶 中,留出 125 到250 克(1 到 2 杯) 面粉。 2. 升降式台式搅拌机:安装桶和面团钩。 抬起台式搅拌机的桶。 倾斜头台式搅拌机:安装桶和面团钩。 锁定台式搅拌机的头。 3. 调到 2 档速度,搅拌约 15 秒,或直到 各种配料混匀为止。 4. 继续使用 2档速度,在面粉混合物中逐 渐添加液体配料,再搅拌1 到 2 分钟。 注意:如果液体配料添加速度过快, 它们会在面团钩周围形成水坑,进而 降低搅拌速度。 5. 继续使用 2 档速度,根据需要逐渐加入 剩余面粉,一次添加... -
Page 34: 蛋白
将室温蛋白放入干燥、干净的桶中。安装 桶和打蛋器。为了避免泼溅,请逐步调到 指定速度,逐渐打发到所需阶段。请参阅 下表。 数量 1 个蛋白... 逐渐调到 10 2-4 个蛋白 ... 逐渐调到 8 6 个或更多蛋白... 逐渐调到 8 打发阶段 台式搅拌机可以迅速打发蛋 KitchenAid ® 白。请仔细观察,以免打发过多。该列表 介绍了预期结果。 起泡 存在不均匀的大气泡。 开始成形 气泡小且紧密;搅拌物呈白色。 将冷的鲜奶油倒入冷却的桶中。安装桶和 打蛋器。为了避免泼溅,请逐步调到指定 速度,逐渐打发到所需阶段。请参阅下 表。 数量 59 毫升( 杯 ) ... 逐渐调到 10 ⁄... -
Page 35: 附件 - 一般说明
一般信息 附件的设计可确保较长的使用寿命。附件动力轴和套筒槽口采用正方形设 KitchenAid ® 计,目的是消除向附件传送动力的过程中的任何滑脱可能性。套筒和轴套采用渐缩设 计,目的是确保滑配合,即使在长时间使用和磨损后也能确保滑配合。 附件无需额外电源即可运行;电源是内置的。 KitchenAid ® 附件套筒槽口 安装 1. 将速度控制器旋转到“O”。 2. 拔出台式搅拌机的插头,或断开电源。 3. 逆时针旋转附件旋钮,将其松开。卸下 附件套筒盖。 4. 将附件轴套插入附件套筒,确保附件动 力轴在方形附件套筒槽口内配合到位。 可能需要前后旋转附件。当附件处于正 确位置时,其上的销钉恰好能卡到套筒 边缘的凹槽中。 5. 顺时针旋转附件旋钮,直到将它牢牢固 定到台式搅拌机上为止。 附件 附件旋钮 凹槽 销钉 附件轴套 一般说明 6. 将搅拌机插入适当的电源插座。 附件罩... -
Page 36: 当您需要服务时
拆卸 1. 将速度控制器旋转到“O”。 2. 拔出台式搅拌机的插头,或断开电 源。 3. 逆时针旋转辅助装置旋钮,将其松 开。前后轻轻旋转附件,同时将其向 外拉。 4. 放回附件套筒盖。顺时针旋转附件旋 钮,将其拧紧。 请在致电服务中心前阅读以下内容。 1. 台式搅拌机在使用过程中可能会发热。 如果负荷大,需要延长搅拌时间,搅拌 机顶部可能会发烫。这是正常现象。 2. 台式搅拌机可能会发出刺鼻气味,新 机器尤其明显。对电机而言,这是常见 现象。 3. 如果平搅器碰撞桶壁,请停止台式搅拌 机。请参阅第 29 页的“搅拌器 与桶的间距”。 一般说明 当您需要服务时 如果台式搅拌机有故障或不能运转,请检 查以下事项: - 是否已插上台式搅拌机的插头? - 台式搅拌机所连接电路中的保险丝是否 正常?如果有断路开关盒,请确保电路 是闭合的。 - 将台式搅拌机关闭 10-15 秒,然后重新 打开。如果台式搅拌机仍不能启动,让... -
Page 37: Kitchenaid 家用台式搅拌机保修证
KitchenAid 保修时间: 中国: 自购买之日起一年内整机 保修。 不对间接损害承担任何责任。 应由当地授权 KitchenAid 服务中心提供所有服务。联系向您出售搅拌机的经销商,以获 取距离您最近的授权 KitchenAid 服务中心的名称。 在亚州: Greenfield World Trade 香港沙田小沥源, 安心街19号 汇贸中心801室 电话: +852 2321 1217 传真: +852 2321 8867 www.greenfieldworld.com 家用台式搅拌机保修证 ® KitchenAid 承担以下费用: 用于校正材料或工艺缺 陷的替换部件和修理人 工费。服务必须由授权 KitchenAid 服务中心提 供。 服务中心 在美国:... - Page 38 ® Registered Trademark of KitchenAid, U.S.A. ™Trademark of KitchenAid, U.S.A. The shape of the Stand Mixer is a trademark of KitchenAid, U.S.A. © 2008. All rights reserved. Specifications subject to change without notice. ® KitchenAid 在美国的注册商标。 ™ KitchenAid 在美国的商标。 台式搅拌机造型是 KitchenAid 在美国的商标。...
Need help?
Do you have a question about the 5K45SSC and is the answer not in the manual?
Questions and answers