Table of Contents
Advertisement
Quick Links
Advertisement
Table of Contents

Subscribe to Our Youtube Channel
Related Manuals for Spinning SPINNER BLADE


Summary of Contents for Spinning SPINNER BLADE
- Page 1 SPINNER BLADE ® SPINNER BLADE ION ® OWNER’S MANUAL...
- Page 2 If you purchased the Spinner Blade, you can upgrade it later with our Performance SPINPower crank. The Blade ION is equipped with the Performance SPINPower crank and you will be ready to train with power.
-
Page 3: Table Of Contents
S PI N N E R ® B L A D E A N D S PI N N E R ® B L A D E I O N OWN E R’ S MANUAL CONTENTS Welcome to the Spinning® Program Spinning® Program Safety Your Spinner®... - Page 4 THANK YOU! Thank you for purchasing your new Spinner Blade bike. Your bike has been ® designed and engineered for safety, durability and to provide a great ride. The following pages will outline a number of safety precautions and part diagrams for your reference.
- Page 5 11. This bike must only be used for the purposes described in this manual. DO NOT use accessories that are not recommended by Spinning ® 12. Differently abled people should not use the bike without the assistance of a qualified person or a doctor.
- Page 6 21. Before every ride please examine brake pad, pedals and drivetrain for signs of wear. The brake pad is a normal wear item and may need to be replaced over time. 22. This bike is not suitable for therapeutic use and is for consumer use only.
- Page 7 S PI N N E R ® B L A D E A N D S PI N N E R ® B L A D E I O N OWNE R’ S MANUAL BIKE INFORMATION AND SPECIFICATIONS BIKE INFORMATION AND SPECIFICATIONS SPINNER BLADE AND BLADE ION- 123.5 Lbs (56 Kg) SPINNER BLADE AND SPINNER BLADE ION - 123.5 Lbs (56 Kg)
- Page 8 OPERATION AND INSTALLATION PERIMETER OPERATION AND INSTALLATION PERIMETER 39.4” PERIMETER SPACE: Keep at least 1 meter (39.4”) of clear space around the entire bike PERIMETER SPACE: Keep at least 1 meter (39.4”) of clear space around the entire bike © 2021 Mad Dogg Athletics, Inc. All rights reserved.
- Page 9 (ABS) screw M6x12L(5m/m) shaft cap (PVC) tablet holder 4.7-12.9 ADV-306 screw M8x16L screw M8x20L flat washer φ8xφ16x2t spring washer φ8.4*φ18*1.5T connector flat washer φ8 finger guard holder PW7324 + PW7325 flat washer φ8 hexagonal screw M5x20L(3m/m) www.spinning.com 800.847.SPIN (7746)
- Page 10 SPINNER BLADE AND SPINNER BLADE ION ® ® EXPLODED VIEW © 2021 Mad Dogg Athletics, Inc. All rights reserved.
-
Page 11: Welcome To The Spinning Program
The bike is just the beginning! Now you can create your own Spinning® experience by choosing content and gear for a ride tailored just for you. Try one of our apps on for size with a free trial for the Spinning® subscription of your choice. -
Page 12: Spinning® Program Safety
• Keep children and pets away from the bike whenever it is in use. • Stay hydrated. Drink plenty of water throughout your ride. • Pedal with a light amount of resistance at all times, even during warm- up and cool-down. The Spinning program reminds riders to maintain a ®... - Page 13 • Keep shoe laces tucked in and foot straps snug around your shoe. If your foot does come out of the toe clip, push down on the resistance knob to stop the flywheel’s motion before clipping back in. www.spinning.com 800.847.SPIN (7746)
-
Page 14: Your Spinner® Bike
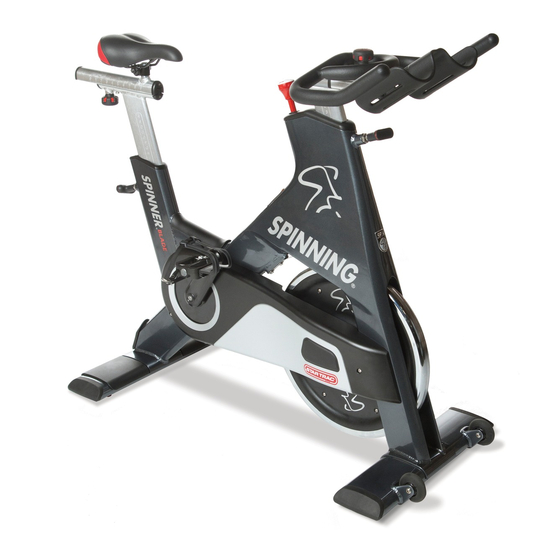
YOUR SPINNER BIKE ® The patented Spinner bike has been specially designed for the Spinning® ® program. The Spinner bike replicates the feel of a real road bike to create an enjoyable, effective workout. Some key features include: • A contoured saddle to keep you comfortable and balanced. You can adjust the saddle horizontally and vertically for a personalized fit. -
Page 15: Caring For Your Spinner Bike
Always spray the cleaner onto the cloth and then wipe the bike down. PEDALS Check the pedals weekly to ensure that the threads are completely tightened. If the pedals have become loose, tighten the threads with the supplied pedal wrench to ensure that they are securely attached. www.spinning.com 800.847.SPIN (7746) -
Page 16: Bike Assembly
SPINNER BIKE ASSEMBLY ® STEP 1: UNPACK THE CARTON Open the shipping carton as illustrated on the box and remove all of the parts. Make sure that the following parts are included and that no damage has occurred during shipping: •... - Page 17 3. Attach the handlebar post end cap using one 3mm bolt and fully tighten with the hex key. 4. Tighten the fore/aft adjustment knob in any position before proceeding. www.spinning.com 800.847.SPIN (7746)
- Page 18 STEP 7: INSTALL THE CRANK Locate the left side crank and push it onto the axle in the opposite orientation of the drive side crank. Give the crank a tap with the hand at that axle bolt location to make the connection snug. Now find the 14mm crank bolt on the assembly card and hand thread the bolt into the axle hole as far as possible, making sure that the threads...
- Page 19 If needed, use the leveling adjusters under the front and rear stabilizer bars to steady the bike. Turn the leveling feet counterclockwise to decrease the height or clockwise to increase the height until the bike is stable www.spinning.com 800.847.SPIN (7746)
-
Page 20: Testing The Bike
• Adjust the seat post and handlebar post to fit your body.. Refer to the Guide to Ride or visit www.spinning.com. • Pedal at a moderate pace and test for proper and smooth resistance changes while varying the amount of turns on the resistance knob. -
Page 21: Troubleshooting
Take the time to enter your Spinner® bike serial number in the space below (the serial number is located on the bottom crossbar). If parts are missing or if you have any assembly questions, please contact customer service at (888) 704.SPIN (7746). Serial No. : ____________________________________________ www.spinning.com 800.847.SPIN (7746) -
Page 22: Pedal Adjustments
PEDAL ADJUSTMENTS The SPD pedals are set for the lowest release tension at the factory for safety. If you would like a stronger release tension, use a 3mm allen wrench and turn the adjustment screw clockwise. Adjust both sides evenly and start with as little adjustment as necessary until you achieve the desired release tension. -
Page 23: Warranty
® Patents for this product are available at : www.spinning.com/patents Copyright 2021 Mad Dogg Athletics, Inc. All rights reserved. SPIN®, Spinner®, Spinning®, Spin Fitness®, SPINPower® and the Spinning® logo ® are registered trademarks that are owned by Mad Dogg Athletics, Inc. - Page 24 1.310.823.7008 Fax: 1.310.823.7408 www.spinning.com SPINNING.COM ©2021 Mad Dogg Athletics, Inc. All rights reserved. Spin®, Spinner®, Spinning®, Spin Fitness®, SPINPower® ® and the Spinning logo ® are registered trademarks that are owned by Mad Dogg Athletics, Inc. Designed and engineered in Venice, California. Made in China.
Need help?
Do you have a question about the SPINNER BLADE and is the answer not in the manual?
Questions and answers