Table of Contents
Advertisement
Quick Links
Advertisement
Table of Contents

Related Manuals for Spinning ELITE


Summary of Contents for Spinning ELITE
- Page 1 ELITE SPINNER ® OWNER’S MANUAL...
- Page 3 Spinner ® bikes in a package that is perfect for home use. Need help? Scan the code to check out our Spinning ® Support Video Library and other useful information about your new bike and the Spinning program.
-
Page 4: Table Of Contents
Testing the Bike Troubleshooting Brake Pad Replacement Warranty For more information about the Spinning program, indoor cycling gear ® and tips to help you make the most of every ride, visit www.spinning.com. © 2021 Mad Dogg Athletics, Inc. All rights reserved. - Page 5 ® THANK YOU! Thank you for purchasing your new Spinner Elite bike. Your bike has been ® designed and engineered for safety, durability and to provide a great ride. The following pages will outline a number of safety precautions and part diagrams for your reference.
- Page 6 11. This bike must only be used for the purposes described in this manual. DO NOT use accessories that are not recommended by Spinning ® 12. Differently abled people should not use the bike without the assistance of a qualified person or a doctor.
- Page 7 27. Turn the resistance knob counter-clockwise to release the brake before exercising. TOOLS INCLUDED FOR SPINNER BIKE ASSEMBLY ® Use the included tools for bike assembly only. Elite (Tools and Hardware) 14mm Socket Wrench for Crank Assembly 14mm Crank Bolt www.spinning.com 800.847.SPIN (7746)
- Page 8 BIKE INFORMATION AND SPECIFICATIONS BIKE INFORMATION AND SPECIFICATIONS SPINNER ELITE- 127.8 Lbs (58 Kg) SPINNER ELITE - 127.8 Lbs (58 Kg) ® Read and properly follow all warnings and instructions prior to using the bike. Improper use, misuse and uncontrolled pedals can result in serious injury.
- Page 9 S PI N N E R E LITE OWN E R’ S MANUAL ® OPERATION AND INSTALLATION PERIMETER 39.4” PERIMETER SPACE: Keep at least 1 meter (39.4”) of clear space around the entire bike www.spinning.com 800.847.SPIN (7746)
- Page 10 SPINNER ELITE PARTS LIST ® Elite Parts List Part No. Description Quantity Part No. Description Quantity frame connector BB axle finger guard holder flywheel hexagonal screw flat washer rear stabilizer flywheel axle adjusting cap flywheel nut front stabilizer bushing adjusting cap...
- Page 11 S PI N N E R E LIT E OWN E R’ S MANUAL ® SPINNER ELITE EXPLODED VIEW ® www.spinning.com 800.847.SPIN (7746)
-
Page 12: Welcome To The Spinning
The bike is just the beginning! Now you can create your own Spinning® experience by choosing content and gear for a ride tailored just for you. Try one of our apps on for size with a free trial for the Spinning® subscription of your choice. -
Page 13: Spinning® Program Safety
• Keep children and pets away from the bike whenever it is in use. • Stay hydrated. Drink plenty of water throughout your ride. • Pedal with a light amount of resistance at all times, even during warm- up and cool-down. The Spinning program reminds riders to maintain a ®... - Page 14 • Focus on form, posture and smooth transitions between movements. • Always ride with proper footwear. Do not ride with bare feet or open-toed shoes. • Keep shoe laces tucked in and foot straps snug around your shoe. If your foot does come out of the toe clip, push down on the resistance knob to stop the flywheel’s motion before clipping back in.
-
Page 15: Your Spinner ® Bike
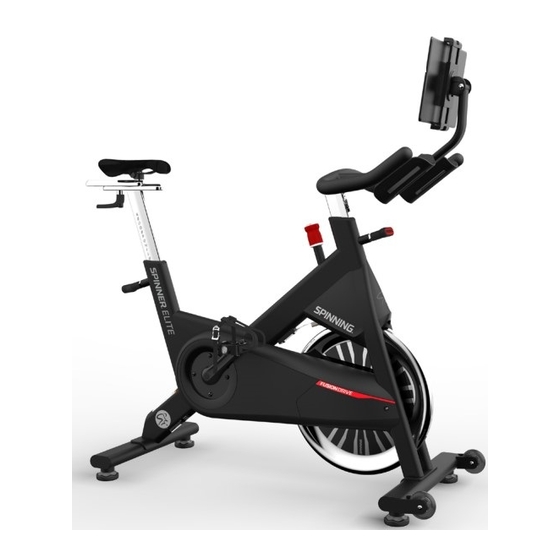
ELITE OWN E R’ S MANUAL ® YOUR SPINNER BIKE ® The patented Spinner bike has been specially designed for the Spinning ® ® program. The Spinner bike replicates the feel of a real road bike to create ® an enjoyable, effective and fun workout. Some key features include: •... -
Page 16: Caring For Your Spinner
CARING FOR YOUR SPINNER BIKE ® MOVING YOUR BIKE Stand in front of the bike, grasp the handlebars and tip the bike toward you until the transportation wheels are touching the floor. Roll the bike to the desired location, then gently lower the rear of the bike back to the floor. -
Page 17: Bike Assembly
fits near the rear of the lower slot of the seat post. 2. Place the large brass washer on the threaded portion of the seat lever. Screw the lever into the threaded slider several rotations. www.spinning.com 800.847.SPIN (7746) - Page 18 3. Position the lever straight back, then use a 6mm allen wrench to secure the bolt while pulling down on the lever (as shown left). Note that after the lever is tightened it can be adjusted to stay out of the way by pulling just the handle straight down and rotating it to the desired position before releasing.
- Page 19 Use the supplied 14mm socket wrench to tighten the bolt clockwise. Make sure it is tight and then snap the dust cap into the bolt hole. www.spinning.com 800.847.SPIN (7746)
- Page 20 NOTE: The pedal spindles and cranks are marked “L” (left) and “R” (right). Left and right are referenced from a seated position on the bike. Be sure to install the pedals on the correct side of the bike. STEP 6B: INSTALL THE PEDALS Turn the resistance knob clockwise until the crank arms are immobilized.
-
Page 21: Testing The Bike
Pressing down on the red knob will apply the brake if you need to stop quickly. • Adjust the seat post and handlebar post to your bike fit needs. Visit www.spinning.com for more information. Or refer to the playlist at https://www.youtube.com/playlist?list=PLZwv65qs7XFRP_ gw32Kh0WRkgpUTt1Atu for video help. -
Page 22: Troubleshooting
TROUBLESHOOTING RATTLING HANDLEBARS OR SEAT POST Make sure that the pop-pins are correctly locked into place. SADDLE PAIN Check to ensure that the saddle is centered and level. Adjust the level as necessary using the outside bolts (shown in RED). Remember that it does take time for a body to acclimate to the saddle. -
Page 23: Brake Pad Replacement
DISMOUNT THE BIKE OR ATTEMPT TO REMOVE YOUR FEET FROM THE PEDALS UNTIL BOTH THE PEDALS AND THE FLYWHEEL HAVE STOPPED COMPLETELY. FAILURE TO COMPLY WITH THESE INSTRUCTIONS MAY LEAD TO LOSS OF CONTROL AND SERIOUS PERSONAL INJURY. www.spinning.com 800.847.SPIN (7746) -
Page 24: Warranty
® Patents for this product are available at : www.spinning.com/patents Copyright 2021 Mad Dogg Athletics, Inc. All rights reserved. SPIN®, Spinner®, Spinning®, Spin Fitness®, SPINPower® and the Spinning logo ® are registered trademarks that are owned by Mad Dogg Athletics, Inc. - Page 25 1.310.823.7008 Fax: 1.310.823.7408 www.spinning.com SPINNING.COM ©2021 Mad Dogg Athletics, Inc. All rights reserved. Spin®, Spinner®, Spinning®, Spin Fitness®, SPINPower® ® and the Spinning logo ® are registered trademarks that are owned by Mad Dogg Athletics, Inc. Designed and engineered in Venice, California. Made in China.
Need help?
Do you have a question about the ELITE and is the answer not in the manual?
Questions and answers