RADWAG AS R2 PLUS Startup Manual
Analytical and precision balances
Hide thumbs
Also See for AS R2 PLUS:
- Startup manual (24 pages) ,
- Startup manual (25 pages) ,
- Startup manual (25 pages)
Table of Contents
Advertisement
Quick Links
Advertisement
Table of Contents

Related Manuals for RADWAG AS R2 PLUS


Summary of Contents for RADWAG AS R2 PLUS
- Page 1 Start up Guide Szybki start Analytical and Precision Balances Wagi Analityczne i Precyzyjne Analytical balances: Wagi analityczne: • AS R2 PLUS Precision balances: Wagi precyzyjne: • PS R1 • PS R1.M • PS R2 • PS R2.M • PS R2.H...
- Page 2 To view a complete User Manual go to the website or scan QR code: radwag.com/en/manuals/198...
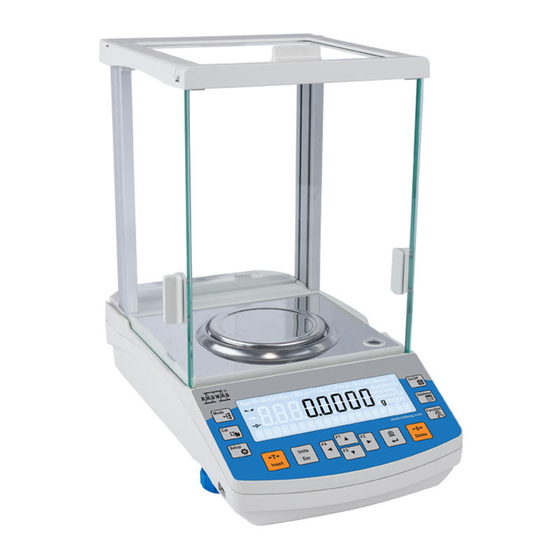
- Page 3 1. CONTENT ZAWARTOŚĆ AS R2 PLUS (d = 0,01 mg) Power Fabric dust Balance Weighing pan Draft shield Centring ring Bottom insert adapter* cover Pierścień Zasilacz Waga Szalka Osłona szalki Osłona dolna Pokrowiec centrujacy sieciowy* ×1 ×1 ×1 ×1 ×1 ×1...
- Page 4 Models: PS R2.H Balance Weighing pan Draft shield Power adapter* Zasilacz Waga Szalka Osłona szalki sieciowy* ×1 ×1 ×1 ×1 Models: PS R2.M.H Balance Weighing pan Draft shield Power adapter* Zasilacz Waga Szalka Osłona szalki sieciowy* ×1 ×1 ×1 ×1 *The plug type may vary by country.
-
Page 5: Recommendations And Warnings
3. RECOMMENDATIONS AND WARNINGS ZALECENIA I OSTRZEŻENIA Operate the device in a room where the temperature ranges between 10–40 +40 °C °C (50–104 °F) and where the relative humidity is below 80%. +104°F Place the balance on a solid surface to ensure stability. To obtain stable and repeatable weighing results, an anti-vibration table is recommended. - Page 6 4. ACTIVITIES TO BE DONE PRIOR TO OPERATION CZYNNOŚCI WSTĘPNE 4.1. Transport lock removal Usunięcie blokad transportowych AS R2 Series Keep the transport lock should a warranty claim or service be required. Zachowaj blokady transportowe do celów gwarancyjnych i serwisowych. Models: PS R2 series | PS R1 series Keep the transport lock should a warranty claim or service be...
-
Page 7: Components Assembly
5. COMPONENTS ASSEMBLY CZYNNOŚCI WSTĘPNE AS R2 (d = 0,01 mg) AS R2 (d = 0,1 mg) PS R1 (d = 1 mg) | PS R2 (d = 1 mg) Install the grounding foot in a freely selected opening. Zamontuj stopkę uziemia- jącą... -
Page 8: Preparing For Work
PS R2.H PS R2.M.H 6. PREPARING FOR WORK PRZYGOTOWANIE WAGI DO PRACY 6.1. Temperature stabilization Stabilizacja temperatury wagi S B 2 U S B Prior to switching the device on, let it Connect the power adapter to DC connector. Connect the power reach room temperature (estimated adapter to the mains. - Page 9 6.2. Leveling Poziomowanie wagi To level the balance, turn its feet and keep turning the feet until an air bubble takes the central position. Obracaj nóżkami wagi do momentu, aż pęcherzyk powie- trza w poziomicy znajdzie się w pozycji centralnej. 6.3.
-
Page 10: Home Screen
7.2. Home screen Pictogram of active Ekran główny working mode Pictogram trybu pracy Stable indication pictogram Piktogram Measurement result stabilizacji wyniku Okno wyniku ważenia Zeroing pictogram Messages and information Piktogram wyzerowania wagi Pole informacyjne 8. BASIC OPERATIONS OPERACJE PODSTAWOWE 8.1.1. Adjustment (for models with an internal adjustment only) Adiustacja (tylko dla modeli z adiustacją... - Page 11 Press to enter “Setup” menu. To proceed to calibration, press key. Naciśnij przycisk , aby wejść do menu. Aby rozpocząć adiustację, naciśnij przycisk Using keys select “External calibration” With unloaded weighing pan, press key. Przy nieobciążonej szalce naciśnij przycisk and press key.
-
Page 12: Working Modes Accessibility
8.2. Zeroing Zerowanie Make sure that the weighing pan is empty The balance has been zeroed. Waga została wyzerowana. and press key. Upewnij się, że szalka jest pusta i naciśnij przycisk 8.3. Taring Tarowanie With loaded weighing pan: upon stabilisation of The balance has been tared. -
Page 13: Working Modes
Using keys select working modes for which In the “Accessibility” position press key. accessibility is to be set and press key. Gdy parametr „Dostępność” jest włączony, Za pomocą przycisków wybierz tryb pracy, naciśnij przycisk które chcesz udostępnić i naciśnij przycisk To confi... - Page 14 The menu features the following working modes: Tryby pracy dostępne w menu: • Weighing • Ważenie Detailed overview of the settings of • Parts Counting • Liczenie sztuk the working modes is to be found in • Checkweighing • Dozowanie balance’s main user manual.
-
Page 15: Weighing Unit Selection
To confi gure other mass units, follow the above procedure. Postępując zgodnie z powyższą procedurą możesz skonfi gurować inne jednostki masy. Using keys set accessibility parameter to “Yes” value for a selected unit and press key to confi rm. Za pomocą przycisków wybierz „Tak”... -
Page 16: User Settings
Using keys select “Admin” and press Using keys select “1111” and press key to confi rm. key to confi rm. Za pomocą przycisków wybierz Za pomocą przycisków wybierz „1111” „ADMIN” i naciśnij aby potwierdzić. i naciśnij aby potwierdzić. Upon logging in pictogram is displayed: Po zalogowaniu wyświetlany jest piktogram:... - Page 17 To select “Users” parameters, press key. Using keys select “New” and press Za pomocą przycisku , przejdź do parametru key to confi rm. „Użytkownicy”. Za pomocą przycisków wybierz „Nowy” i naciśnij aby potwierdzić. In the following steps, set: W kolejnych krokach ustaw: •...
- Page 18 Using keys select “Password” and press Using keys enter user password key to confi rm. and press key to confi rm. Za pomocą przycisków wybierz parametr Za pomocą przycisków wprowadź hasło „Hasło” i naciśnij aby potwierdzić. i naciśnij aby potwierdzić. Using keys select “Access Level”...
- Page 19 10. PERIPHERAL DEVICES CONNECTORS PODŁĄCZENIE URZĄDZEŃ PERYFERYJNYCH Additional Barcode Power adapter Computer Printer display scanner Zasilacz Wyświetlacz Skaner kodów Komputer Drukarka dodatkowy kreskowych Barcode Computer Keyboard Printer scanner Skaner kodów Komputer Drukarka Klawiatura kreskowych...
-
Page 20: Device Cleaning
11. DEVICE CLEANING CZYSZCZENIE I KONSERWACJA 11.1. Guidelines and precautions Zalecenia i ostrzeżenia Prior to cleaning it is necessary Use soft cloth made of either natural Apply the cleanser onto the cloth. to disconnect the device from the or synthetic fi ber exclusively. Avoid Mind not to apply the cleanser di- mains! Remove the plug from the using cloth made of stiff... - Page 21 • OPERATION PANEL AND HOUSING can be cleaned using a cloth slightly soaked in a solution of water and gentle cleanser (e.g. soap or dishwashing liquid). • Dry sample leftovers can be removed using either brush or handheld vacuum cleaner. •...
- Page 22 Press the moldings Now you can take out the upper Take out the back glass. on the housing and lift glass. The housing has recesses the movable element up. to facilitate removing the glass. Wysuń górną szybę. Chwyć za wypustki listwy Wyciągnij tylną...
- Page 24 www.radwag.com...
Need help?
Do you have a question about the AS R2 PLUS and is the answer not in the manual?
Questions and answers