
Related Manuals for Webasto 900CE


Summary of Contents for Webasto 900CE
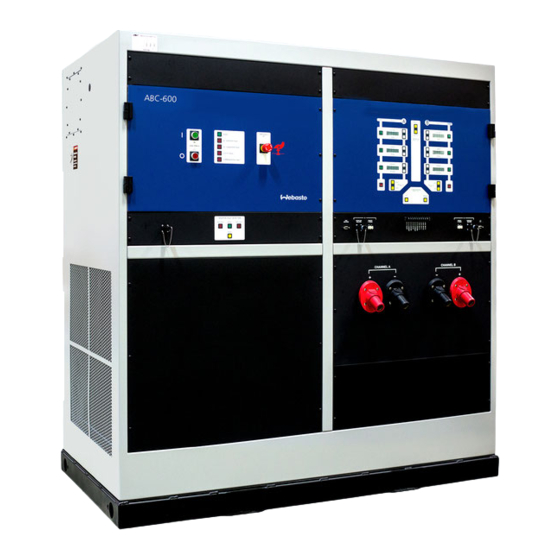
- Page 1 Installation, Operation and Maintenance Manual Power Processing Products 900CE English 11477-03-D...
- Page 2 © 2019 Webasto Charging Systems, Inc. All rights reserved. P3™ systems is a product line of Webasto Charging Systems, Inc. Webasto and the Webasto logo are trademarks of Webasto Charging Systems, Inc. Corporate names, trademarks, registered trademarks, service marks, symbols, and logos stated herein are property of their respective companies.
- Page 3 11477-03-D Page 3 of 56 Webasto Charging Systems, Inc.
- Page 4 Warranty Webasto 900CE Limited Warranty Products manufactured by Webasto Inc. are warranted to the original user only to be free of defects in material and workmanship for a period of 12 months from the date of installation, but not more than 18 months from the date of manufacture. Webasto’s liability under this warranty shall be limited to repairing or replacing at Webasto’s option, without charge, F.O.B.
-
Page 5: Warning
2) Depress and latch the Emergency Off switch for at least 5 minutes to allow the high voltage to discharge. 3) Do not open the covers; there are no user serviceable parts inside. CONTACT WEBASTO’S CUSTOMER SERVICE DEPARTMENT PRIOR TO PERFORMING ANY SERVICE ON THE UNIT. 11477-03-D Page 5 of 56 Webasto Charging Systems, Inc. -
Page 6: Table Of Contents
2.1.3 DC Converter Functions & Controls Independent Configuration External Parallel Configuration 2.1.4 DC Side Connector Interface Remote Operation Interface 900CE Remote Operation System (ROS) HV Interlock (Front Panel) RVS (Remote Voltage Sense) CAN Operation (Optional) Analog Signal Control 2.1.5 Remote Emergency Stop (Optional) 2.2 Technical Specifications... - Page 7 5.2 Fault Indications APPENDIX I: GLOSSARY OF TERMS APPENDIX II: DC I/O CONNECTOR ASSEMBLY EQUIPMENT REQUIREMENTS: General Cable Assembly Procedures APPENDIX III: 900CE REMOTE VOLTAGE SENSE OPERATION APPENDIX IV: 900CE ANALOG SIGNAL CONTROL INDEPENDENT MODE PARALLEL MODE 11477-03-D Page 7 of 56...
- Page 8 THE ANALOG VOLTAGE RESPONSE AND SCALING APPENDIX V: HIGH VOLTAGE INTERLOCK WIRING 11477-03-D Page 8 of 56 Webasto Charging Systems, Inc.
-
Page 9: Safety Precautions - Read Before Use
Installation, Operation and Maintenance Safety Precautions - Read Before Use The 900CE is designed with the safety of the user as the highest priority. However, installation must comply with all local codes, and the following safety precautions must be read and observed. - Page 10 • Excess gassing (H • The HV Interlock on the PPS is provided to allow a hardware monitor to shut down the PPS in the event of an unsafe battery condition. 11477-03-D Page 10 of 56 Webasto Charging Systems, Inc.
-
Page 11: Introduction
Examples include APU’s, flywheels, motors, inverters, batteries, fuel cells, capacitors, and more. The 900CE is an ideal test system for a wide range of DC loads in addition to batteries; offering more capability than a traditional power supply system. The... -
Page 12: 900Ce Applications
900CE Installation, Operation and Maintenance 1.3 900CE Applications The 900CE is flexible and may be used for a wide variety of DC power applications. This section describes a few typical applications to illustrate the different features of the 900CE. Constant Voltage Source In Voltage Mode, the 900CE regulates the voltage of a given DC output channel. -
Page 13: Battery Emulation
Battery Emulation With its computer control capabilities, the 900CE can be programmed to emulate a battery. To do so, the 900CE would first be put into constant Voltage Mode at the desired state of charge. As current is drawn from the 900CE, the voltage would be lowered as if the “battery”... -
Page 14: System Description
RS-485 data bus. The DC Converter also communicates to the 900CE Remote Operation System via an RS-232 data link. The DC Converter provides the DC interface to a load (or possibly two separate loads) in one of two operating modes. - Page 15 Ready Light (Green) Illuminates when the system power is on and the system is functioning normally. 11477-03-D Page 15 of 56 Webasto Charging Systems, Inc.
-
Page 16: Isolation Fault Detection
Prior to contactor closure, this circuit monitors the impedance between the positive and negative busses and the chassis. Once the contactors have been closed and the Unit Under Test (UUT) is connected to the 900CE, the isolation monitor is disabled to prevent nuisance trips with low impedance loads. - Page 17 While this is happening, the Ready light (green) is flashing. The 900CE will stay in this state until the voltage threshold is reached, or for a maximum of nine (9) seconds, after which the unit declares a Standby Fault.
-
Page 18: Dc Converter Functions & Controls
Once the fault is cleared, the light will return to a steady yellow indicating the circuit is ready to resume monitoring and the 900CE lockout has been released. 2.1.3 DC Converter Functions & Controls The DC Converter monitors load connections, processes power from the Intermediate DC Bus for the load, and provides a local control interface for the user. - Page 19 Figure 2.4 – DC Converter Front Panel The following displays and controls are operable in manual mode or through a scripting tool, like the ROS. The 900CE starts up with both Channel A and Channel B in manual mode. Both the Remote A and the Remote B LEDs are unlit in this mode.
-
Page 20: Dc Side Connector Interface
2.1.4 DC Side Connector Interface All of the manual functions of the 900CE are controllable with the Remote Operation System or other scripting tool. In addition, there are serial data output and monitoring connectors that are accessible on the DC Connector Panel (Figure 2.5). -
Page 21: Remote Operation Interface
HV Interlock (Front Panel) Each channel of the 900CE has a High Voltage Interlock Switch (HVIS) for added protection (Figure 2.6). The HVIS can put one channel of the 900CE into Standby Mode without affecting the other channel. -
Page 22: Rvs (Remote Voltage Sense)
Figure 2.6 – 900CE Connector Pin Outs RVS (Remote Voltage Sense) To increase voltage accuracy at the Load, the 900CE can feed back on a remote voltage measurement. The RVS mode is activated by pressing the RVS button on the front panel. This feature can be used in Voltage mode and Power mode. -
Page 23: Technical Specifications
The maximum continuous power is a function of the voltage limits. At higher voltages, the peak continuous power is reduced (see Section 4 for details). 11477-03-D Page 23 of 56 Webasto Charging Systems, Inc. -
Page 24: Accuracy
The 900CE is designed with safety of the customer as the highest priority. The following safety precautions must be read and observed. Installation must comply with all local codes and the National Electrical Code (NEC). The 900CE is designed to operate in a 0- 35°C lab environment that is free of significant airborne particulate. - Page 25 Solid copper crimp lug with ½” diameter bolt hole. Torque to 350 in.-lb. DC I/O CONNECTOR: Use 350MCM cables, rated 1000VAC, connected to (-) and (+) marked terminals, per channel. See Appendix II for instructions. 11477-03-D Page 25 of 56 Webasto Charging Systems, Inc.
- Page 26 If you discover shipping damage after acceptance, file a claim for concealed damages. 11477-03-D Page 26 of 56 Webasto Charging Systems, Inc.
-
Page 27: Operation
900CE into Standby Mode before closing the external contact. This can be achieved manually or via instructions in a script. Failure to put the 900CE in Standby Mode after the external contact is opened may cause serious damage to the equipment. -
Page 28: Planning
4.1 Planning Before you begin a test with the 900CE, you will need to decide on certain parameters. The following checklist may be used as a guideline for preparation: What load configuration is required? -
Page 29: Operating Above 750 Volts In Parallel Configuration
826-900 ±300 ADC ±300 ±200 kW The user may always specify limits that are more restrictive than these system limits. See Figure 4.1 for a graphical representation of the 900CE limits. 11477-03-D Page 29 of 56 Webasto Charging Systems, Inc. - Page 30 900CE Installation, Operation and Maintenance Figure 4.1 – 900CE Operating Limits Note: Voltage refers to limit on either channel and not the output. 11477-03-D Page 30 of 56 Webasto Charging Systems, Inc.
- Page 31 A single load may be connected in Independent Configuration (i.e., either Load A or Load B) with no change in functionality. A load connected to an 900CE in the Independent Configuration is illustrated in Figure 4.2.
-
Page 32: External Parallel Configuration
Figure 4.3 – Parallel Configuration 4.4 Choosing Operating Limits The 900CE allows the user to set temporary upper and lower operating limits for voltage, current and power that are more restrictive than the absolute system limits defined above. In many cases, the user may want to use these more restrictive limits in order to protect the load or avoid unsafe conditions. -
Page 33: General Limit Considerations
3. The sum of the upper and lower power limits must be no greater than the maximum power for the set voltage limit. These values are ±250 kW, ±225 kW, and ±200 kW for 750V, 825V, and 900V limits, respectively. 11477-03-D Page 33 of 56 Webasto Charging Systems, Inc. - Page 34 Prior to connection, no current is flowing in the terminals, and the voltage is by definition zero. If the resistive load is to be energized successfully, the 900CE DC Converter's operating space must include this initial condition.
-
Page 35: Operating The System
The flashing LEDs are controlled so that the user is reminded to check or reset all settings in the appropriate order. In general, whenever there are flashing LEDs, the 900CE is expecting the user to make a choice or verify a setting and will not allow certain other actions until that step is completed. - Page 36 End of test program, Select standby mode enter standby mode Resume test Enter Same load remote configuration operation Change load configuration Figure 4.5 – 900CE Operation Flow Chart 11477-03-D Page 36 of 56 Webasto Charging Systems, Inc.
-
Page 37: System Startup
Installation, Operation and Maintenance 4.6 System Startup The DC Converter contains the controls to start the 900CE. To start the system: 1. Normally, the RED light on the MAIN POWER OFF button on the Webasto inverter front panel will be illuminated to confirm that input power is available. -
Page 38: Selecting Local Or Remote Operation
Once the load has been connected, the load configuration has been chosen, and the operating limits have been set, the 900CE is ready to run. At this point, the unit is in Local/Independent Mode operation by default. If ROS is running Remote Operation of each channel, it can be initiated;... -
Page 39: Adjusting Setting
Changing Operating Limits below). In particular, if the mode button is flashing for a mode other than the control mode that the user has selected, check the limits for that parameter. 11477-03-D Page 39 of 56 Webasto Charging Systems, Inc. -
Page 40: Changing Mode While Running A Test
Voltage, Current or Power Mode. This sequence is required to make sure that she/he is aware of the limit settings and has confirmed that they are correct before applying power to the load again. 11477-03-D Page 40 of 56 Webasto Charging Systems, Inc. -
Page 41: Entering Remote Operation
Configuration above and proceed through the remaining setup steps. 4.11 Remote Operation Once in remote operation, all control can be done from the 900CE Remote Operating System (ROS) or other scripting tool. The ROS provides the complete set of 900CE front panel controls. Limits and mode selection is easily performed with a few clicks of the mouse. -
Page 42: Turning Off Power
Remote Operation System. 4.12 Turning Off Power To shut down the 900CE at any time, the user may press the OFF switch or depress the EMERGENCY OFF button (both on the AC inverter front panel). However, in the event of a normal, non-emergency shutdown, it is recommended that the DC Converter be placed in Standby Mode (STANDBY button(s) lit, while other mode buttons are unlit) first before turning off the control power. -
Page 43: Maintenance
Coolant used in this product is 25% Peak™ and 75% distilled water (referred to as “Webasto approved coolant” hereunder). The system’s cooling system may deteriorate and cause failure if any other cooling fluid is used. Contact Webasto’s Customer Service Department if you need help in procuring Peak. -
Page 44: Fault Indications
To aid fault diagnosis, fault indicators have been built into the design of the 900CE. If a system shuts down due to a fault condition, look at the front panel to see if any of the fault lights are lit or fault codes displayed and refer to Tables 5.1 and 5.2 for information. - Page 45 A communication fault has occurred Isolation Fault Indicator ±Bus Fault On Steady Loss of isolation between the positive or negative Isolation Fault Detection Reset Flashing Isolation fault has been latched 11477-03-D Page 45 of 56 Webasto Charging Systems, Inc.
- Page 46 Channel A Current - Display Board Status Unit Over Temperature RS-485 Communication Fault* *5.1V & 0.4A is the standard fault condition indicated when power is removed from the system. 11477-03-D Page 46 of 56 Webasto Charging Systems, Inc.
-
Page 47: Appendix I: Glossary Of Terms
A subassembly of the 900CE on the left side of the cabinet. AC Inverter Converts AC to DC to regulate the Intermediate DC Bus. A term for the 900CE that refers to its use in battery charge and Battery Cycler discharge cycling. - Page 48 The slave or right converter in the DC Side B Converter. An operational mode in which the output terminals are internally Standby Mode disconnected and no power transfer occurs. Utility AC three-phase power source. 11477-03-D Page 48 of 56 Webasto Charging Systems, Inc.
-
Page 49: Appendix Ii: Dc I/O Connector Assembly
EMI box will have to be removed for the wiring installation. Figure 1 below shows the top hole of the enclosure where the load cables enter. Figure 1 11477-03-D Page 49 of 56 Webasto Charging Systems, Inc. -
Page 50: Cable Assembly Procedures
3. Marked the cable ends with red tape for (+) and black tape for (-). 4. Connect the lug with marked cable to the DC terminal as shown in the Figure 11477-03-D Page 50 of 56 Webasto Charging Systems, Inc. -
Page 51: Appendix Iii: 900Ce Remote Voltage Sense Operation
Remote Voltage Sense (RVS) Operation: 1) Independent Mode The output voltage of each channel of the 900CE can be regulated directly at the load, eliminating excessive voltage drop across the cables, which carry high current between the 900CE and the load and yet maintain greater voltage accuracy. This is accomplished by utilizing the V Sense connectors provided on the front panel user I/O strip. - Page 52 Figure A3.1 – Connection Diagram for RVS in Independent Mode 2) Parallel Mode In Parallel Mode, only the RVS connector on channel A is used with the load connected up as in Figure 4.3. 11477-03-D Page 52 of 56 Webasto Charging Systems, Inc.
-
Page 53: Appendix Iv: 900Ce Analog Signal Control
900CE Installation, Operation and Maintenance Appendix IV: 900CE Analog Signal Control Equipment Requirements: • 900CE Analog Signal Generator or variable power supply • Interface connections by panel mount terminal block for signal generator (power • supply) User I/O Terminal On 900CE... -
Page 54: Parallel Mode
Output Power = Power Command -4.5 V <= (Analog V) <= -0.45 V Output Power = Power Command *[|Analog V| / 4.5] -4.5 V <= (Analog V) <= -5.0 V Output Power = Power Command 11477-03-D Page 54 of 56 Webasto Charging Systems, Inc. - Page 55 900CE Installation, Operation and Maintenance Load_Sim Profile for Positive Power Command Analog Signal (V) Load_Sim Profile for Negative Power Command Analog Signal (V) 11477-03-D Page 55 of 56 Webasto Charging Systems, Inc.
- Page 56 Pin 4 (GND) is the Ground signal of the +5 V voltage source. A break in either one of these links will put that channel into Standby Mode (open the output contactor and isolate the output of the 900CE from the load). High Voltage Interlock Connector Wiring...
Need help?
Do you have a question about the 900CE and is the answer not in the manual?
Questions and answers