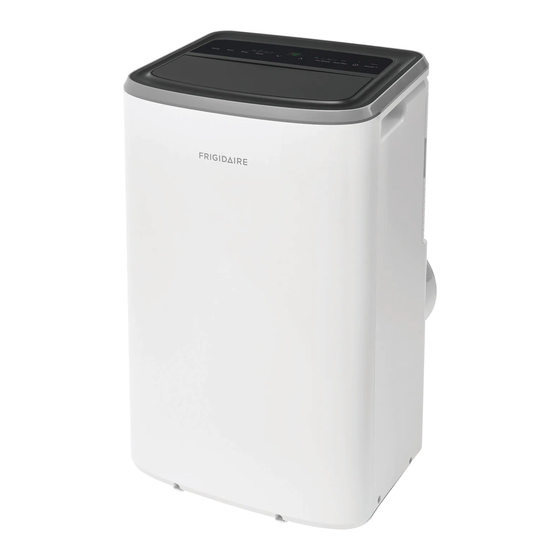
Frigidaire FHPC102AC1 Use & Care Manual
Hide thumbs Also See for FHPC102AC1:

Advertisement

Introduction...................................................... 2
Important Safety Instructions.................... 3
Unit Description...............................................7
Accessories Included.....................................7
Installation Instructions................................ 8
Frigidaire.com USA 1-800-944-9044
use
Portable Air Conditioner
care
&
Air Conditioner Features............................ 11
Operating Instructions............................... 12
Care and Cleaning........................................ 23
Before You Call............................................. 24
13326050000228 (July 2019)
Frigidaire.ca Canada 1-800-265-8352

Advertisement

Table of Contents
loading

Summary of Contents for Frigidaire FHPC102AC1

  • Page 1: Table Of Contents

    Air Conditioner Features......11 Important Safety Instructions....3 Operating Instructions....... 12 Unit Description..........7 Care and Cleaning........23 Accessories Included........7 Before You Call..........24 Installation Instructions........ 8 Major Appliance Limited Warranty..26 13326050000228 (July 2019) Frigidaire.com USA 1-800-944-9044 Frigidaire.ca Canada 1-800-265-8352...
  • Page 2: Introduction

    INTRODUCTION family Welcome to our Thank you for bringing Frigidaire into your home! We see your purchase as the beginning of a long relationship together. This manual is your resource for the use and care of your product. Please read it before using your appliance.
  • Page 3: Important Safety Instructions

    IMPORTANT SAFETY INSTRUCTIONS • Your air conditioner must be used in a WARNING properly grounded wall receptacle. If the wall receptacle you intend to use is not For Your Safety adequately grounded or protected by a time delay fuse or circuit breaker, have a Do not store or use gasoline or other qualified electrician install the proper flammable vapors and liquids in the vicinity...
  • Page 4 IMPORTANT SAFETY INSTRUCTIONS • Provide ventilation per installation SAFETY PRECAUTIONS instructions. • Do not direct airflow at fireplaces or other DANGER! Avoid Serious Injury or Death heat related sources as this could cause flare ups or make units run excessively. •...
  • Page 5 IMPORTANT SAFETY INSTRUCTIONS • Keep ventilation openings clear of store or maintain the air conditioner to obstruction. prevent mechanical damage from occurring. • The appliance shall be stored in a room without continuously operating ignition • Flammable refrigerant - R32 is used in air sources (for example: open flames, an conditioner.
  • Page 6 IMPORTANT SAFETY INSTRUCTIONS • Do not use this device to turn the unit on corrode the copper pipe-work. or off. NOTE Examples of leak detection fluids are • Always make sure the RESET button is – bubble method, pushed in for correct operation. –...
  • Page 7: Unit Description

    UNIT DESCRIPTION & ACCESSORIES INCLUDED Explanation of symbols displayed on the unit This symbol shows that this appliance used a flammable refrigerant. If the refrigerant is leaked and exposed to an WARNING external ignition source, there is a risk of fire. This symbol shows that the operation manual should be CAUTION read carefully.
  • Page 8: Accessories Included

    ACCESSORIES INCLUDED & INSTALLATION INSTRUCTIONS Accessories Included PARTS: PARTS NAME: QUANTITY: Window Kit Connector A 1 pc Exhaust hose connector B 1 pc Window Kit 1 set Exhaust Hose 1 pc 4 pcs (1/2 screws) Screws 2 pcs (3/4 screws) Safety Lock 1 pc Bolts...
  • Page 9 INSTALLATION INSTRUCTIONS 1. Extend either side of the hose(Fig.1). The hose can be extended from its original length of 15" up to 59", but try to maintain the minimum required length. Also make sure that the hose does not have any sharp bends or sags.(Fig.5) Fig.5 Fig.1A...
  • Page 10 INSTALLATION INSTRUCTIONS 7.Cut the non-adhesive foam seal (B) to an Cut this to fit your window appropriate length and seal the open gap between the top window sash and outer window sash, as shown in Fig.11. Foam seal B Fig.8 Fig.11 3.Close the window sash securely against the window slider kit.(Fig.9)
  • Page 11 INSTALLATION INSTRUCTIONS & AIR CONDITIONER FEATURES 3.Close the window sash securely against the window slider kit.(Fig.14) 4.Drive two 1/2" screws to secure the Foam seal B window slider kit to the window sash.(Fig.14) 5.Drive two 3/4" screws to secure the window slider kit to the window sill.(Fig.14) Fig.15 Window slider kit...
  • Page 12: Air Conditioner Features

    OPERATING INSTRUCTIONS AIR CONDITIONER FEATURES Control Panel Swing Fan Speed Display Temperature/Timer Adjust Temperature or Timer PureAir Button Mode Selection Power on·o Sleep Button Dust Filter Timer Indicator Note: “Heat” mode is only for heat and cool models. OPERATING INSTRUCTION To change temperature setting Press the “...
  • Page 13: Operating Instructions

    OPERATING INSTRUCTIONS Cool mode Press the “Mode” button until the Cool mode indicator lights up. Press the "fan speed" button to choose the fan speed according to the illumination of the fan speed indicator. You can choose the “Auto”, “Lo”, “Med”, or “Hi” fan speed setting. Press the “...
  • Page 14 OPERATING INSTRUCTIONS Auto mode Press the “Mode” button until the Auto mode indicator lights up. Press the “ ” or “ ” button to choose the temperature you want. The screen will display the temperature setting. In this mode, the unit will automatically select cooling, or fan only operation depending on what temperature you have selected and the room temperature.
  • Page 15 OPERATING INSTRUCTIONS Dust filter reset This feature is a reminder to clean the Air Filter (See Care and Cleaning) for more e cient operation. The “Clean” indicator will illuminate after 250 hours of fan operation. Press and hold the “Dust Filter” button for 3 seconds to reset, after cleaning the filter. Replace indicator This feature is a reminder to replace the Advance Filter (not included, sold separately) for more e cient operation.
  • Page 16 OPERATING INSTRUCTIONS How to delay shutdown You can delay shutdown when the unit is on. Press the "Timer" button, then the Timer indicator and number of hours on the screen will light up. Tap or hold the UP arrow ( ) or the DOWN arrow ( ) to change delay shutdown timer at 0.5 hour increments up to 10 hours, then at 1 hour increments up to 24 hours.
  • Page 17 OPERATING INSTRUCTIONS Remote Control Timer Button on·o Button Mode Button Fan Speed Button Temp/Timer Setting Button Swing Button Remote Control Screen Sleep Button and disposed of in accordance with local Battery Installation and Important legislation as they do harm to the Instructions environment.
  • Page 18 OPERATING INSTRUCTIONS This device complies with Part 15 of the FCC Note: Rules. Operation is subject to the following In this mode, the fan speed will be set as two conditions: (1) This device may not “low” automatically, which cannot be cause harmful interference, and (2) this changed.
  • Page 19 OPERATING INSTRUCTIONS Sleep mode cooling only models), or fan only operation depending on what temperature you have When the unit is in Cool, Heat or Auto mode, selected and the room temperature. The air you can press the “sleep” button to make conditioner will control room temperature the unit run in Sleep mode.
  • Page 20 OPERATING INSTRUCTIONS change delay shutdown timer at 0.5 hour increments up to 10 hours, then at 1 hour increments up to 24 hours. After 3 seconds, the timer function is enabled, then “o ” will stop flashing, the display will show the temperature and the control will count down the time remaining until shutdown.
  • Page 21 Fault Code Garden hose If the screen on the unit displays “AS”, the room temperature sensor has failed. Contact your Authorized Frigidaire Service Center. If the display reads "E4", the Figure 21 communication between display PCB and main control PCB is NOTE: faulty.
  • Page 22 OPERATING INSTRUCTIONS Window slider kit Heat pump drain cap 1/4" hole Figure 22 • Insert the rubber head into the outlet. Then screw the sealing cap into the heat pump Figure 24 drain outlet(Fig.23). Emptying the condensate residue inside the unit during winter storage. Put a drip tray (not supplied) under the continuous drain outlet, then unscrew the drain cap to allow the condensate to flow...
  • Page 23: Care And Cleaning

    CARE AND CLEANING Cleaning Clean your air conditioner occasionally to keep it looking new. Be sure to unplug the unit before cleaning to prevent shock or fire hazards. CLEANING THE UNIT The cabinet and front may be dusted with an oil-free cloth or washed with a cloth dampened in a solution of warm water and mild liquid dishwashing detergent.
  • Page 24: Before You Call

    BEFORE YOU CALL Before calling for service, review this list. It may save you time and expense. This list includes common occurrences that are not the result of defective workmanship or materials in this appliance. OCCURRENCE SOLUTION • Wall plug disconnected. Push plug firmly into wall outlet. •...
  • Page 25 BEFORE YOU CALL OCCURRENCE SOLUTION Room too cold. • Set temperature too low. Increase set temperature. Room too hot. • Set temperature too high. Lower setting. If These Solutions Fail, Call 1-800-944-9044(US)/1-800-265-8352(Canada) For Frigidaire Service.
  • Page 26: Major Appliance Limited Warranty

    MAJOR APPLIANCE LIMITED WARRANTY Your appliance is covered by a limited one-year warranty for functional repairs only. For one year from your original date of purchase, Electrolux will pay all costs for repairing or replacing any parts of this appliance that prove to be defective in materials or workmanship when such appliance is installed, used and maintained in accordance with the provided instructions.
  • Page 28 Our home is your home. Visit us if you need help with any of these things: owner support accessories service registration (See your registration card for more information.) Frigidaire.com 1-800-944-9044 Frigidaire.ca 1-800-265-8352...

This manual is also suitable for:

Fhph142ac1Fhpw142ac1Fhpw122ac1

Table of Contents