Table of Contents
Advertisement
Quick Links
Advertisement
Table of Contents

Related Manuals for Stihl FR 230


Summary of Contents for Stihl FR 230
- Page 1 STIHL FR 230 Instruction Manual...
-
Page 3: Table Of Contents
English Contents Adjusting Trimmer for User ......18 Introduction ......... 2 8.1 Fitting and Adjusting the Carrying System . -
Page 4: Introduction
Specifications ........31 20.1 STIHL FR 230 Trimmer ......31 20.2 Noise and Vibration Data. -
Page 5: Symbols Used With Warnings In The Text
3 Videos WARNING For videos on the following chapters visit This symbol indicates dangers that can cause serious www.stihl.com/instruction-video: injuries or death. – Mounting the loop handle, control handle and ► The measures indicated can avoid serious injuries or flexible drive tube and shaft death. -
Page 6: Overview
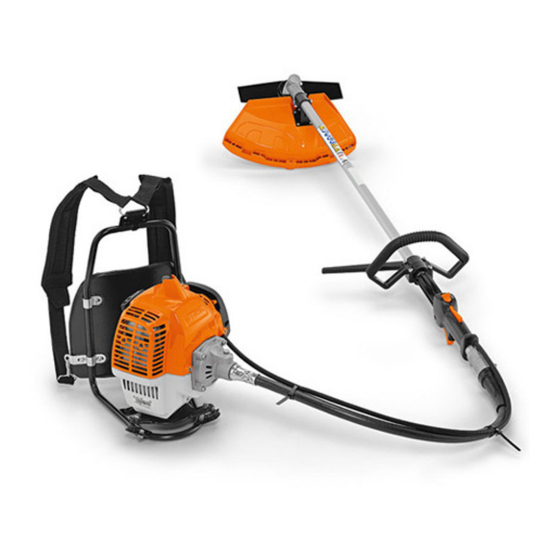
English 4 Overview 2 Flexible Drive Tube 4 Overview Connects coupling sleeve to powerhead and protects the flexible shaft. 3 Pin Trimmer Secures the flexible drive tube to the powerhead. 4 Choke Lever Helps start the engine. 5 Manual Fuel Pump Eases engine starts. -
Page 7: Deflectors And Cutting Attachments
Blocks shaft while cutting attachment is being mounted. The mowing head contains the mowing line. 27 Screw Plug 5 Skirt Closes filler opening for STIHL gear grease. Extends universal deflector for use with a mowing head. 28 Gear Housing 6 Line Limiting Blade Encloses the gearbox. -
Page 8: Safety Precautions
15m (50ft) Warning Signs Intended Use Meanings of warning signs on the trimmer: The STIHL FR 230 backpack trimmer is designed for the Observe safety notices and take the necessary following applications: precautions. – with a mowing head: Mowing grass –... -
Page 9: The Operator
► Wear a respirator. ► If you have any queries: Contact a STIHL servicing dealer for assistance. ■ Inappropriate clothing can snag on wood, brush or the trimmer. Not wearing personal protective equipment may ■... -
Page 10: Work Area And Surroundings
► Wear work gloves made of durable material. recommended in this instruction manual is mounted. – Cutting attachment and deflector are properly mounted. – Only original STIHL accessories designed for this trimmer are fitted. ■ Wearing unsuitable footwear may cause you to slip or stumble. - Page 11 ► Never insert objects in the trimmer’s openings. ► Work only with an undamaged mowing head. ► If you have any queries: Contact your STIHL servicing ► Never use metal elements in place of the nylon mowing dealer for assistance.
-
Page 12: Fuel Mixture And Refueling
► Use a mixture of gasoline and two-stroke engine oil that tank cap carefully. is not older than 30 days (STIHL MotoMix: 2 years). ■ Clothing that has been in contact with fuel or gasoline is more easily flammable. This can result in serious or fatal injuries and damage to property. - Page 13 ► Operate the trimmer alone. can result in serious injuries and damage to property. ► Keep the cutting attachment close to the ground. ► Stop work and contact your STIHL dealer for assistance. ► Watch out for obstacles. ■ Trimmer vibrations may occur during operation.
-
Page 14: Reactive Forces
English 5 Safety Precautions WARNING ■ Note that the cutting attachment continues to rotate for a short period after you release the trigger. This can result in serious injuries. ■ These situations can abruptly decelerate or stop rotation of the cutting attachment and cause the cutting ►... -
Page 15: Storing
This can damage the ► If the trimmer or the deflector require servicing or trimmer. repairs: Contact your STIHL servicing dealer for ► Store the trimmer in a clean and dry condition. assistance. ► Maintain the cutting attachment as described in the 5.12 Cleaning, Maintenance and Repairs... -
Page 16: Assembling The Trimmer
► If you cannot carry out this work: Do not use your trimmer ► Push the sleeve (4) onto the drive tube (5). and contact your STIHL dealer for assistance. ► Push the control handle (3) onto the drive tube (5). - Page 17 English 7 Assembling the Trimmer ► Push the flexible drive tube (11) into the coupling sleeve ► Slide the rubber lip (16) as far as stop over the joint (7). between the flexible drive tube (11) and coupling sleeve. ► Insert and tighten down the screw (12) firmly. ►...
-
Page 18: Mounting The Deflector
The control handle and loop handle do not need to be removed again. Mounting the Deflector For video on this chapter visit www.stihl.com/instruction-video. ► Shut off the engine. ► Push the skirt (3) into the recesses in the universal deflector (1) as far as stop. -
Page 19: Mounting And Removing The Mowing Head
► If the sleeve (3) between the shaft (1) and the sealing ring (2) is missing: Do not use your trimmer and contact your 7.5.1 Mounting Metal Cutting Attachment STIHL dealer for assistance. For video on this chapter visit www.stihl.com/instruction-video. ► Shut off the engine. -
Page 20: Adjusting Trimmer For User
A video is available for this chapter ► Rotate the metal cutting attachment clockwise until the stop pin engages in position. The shaft is now blocked. www.stihl.com/sxpweh ► Unscrew the mounting nut clockwise. ► Remove stop pin. ► Remove the rider plate, thrust washer, metal cutting attachment and thrust plate. -
Page 21: Fueling The Trimmer
9 Mixing Fuel and Refueling the Brushcutter STIHL recommends you use STIHL MotoMix. If you mix the fuel yourself, use only STIHL two-stroke engine oil or another high-performance engine oil in accordance with JASO FB, JASO FC, JASO FD, ISO-L- EGB, ISO-L-EGC or ISO-L-EGD. -
Page 22: Starting And Stopping The Engine
► Start the engine. 10.2 Preparing Engine for Start For video on this chapter visit www.stihl.com/instruction-video. ► Select the correct starting procedure. ► Stand the trimmer on a level surface. ► Press the trimmer down on the ground with your left hand on the powerhead and step on the carrying frame with ►... -
Page 23: Starting The Engine
The engine stops. 10.3 Starting the Engine For video on this chapter visit www.stihl.com/instruction-video. ► Select the correct starting procedure. ► Stand the trimmer on a level surface. ► Press the trimmer down on the ground with your left hand ►... -
Page 24: Testing The Trimmer
► Move the choke lever to position ► Move the choke lever to position The engine stops. The engine stops. ► Do not use your trimmer and contact your STIHL dealer ► Do not use your trimmer and contact your STIHL dealer for assistance. for assistance. -
Page 25: Holding And Controlling The Trimmer
English 12 Operating the Trimmer NOTICE If the trimmer is again used at a low altitude, the engine may overheat. ► Carry out the standard setting. ► Rotate the high speed screw H clockwise until the engine delivers optimum power. 12.2 Holding and Controlling the Trimmer ►... -
Page 26: After Finishing Work
► Shut off the engine. transport guard. ► Allow trimmer to cool down. ► Carry the trimmer on your back. ► Clean the trimmer with a damp cloth or STIHL resin ► Hold the trimmer with your right hand on the control solvent. handle. -
Page 27: Cleaning The Air Filter
English 16 Cleaning 16.3 Cleaning the Air Filter For video on this chapter visit www.stihl.com/instruction-video. ► Shut off the engine. ► Install the air filter (3). ► Fit the filter cover (2) so that the tabs (5) engage the recesses (4). -
Page 28: Maintenance
► If the flexible shaft (5) has turned blue: Replace flexible shaft (5). Monthly: ► Lubricate the flexible shaft (5) with an even coat of STIHL ► Have fuel tank cleaned by a STIHL servicing dealer. multipurpose grease. ► Have pickup body in fuel tank cleaned by a STIHL ►... -
Page 29: Lubricating The Gearbox
► Remove the screw plug (2). ► If no grease can be seen on the end of the screw plug (2): ► Apply tube of STIHL gear grease (1) to the filler hole. ► Pull the trigger (1) without depressing the lockout lever ►... -
Page 30: Sharpening And Balancing A Metal Cutting
Correctly sharpening and balancing metal cutting attachments requires a lot of practice. STIHL recommends you have metal cutting attachments resharpened and balanced by a STIHL servicing dealer. 18 Repairing 18.1 Repairing the Trimmer and Cutting Attachment The trimmer and cutting attachment cannot be repaired by the user. -
Page 31: Troubleshooting
Engine stops while idling Carburetor is iced up. ► Allow trimmer to warm up to +10°C. Cutting attachment does Connection between ► Contact your STIHL servicing dealer for assistance. not rotate properly or flexible shaft and rotates erratically. powerhead or drive tube is worn. -
Page 32: Standard Setting
English 19 Troubleshooting Engine stops while idling ► Turn the idle speed screw (LA) clockwise until the cutting 19.2 Standard Setting attachment begins to rotate. ► Shut off the engine. ► Turn the idle speed screw (LA) one full turn counterclockwise. -
Page 33: Specifications
9,000 rpm and Deflectors – Idle speed: 2,800 rpm – Max. output shaft speed: 8,900 rpm 21.1 Combinations of Cutting Attachments and – Approved spark plug: Bosch WSR 6 F from STIHL Deflectors – Electrode gap: 0.5 mm Cutting Attachment Deflector –... -
Page 34: Spare Parts And Accessories
22.1 Spare Parts and Accessories These symbols identify original STIHL replacement parts and original STIHL accessories. STIHL recommends the use of original STIHL replacement parts and accessories. Original STIHL replacement parts and original STIHL accessories are available from STIHL servicing dealers. - Page 36 0458-735-0121-A englisch www.stihl.com *04587350121A* 0458-735-0121-A...
Need help?
Do you have a question about the FR 230 and is the answer not in the manual?
Questions and answers