
Related Manuals for iLive IT209B


Summary of Contents for iLive IT209B
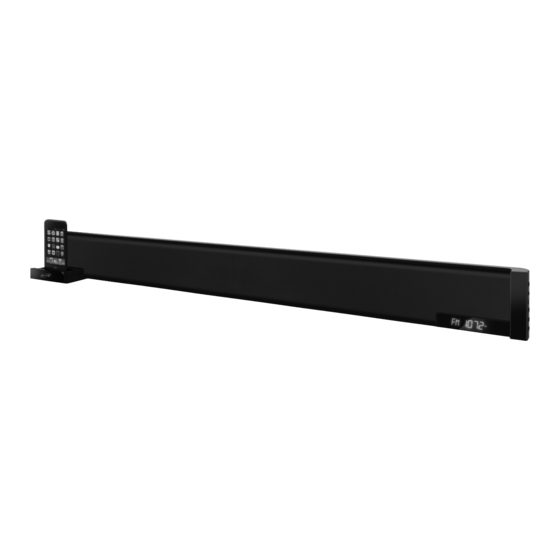
- Page 1 USER’S GUIDE V:2149-0511-09 IT209B 3.1 Channel Home Music System with Dock for iPod For the most up-to-date version of this User’s Guide, go to www.ilive.net...
-
Page 2: Warnings And Precautions
WARNINGS AND PRECAUTIONS • CAUTION: TO PREVENT ELECTRIC SHOCK, MATCH WIDE BLADE OF PLUG TO WIDE SLOT, FULLY INSERT. • WARNING: To prevent fire or shock hazards, do not expose this bar speaker to rain or moisture. • CAUTION: Use of controls or adjustments or per- formance of procedures other than those specified may result in hazardous radiation exposure. • WARNING: Changes or modifications to this bar speaker not expressly approved by the party respon- sible for compliance could void the user’s authority to operate the equipment. -
Page 3: Table Of Contents
█ INTERNATIONAL SUPPORT To download this User’s Guide in English, Spanish, or French, visit the support section at www.ilive. net. Para transferir esta guía de usuario en inglés, español, o francés, visite la sección de la ayuda en www.ilive.net. -
Page 4: Quick Start
QUICK START █ POWER THE BAR SPEAKER 1. Connect the bar speaker to AC power source using the attached AC Power Cord. PLAYING AN IPOD 1. Locate the numbered bracket that fits the iPod that will be docked. Each included Bracket has a number on it, indicating which iPod model that bracket is compatible with. • See the separate bracket chart page to identify which bracket is needed. -
Page 5: Quick Start
█ POWER THE BAR SPEAKER 1. Connect the bar speaker to AC power source using the attached AC Power Cord. CONNECTING AUDIO FROM A TV TO THE BAR SPEAKER 1. Connect a Stereo RCA Cable to the Audio Outputs on the television. 2. Connect the other end of the Stereo RCA Cable to the Auxiliary Stereo Inputs on the bar speaker. -
Page 6: Product Information
PRODUCT INFORMATION █ ACCESSORIES AM Loop Antenna FM Wire Antenna (4) Docking Brackets for iPod Remote Control (2) AAA Batteries for Remote (2) Wall Mount Brackets (4) Long Screws (4) Short Screws (2) 1/4” Spacers (2) 1/2” Spacers (2) 3/4” Spacers SLEEP SHUFFLE... -
Page 7: Product Information & Power Options
█ FEATURES Dock plays and charges iPod 3.1 channel speaker system with simulated 5.1 system AM/FM radio with digital tuning Remote Control RCA stereo input Auxiliary input for iPod shuffle and other audio devices Composite video input (2) Integrated subwoofer output S-Video Output for iPod Composite Video Output for DVD Player and iPod SRS TruSurround XT™ Preset EQ settings Electronic volume, treble, and bass controls Motorized iPod docking drawer Wall mountable Integrated subwoofer... -
Page 8: Installation
INSTALLATION █ BAR SPEAKER PLACEMENT The bar speaker depends, in part, on it’s environment to help produce a realistic surround sound environment. We’ve suggested two potential placement options in the diagrams below to help you get the most out of your 3.1 Channel Music System. -
Page 9: Installation
█ MOUNTING THE BAR SPEAKER ONTO A WALL • We recommend having this bar speaker professionally mounted. By using the included wall mounting accessories, the bar speaker can be mounted onto a wall. The included spacers should be used at your discretion to extend the face of the bar speaker farther from the wall. -
Page 10: Connectivity
CONNECTIVITY Below, you’ll see a basic flow chart of how you can connect your home entertainment devices to the bar speaker, and in turn how the bar speaker connects to them. The following pages contain more detailed instructions on what exactly needs to be done to make these connections. AUDIO VIDEO AUDIO &/Or VIDEO AUDIO &/Or VIDEO AUDIO DVD PLAYER DIGITAL CABLE or SATELLITE TUNER GAMING CONSOLE SUBWOOFER... -
Page 11: Connectivity
█ CONNECTING A TELEVISION TO THE BAR SPEAKER When connecting a television to the bar speaker, is outputting the audio from the television to the bar speaker, the bar speaker will provide you with a higher quality audio output than your television. █ AUDIO TO THE BAR SPEAKER 1. Connect a Stereo RCA Cable to the Audio Outputs on the television. -
Page 12: Connectivity
CONNECTIVITY █ CONNECTING A DVD PLAYER TO THE BAR SPEAKER When connecting a DVD Player to the bar speaker, outputting the audio from the device to the bar speaker, and outputting video from the device either directly to the television or to the television through the bar speaker. These instructions will show you how to connect the device to the television by going through the bar speaker Example of DVD Player Outputs AV OUTPUT... -
Page 13: Ipod Operations
█ DOCKING AN IPOD 1. Locate the numbered bracket that fits the iPod that will be docked. Each included Bracket has a number on it, indicating which iPod model that bracket is compatible with. • See the separate bracket chart page to identify which bracket is needed. 2. Press the Power Button to turn the bar speaker on. 3. Press the Source Button to switch to iPod Mode. 4. -
Page 14: Radio Operations
RADIO OPERATIONS Before playing the FM or AM radio on the bar speaker, connect the included AM and FM antennas to ensure reliable radio reception. █ AM LOOP ANTENNA 1. Remove the small rubber wire protector from the ends of the wires on the included AM Loop Antenna. 2. -
Page 15: Miscellaneous Operations
█ BUILT IN SOUND TECHNOLOGIES If you press the EQ Button on the remote, you can cycle through the available sound technologies that are built into the bar speaker. █ FOR AUDIO • SRS TruSurround XT® creates a truly immersive surround sound experience with rich bass and clear dialog. • SRS TruSurround XT®... -
Page 16: Controls & Control Glossary
CONTROLS - SIDES OF THE BAR SPEAKER CONTROL GLOSSARY 01. Power Button Press the Power Button to turn the bar speaker off and on. Please note, the bar speaker must be plugged into a power source in order for the bar speaker to be turned on. 02. Volume Buttons Press the Volume Buttons to adjust the volume of the bar speaker. - Page 17 06. Line Input Use the Line Input to connect an MP3 Player, such as an iPod Shuffle, or another Audio Source. Any device with a headphone jack, line output, or auxiliary output can be connected to the Line Input. 07. Play/Pause Button Press the Play Button to play a docked iPod. Press the Pause Button to pause a docked iPod while playing. 08. iPod Drawer Button Press the iPod Drawer Button to open or close the motorized dock for iPod.
- Page 18 CONTROLS - BACK OF THE BAR SPEAKER CONTROL GLOSSARY 09. Video Output (iPod and DVD Player) Requires a Composite RCA Video Cable. Use the Video Output to output video from a docked iPod or connected DVD Player to a Television. 10. Reset Button Use a paperclip or like object to press the Reset Button. Pressing the Reset Button will restore the bar speaker to it’s default settings. 11. AC Power Cord (120V/60Hz) Use the AC Power Cord to connect the bar speaker to standard AC outlet.
- Page 19 15. AM Antenna Connection Use the AM Antenna Connection to connect the included AM Loop Antenna to the bar speaker. Connecting the AM Loop Antenna will dramatically improve AM radio reception. 16. FM Antenna Connection Use the FM Antenna Connection to connect the included FM Wire Antenna to the bar speaker. Connecting the FM Wire Antenna will dramatically improve FM radio reception.
- Page 20 CONTROLS - REMOTE SLEEP SHUFFLE...
- Page 21 19. Power Button Press the Power Button to turn the bar speaker off and on. 20. Mute Button Press the Mute Button to reduce the volume of the bar speaker entirely. 21. Timer Button With the bar speaker powered off, press the Timer Button to activate or deactivate the timer. 22. Sleep Button Press the Sleep Button repeatedly to set the sleep timer.
- Page 22 CONTROLS - REMOTE SLEEP SHUFFLE...
- Page 23 29. Repeat Button Press the Repeat Button to repeat tracks, chapters, albums and playlists, or movies on a docked iPod. Press Once: Repeat the current track or chapter. Press Twice: Repeat the current album, playlist, or movie. Press Three Times: Turn the repeat off. 30. Play/Pause Button Press the Play Button to play a docked iPod.
- Page 24 © 2009 Digital Products International (DPI, Inc.) | All other trademarks appearing herein are the property of their respective owners. Specifications are subject to change without notice...
Need help?
Do you have a question about the IT209B and is the answer not in the manual?
Questions and answers