Samsung AM KN4DCH Series Installation Manual
Hide thumbs
Also See for AM KN4DCH Series:
- Installation manual (48 pages) ,
- User manual (20 pages) ,
- Installation manual (48 pages)
Table of Contents
Advertisement
Quick Links
Advertisement
Table of Contents

Related Manuals for Samsung AM KN4DCH Series


Summary of Contents for Samsung AM KN4DCH Series
- Page 1 All manuals and user guides at all-guides.com Air conditioner Installation manual KN4DCH Thank you for purchasing this Samsung air conditioner. Before operating this unit, please read this manual carefully and retain it for future reference.
-
Page 2: Table Of Contents
All manuals and user guides at all-guides.com Contents Safety Information Installation Procedure Step 1 Checking and preparing accessories Step 2 Choosing the installation location Step 3 Optional: Insulating the body of the indoor unit Step 4 Installing the indoor unit Step 5 Purging inert gas from the indoor unit Step 6 Cutting and flaring the pipes Step 7 Connecting the assembly pipes to the refrigerant pipes... -
Page 3: Safety Information
All manuals and user guides at all-guides.com Safety Information WARNING WARNING CAUTION WARNING General information WARNING Installing the unit WARNING IMPORTANT: When installing the unit, always remember to connect first the refrigerant tubes, then the electrical lines. English... - Page 4 All manuals and user guides at all-guides.com Safety Information CAUTION Make sure that you earth the cables. Install the circuit breaker. Make sure that the condensed water dripping from the drain hose runs out properly and safely. Power supply line, fuse or circuit Install the power cable and communication cable of the indoor and outdoor unit at least 1m away from the breaker...
-
Page 5: Installation Procedure
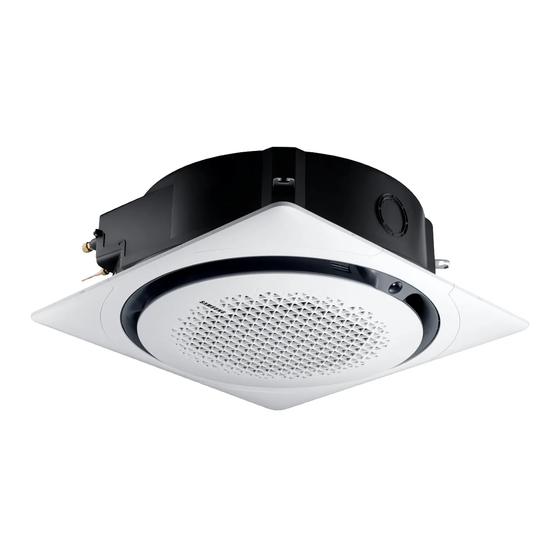
All manuals and user guides at all-guides.com Installation Procedure Step 1 Checking and preparing Step 2 Choosing the installation accessories location Installation location requirements Insulation pipe (3 ea) Cable-tie (6 ea) Drain hose (1 ea) Installation manual (1 ea) Clamp (1 ea) User manual (1 ea) Installation template (1 ea) Bushing bracket (1 ea) - Page 6 All manuals and user guides at all-guides.com Installation Procedure Indoor unit dimensions Category Square panel Circular panel 1050 (41.37) 1000 (39.40) 883 (34.79) 358 (14.11) Front Ceiling opening dimension (4.57) 960 (37.80) [950 (37.40) - 960 (37.80)] (15.17) (15.92) (14.07) Large (15.17) (15.92)
- Page 7 All manuals and user guides at all-guides.com Model Chassis Net dimension mm (in.) (W × D × H) Net weight kg (lb) Liquid pipe connection mm (in.) Gas pipe connection mm (in.) Drain hose connection 1050 (41.37) Inspection hole 883 (34.79) Refrigerant pipe Indoor unit...
-
Page 8: Step 3 Optional: Insulating The Body Of The Indoor Unit
All manuals and user guides at all-guides.com Installation Procedure CAUTION NOTE Indoor unit type and models Dimensions Step 4 Installing the indoor unit Step 3 Optional: Insulating the body of the indoor unit NOTE English... - Page 9 All manuals and user guides at all-guides.com Ceiling support Refrigerant pipe Indoor unit display Inspection hole CAUTION Inspection hole Refrigerant pipe CAUTION Indoor unit display Inspection hole Concrete Hole in anchor Insert Hole in plug Suspension bolt [Ø9.52(3/8”) or M10] English...
-
Page 10: Step 5 Purging Inert Gas From The Indoor Unit
All manuals and user guides at all-guides.com Installation Procedure Step 6 Cutting and flaring the pipes Pipe cutter Ceiling Indoor unit For the recessed installation Gauge of of the square panel: 11.5 mm (0.45 in.) dimensions Oblique Rough For the recessed installation Burr Pipe of the circular panel: 41.5 mm (1.63 in.) -
Page 11: Step 7 Connecting The Assembly Pipes To The Refrigerant Pipes
All manuals and user guides at all-guides.com Outer Diameter (D) Torque N·m lbf·ft Damaged Cracked Uneven Correct Inclined Surface Thickness NOTE Step 6 Cutting and flaring the pipes Step 7 Connecting the assembly pipes to the refrigerant pipes There are two refrigerant pipes of different diameters : Spanner Torque wrench... -
Page 12: Step 8 Performing The Gas Leak Test
All manuals and user guides at all-guides.com Installation Procedure Step 9 Insulating the refrigerant CAUTION pipes No gap NOTE Step 8 Performing the gas leak test Insulation cover pipe Insulation pipe Indoor unit Be sure to overlap the insulation. Insulator Gas side Liquid side English... - Page 13 All manuals and user guides at all-guides.com CAUTION Hanger Additional insulation Refrigerant pipe insulation a x 3 Insulation type (heating/cooling) General High humidity Pipe size Remarks [30°C(86°F), 85%] [30°C(86°F), 85%] Pipe EPDM, NBR inch inch inch English...
-
Page 14: Step 10 Installing The Drain Hose And Drain Pipe
All manuals and user guides at all-guides.com Installation Procedure Steel ring of drain hose <Geological condition> Joint of drain hose Drain hose Fix with Cable-Tie Drain hose <Operation purpose condition> Reducer A-A’ <Building construction condition> Wrap thermal sleeve hose As shown in the figure, Step 10 Installing the drain hose and tighten clamp of the drain hose. - Page 15 All manuals and user guides at all-guides.com Under gradient Indoor unit Max. 30˚ Ceiling NOTE 1000 to 1500 mm (39.37 to 59.06 in.) Full thread bolt hanger Individual air Main air vent (must be installed) vent Support pieces 1 to 1.5 m (3 ft 3 in. 200 mm (7.87 in.) or more to 4 ft 11 in.)
-
Page 16: Step 11 Performing The Drainage Test
All manuals and user guides at all-guides.com Installation Procedure Step 11 Performing the drainage test CAUTION Water leakage check part CAUTION Hose Flexible hose CAUTION English... - Page 17 All manuals and user guides at all-guides.com Bushing bracket installation Indoor unit Push < 1 conduit tube > < 2 conduit tube > NOTE English...
-
Page 18: Step 12 Connecting The Power And Communication Cables
All manuals and user guides at all-guides.com Installation Procedure Step 12 Connecting the power and Tightening torque (lbf.ft) communication cables Power and communication cable connection For connecting the power and communication cables Indoor unit 1(L) 2(N) 1(L) 2(N) 1(L) 2(N) MCCB ELCB +ELB... - Page 19 All manuals and user guides at all-guides.com Selecting the crimping terminal lug Silver solder English...
- Page 20 All manuals and user guides at all-guides.com Installation Procedure Specifications of the terminal blocks Rated currents Model Rating current(A) Communication: M3.5 screw AC power: M4 screw 7.5 (5/16) 9.0 (3/8) 11 (7/16) 13 (1/2) Power supply MCCB (single phase) Coef×35.6×Lk ∑...
-
Page 21: Step 13 Optional: Extending The Power Cable
All manuals and user guides at all-guides.com – 2.5 [mm ] (0.003 in 2.5 [mm ] (0.003 in ············· 2.5 [mm ] (0.003 in ) ············· Within 187V to 253V -2.2 [V] -2.0 [V] 220 [V] -(2.2+2.0+1.8+1.5+1.3+1.1+0.9+0.7+0.4+0.2)=-11.2 [V] 208.8 [V] : Applicable –... - Page 22 All manuals and user guides at all-guides.com Installation Procedure Method 1 Method 2 Compress it 4 times. Compress it 4 times. Step 14 Setting the indoor unit addresses and the installation options 5 mm (0.2 in.) 5 mm (0.2 in.) Common steps for setting the addresses and options Method 1...
- Page 23 All manuals and user guides at all-guides.com SEG1 SEG2 SEG3 SEG4 SEG5 SEG6 SEG7 SEG8 SEG9 SEG10 SEG11 SEG12 SEG13 SEG14 SEG15 SEG16 SEG17 SEG18 CAUTION SEG19 SEG20 SEG21 SEG22 SEG23 SEG24 On (SEG1 to SEG12) Off (SEG13 to SEG24) Steps Remote control display Cool...
- Page 24 All manuals and user guides at all-guides.com Installation Procedure Steps Remote control display Heat English...
- Page 25 All manuals and user guides at all-guides.com Steps Remote control display Auto Cool English...
- Page 26 All manuals and user guides at all-guides.com Installation Procedure Steps Remote control display Heat English...
- Page 27 All manuals and user guides at all-guides.com Steps Remote control display [SEG2, SEG3] [SEG4, SEG5] [SEG6, SEG8] [SEG9, SEG10] [SEG11, SEG12] [SEG14, SEG15] [SEG16, SEG17] [SEG18, SEG20] [SEG21, SEG22] [SEG23, SEG24] English...
- Page 28 All manuals and user guides at all-guides.com Installation Procedure MR-EH00U and MR-EC00U remote controls CAUTION Entering the Setting the mode for setting option values the options SEG1 SEG2 SEG3 SEG4 SEG5 SEG6 SEG7 SEG8 SEG9 SEG10 SEG11 SEG12 NOTE SEG13 SEG14 SEG15 SEG16...
- Page 29 All manuals and user guides at all-guides.com Steps Remote control display Cool English...
- Page 30 All manuals and user guides at all-guides.com Installation Procedure Steps Remote control display Heat English...
- Page 31 All manuals and user guides at all-guides.com Steps Remote control display Auto Cool English...
- Page 32 All manuals and user guides at all-guides.com Installation Procedure Steps Remote control display Heat English...
- Page 33 All manuals and user guides at all-guides.com Steps Remote control display Setting the indoor unit addresses (MAIN/RMC/MCU) [SEG6, SEG8] [SEG9, SEG10] [SEG2, SEG3] [SEG4, SEG5] [SEG11, SEG12] [SEG14, SEG15] [SEG16, SEG17] [SEG18, SEG20] [SEG21, SEG22] [SEG23, SEG24] Indoor unit NOTE –...
- Page 34 All manuals and user guides at all-guides.com Installation Procedure Option No. for an indoor unit address: 0AXXXX-1XXXXX-2XXXXX-3XXXXX Option SEG1 SEG2 SEG3 SEG4 SEG5 SEG6 Option SEG7 SEG8 SEG9 SEG10 SEG11 SEG12 Option SEG13 SEG14 SEG15 SEG16 SEG17 SEG18 CAUTION English...
- Page 35 All manuals and user guides at all-guides.com Setting the indoor unit installation option (suitable for the condition of each installation location) Indoor unit Installation options for the 02 series SEG1 SEG2 SEG3 SEG4 SEG5 SEG6 SEG7 SEG8 SEG9 SEG10 SEG11 SEG12 SEG13 SEG14...
- Page 36 All manuals and user guides at all-guides.com Installation Procedure Installation options for the 02 series (detailed) Option No. for an indoor unit address: 02XXXX-1XXXXX-2XXXXX-3XXXXX Option SEG1 SEG2 SEG3 SEG4 SEG5 SEG6 English...
- Page 37 All manuals and user guides at all-guides.com Option SEG7 SEG8 SEG9 SEG10 SEG11 SEG12 Option SEG13 SEG14 SEG15 SEG16 SEG17 SEG18 Option SEG19 SEG20 SEG21 SEG22 SEG23 SEG24 English...
- Page 38 All manuals and user guides at all-guides.com Installation Procedure (*1) (*2) (*3) (*4) (*5) (*6) (*7) English...
- Page 39 All manuals and user guides at all-guides.com Installation options for the 05 series SEG1 SEG2 SEG3 SEG4 SEG5 SEG6 SEG7 SEG8 SEG9 SEG10 SEG11 SEG12 SEG13 SEG14 SEG15 SEG16 SEG17 SEG18 SEG19 SEG20 SEG21 SEG22 SEG23 SEG24 Installation options for the 05 series (detailed) Option No.
- Page 40 All manuals and user guides at all-guides.com Installation Procedure Option SEG7 SEG8 SEG9 SEG10 SEG11 SEG12 Option SEG13 SEG14 SEG15 SEG16 SEG17 SEG18 English...
- Page 41 All manuals and user guides at all-guides.com Option SEG19 SEG20 SEG21 SEG22 SEG23 SEG24 (*1) (*2) (*3) (*4) English...
- Page 42 All manuals and user guides at all-guides.com Installation Procedure Additional information on SEG 3, 4, 5, 6, 8, 9 Temperature A: Set with SEG4 Reference temperature for change from heating to cooling B: Set with SEG5 C: Set with SEG6 Reference temperature for cooling D: Set with SEG8...
- Page 43 All manuals and user guides at all-guides.com Changing the addresses and options individually Common steps for setting the addresses and options Option SEG1 SEG2 SEG3 SEG4 SEG5 SEG6 Option SEG1 SEG2 SEG3 SEG4 SEG5 SEG6 CAUTION English...
- Page 44 All manuals and user guides at all-guides.com Installation Procedure For the installation of the circular panel Making a circular opening on the ceiling For the painting of the panel English...
-
Page 45: Troubleshooting
All manuals and user guides at all-guides.com Troubleshooting Indoor unit display indications Condition of the indoor unit Error code Yellow Ice blue Blue green English... - Page 46 All manuals and user guides at all-guides.com Troubleshooting Indoor unit display indications Condition of the indoor unit Error code Yellow Ice blue Blue green English...
- Page 47 All manuals and user guides at all-guides.com Memo English...
- Page 48 All manuals and user guides at all-guides.com...
Need help?
Do you have a question about the AM KN4DCH Series and is the answer not in the manual?
Questions and answers