Table of Contents
Advertisement
Quick Links
Advertisement
Table of Contents

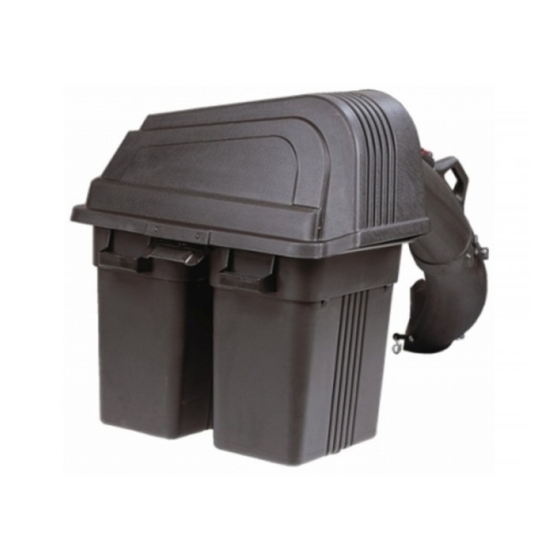
Summary of Contents for Husqvarna 115 145727
- Page 1 Operator and Parts Manual GRASS CATCHER 42" 966004001...
-
Page 2: Table Of Contents
SAFETY RULES ... 4 GENERAL OPERATION ... 4 SLOPE OPERATION ... 4 CHILDREN ... 5 SERVICE ... 5 CONTAINER CONTENTS ... 7 ASSEMBLY ... 8 CONGRATULATIONS on your purchase of a new Grass Catcher. It has been designed, engineered and manufactured to give you the best possible dependability and performance. -
Page 3: Safety Rules
SAFE OPERATION PRACTICES FOR RIDE-ON MOWERS DANGER ! THIS CUTTING MACHINE IS CAPABLE OF AMPUTATING HANDS AND FEET AND THROWING OBJECTS. FAILURE TO OBSERVE THE FOLLOWING SAFETY INSTRUCTIONS COULD RESULT IN SERIOUS INJURY OR DEATH. GENERAL OPERATION • Read, understand and follow all instructions in the manual and on the machine before starting. -
Page 4: Children
SAFE OPERATION PRACTICES FOR RIDE-ON MOWERS CHILDREN Tragic accidents can occur if the operator is not alert to the presence of children. Children are often attracted to the machine and the mowing activity. Never assume that children will remain where you last saw them. - Page 5 SAFE OPERATION PRACTICES FOR RIDE-ON MOWERS Keep machine free of grass, leaves, or other • debris buildup. Clean oil or fuel spillage. Allow machine to cool before storing. • Stop and inspect the equipment if you strike an object. Repair, if necessary, before restarting. •...
-
Page 6: Container Contents
UNPACKING INSTRUCTIONS • Remove all parts and packing materials from carton • Check carton contents against list. Be sure all parts are there. TOOLS REQUIRED ½" Wrench (2) " Wrench (2) " Wrench (2) Ft/Lbs Torque Wrench Drill ¼" and "... -
Page 7: Assembly
INSTALL PLATE AND HANGER Using hardware provided in kit, attach support mount to unit. Attach hanger bracket to support mount. Do not fully tighten nuts at this time. Support Mount Hanger Bracket Secure rear end of support straps to outside of hanger assembly. - Page 8 CONTAINER INSTALLATION Install containers on support frame, overlapping containers at center tube. Note: One container should always overlap the other container at the center tube. Close cover and lock latch handle over support tubes. WARNING! DO NOT operate mower unless container is properly installed.
- Page 9 UPPER CHUTE INSTALLATION NOTE: Depending on model, it may be necessary to drill a ¼" hole to move the upper chute latch nut. Slide upper chute onto lower chute, lining up notches and channels. If latch on lower chute and latch nut on upper chute are aligned, skip to Step If upper chute latch nut is not aligned to the lower chute bungee, drill a ¼"...
-
Page 10: Operation
IMPROVED BAGGING TIPS Follow the mower operation instructions in the mower operator’s manual. When using the grass catcher on a lawn where grass and leaf bagging equipment has not been used, thatch and debris that has accumulated for long periods of time will be picked up. The amount collected and the total time of operation may be greater than experienced with regular use of the grass catcher. -
Page 11: Parts
PARTS... - Page 12 ITEM PART NO. QTY. DESCRIPTION 539 111139 ...1 ... COVER ASSM, COMPLETE INCLUDES ITEMS 2-4 532 127533 ...1 ... SCREEN, COVER 532 155042 ...1 ... STRIP, REINFORCEMENT 532 130895 ...1 ... LATCH HANDLE, COVER 539 976952 ...9 ... SCREW #10-24 x 532 132796 ...1 ...
- Page 13 PARTS...
- Page 14 ITEM PART NO. QTY. DESCRIPTION 539 111006 ...1 ... CHUTE, LOWER 539 108194 ...2 ... LATCH ASSM, CHUTE 539 976952 ...3 ... SCREW #10-24 x 539 108084 ...4 ... WASHER 539 108089 ...3 ... NUT #10-24 WELD 539 113232 ...1 ... WEIGHT PLATE 539 109552 ...3 ...
- Page 15 SECTION 1: LIMITED WARRANTY Husqvarna Professional Products, Inc (“Husqvarna”) warrants the original purchaser the Husqvarna branded product to which this warranty apply (the “Product”) that the Product shall be free from defects in material and workmanship from the date of purchase for the period of the applicable “Warranty Schedule” of the Product as set forth below. Additional limitations are described in Section 2 through 6, inclusive.
- Page 16 Proof of purchase must be presented to the authorized Husqvarna retailer in order to obtain warranty service. This proof must include date purchased, model number, serial number, and complete name and address of the selling retailer. To obtain the benefit of this warranty, the product believed to be defective must be delivered to an authorized Husqvarna retailer in a timely manner, no later than thirty (30) days from date of the operational problem or failure.
- Page 17 P/N 115 145727 IR 05/20/09...


Need help?
Do you have a question about the 115 145727 and is the answer not in the manual?
Questions and answers