Makita KP001G Instruction Manual
Hide thumbs
Also See for KP001G:
- Instruction manual (156 pages) ,
- Instruction manual (124 pages) ,
- Instruction manual (156 pages)
Table of Contents
Advertisement
Quick Links
Advertisement
Table of Contents

Related Manuals for Makita KP001G


Summary of Contents for Makita KP001G
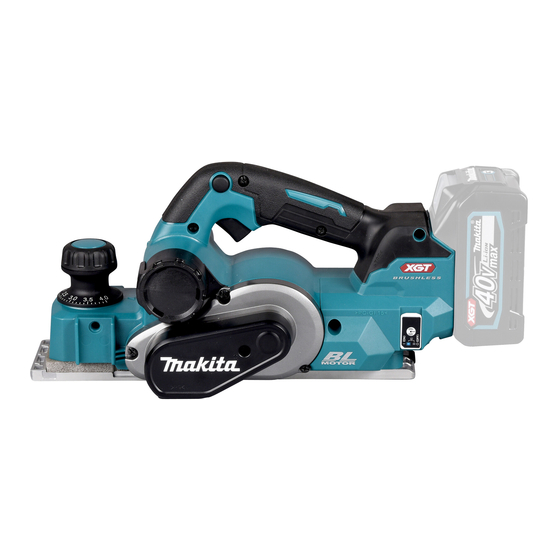
- Page 1 INSTRUCTION MANUAL Cordless Planer KP001G Read before use.
-
Page 2: Specifications
SPECIFICATIONS Model: KP001G Planing width 82 mm Planing depth 4 mm Shiplapping depth 25 mm No load speed 15,000 min Overall length (with BL4040) 385 mm Rated voltage D.C. 36 V - 40 V max Net weight 3.7 - 4.9 kg •... -
Page 3: Ec Declaration Of Conformity
Electrical safety Vibration Power tool plugs must match the outlet. Never modify the plug in any way. Do not use any The vibration total value (tri-axial vector sum) deter- adapter plugs with earthed (grounded) power mined according to EN62841-2-14: tools. Unmodified plugs and matching outlets will Work mode: planing softwood reduce risk of electric shock. - Page 4 Do not let familiarity gained from frequent use Keep handles and grasping surfaces dry, of tools allow you to become complacent and clean and free from oil and grease. Slippery ignore tool safety principles. A careless action can handles and grasping surfaces do not allow for cause severe injury within a fraction of a second.
- Page 5 16. Use only Makita blades specified in this For preparation of the item being shipped, consult- manual. ing an expert for hazardous material is required.
- Page 6 Keep the wireless unit away from young chil- dren. If accidentally swallowed, seek medical 26. Do not insert any devices other than Makita attention immediately. wireless unit into the slot on the tool. Use the wireless unit only with Makita tools.
-
Page 7: Functional Description
Turn the tool off, and then turn it on again to restart. Charge the battery(ies) or replace it/them with recharged battery(ies). Let the tool and battery(ies) cool down. If no improvement can be found by restoring protection system, then contact your local Makita Service Center. Indicating the remaining battery Fig.1 capacity ► 1 . Red indicator 2. Button 3. Battery cartridge Press the check button on the battery cartridge to indi- To remove the battery cartridge, slide it from the tool cate the remaining battery capacity. The indicator lamps while sliding the button on the front of the cartridge. -
Page 8: Adjusting Depth Of Cut
WARNING: NEVER use the tool if it runs when you simply pull the switch trigger without pressing the lock-off Charge the button. A switch in need of repair may result in unintentional battery. operation and serious personal injury. Return tool to a Makita service center for proper repairs BEFORE further usage. The battery may have NOTICE: malfunctioned. Do not pull the switch trigger hard without pressing in the lock-off button. -
Page 9: Electronic Function
CAUTION: Use only the Makita wrench pro- Electric brake vided to remove and install the planer blades. Failure to do so may result in overtightening or insuf- The tool is equipped with an electric brake. If the tool ficient tightening of the installation bolts. This could... - Page 10 Untighten the screws from the conventional planer Hold the adjusting plate where it is and tighten the blade, and then remove the adjusting plate. screws to secure it in place. Fig.8 ► 1 . Screws 2. Conventional planer blade 3. Adjusting plate Installing conventional planer blades Set a conventional planer blade onto the blade gauge, aligning its cutting edge along the guide wall on the blade gauge horizontally.
- Page 11 For tool with mini planer blades Installing mini planer blades Clean out all the wood chips and foreign matters NOTE: A pair of planer blades are assembled in adhering to the drum and mini planer blade. the drum. Repeat the following procedures for each planer blade.
- Page 12 Mini planer blade calibration Place the set plate (with adjusting plate) over the mini planer blade, aligning the guide ridges on the set Perform a calibration on planner blades at regular inter- plate with guide grooves on the mini planer blade. vals to optimize work efficiency. Loosen the installation bolts one turn using the box wrench provided.
- Page 13 10. Hold the adjusting plate where it is and tighten the 12. Slightly tighten the installation bolts, and slide the screws to secure it in place. mini planer blade along between the drum and set plate by pushing one end of the blade inwards from the side opposite to the belt cover. 13. Cross-tighten all the installation bolts evenly with the box wrench. Fig.18 ► 1 . Adjusting plate 2. Set plate 3. Screw 4. Positioning guide 5. Rear side wall 6. Blade gauge Fig.20 11. Slip the positioning guide of the adjusting plate...
- Page 14 Planer blade settings Your planing surface will end up rough and uneven, unless the planer blades are set properly and securely. Install planer blades correctly so the cutting edges sit in a right angle, on an absolute level with the rear baseline, and exactly parallel to the sole of the plane. Read the examples in the table for proper settings. Planing surface Blade setting Cause Correct setting Cutting edges sit on a level with the rear baseline and run side to side parallel to the sole of the plane. Gouging at start Cutting edges underreach the rear baseline.
- Page 15 Mount the chamfering rules (sets of edge fences and Installing depth guide mounting arms) in place by securing them with the thumb screws into the mounting holes on both sides of the tool head. Lay the tool down with the belt cover facing downwards. Mount the depth guide in place by securing it with the washer and thumb screw into the mounting hole on side of the tool head. Fig.25 ► 1.
-
Page 16: Planing Operation
As for installation, insert the stopper straight into one NOTE: If you connect a Makita vacuum cleaner to this tool, of the openings aligning the locking slot in the stopper more efficient and cleaner operations can be performed. with the guide projection on the opening until it locks in place. Connecting a vacuum cleaner When you wish to perform clean planing operation, connect a Makita vacuum cleaner to your tool. Connect a hose of the vacuum cleaner to one of the discharge openings as shown in the figure. Fig.28 ► 1 . Stopper 2. Locking slot 3. Guide projection Dust bag Fig.31... - Page 17 Turn the tool on and wait until it attains full speed. NOTE: Planing can be easier if you position the work- Gently move the tool forwards, applying slightly piece at a slight forward tilt so you ease up on the more downwards pressure on the depth adjustment pressure to hold the tool during operation. knob at the start so as to keep the entire planer base NOTE: Adjust the cutting speed and depth for your level and even with the workpiece surface. desired surface finishes.
- Page 18 Chamfering NOTE: Make sure that the blade edge comes out of the side end of the drum by 1.6 mm – 1.8 mm for shiplapping. (See “A” in the following figure.) * You can opt to let the blade end come out of the side end of the front base by 0.2 mm - 0.4 mm. (See “B” in the following figure.) Fig.41 Use the "V" grooves cut in the front base to make a chamfering cut as shown in the figure.
- Page 19 Installing the wireless unit NOTE: For large chamfers, make many passes of planning, starting from small chamfering to larger chamfering, as shown in the figure. Optional accessory CAUTION: Place the tool on a flat and stable surface when installing the wireless unit. NOTICE: Clean the dust and dirt on the tool before installing the wireless unit. Dust or dirt may cause malfunction if it comes into the slot of the wireless unit.
- Page 20 Tool registration for the vacuum cleaner NOTE: A Makita vacuum cleaner supporting the wireless activation function is required for the tool registration. NOTE: Finish installing the wireless unit to the tool before starting the tool registration.
- Page 21 Push the wireless activation button on the tool NOTE: The wireless activation lamps finish blinking briefly. The wireless activation lamp will blink in blue. in green after 20 seconds elapsed. Press the wireless activation button on the tool while the wireless acti- vation lamp on the cleaner is blinking. If the wireless activation lamp does not blink in green, push the wire- less activation button briefly and hold it down again.
- Page 22 Description of the wireless activation lamp status Fig.54 ► 1 . Wireless activation lamp The wireless activation lamp shows the status of the wireless activation function. Refer to the table below for the meaning of the lamp status. Status Wireless activation lamp Description Color Duration...
- Page 23 If the cancellation is performed successfully, the wire- Cancelling tool registration for the less activation lamps will light up in red for 2 seconds vacuum cleaner and start blinking in blue. NOTE: The wireless activation lamps finish blinking in Perform the following procedure when cancelling the red after 20 seconds elapsed. Press the wireless acti- tool registration for the vacuum cleaner.
- Page 24 Troubleshooting for wireless activation function Before asking for repairs, conduct your own inspection first. If you find a problem that is not explained in the manual, do not attempt to dismantle the tool. Instead, ask Makita Authorized Service Centers, always using Makita replace- ment parts for repairs. State of abnormality Probable cause (malfunction) Remedy The wireless activation lamp does The wireless unit is not installed into the tool. Install the wireless unit correctly. not light/blink. The wireless unit is improperly installed into the tool. The terminal of the wireless unit and/or Gently wipe off dust and dirt on the terminal of the the slot is dirty.
-
Page 25: Maintenance
For conventional planer blades only Always keep your planer blades sharp for the best perfor- OPTIONAL mance. Use the sharpening holder (optional accessory) to refine the planer blade edges safely and effectively. ACCESSORIES CAUTION: These accessories or attachments are recommended for use with your Makita tool specified in this manual. The use of any other accessories or attachments might present a risk of injury to persons. Only use accessory or attachment for its stated purpose. If you need any assistance for more details regard- ing these accessories, ask your local Makita Service Center. - Page 28 Makita Europe N.V. Jan-Baptist Vinkstraat 2, 3070 Kortenberg, Belgium Makita Corporation 3-11-8, Sumiyoshi-cho, Anjo, Aichi 446-8502 Japan 885951-222 www.makita.com 20211101...