
Related Manuals for Art-Tech CESSNA-182


Summary of Contents for Art-Tech CESSNA-182
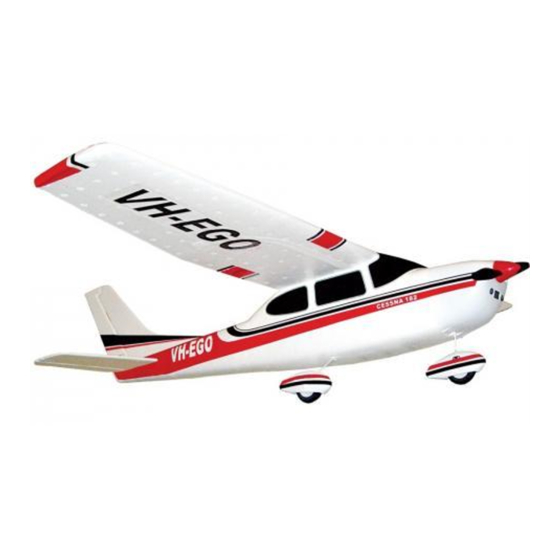
- Page 1 CESSNA-182 CESSNA-182 Brushless version Brushless version Remote Control Model Airplane OPERATING MANUAL It is necessary to do frequency correction again when the 2.4 G transmitter is non-reaction, please refer to attached manual for reference. 2 1 0 *2 85m m...
- Page 2 LEARNING HOW TO FLY There are many true “beginner” airplanes out on the market today. They are usually electric power gliders, slowflyers, or parkflyers. These beginner airplanes are such good models that most of them are not even bought by first-time flyers but by long-time expert flyers! By following these simple instructions, you will learn to fly a RC airplane in no time! Understand how a plane flies.
-
Page 3: Table Of Contents
CATALOG - 430832 Main speclfication............4 Safet y precautions..............5 Ma in par ts of Cessna............7 Char ging..............11 Radio Control system for Cessna.........12 Trouble shooting............15 Valuable experience............16 Spare parts list..............17... -
Page 4: Main Speclfication
Ple ase read before operatin g this system! We would like to thank you for purchasing an innovative new product, designed for the hobby enthusiast. The Cessna incorporates the use of a Radio Transmitter, speed controller, electric motor, and electric servo's to provide long time enjoyment and give the user an introduction into the excitement of R/C flight. -
Page 5: Safety Precautions
Safety precautions! Please read this section until you fully understand! 1) Do not fly in Strong wind or bad weather. 2) Never fly the model in crowded areas, where there are lots of people, automobiles on the road and power lines over head. Also not to fly around the airport. Please make yourself enough room for the flying and operating, as the plane can travel at high rates of speed. - Page 6 5) The Cessna is made from PA and polythene w h i c h a r e t i n d e r. W h e n i t m e e t s t h e h e a t , transfiguration can easily happen, so you must keep your Cessna away from heat.
-
Page 7: Ma In Par Ts Of Cessna
Main par ts of Ce ssna Fuselage, main wing, elevator, rudder, transmitter, battery, charger, landing gear, wheel, propeller, glue Assembly Glue the Horizontal Tail 1. Inspect the elevator opening. Make sure that the top of the rudder and elevator opening has a micro separation. - Page 8 Glue the Vertical Tail 1.Apply some glue on the rudder position of fuselage 2.Apply some glue on the mounting tabs of the rudder 3.Attach the rudder into the fuselage. 4. Next apply glue to bottom edge of Rudder and slide into fuselage. Make sure rudder is perpendicular to body.
- Page 9 Landing gear : Push the main landing gear to the fuselage. Push the nose landing gear onto the nose of the plane Insert both rear and front landing gear into the plastic openings on the underside of the fuselage. Landing gear maybe slightly bent from factory. You can adjust this by hand as needed.
- Page 10 2. Attach the control stick on the elevator 3. Look from the tail after finished control horn. Attaching Clevises to Control Hor n Turn your transmitter on. Attach main battery to airplane. Set the control stick not throttle stick on the transmitter to the neutral (centered) position.
-
Page 11: Charging
Insert the main wing into fuselage with mid-front section plugging into the female receptors on fuselage and then secure the rear of the wing with both plastic set screws. Charging 1.Plug the charger into the AC power (pay attention to the voltage). Plug the Battery to the charger and wait for 3 -4 hours the battery will become a warm to the touch, and may seem even hot. -
Page 12: Radio Control System For Cessna
Ra dio Co ntrol system for Ce ssna Your radio system will be one of the below four types, please choose one. ( Mode 1) Antenna Carrying bar Hook Throttle Max Elevator down Aileron Rudder Rudder Aileron right left right left Elevator up Throttle Min... - Page 13 1.The transmitter needs 8 AA dry batteries. After you install the batteries, you can turn on the transmitter, the green will come on. If the voltage of battery is too low, the transmitter will beep automatically, then you must install new batteries. 2.Turn on the transmitter first, then connect battery.
- Page 14 Flight adjustment 1. Cessna will fly better with fully-charged batteries. 2. Keep flight straight: when you find it is difficult to fly Cessna straightly, please adjust the micro-adjuster on the transmitter. For example, when you find Cessna always fly toward left, please push the micro-adjuster on the transmitter to inverse direction --- right, as this will move the rudder to compensate.
-
Page 15: Trouble Shooting
Propeller assemble Press the cowling into the propeller holder, it means to be fastened when it make a sound of "Pa". Trouble shooting Phenomenon Problem How to solve 1.Charge the battery. 1.Battery in plane is not fully charged. 2.The battery in the transmitter 2.Install new dry cells. -
Page 16: Valuable Experience
Valuable experience 1.If you have a computer flight simulator, it is a good idea to practice with it before actually flying with the Cessna. 2. You can taxi Cessna on the ground with little power, make yourself become familiar with the direction control. -
Page 17: Spare Parts List
Spare parts list Item:54013 Item:54021 Item:54011 Main wing Tail wing Fuselage Item:54014 Item:54031 Item:54024 Propeller Landing gear Propeller Adapter Item:54034 Item:54041 Item:3A01D Propeller Spinner Small Plastic Parts Brushless Motor 80W Item:54044 Item:31031 Item:3F021 Sticker Radio set Battery Pack (8.4V) -17-... - Page 18 SHENZHEN ART-TECH R/C HOBBY CO.,LTD...
Need help?
Do you have a question about the CESSNA-182 and is the answer not in the manual?
Questions and answers