Advertisement
Quick Links
PROPER USE GUIDELINES
Cumulative Trauma Disorders can result from the prolonged use of manually powered hand tools. Hand tools are intended for occasional use
and low volume applications. A wide selection of powered application equipment for extended-use, production operations is available.
Nut
Insulation Crimper
(Upper Die)
Wire Crimper
(Upper Die)
Anvil (Lower)
Wire Die
DIE ASSEMBLY
2161057-2
1. INTRODUCTION
All dimensions on this instruction sheet are in
NOTE
metric units [with U.S. customary units in brackets].
Figures and illustrations are for identification only
i
and are not drawn to scale.
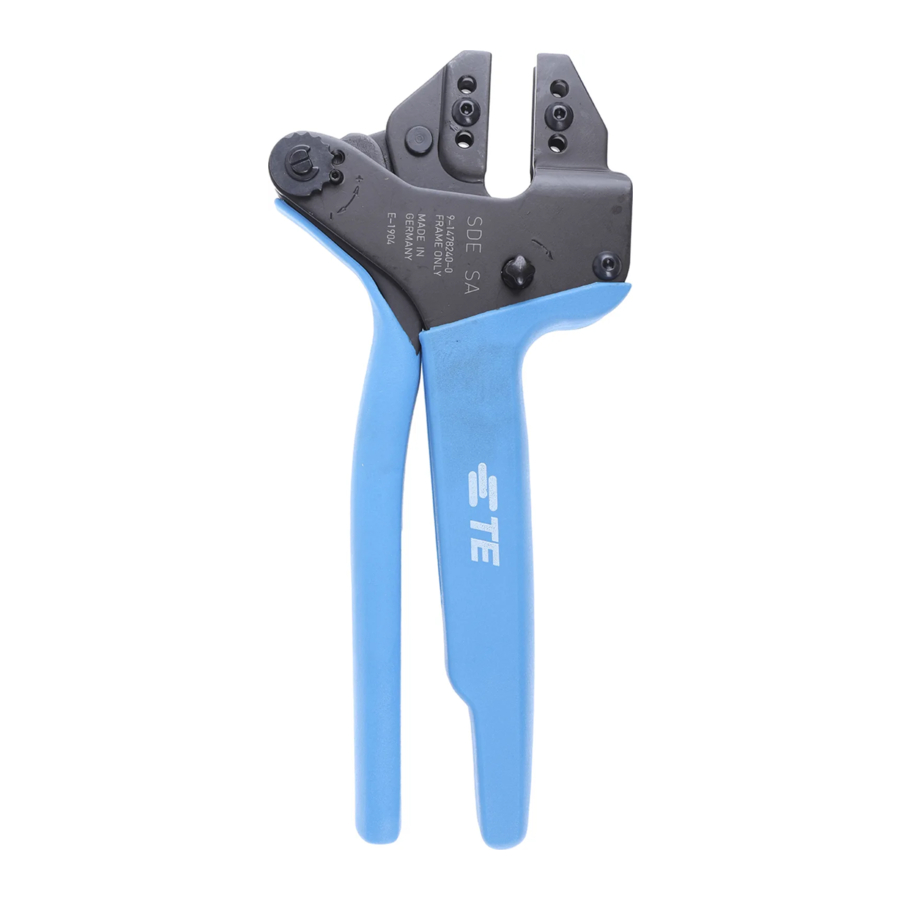
SDE Commercial Hand Tool Assembly 2161057-1
consists of SDE-SA Frame Assembly 9-1478240-0
(Instruction Sheet 408-8851) and Die Set Assembly
2161057-2. See Figure 1. The tool is used to crimp
MCI Receptacle Contacts listed in Figure 1.
2. DESCRIPTION
The tool frame features two jaws, a handle, ratchet
adjustment wheel, and an emergency ratchet release.
The die set consists of an indenter (upper die) and an
anvil (lower die). The tool frame holds a die assembly
with two crimping chambers. See Figure 1. Die
retaining screws are used to secure the dies in the tool
frame.
©2011 Tyco Electronics Corporation, a TE Connectivity Ltd. Company
All Rights Reserved
*Trademark
TE Connectivity, TE connectivity (logo), and TE (logo) are trademarks. Other logos, product and/or Company names may be trademarks of their respective owners.
SDE-SA Commercial Hand Tool
Assembly 2161057-1 with Die
Assembly 2161057-2
Locator
Stationary Jaw
Moving Jaw
Ratchet
Adjustment
Wheel
Anvil (Lower)
Insulation Die
CONTACT
INSULATION DIAMETER
142183-[ ]
1.30-2.00 [.051-.079]
TOOLING ASSISTANCE CENTER 1-800-722-1111
PRODUCT INFORMATION 1-800-522-6752
WIRE SIZE (mm²)
Figure 1
The tool features a ratchet and an adjustment wheel
with a range of settings. The ratchet ensures that the
tool has completed the cycle and will not release until
the handles have been FULLY closed, unless the
emergency ratchet release is rotated to manually
release the ratchet. The adjustment wheel controls the
amount of handle pressure exerted on the dies during
the crimping procedure.
The dies bottom before the ratchet releases. This
CAUTION
feature ensures maximum tensile performance of
the crimp. DO NOT re-adjust the ratchet.
!
3. INSTALLATION AND REMOVAL OF DIE SET AND
LOCATOR ASSEMBLY
1. Open the tool handles and remove the two die
retaining screws from the tool jaws.
This controlled document is subject to change.
For latest revision and Regional Customer Service,
visit our website at www.te.com
Instruction Sheet
408-10455
21 JUL 11 Rev A
Handle
Emergency
Ratchet Release
Die Retention
Screws
Retaining Pins
(4) Required
STRIP LENGTH
0.60
5.1-5.9 [.201-.232]
0.30
(Figure 1)
1 of 5
LOC B
Advertisement

Related Manuals for TE Connectivity SDE-SA


Summary of Contents for TE Connectivity SDE-SA
- Page 1 PRODUCT INFORMATION 1-800-522-6752 For latest revision and Regional Customer Service, *Trademark visit our website at www.te.com LOC B TE Connectivity, TE connectivity (logo), and TE (logo) are trademarks. Other logos, product and/or Company names may be trademarks of their respective owners.
- Page 2 408-10455 4. CONTACT SUPPORT ADJUSTMENT (Figure 2) 2. Place the wire anvil so that the chamfered side and the marked surfaces face outward, when The contact support is preset prior to shipment, but mounted in the moving jaw of the tool frame. NOTE minor adjustment may be necessary.
-
Page 3: Crimping Procedure
Figure 3. Refer to Section 6, Crimp referred to as a crimp-height comparator. Height Inspection, and Section 7, RATCHET TE Connectivity does not manufacture or market (Crimp Height) Adjustment, to verify crimp height crimp-height comparators. Detailed information on... -
Page 4: Maintenance And Inspection
408-10455 8.2. Inspection 3. If the crimp cannot be made to conform to the recommended crimp height, the tool or die set must Close the tool handles until the ratchet releases, and be replaced. See Section 9, REPLACEMENT. then allow them to quickly open freely. If they do not open quickly and fully, the spring is defective. - Page 5 408-10455 Tooling Compatible with Die Assembly 2161057-2 PRO-CRIMPER* III Hand Tool Frame 354940-1 SDE-SA Hand Tool 9-1478240-0 (Instruction Sheet 408-9930) (Instruction Sheet 408-8851) SDE Bench Terminator 1490076-2 626 Adapter 679304-1 (Customer Manual 409-10052) (Instruction Sheet 408-4070) Electro-Hydraulic (BT 3500 Battery-Hydraulic) Closed Head Assembly 2031460-1 “C”-Head Assembly 2031450-1...
Need help?
Do you have a question about the SDE-SA and is the answer not in the manual?
Questions and answers