Advertisement
Quick Links
Advertisement

Related Manuals for Wellion CALLA mini


Summary of Contents for Wellion CALLA mini
- Page 1 ni n OWNERS CALLA mini GUIDE...
- Page 2 Dear Wellion CALLA Mini Owner, Thank you for choosing the Wellion CALLA Mini Blood Glucose Monitoring System to help you monitoring your blood sugar levels. We designed the Wellion CALLA Mini Blood Glucose Monitoring System to be accurate and easy to use.
- Page 3 Testing is done outside the body (in vitro diagnostic use). The Wellion CALLA Mini blood glucose meter is intended for both self-testing use by people with diabetes and professional use by healthcare professionals in a clinical setting, as an aid to monitoring glucose levels in Diabetes Mellitus.
- Page 4 If you have questions or simply need more information, please call our authorized representative or visit our website at www.medtrust.at Thank you again for choosing the Wellion CALLA Mini Blood Glucose Monitoring System.
- Page 5 YOUR NEW BLOOD GLUCOSE KIT The Wellion CALLA Mini Blood Glucose Monitoring System kit includes the following items: Wellion CALLA Mini blood glucose meter Wellion Lancing device 10 Wellion Lancets Compact Pouch User Guide...
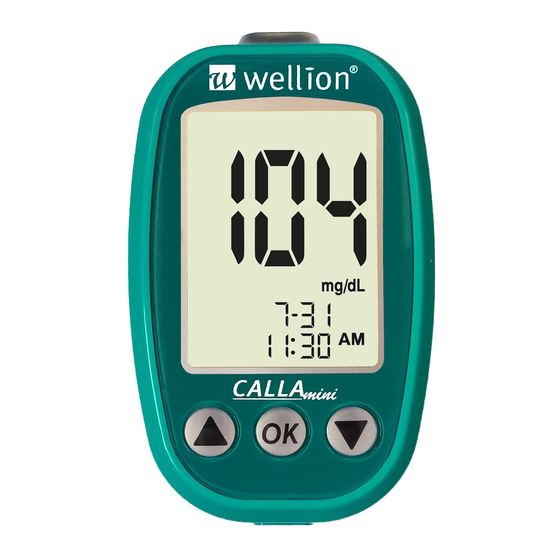
- Page 6 The Wellion CALLA Mini meter Test Strip Port Insert test strip to turn on the meter. Meter Display Shows your blood glucose test results, memory values, averages, and other messages. OK Button Press and hold to turn meter on and off.
- Page 7 PC Connection Port Plug in the data cable to transmit results onto a PC (Data cable and software sold separately*). The correct reading of your data can be ensured only with the original Wellion CALLA USB cable with Micro-USB connector.-...
- Page 8 The Wellion CALLA Test Strips are glucose specific, biosensor-based test strips that can test glucose in capillary whole blood in as quickly as 6 sec- onds and require very little blood sample.
- Page 9 IMPORTANT: the Wellion CALLA Mini Blood Glucose Meter. Other brands of test strips will not work with the Meter. and light, it is important to close the vial cap of the test strip bottle immediately tightly after each use. Keep the un-used test strips in the original bottle.
- Page 10 Meter Display Screen Alarm Clock Icon (meter electronic works properly) Tone Icon Memory Icon Test result, stored Low Battery Icon test results, averages, countdown, messages Icon for control solution mode Units of measurement Blood drop Icon Day Average Icon (meter ready for testing) Test strip Icon (meter is ready to insert a test strip)
-
Page 11: Setting Up Your New System
SETTING UP YOUR NEW SYSTEM Inserting (or changing) batteries Batteries need to be inserted before using your Wellion CALLA Mini Meter for the first time or when the battery icon appears on the meter display. Materials you will need: Your Wellion CALLA Mini Meter... - Page 12 NOTE: are being changed. to check the time and date, when you turn on the meter or insert a test strip. If time and date are correct, press OK. If time and date are not correct, set them to the correct values.
- Page 13 Setting the clock Material you will need: Your Wellion CALLA Mini Meter NOTE: test or control results will not be stored in the meter memory. Step 1: Press and hold the OK button to turn on the meter. Step 2: Release the OK button and the meter will run a system check automatically.
- Page 14 After a flashing test strip icon appears on the screen, press the arrow-button twice until you can see the clock-symbol Step 3 - Set Year: Press the OK button to enter date and time set up. The current year will flash.
- Page 15 buttons to select the time format. Press the OK button to confirm your choice and to advance to set the hour. The current hour will flash. Use buttons to select the correct hour. Press the OK button to confirm your choice and to advance to set the minutes.
- Page 16 NOTE: The changes you have done so far will be memorized by the meter.
- Page 17 The Wellion CALLA Mini Meter comes with tone ON as preset. Turning off the tone will cause you to miss many important cues from your meter - such as confirmation or error messages. Material you will need: Your Wellion CALLA Mini Meter Step 1: Scroll through the settings for the tone setting, press OK button to enter tone set up.
- Page 18 NOTE: The changes you have made so far will be memorized by the meter. Setting alarms Your Wellion CALLA Mini Meter has 3 alarms that can be setup. The factory Material you will need Your Wellion CALLA Mini Meter Step 1: Press buttons in the settings menu until the alarm clock flashes.
- Page 19 Step 2: Press the OK button and enter alarm setup for alarm number 1. Step 4: If ON is selected and you press the OK button, you will proceed with setting the hour. Press the to change the hour. Press OK to con- firm your choice.
-
Page 20: Control Solution Testing
CONTROL SOLUTION TESTING The purpose of the control solution testing is to validate the performance of the Wellion CALLA Mini Blood Glucose Monitoring System using the testing solution with a known range of glucose. You can perform control solution testing when:... - Page 21 Materials you will need: Your Wellion CALLA Mini Meter A new Wellion CALLA Blood Glucose Test Strip...
- Page 22 IMPORTANT: CALLA Test Strips. Other brands of control solution will produce inac- curate results. discard any unused control solution three months after opening. printed on the test strip bottle and its package diately and close it tightly. dry, cool place.
- Page 23 open it. 6 months after first opened date, discard the bottle and any re- maining Test Strip Meter will not begin testing if it’s outside this temperature range.
- Page 24 Step 1: Insert a Wellion CALLA Blood Glucose Test Strip into the meter. Make sure the test strip contact points are inserted all the way into the meter. Close the test strip bottle immediately after you take out a strip.
- Page 25 testing result will appear on the meter display screen. Step 6: Compare the reading on the screen to the corresponding control range printed on the test strip bottle or its package. If the reading does not fall within the ranges printed on the test strip bottle or its package, see chapter “Control Solution Trouble Shooting”.
- Page 26 NOTE: and indicated by ctl icon.
- Page 27 Control Solution Trouble Shooting If your control solution testing is out of range (too high or too low), it maybe caused by the following: Possible Causes What you can do ... Solution being used Solution. temperature control solution all control solution and test strips. Repeat test- ing using a new test strip.
-
Page 28: Testing Your Blood Glucose
Materials you will need: Your Wellion CALLA Mini Meter A new Wellion CALLA Blood Glucose Test Strip Lancing device with a clean, unused lancet Before you begin, make sure: Up Your New System”, and “Control Solution Testing” for details. - Page 29 Preparing your Lancing device Step 1: Unscrew the adjustable cap of the lancing device and insert the lancet by push down firmly until it is fully seated. Step 2: Twist the protective cover off from the lancet. Twist clockwise the adjustable cover back onto the lancing device.
- Page 30 Step 4: With one hand holding the lancing device, pull back the cocking handle with your other hand until you hear a click sound and the lancing device is ready. The release button is now colored red, so you can easily verify if the lancing device is ready for blood sampling.
- Page 31 Performing a Blood Glucose Test IMPORTANT: a dry, cool place. any remaining test strip after 6 months from date of opening.
- Page 32 Step 1: Take out a Wellion CALLA Test Strip from the test strip bottle and close the bottle immediately. Insert the test strip to turn on the meter. Wait for the test strip and flashing blood drop icons to appear on the meter display screen.
- Page 33 Step 3: Gently bring the test strip and touch the drop of blood at a slight angle. The test strip acts like a straw to pull the blood in. Keep the test strip in the blood drop until the meter beeps to indicate the test strip has enough blood to test.
- Page 34 CAUTION: using fingertip testing. If you still receive the same result, call your physician or healthcare professional immediately. Step 6: Remove the used lancet from your lancing device. You can use the lancet ejector to prevent needlestick injuries. Push the lancet ejector forward with the thumb and simultaneously pull out the sliding barrel to dispose of the used lancet.
- Page 35 IMPORTANT: Discard used test strips and lancets according to your local disposal reg- ulations where applicable. UNDERSTANDING YOUR BLOOD GLUCOSE TEST RESULT Blood glucose value will vary depending on food intake, medication, health, It is important to consult with your physician or healthcare professional to determine an appropriate target range for you.
- Page 36 What to do if you get a high or low reading? consult your healthcare provider. Testing”.
- Page 37 The CALLA Mini Meter automatically stores up to 300 test and control results with date and time. In addition, the meter also provides 7, 14, 21 and 30 days averaging to help you better track your effort in controlling your blood glucose level.
- Page 38 flashing test strip icon appears, press the button once, and the “mem” will appear at the upper left corner of the display screen. Press “OK” to select the “mem” mode. Step 2: The meter shows the latest memorized result. Press button to scroll through the results.
- Page 39 NOTE: display screen in addition to “mem”. show 3 dashes. cause the oldest one to be deleted. changing batteries.
- Page 40 keep your meter working properly. Cleaning the Meter with a mild detergent. or hold it under running water...
- Page 41 Storage and Precautions could damage the electronics. as bathroom or kitchen. make sure it’s closed tightly. technical problems or questions, call our authorized dealer for assistance. materials are present. Synthetic clothes, carpets, etc., may cause damaging static discharges in a dry environment.
- Page 42 garage door openers, radio transmitters, or other electrical or electrical equipment that are sources of electromagnetic radiation, as these may interfere with the proper operation of the meter.
- Page 43 This section details the significant display screen messages and error codes you will encounter when using your Wellion CALLA Mini meter and test strips. What you see What it meanst What should you do Memory Error again strip into the meter.
- Page 44 Strip error strip into the meter. until you see the flashing blood drop icon before you add blood or control solution sample. distributor. Blood is not enough with a new test strip. See chapter “Perform- ing a blood glucose test”...
- Page 45 Test result is higher than contact your physician or healthcare profes- sional immediately. Test result is lower than using a new test strip. If the result is still LO, contact your physician or healthcare profes- sional immediately. Battery is low serting (or changing) the Battery”...
- Page 46 There are no memorized ter “Performing a blood glucose test” results in the meter Testing has been performed it to reach the new temperature outside of operating temperature.
- Page 47 The producer warrants Wellion CALLA Mini blood glucose meter against defects in materials and workmanship for a period of two years from the date of purchase. The warranty is lost if the instrument is misused, poorly maintained or is tampered with.
- Page 48 Test Strips: Wellion CALLA Blood Glucose Test Strips Calibration: Plasma Test Time: 6 Seconds Display Type: Large LCD screen Memory: 300 blood test results with date and time Weight: 34g (incl. batteries) Battery Life: 1000 tests of continuous use or 1 year...
- Page 49 Alternate Site Testing (AST) on palm or forearm possible.
- Page 50 SYMBOLS (LOT) Batch Code C ˚ Temperature Limitations C ˚ F ˚ F ˚ Consult Instructions for Use Caution, consult accompanying documents Catalogue number Do not reuse Do not use if package is damaged...
- Page 51 Keep dry Manufacturer In vitro diagnostic, medical device for self-testing...
- Page 52 Gewerbepark 10 7221 Marz In Vitro diagnostisches, AUSTRIA www.medtrust.at medizintechnisches Gerät...
Need help?
Do you have a question about the CALLA mini and is the answer not in the manual?
Questions and answers