Table of Contents
Advertisement
Quick Links
Download this manual
See also:
Service Manual
Advertisement
Table of Contents

Related Manuals for Hitachi DV-P303U


Summary of Contents for Hitachi DV-P303U
- Page 1 DVP303U HITACHI DVD PLAYER MODEL DV-P303U Instruction manual To obtain the best performance and ensure years of trouble-free use, please read this instruction manual completely.
-
Page 2: Table Of Contents
DVD Function Buttons... 10 Rear Panel ... 11 Connections... 13 Choosing a Connection ... 13 Before Connection the DVD Player... 13 Connection to an Audio System... 13 Connection to a TV ... 13 Connection to a TV (For Video) ... 14 Basic Functions ... - Page 3 Index View (VCD) ... 21 Selecting the Audio Language ... 22 Using the AUDIO Button... 22 Using the MENU Button... 22 When playing a VCD ... 23 Selecting the Subtitle Language... 23 Using the MENU button ... 23 Changing the Camera Angle ... 24 Using the ANGLE button...
-
Page 4: Precautions
This Class B digital apparatus meets all requirements of the Canadian Interference-Causing Equipment Regulations. CLASS 1 LASER PRODUCT WARNING : TO REDUCE THE RISK OF FIRE OR SHOCK HAZARD, DO NOT EXPOSE THIS DVD PLAYER TO RAIN OR MOISTURE. CAUTION: THIS PRODUCT UTILIZES A LASER. USE OF CONTROLS OR ADJUSTMENTS OR PERFORMANCE... -
Page 5: Handling Cautions
• This DVD player is designed and manufactured to respond to the Region Management Information. If the Region number of a DVD disc does not correspond to the Region number of this DVD player, this DVD player cannot play the disc. -
Page 6: If Remote Doesn't Operate Properly
COPY PROTECTION • Many DVD discs are encoded with copy protection. Because of this, you should only connect your DVD player directly to your TV, not to a VCR. Connecting to a VCR results in a distorted picture from copy-protected DVD discs. -
Page 7: Disc Markings
Japan, etc. Playback Region Number Both the DVD player and the discs are coded by region. These regional codes must match in order for the disc to play. If the codes do not match, the disc will not play. The Region Number for this player is described on the rear panel of the player. -
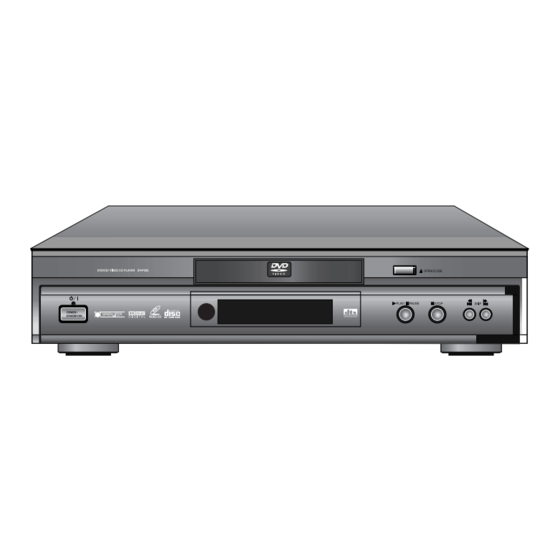
Page 8: Front Panel Controls
Front Panel Controls Œ STANDBY/ON • When the unit is first plugged in, the indicator lights. When STANDBY/ON is pressed, the lamp goes out and the player is turned on. DISC TRAY • Press OPEN/CLOSE to open and close the disc tray. Ž... -
Page 9: Tour Of The Remote Control
(2) Disc type indicators. (3) Reverse playback/Pause/Forward playback (4) Lights when 3D surround is turned on. (5) DVD: Title number (6) DVD: Chapter number. (7) Video/Audio CD: Track number (8) Repeat play mode (9) Linear PCM audio output (10) Dolby Digital audio output (11) DTS (Digital Theater System) audio output (Digital only) (12) MPEG-2 Audio output (13) Displays various messages concerning operations such as PLAY, STOP, LOAD, RANDOM, ... -
Page 10: Dvd Function Buttons
• Allows you to repeat play a title, chapter, track, or disc. (4) A-B REPEAT Button • Marks a segment to repeat between A and B. (5) SETUP Button • Brings up the DVD player's Setup menu. (6) MODE Button • Allows you to program a specific order. (7) SEARCH Buttons •... -
Page 11: Rear Panel
• To stop playback. (9) SKIP Buttons • Skip the, Chapter, or Track. (10) MENU Button • Brings up the Menu on a disc. (11) TOP MENU Button • Brings up the Top Menu on a disc. (12) ENTER/DIRECTION Button (UP/DOWN or LEFT/RIGHT Button) (13) STEP Button •... - Page 12 (1) DIGITAL AUDIO OUT JACK • Use either a coaxial digital cable to connect to a compatible Dolby Digital receiver. Use to connect to an A/V Amplifier that contains a Dolby Digital decoder or DTS decoder. (2) MIXED AUDIO OUT JACKS •...
-
Page 13: Connections
Connections Choosing a Connection The following show examples of connections commonly used to connect the DVD player with a TV and other components. Before Connection the DVD Player • Always turn off the DVD player, TV, and other components before you connect or disconnect any cables. -
Page 14: Connection To A Tv (For Video)
Connection to a TV (For Video) • Method 1 DVD Player + TV with Video Input Jack • Method 2 DVD Player + TV with S-Video Input Jack (If the S-Video is selected in the VIDEO OUT SELECT.) Basic Functions... -
Page 15: Playback
When you stop disc play, the player remembers where you stopped, so when you press PLAY again, it will pick up where you left off (unless the disc is removed, the STOP button is pressed twice or the player is unplugged.) NOTE •... -
Page 16: Skipping Tracks
(2X/4X/8X/16X/32X/normal speed, in order) on DVD. • Press the REVERSE or FORWARD SEARCH button on the remote and press again to search at a faster speed (4X/8X/normal speed in order) on VCD and CD. • To return to normal speed playback, press the PLAY/PAUSE button. Skipping Tracks Press the NEXT SKIP or BACK SKIP button during playback. -
Page 17: Using Top Menu Screen On Disc To Play Dvd
Play a VCD(version 2.0) • The Menu screen will appear. Use the number buttons to select the desired item. • Simply pressing the number buttons will enter the item. • With some VCDs, you can use the PLAY/PAUSE, SKIP and RETURN buttons With some VCDs, the RETURN button operation may be displayed using the •... -
Page 18: Using The Display Function
Using the Display Function If you want to obtain the information on the title, chapter, time, audio configuration and subtitles in DVD play, press the PLAY button.To get information on the track and time in VCD or CD play, also press DISPLAY When Playing a DVD During playback, press the DISPLAY button on the remote. -
Page 19: Using The Repeat Button
Using the REPEAT button Press the REPEAT button on the remote. Repeat screen appears. Select Chapter, Title or A-B using the LEFT/RIGHT button. • A-B Repeat 1 Press the REPEAT button. Select A-B on screen with the LEFT/RIGHT button. 2 Press ENTER at the point where you want the repeat play to start (A). The B is automatically highlighted. 3 Press ENTER at the point where you want the repeat play to stop (B). -
Page 20: Random Playback (Dvd/Vcd/Cd)
1 Press the MODE button. 2 Use the LEFT/RIGHT button to select PROGRAM. Press the ENTER button. 3 Use the LEFT/RIGHT button to select the first Chapter (or Track) to add to program. Press the ENTER button. The selected numbers appear in the Program Order box. 4 Press the PLAY/PAUSE button. -
Page 21: Advanced Functions
Advanced Functions Using the Disc View Function You can directly access the desired music or video track without using the menu. Track View (VCD) Displays the beginning view of each Track and the Track number. Press the TOP MENU button during playback. Press the UP/DOWN button to select TRACK VIEW. -
Page 22: Selecting The Audio Language
• When pressing the TOP MENU on DVD; The disc's Top Menu will come up. • When pressing the TOP MENU on CD ; The unit enters the INTRO mode. INTRO lets you listen to the beginning of each Track for about 10 seconds. Selecting the Audio Language You can select a desired language quickly and easily with the AUDIO button. -
Page 23: When Playing A Vcd
When playing a VCD In disc version 2.0, the MENU button works as a conversion switch between MENU ON and MENU OFF mode. When playing a VCD 1.1 or CD, the MENU button will not work. • This function depends on what languages are encoded on the disc and may not work with all DVDs. •... -
Page 24: Changing The Camera Angle
Use the UP/DOWN /LEFT/RIGHT button to select the desired language. Press the ENTER button. When playing a VCD In disc version 2.0, the MENU button works as a conversion switch between MENU ON and MENU OFF mode. When playing a VCD 1.1 or CD, the MENU button will not work. NOTE •... -
Page 25: Using The Bookmark Function (Dvd/Vcd)
Using the Bookmark Function (DVD/VCD) During playback, press the BOOKMARK button on the remote. Then a marker will be displayed. Use the LEFT/RIGHT button to move to the desired bookmark icon. When you reach the scene you want to mark, press the ENTER button. The icon will change to a number (1, 2, or 3). Press the BOOKMARK button to turn off the display. -
Page 26: Using The 3D Sound Function
This feature is useful when you are using the DVD player with a two channel stereo through the analog outputs. (Discs which are recorded with LPCM or DTS will not work. When the DIGITAL OUTPUT is set to BITSTREAM in the Setup Menu, the 3D Sound function will not work.) -
Page 27: Changing Setup Menu
Changing Setup Menu Using the Setup Menu The Setup Menu lets you customize your DVD player by allowing you to select various language preferences, set up a parental level, even adjust the player to the type of television screen you have. -
Page 28: Using The Disc Menu Language
Use the UP/DOWN button to select Player Menu. Press the ENTER button. Use the UP/DOWN button to select 'ENGLISH'. Press the ENTER button. - ENGLISH is selected and the screen returns to Setup Menu - To make the Setup Menu disappear, press the RETURN button. Using the Disc Menu Language This function changes the language only for the text on the Disc Menu screens. -
Page 29: Using The Subtitle Language
Press the SETUP button when in stop mode. Press the UP/DOWN button to select Audio. Press the ENTER button. Press the UP/DOWN button to select 'ENGLISH'. - Select "ORIGINAL" if you want the default soundtrack language to be the original language the disc is recorded in. - Select "OTHERS"... -
Page 30: Setting Up The Audio Options
With no disc playing, press SETUP. The Setup Menu screen appears. Use UP/DOWN to select Parental. Press ENTER. The Parental Control screen appears. Use LEFT/RIGHT to select Yes if you want to use a password. Press ENTER. The Enter Password screen appears. Enter your password. -
Page 31: Setting Up The Display Options
Press the SETUP button when in stop mode. Use the UP/DOWN button to select Audio Options. Then press the ENTER button. Use the UP/DOWN button to select the desired item. Then press the LEFT/RIGHT button. (1) DIGITAL OUTPUT PCM : Converts to PCM(2CH) 48kHz/16bit audio. Select PCM when using 3D sound. - Page 32 Use the UP/DOWN button to select the desired item. Then press the ENTER button or LEFT/RIGHT button. (1) TV ASPECT Depending on the type of television you have, you may want to adjust the screen setting (aspect ratio). (2) STILL MODE Prevent picture shaking in still mode and display small text clearer.
-
Page 33: Troubleshooting Guide
5.1 channel sound is - 5.1 channel sound is reproduced only when the following conditions are met. : not being 1)The DVD player is connected with the proper amplifier reproduced. 2)The disc is recorded with 5.1 channel sound. - Check whether the disc being played has the "Dolby 5.1 ch" mark on the outside. -
Page 34: Reference
Reference Specifications General Power Requirements Power Consumption 17 W Weight 3.3 kg Dimensions W 430 mm x D 285 mm x H 80 mm Operating Temperature +5`C to +35`C Range Operating Humidity Range 10 % to 75 % Disc (DIGITAL VERSATILE DISC) CD: 12 cm (COMPACT DISC) CD: 8 cm... -
Page 35: Back Cover
Hitachi has made every effort to assure you hours of trouble free operation from your unit However,should you require service, a network of Hitachi Authorized Service Facilities has been established in all 50 states and Puerto Rico . Each facility will provide you with convenient and expedient assistance . Our service "Hotline" operator will direct you to the Hitachi Authorized Service Facility nearest you.
Need help?
Do you have a question about the DV-P303U and is the answer not in the manual?
Questions and answers