Rice Lake ISHIDA WM-Nano Setup Manual
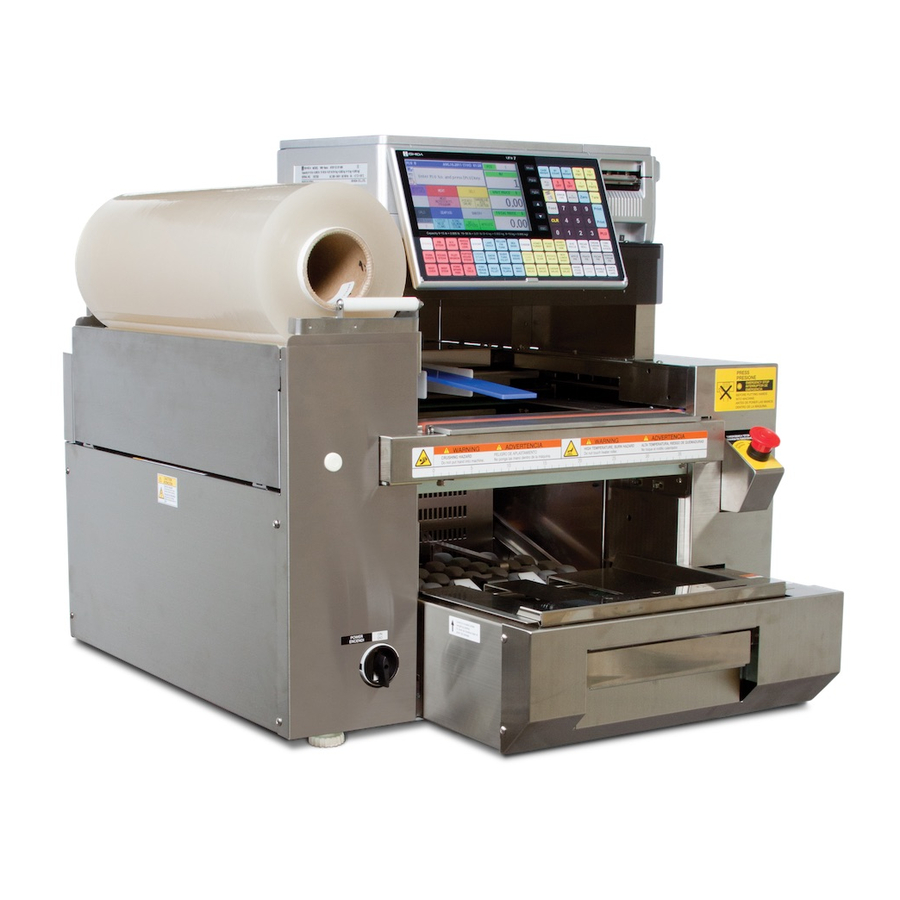
Table top automatic wrapper
Hide thumbs
Also See for ISHIDA WM-Nano:
- Manual (14 pages) ,
- Cleaning, sanitizing and inspection instructions (4 pages) ,
- Manual (13 pages)

Subscribe to Our Youtube Channel
Related Manuals for Rice Lake ISHIDA WM-Nano


Summary of Contents for Rice Lake ISHIDA WM-Nano
- Page 1 ISHIDA WM-Nano Table Top Automatic Wrapper Setup Manual Rev 3, October 2012 P/N 151363...
-
Page 2: Table Of Contents
Ishida WM-Nano Setup Contents 1. Overview ........................... 3 2. Firmware ........................... 3 3. Connections ..........................3 3.1. Power ..........................3 3.2. Scale Cables ........................3 4. Setup Menu and Adjust Menu Access ..................4 5. Firmware Update & Model selection ..................4 6. -
Page 3: Overview
Ishida WM-Nano Setup 1. Overview The WM-Nano is a compact table top automatic wrapper. The Uni-7 scale provides the operator interface and prints labels that are applied to the wrapped package. Refer to the Uni-7 Series Setup Manual to configure standard scale features such as communications, label formats, etc. -
Page 4: Setup Menu And Adjust Menu Access
Ishida WM-Nano Setup iii. Tip up the Uni-7 to access the bottom. Plug the power cord into the socket. iv. Mount the "L" plate using two screws to secure the Uni-7 power cord. See Figure 3.3. Figure 3.2. "U" Plate Securing Power Cord Figure 3.3. - Page 5 Ishida WM-Nano Setup 5.1. Load the WM-Nano Main firmware following the procedure in the ISHIDA Uni-7 Series Setup Manual. 5.2. Clear the memory following the procedure in the ISHIDA Uni-7 Series Setup Manual. 5.3. Configure the Uni-7 to operate with the WM-Nano Wrapper.
-
Page 6: Film Configuration
Ishida WM-Nano Setup Figure 5.4. Download WM-Nano Application Firmware h. Press EXECUTE. Press EXEC to begin the firmware download. The screen will show the firmware download progress. k. When the download is complete press the RETURN ARROW (top right). Press the OPERATION button (lower right) to return to Normal Operation mode. - Page 7 Ishida WM-Nano Setup b. Adjust the Front Guide to align the front edge of the film with the edge of the Support Roller. See Figure 6.1.2. Note: For a 22-inch roll the film may overhang the front edge of the Polished Roller if necessary.
- Page 8 Ishida WM-Nano Setup Figure 6.1.4. Raise the Film Loading Arm c. Tuck the film behind the Film Loading Arm. d. Pull the film down until the front and rear sides are straight. The sides should not taper inward. e. Tear the excess film approximately halfway down the door with a relatively straight edge.
-
Page 9: Film Material (Type)
Ishida WM-Nano Setup h. Close the left side door. Press FILM FEED and remove the film. 6.2. Film Material (Type) Select the appropriate film type. a. Press the MODE key to enter the Main menu. b. Enter 495344 and press the PLU key to access hidden menu steps. -
Page 10: Film Detection Check
Ishida WM-Nano Setup c. Enter the LOWER LIMIT temperature. If the wrapping area temperature is less than this setting a message is displayed when a tray is wrapped. d. Proceed to step 6.5. "Film Detection Check". Figure 6.4.1. Film Temperature and "No Film" Sensor Timeout 6.5. -
Page 11: Configure Wrapping Function Keys
Ishida WM-Nano Setup TRAY NUMBER YES (tray linked to the PLU) WRAP MODE NO (Wrap+Print, Wrap, or Print) VOLUME YES (Height of tray contents) Figure 7.1. PLU Overwrite Wrapper Settings g. Press the RETURN ARROW (top right). - Page 12 Ishida WM-Nano Setup FILM FEED – Feeds a sheet of film WRAP ADJUST – Accesses tray programming to adjust the wrapping quality WRAP MODE – Toggles between Wrap+Print, Print, and Wrap modes TRAY – Selects a tray assigned to a preset key ...
-
Page 13: Plu Programming
Ishida WM-Nano Setup 7.3. PLU Programming Three wrap settings are available in the PLU File. Although these may be programmed in the PLU File it is preferable to allow the operator to set these items when PLU Overwrite is configured as described in section 7.1 above. - Page 14 Ishida WM-Nano Setup On the BASIC tab enter the tray name, dimensions, weight, and volume. See Figure 7.4.1 Press EDIT and enter a short name – usually the number found on the bottom of the tray, for example "9L".
- Page 15 Ishida WM-Nano Setup o Press the – button to release the film sooner for a looser wrap. o Press the + button to hold the film longer for a tighter wrap. IMPORTANT: Set the clamp times at the minimum value to produce a satisfactory wrap.
-
Page 16: Standby Mode
Ishida WM-Nano Setup o Press – to start the side folders sooner (less delay) o Press + to start the side folders later (more delay) Caution: Starting the side folders sooner (negative values) may cause the side folders to stop prematurely as there is too much resistance from the film. -
Page 17: Plu Wrap Parameters Download
Ishida WM-Nano Setup Figure 7.5. Standby Mode 7.6. PLU Wrap Parameters Download The settings for Tray Number, Volume, and Wrap Mode are stored in each PLU (see section 7.3 PLU Programming above). These three items are normally set by the operator at the WM-Nano rather than downloaded in the PLU File. -
Page 18: Calibration
Ishida WM-Nano Setup 8. Calibration The WM-Nano should be powered up at least 30 minutes prior to calibration. Confirm the wrapper is level. The wrapper and stand must be stable with the weight evenly distributed among the leveling feet to ensure accurate weighing and maximum speed. - Page 19 Ishida WM-Nano Setup k. Seal the scale. Place a water tight sticker or tape over the round Calibration Save button hole. IMPORTANT: The seal must be water tight to protect the A/D Board located in the scale base. ii. Install the L plate covering the Calibration Save button. Secure using two brass seal hex bolts.
-
Page 20: Appendix A - Menu Structure
Ishida WM-Nano Setup Appendix A – Menu Structure OPERATION TOTAL PROGRAM SETUP ADJUST SALES DAILY TOTAL MACHINE No. (COMMS) TIME / DATE ACC1 WEEKLY TOTAL CAMPAIGN SALES MODE TOUCH SCREEN ACC2 CUMULATIVE TOTAL OPERATORS PASSWORD DISPLAY CHECK ACC3 TRACEABILITY TOTAL... -
Page 21: Appendix B - Configuration Features With Menu Locations
Ishida WM-Nano Setup Appendix B – Configuration Features with Menu Locations Feature Menu Step Comments Auto PLU Call Setup Operation Setting Auto PLU. Disable by func key: "Auto PLU" Backup (by USB) Setup File Save/Load "Scale>USB": backup, "USB>Scale": restore Barcode Format...
Need help?
Do you have a question about the ISHIDA WM-Nano and is the answer not in the manual?
Questions and answers