Table of Contents
Advertisement
Advertisement
Table of Contents
Troubleshooting

Related Manuals for Go-Video VR2945


Summary of Contents for Go-Video VR2945
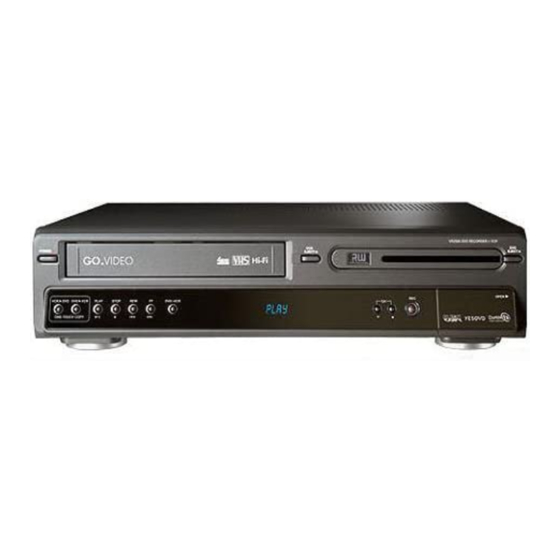
- Page 1 DF-L72B1N-BS(GB) 04.7.1 3:9 AM 페이지A DVD Recorder + VCR VR2945 User Manual...
-
Page 2: Important Safeguards
DF-L72B1N-BS(GB) 04.7.1 3:9 AM 페이지1 Important Safeguards Important Safeguards CAUTION RISK OF ELECTRIC SHOCK DO NOT OPEN CAUTION: TO REDUCE THE RISK OF ELECTRIC SHOCK, DO NOT REMOVE COVER (OR BACK). NO USER-SERVICEABLE PARTS INSIDE. REFER SERVICING TO QUALIFIED SERVICE PERSONNEL. - Page 3 DF-L72B1N-BS(GB) 04.7.1 3:9 AM 페이지2 REGULATORY INFORMATION: FCC Part 15 This product has been tested and found to comply with the limits for a Class B digital device, pursuant to Part 15 of the FCC Rules. These limits are designed to provide reasonable protection against harmful interference when the product is operated in a residential installation.
- Page 4 DF-L72B1N-BS(GB) 04.7.1 3:9 AM 페이지3 Do not use this product near water. For example: near a bath tub, wash bowl, kitchen sink, laundry tub, in a wet basement; or near a swimming pool; and other areas located near water. Clean only with dry cloth. Unplug this product from the wall outlet before cleaning.
-
Page 5: Table Of Contents
DF-L72B1N-BS(GB) 04.7.1 3:9 AM 페이지4 Table of Contents Table of Contents INTRODUCTION Important Safeguards _________________________1 Table of Contents ______________________________4 Overview ______________________________________5 Identification of Controls_______________________10 CONNECTIONS Connecting Antenna/Cable ____________________15 Connecting a TV _______________________________16 Connecting an Amplifier/Receiver _____________18 Connecting Optional Equipment ______________19 Connecting a Digital Camcorder ______________19 SETUP Initial Installation ______________________________20... -
Page 6: Overview
DF-L72B1N-BS(GB) 04.7.1 3:9 AM 페이지5 Overview Overview DVD, DVD+R, DVD+RW? What is a DVD? DVD (Digital Versatile Disc) is a storage medium that combines the convenience of the compact disc with the latest digital video technology. DVD video uses modern MPEG2 data compression technology that enables an entire feature film to be stored on a single five inch disc. - Page 7 DF-L72B1N-BS(GB) 04.7.1 3:9 AM 페이지6 Which discs you can use The following discs can be used in your DVD Recorder+VCR: Playback and recording DVD+RW (Digital Versatile Disc + ReWritable) DVD+R (Digital Versatile Disc + Write-Once) Playback only DVD Video (Digital Versatile Disc) DVD-R (DVD-Recordable): These discs can only be played back if the recording was made in ‘Video mode‘...
- Page 8 DF-L72B1N-BS(GB) 04.7.1 3:9 AM 페이지7 About DVD Recording Notes on Recording • The recording times shown are not exact because the DVD Recorder+VCR uses variable bit-rate video compression. This means that the exact recording time will depend on the material being recorded. •...
- Page 9 DF-L72B1N-BS(GB) 04.7.1 5:22 AM 페이지8 Precautions Handling the Unit When shipping the unit The original shipping carton and packing materials come in handy. For maximum protection, re-pack the unit as it was originally packaged at the factory. When setting up the unit The picture and sound of a nearby TV, VCR, or radio may be distorted during playback.
- Page 10 DF-L72B1N-BS(GB) 04.7.1 3:9 AM 페이지9 Notes on Discs Handling Discs Do not touch the playback side of the disc. Hold the disc by the edges so that fingerprints will not get on the surface. Do not stick paper or tape on the disc. Storing Discs After playing, store the disc in its case.
-
Page 11: Identification Of Controls
DF-L72B1N-BS(GB) 04.7.1 3:9 AM 페이지10 Identification of Controls Identification of Controls Front Panel &*() 1 POWER Turns the DVD Recorder+VCR on and off. Lock/Unlock the front panel and Remote control by pressing and holding it over 5 seconds. Cassette Compartment (VCR deck) Insert a video cassette here. - Page 12 DF-L72B1N-BS(GB) 04.7.1 3:9 AM 페이지11 Front Panel Display # $ % ^ ! Indicates a VHS tape is inserted in the VCR deck. @ Circle : Indicates the VCR is recording. Clock : Indicates a VCR Timer Recording is set. # Indicates that a stereo broadcast is being received.
- Page 13 DF-L72B1N-BS(GB) 04.7.1 3:9 AM 페이지12 Remote Control Turns the DVD Recorder+VCR on and off. - Opens and closes the disc tray in DVD mode. - Ejects the tape in the VCR deck in VCR mode. Selects DVD mode. Selects VCR mode. Switches between the DVD Recorder+VCR tuner and your TV tuner.
- Page 14 DF-L72B1N-BS(GB) 04.7.1 3:9 AM 페이지13 Identification of Controls Press and hold for 3 seconds to switch between Progressive Scan and Interlace Scan mode. Selects Recording mode: - DVD : HQ (1hr), SP (2hrs), EP (4hrs) or SLP (6hrs). - VCR : SP or SLP. Switches the DVD Recorder+VCR input to Tuner, LINE1, LINE2, or DV.
-
Page 15: Rear Panel
DF-L72B1N-BS(GB) 04.7.1 3:9 AM 페이지14 Rear panel AC Power Cord Plug into a power outlet. AUDIO OUT (L, R) Connect to a TV or other equipment with audio inputs. COMPONENT/PROGRESSIVE VIDEO OUT (Y Pb Pr) Connect to a TV with Component Video (Y Pb Pr) inputs. -
Page 16: Connections
DF-L72B1N-BS(GB) 04.7.1 3:9 AM 페이지15 Connections Connections • There are a variety of ways to connect the DVD Recorder+VCR to your TV and other equipment. Use only one of the connections described below. Whichever TV connection you use will work with all input sources. •... -
Page 17: Connecting A Tv
DF-L72B1N-BS(GB) 04.7.1 3:9 AM 페이지16 Connecting a TV Choose one of the following TV connections, depending on the capabilities of your equipment. All video signals are available from all video outputs. work with all input sources, including VHS out of the Component/Progressive Video Output. RF Coaxial Connection Connect the RF OUT (TO TV) jack on the DVD Recorder+VCR to the antenna in jack on your TV using... - Page 18 DF-L72B1N-BS(GB) 04.7.1 3:9 AM 페이지17 Progressive Scan Connection • If your television is a high-definition or ‘digital ready‘ television, you may take advantage of the DVD Recorder+VCR’s Progressive Scan output for the highest video resolution possible. • If your TV does not accept the Progressive Scan format, the picture will appear scrambled. Connect the COMPONENT/PROGRESSIVE VIDEO OUT jacks on the DVD Recorder+VCR to the corresponding in jacks on your TV using an optional Y Pb Pr cable (C).
-
Page 19: Connecting An Amplifier/Receiver
DF-L72B1N-BS(GB) 04.7.1 3:9 AM 페이지18 Connecting an Amplifier/Receiver Connecting to an amplifier equipped with two channel analog stereo or Dolby Pro Logic ll/Pro Logic Connect the Left and Right AUDIO OUT jacks on the DVD Recorder+VCR to the left and right audio in jacks on your amplifier, receiver, or stereo system, using the supplied audio cables (A). -
Page 20: Connecting Optional Equipment
DF-L72B1N-BS(GB) 04.7.1 3:10 AM 페이지19 Connecting Optional Equipment To receive audio/video signals from other equipment, connect the LINE1 or LINE2 jacks on the DVD Recorder+VCR to the audio/video out jacks on your external component, using optional audio/video cables. Connecting a Digital Camcorder Using the front panel DV IN jack, it is possible to connect a DV digital camcorder, video deck or DVD+R/RW recorder and digitally transfer DV tapes or DVD+R/RW discs to DVD+R/RW. -
Page 21: Initial Installation
DF-L72B1N-BS(GB) 04.7.1 3:10 AM 페이지20 Initial Installation Initial Installation Initial Installation After successfully connecting your DVD Recorder+VCR to your TV and other devices, this chapter will show you how to complete the initial installation. • You must follow the initial installation process to set the time, date, channels, and language preferences for the DVD Recorder+VCR. - Page 22 DF-L72B1N-BS(GB) 04.7.1 3:10 AM 페이지21 Select the desired disc playback subtitle language using […/†]. Press [ENTER] to confirm. Select the desired signal type using […/†]. Press [ENTER] to confirm. The DVD Recorder+VCR detects channels automatically and stores them in memory. After finishing Auto Channel Search, set the clock.
-
Page 23: Initial Setup
DF-L72B1N-BS(GB) 04.7.1 3:10 AM 페이지22 Initial Setup Initial Setup Setup Menu Overview The DVD Recorder+VCR Setup menu includes six categories, including: Installation, Recording Options, Languages, Preferences, System Info, and Restore Defaults. Press [SETUP] and [œ/√] on the remote control to view the first and second levels of the Setup menu. - Page 24 DF-L72B1N-BS(GB) 04.7.1 3:10 AM 페이지23 Auto Channel Search The DVD Recorder+VCR has a frequency synthesized tuner capable of receiving up to 181 channels. These include VHF channels 2-13, UHF channels 14-69 and CATV channels 1-125. Preparation: Connect the DVD Recorder+VCR to the desired type of antenna or cable TV system, as shown in ‘Connecting Antenna/Cable‘...
- Page 25 DF-L72B1N-BS(GB) 04.7.1 3:10 AM 페이지24 Modulator Out This feature allows you to set the RF Output channel to your TV (you only need to set this if you are using the RF Out connection to your TV). Follow steps 1-2 as shown under Tuning Band. Use […/†] to select ‘Modulator Out‘.
-
Page 26: Recording Options Settings
DF-L72B1N-BS(GB) 04.7.1 3:10 AM 페이지25 RECORDING OPTIONS Settings DVD Record Quality You can set the default DVD recording quality to: HQ (High Quality - 1 hr/disc), SP (Standard Quality - 2 hrs/disc), EP (Average Quality - 4 hrs/disc), or SLP (Low Quality - 6 hrs/disc). Press [SETUP]. -
Page 27: Language Settings
DF-L72B1N-BS(GB) 04.7.1 3:10 AM 페이지26 LANGUAGE Settings OSD Language Select a language for the DVD Recorder+VCR Setup menu and on-screen displays. Press [SETUP]. The Setup menu appears. Use [œ] and [√] to select ‘Language‘. While ‘Language‘ is selected, press [†] to select ‘OSD Language‘. -
Page 28: Preference / Video Settings
DF-L72B1N-BS(GB) 04.7.1 3:10 AM 페이지27 PREFERENCE / Video Settings Press [SETUP]. Use [œ/√] to select ‘Preference‘. While ‘Preference‘ is selected, press [†] to select ‘Video‘. Press [ENTER]. The ‘Video‘ submenu is displayed. TV Aspect Ratio Use […/†] to select ‘TV Aspect‘ while the ‘Video‘ submenu is displayed. -
Page 29: Preference / Audio Settings
DF-L72B1N-BS(GB) 04.7.1 3:10 AM 페이지28 PREFERENCE / Audio Settings Follow the same procedure as Video Settings to select Audio Settings. Digital Output Use […/†] to select ‘Digital Output‘ while the Audio submenu is displayed. Press [ENTER] or [√] to go to the second level. Use […/†] to select the desired digital output type. - Page 30 DF-L72B1N-BS(GB) 04.7.1 3:10 AM 페이지29 Virtual Surround You can enjoy a simulated 3D effect from two speakers by setting Virtual Surround to On. Follow the same procedure as ‘Digital Output‘ to set the Virtual Surround option. VCR Reception Select your desired audio source for VCR recording (Stereo, Mono, or SAP).
-
Page 31: Preference / Parental Controls
DF-L72B1N-BS(GB) 04.7.1 3:10 AM 페이지30 PREFERENCE / Parental Controls Set Parental Level The Parental Controls feature allows you to prevent DVDs from being played based on their ratings or to have certain discs played with alternative scenes. You can set the parental level from 1 to 8. Press [SETUP]. - Page 32 DF-L72B1N-BS(GB) 04.7.1 3:10 AM 페이지31 Press [ENTER] to confirm your rating selection, then press [SETUP] to exit the menu. Change Password While ‘Preference‘ is selected, press [†] to select ‘Parental Controls‘. Press [ENTER]. The ‘Parental Controls‘ submenu appears. Use […/†] to select ‘Change Password‘ then press [ENTER]. The Change Password submenu appears.
-
Page 33: Various Preference Settings
DF-L72B1N-BS(GB) 04.7.1 3:10 AM 페이지32 Various PREFERENCE Settings AutoPlay AutoPlay enables the DVD Recorder+VCR to skip the opening ads and previews at the beginning of a DVD and play the DVD automatically when it is inserted in the tray. Use […/†] to select ‘AutoPlay‘. Press [ENTER] or [√] to go to the second level. - Page 34 DF-L72B1N-BS(GB) 04.7.1 3:10 AM 페이지33 This feature enables you to search for Index marks or specific times on your VHS tapes. While ‘Preference‘ is selected, press [†] to move to the second level. Use […/†] to select ‘VCR‘. Press [ENTER] to display the submenu. Select ‘Index Search’...
-
Page 35: System Information
DF-L72B1N-BS(GB) 04.7.1 3:10 AM 페이지34 System Information System Information helps service personnel identify key firmware information about your DVD Recorder+VCR in case service is required. Restore Defaults If you wish, you can reset the DVD Recorder+VCR to its original factory settings. Press [SETUP]. -
Page 36: On-Screen Display Overview
DF-L72B1N-BS(GB) 04.7.1 3:10 AM 페이지35 On-Screen Display Overview On-Screen Display Overview The On-Screen Display provides feedback on the status of the DVD Recorder+VCR and/or the currently loaded disc or tape. To access the On-Screen Display (or OSD), press the [DISPLAY] button. Displaying Disc Information To display information about the currently loaded disc or tape: On-screen display operation... - Page 37 DF-L72B1N-BS(GB) 04.7.1 3:10 AM 페이지36 Changing the TV Audio Channel Some TV programs are broadcast with both a main and a Secondary Audio Program (SAP). You can change the TV audio using the [AUDIO] button. Press [AUDIO] repeatedly to change the TV audio, according to the Broadcast audio signal as shown below. •...
- Page 38 DF-L72B1N-BS(GB) 04.7.1 3:10 AM 페이지37 Chapter Shows the current chapter number and total number of chapters, and skips to the desired chapter number. Press [DISPLAY] during playback. The on-screen display appears on the TV screen. Use […†] to select the ‘Chapter‘ icon on the on-screen display. Press [ENTER] to display a submenu. Use […†] to change the numbers.
-
Page 39: Dvd Playback
DF-L72B1N-BS(GB) 04.7.1 3:10 AM 페이지38 DVD Playback DVD Playback Playing a DVD Press the [DVD] button to set the remote control to operate the DVD deck. Turn the TV on and select the video input source connected to the DVD Recorder+VCR. Audio system: Turn the audio system on and select the input source connected to the DVD Recorder+VCR. - Page 40 DF-L72B1N-BS(GB) 04.7.1 3:10 AM 페이지39 Slow Motion Press [SLOW+] to enter Slow Motion mode. The default speed is 1/2. When you press [SLOW+] repeatedly, the speed will be set to 1/4, 1/8, and normal speed. • Slow reverse playback is not supported. Changing the Audio Language Press [AUDIO] and then press [AUDIO] repeatedly during playback to hear a different audio language or audio track.
- Page 41 DF-L72B1N-BS(GB) 04.7.1 3:10 AM 페이지40 You can repeat a scene between two points (A and B): Press [PLAY/PAUSE] play to the start of the desired scene. Press [A-B] to mark the start point. Use [FF], [NEXT] to search the end point. Press [A-B] to mark the end point.
-
Page 42: Vcr Playback
DF-L72B1N-BS(GB) 04.7.1 3:10 AM 페이지41 VCR Playback VCR Playback Before You Begin Press the VCR button to set the remote control to operate the VCR deck. Turn the TV on and select the video input source connected to the DVD Recorder+VCR. Audio system: Turn the audio system on and select the input source connected to the DVD Recorder+VCR. -
Page 43: Special Playback Features
DF-L72B1N-BS(GB) 04.7.1 3:10 AM 페이지42 Special Playback Features Notes on special playback features Horizontal lines (noise bars) will appear on the TV screen. This is normal. The audio is automatically muted during special playback modes, so there is no sound during search, slow motion, etc. During high-speed picture search, a short time is needed to stabilize tape speed when re-entering Play mode. -
Page 44: Other Disc Playback
DF-L72B1N-BS(GB) 04.7.1 3:10 AM 페이지43 Other Disc Playback Other Disc Playback Audio CD/MP3 PLAYBACK The DVD Recorder+VCR can play audio CDs and MP3 files on CD-ROM, CD-R or CD-RW discs. Insert the CD disc and close the tray. The Audio CD or MP3 CD menu appears on the TV screen after a few moments to load the disc. - Page 45 DF-L72B1N-BS(GB) 04.7.1 3:10 AM 페이지44 Select the thumbnail you want to display using […†œ √] and press [ENTER]. The full size image will be displayed and a slide show starts automatically with a time interval of 10 seconds. Press [NEXT] or [PREV] to manually skip to the next or previous image. Press [√] (or [œ]) to rotate the image (counter) clockwise.
-
Page 46: Basic Recording
DF-L72B1N-BS(GB) 04.7.1 3:10 AM 페이지45 Basic Recording Basic Recording Recording from TV Follow the instructions below to record a TV program. Turn on the DVD Recorder+VCR and load a recordable disc or tape. Make sure your TV input is set to view the DVD Recorder+VCR. Set the desired Recording mode by pressing [REC MODE] repeatedly. -
Page 47: One Touch Record (Otr)
DF-L72B1N-BS(GB) 04.7.1 3:10 AM 페이지46 One Touch Record (OTR) One Touch Recording allows you add recording time in fixed increments at the touch of a button. Follow steps 1-4 under Recording from TV. Press [REC (G)] repeatedly to set the length of the recording. Recording starts after the first press. -
Page 48: One Touch Copy - Dvd To Vhs
DF-L72B1N-BS(GB) 04.7.1 3:10 AM 페이지47 One Touch Copy - DVD to VHS You can copy the contents of a DVD to a VHS tape using the [DVD ➝ VCR] button. • If the DVD you are attempting to copy is copy-protected, you will not be able to copy the disc. It is not permitted to copy Macrovision encoded DVDs. -
Page 49: One Touch Copy - Vhs To Dvd
DF-L72B1N-BS(GB) 04.7.1 3:10 AM 페이지48 One Touch Copy - VHS to DVD You can copy the contents of a VHS tape to a DVD+R or DVD+RW using the [VCR ➝ DVD] button. This allows you to archive your old VHS tapes to DVD. If the VHS videotape you are attempting to copy is copy-protected, you will not be able to copy the tape. -
Page 50: Timer Recording
DF-L72B1N-BS(GB) 04.7.1 3:10 AM 페이지49 Timer Recording Timer Recording The Timer Recording function allows you to record up to 8 programs within a period of one month. Insert recordable media such as DVD+R ,DVD+RW, recordable VHS tape. Press [TIMER]. The ‘Timer Recording’ menu appears. Use […†] to move to a timer recording slot, and press [ENTER] to modify it. -
Page 51: Timer Recording Troubleshooting
DF-L72B1N-BS(GB) 04.7.1 3:10 AM 페이지50 Canceling a Timer Recording You can clear a Timer Recording any time before the recording actually starts. • Use […†] to select the program you want to erase on the Timer Recorder List, then press [ENTER] to modify it. -
Page 52: Recording From An External Input
DF-L72B1N-BS(GB) 04.7.1 3:10 AM 페이지51 Recording from an External Input Recording from an External Input Recording from External Components You can record from an external component, such as a camcorder or VCR, connected to any of the DVD Recorder+VCR’s external inputs. Make sure the component you want to record from is connected properly to the DVD Recorder+VCR;... - Page 53 DF-L72B1N-BS(GB) 04.7.1 3:10 AM 페이지52 Recording from a Digital Camcoder You can record from a digital camcorder connected to the DV IN jack on the front panel of the DVD Recorder+VCR. You can use the DVD Recorder+VCR remote to control both the camcorder and the DVD Recorder+VCR. Before recording, make sure the digital camcorder is properly connected to the front panel DV IN jack;...
-
Page 54: Editing
DF-L72B1N-BS(GB) 04.7.1 3:10 AM 페이지53 Editing Editing DISC Initialize • If you load a blank DVD+R(+RW) disc, it will be initialized (formatted to enable recording). • Do not start recording until disc initialization is complete. • If you load a DVD+RW that has already been used you can record a program immediately. Disc Menu For recordable DVD media, such as DVD+R and DVD+RW discs, you can manage the disc using the Disc Menu. - Page 55 DF-L72B1N-BS(GB) 04.7.1 3:10 AM 페이지54 Lock/Unlock Disc (DVD+RW) If you want to protect a disc from accidental recording, editing, or erasing, you can lock the disc. Later, if you change your mind, you can unlock the disc. Use […] to go to the top menu. Press [√] to display the Disc Information Menu.
- Page 56 DF-L72B1N-BS(GB) 04.7.1 3:10 AM 페이지55 Finalize (Make Compatible) Finalizing a DVD+R ‘locks’ its recordings in place so the disc can be played on most standard DVD players or computers equipped with DVD-ROM drives. 'Make Compatible' for a DVD+RW will automatically create a menu screen for navigating the disc. This menu screen is accessible by pressing [MENU] or [TITLE].
- Page 57 DF-L72B1N-BS(GB) 04.7.1 3:10 AM 페이지56 Change Disc Name You can rename your disc to any name you choose. The default disc name is ‘MY DVD‘. Use […] to go tothe top menu. Press [√] to display the Disc Information Menu. Press [√] and select ‘Change Disc Name‘.
-
Page 58: Title Menu
DF-L72B1N-BS(GB) 04.7.1 3:10 AM 페이지57 Title Menu You can manage the titles on your DVD+R/RW discs using the Title menu. Play a Title To play a title: Press [MENU] to display the disc menu. Select the desired title you want to manage using […†]. Press [√] to display the title menu. - Page 59 DF-L72B1N-BS(GB) 04.7.1 3:10 AM 페이지58 Change Name To change the name of a title: Follow steps 1 to 3 under ‘Play Title‘. Select ‘Change Name’ using [œ √] . Press [ENTER] to change the title name. The Keyboard Menu will be displayed. Use [œ √…†] to select a character or function and press [ENTER].
-
Page 60: Editing
DF-L72B1N-BS(GB) 04.7.1 3:10 AM 페이지59 Editing When you insert a DVD+R or DVD+RW disc already recorded by your DVD Recorder+VCR, you can edit the titles and chapters in a variety of ways. To edit a recorded title, select the title on the disc menu and press [EDIT]. The selected title will begin playing automatically. - Page 61 DF-L72B1N-BS(GB) 04.7.1 3:10 AM 페이지60 Hide Chapters This feature allows you to hide or unhide a chapter. After hiding a chapter, the chapter is not deleted but only hidden. If a chapter is hidden then it shows ‘Unhide Chapter‘ and vice versa. Change Index Picture Each title displayed in the Playlist menu is represented by a thumbnail picture taken from the start of that title or chapter.
-
Page 62: Troubleshooting
DF-L72B1N-BS(GB) 04.7.1 3:10 AM 페이지61 Troubleshooting Troubleshooting Check the following guide for the possible cause of a problem before contacting customer support. Symptom Cause No power. The power cord is disconnected. No picture. The TV is not set to receive DVD Recorder+VCR signal output. - Page 63 DF-L72B1N-BS(GB) 04.7.1 3:10 AM 페이지62 Symptom Cause Camcorder image via A/V DVD Recorder+VCR’s source is not input to DVD Recorder+VCR set to LINE1/LINE2 composite. is not shown on TV screen. Can’t play disc recorded The disc was not finalized (or not on this DVD Recorder+VCR made compatible if using a DVD+RW).
- Page 64 DF-L72B1N-BS(GB) 04.7.1 3:10 AM 페이지63 Moisture Condensation Moisture condensation can occur: When the DVD Recorder+VCR is moved from a cold place to a warm place. Under extremely humid conditions. Troubleshooting In locations where moisture condensation may occur: Keep the DVD Recorder+VCR plugged into an AC power outlet with the power on.
-
Page 65: Technical Specifications
DF-L72B1N-BS(GB) 04.7.1 3:10 AM 페이지64 Technical Specifications Technical Specifications General Power requirements AC 120V, 60 Hz Power consumption Dimensions (approx.) 16.9 x 3.54 x 14.0 inches (430 x 91 x 354 mm) (w x h x d) Mass (approx.) 13.5 lbs (6.18 kg) Operating temperature 41°F to 95°F (5°C to 35°C) Operating humidity... - Page 66 DF-L72B1N-BS(GB) 04.7.1 3:10 AM 페이지65 Outputs 1 Vp-p 75 Ω, sync negative, RCA jack x 1 VIDEO OUT 1.0 V (p-p), 75 Ω, negative sync, Mini DIN 4-pin x 1 S-VIDEO OUT (Y) (C) 0.286 V (p-p) 75 Ω (Y) 1.0 V (p-p), 75 Ω, negative sync, RCA jack x 1 COMPONENT VIDEO OUT (Pb)/(Pr) 0.7 V (p-p), 75 Ω, RCA jack x 2 (PROGRESSIVE SCAN)
- Page 67 DF-L72B1N-BS(GB) 04.7.1 3:10 AM 페이지66 P/N : 97P95600N0-D1...
Need help?
Do you have a question about the VR2945 and is the answer not in the manual?
Questions and answers