Table of Contents
Advertisement
Advertisement
Table of Contents
Troubleshooting

Related Manuals for Go-Video VR3840


Summary of Contents for Go-Video VR3840
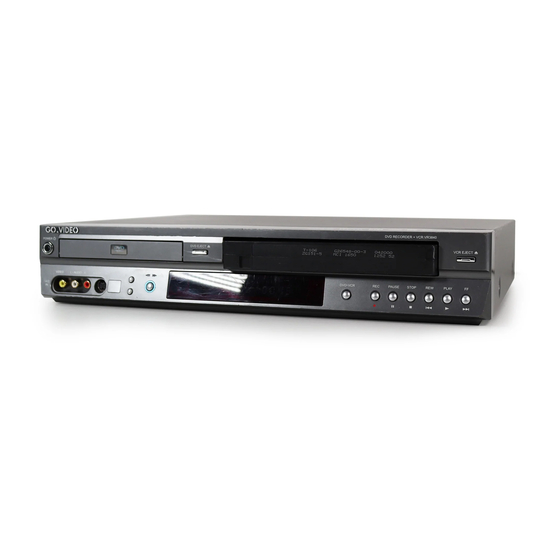
- Page 1 DVD Recorder+VCR VR3840 User's Guide...
-
Page 2: Safety Precautions
Safety Precautions CAUTION RISK OF ELECTRIC SHOCK DO NOT OPEN CAUTION: TO REDUCE THE RISK OF ELECTRIC SHOCK DO NOT REMOVE COVER (OR BACK). NO USER-SERVICEABLE PARTS INSIDE REFER SERVICING TO QUALIFIED SERVICE PERSONNEL. The lightning flash with arrowhead symbol within an equilateral triangle is intended to alert the user to the presence of uninsulated dangerous voltage within the product’s enclosure that may be of... -
Page 3: Important Safety Instructions
IMPORTANT SAFETY INSTRUCTIONS CAUTION: PLEASE READ AND OBSERVE ALL WARNINGS AND INSTRUCTIONS IN THIS OWNER’S MANUAL AND THOSE MARKED ON THE PRODUCT. RETAIN THIS MANUAL FOR FUTURE REFERENCE. This product has been designed and manufactured to assure personal safety. Improper use can result in electric shock or fire hazard. -
Page 4: Table Of Contents
Table of Contents INTRODUCTION Overview ......6-10 Recordable Discs ..... . . 6 Playable Discs . - Page 5 Table of Contents Audio CD and MP3/WMA Operation..35-36 Playing an Audio CD or MP3/WMA Disc ..35 Music Menu Options ....35 •...
-
Page 6: Overview
Overview Recordable Discs DVD-RW (DVD - ReWritable): These discs can be recorded on repeatedly. Recordings can be erased, then you can record again on the same disc. DVD-R (DVD - Recordable): These discs can be recorded only once. After you finalize a DVD-R, you cannot record on it or edit it. -
Page 7: Disc Related Terms
Overview (Continued) Disc Related Terms Title (DVD only) The main film content or accompanying feature content or music album. Each title is assigned a title reference number enabling you to locate it easily. Chapter (DVD only) Sections of a picture or a musical piece that are smaller than titles. -
Page 8: About Dvd-R And Dvd-Rw Discs
Overview (Continued) About DVD-R and DVD-RW discs How are DVD-R and DVD-RW discs different? DVD-R is a record-once medium, while DVD-RW is a re-recordable/erasable medium. You can re-record/ erase an RW disc approximately 1,000 times. Can I play my recordable discs in a regular DVD player? Generally, DVD-R discs and DVD-RW discs recorded in “Video mode”... -
Page 9: Notes For Recording
Overview (Continued) Notes for Recording • The recording times shown are not exact because the DVD Recorder+VCR uses variable bit-rate video com- pression. This means that the exact recording time will depend on the material being recorded. • When recording a TV broadcast, if the reception is poor or the picture contains interference, the record- ing times may be shorter. -
Page 10: Precautions
Overview (Continued) Precautions Handling the unit When shipping the unit The original shipping carton and packing materials come in handy. For maximum protection, re-pack the unit as it was originally packaged at the factory. When setting up the unit The picture and sound of a nearby TV, VCR, or radio may be distorted during playback. -
Page 11: Front Panel Overview
Front Panel Overview POWER button and indicator Switches the DVD Recorder+VCR ON and OFF. Lights green when the DVD Recorder+VCR is turned on. DVD EJECT (Z) Opens or closes the disc tray. Disc Tray (DVD deck) Insert a disc here. COPY Copies from DVD to VCR (or from VCR to DVD). -
Page 12: Front Panel Display Overview
Front Panel Display Overview Disc Type indicators Indicates the type of disc loaded. Indicates that a timer recording is in progress or is programmed. REC Indicates that a recording is in progress. PRG Indicates that program playback is active. TTL Indicates current title number. PRG TTL SVCD REPEAT Indicates current Repeat mode. -
Page 13: Remote Control Overview
Remote Control Overview POWER Turns DVD Recorder+VCR on and off. TV/VCR Switches between the DVD Recorder+VCR tuner and your TV tuner. Selects DVD mode. Selects VCR mode. INPUT Switches the DVD Recorder+VCR input to Tuner, AV1, or AV2. 0-9 buttons Selects numbered options in menus. -
Page 14: Rear Panel Overview
Rear Panel Overview RF IN (FROM ANT.) Connect to your antenna or cable TV outlet. AC Power Cord Plug into a power outlet. RF OUT (TO TV) Connect to a TV with an RF coaxial input. AV 1 IN (VIDEO, L-AUDIO-R) Connect to the audio/video output of an external source (VCR, Camcorder, etc.). -
Page 15: Connections
Connections There are a variety of ways to connect the DVD Recorder+VCR to your TV and other equipment. Use only one of the connections described below. Whichever TV connection you use will work with all input sources. Please refer to the manuals for your TV, VCR, stereo system or other devices as necessary to make the best connections. -
Page 16: Connecting A Tv
Connections (Continued) Connecting a TV Choose one of the following TV connections, depending on the capabilities of your equipment. All video signals are available from all video out- puts. That means that whichever TV connection you use, it will work with all input sources, including VHS out of the Component/Progressive Video Output. -
Page 17: Connecting An Amplifier/Receiver
Connections (Continued) Connecting an Amplifier/Receiver Connecting to an amplifier equipped with two channel analog stereo or Dolby Pro Logic ll/ Pro Logic Connect the Left and Right AUDIO OUT jacks on the DVD Recorder+VCR to the left and right audio in jacks on your amplifier, receiver, or stereo system, using the supplied audio cables (A). -
Page 18: Connecting Optional Equipment
Connections (Continued) Connecting Optional Equipment Connect the AV 1 IN or AV 2 IN jacks on the DVD Recorder+VCR to the audio/video out jacks on your external component, using optional audio/video cables. If you use the S-VIDEO jack on the front panel, there will be no signal output from the front panel VIDEO jack. -
Page 19: Initial Setup
Initial Setup Setup Menu Overview The DVD Recorder+VCR Setup menu includes system settings in six categories GENERAL, LANGUAGE, AUDIO, LOCK, RECORD and DISC. Press SETUP on the remote control to view the first and second levels of the Setup menu, and press B to display the third level . You will see the “B”... -
Page 20: Channel Add/Delete
Initial Setup (Continued) Channel Add/Delete This feature allows you to manually add or delete chan- nels from your channel list. Follow steps 1-3 as shown under Auto Channel Set. Use v / V to select the CH. Add/Del option. Press B to move to the third level. The Edit icon is highlighted. -
Page 21: Tv Aspect
Initial Setup (Continued) TV Aspect 4:3 Letterbox: Select when a standard 4:3 TV is con- nected. Displays theatrical images with masking bars above and below the picture. 4:3 Fullscreen: Select when a standard 4:3 TV is con- nected. Displays pictures cropped to fill your TV screen. Both sides of the picture are cut off. -
Page 22: Audio Settings
Initial Setup (Continued) AUDIO Settings Each DVD disc has a variety of audio output options. Set the DVD Recorder+VCR’s Audio Output according to the type of audio system you use. Dolby Digital PCM: Select when connected to a 2-channel digital stereo amplifier. -
Page 23: Lock Settings
Initial Setup (Continued) LOCK Settings Movie Rating The Lock feature allows you to prevent DVDs from being played based on their ratings or to have certain discs played with alternative scenes. Movie Rating No Limit 8(Adult) Set Password Country Code 1(Kids) Prev. -
Page 24: Country Code
Initial Setup (Continued) Country Code Enter the 2-letter code for the country/area whose stan- dards were used to rate your DVDs, referring to the “Country Code List” on page 56. Movie Rating Set Password Country Code Prev. Select Press SETUP. The Setup menu appears. -
Page 25: Auto Chapter
Initial Setup (Continued) Auto Chapter During recording, chapter markers are added automati- cally at fixed intervals. You can set this interval to 5 min- utes or 10 minutes. To turn off automatic chapter mark- ing, select “OFF”. Disc Record Mode VCR Record Mode DV Record Audio Auto Chapter... -
Page 26: Disc Finalize
Initial Setup (Continued) Disc Finalize Finalizing a recordable disc ‘locks’ its recordings in place so the disc can be played on most standard DVD players or computers equipped with DVD-ROM drives. Finalizing a disc formatted in Video mode will automati- cally create a menu screen for navigating the disc. -
Page 27: Autoplay
Initial Setup (Continued) AutoPlay When you load a DVD with AutoPlay turned on, the DVD Recorder+VCR will bypass the Disc menu and trailers and start playing the movie automatically. Set AutoPlay to ON or OFF. Disc Initialize Disc Finalize Disc Label Disc Protect AutoPlay YourDVD... -
Page 28: On-Screen Display Overview
Initial Setup (Continued) On-Screen Display Overview The On-Screen Display provides feedback on the status of the DVD Recorder+VCR and/or the currently loaded disc or tape. To access the On-Screen Display (or OSD), press the DISPLAY button. Displaying Disc Information To display information about the currently loaded disc or tape: On-screen display operation Press DISPLAY repeatedly to display/change the... -
Page 29: Osd Menu Options By Media Type
Initial Setup (Continued) OSD Menu Options by Media Type Shows the current title/chapter number and Title total number of Chapter: 3/28 titles/chapters Menu Options Function Title number Shows the current title number and total number of titles, and skips to the desired title number. Chapter number Shows the current chapter number and total number of 4/26... -
Page 30: Video
Initial Setup (Continued) OSD Menu Options by Media Type (Continued) Video Shows the title name, recording date, Title 1 recording mode, etc. 01/02/03 Menu Options Function Title Number Shows the current title number and total number of titles, and skips to the desired title number. Chapter Number Shows the current chapter number and total number of chapters, and skips to the desired chapter number. -
Page 31: Dvd/Vcd Playback
DVD/VCD Playback Playing a DVD/Video CD Playback Setup Press the DVD button to set the remote control to operate the DVD deck. Turn the TV on and select the video input source con- nected to the DVD Recorder+VCR. Audio system: Turn the audio system on and select the input source connected to the DVD Recorder+VCR. -
Page 32: Still Picture And Frame-By-Frame Playback
DVD/VCD Playback (Continued) Playing a DVD/Video CD (Continued) Still Picture and Frame-by-Frame Playback Video 1 Press PAUSE/STEP (X) during playback. The DVD Recorder+VCR will go into Pause mode. 2 You can back up or advance the picture frame-by- frame by pressing b / B repeatedly during Pause mode. -
Page 33: Time Search
DVD/VCD Playback (Continued) Playing a DVD/Video CD (Continued) Time Search Video - : -- : -- The Time Search function allows you to start playback from any chosen time on the disc. 1 Press DISPLAY during playback. The on-screen dis- play appears on the TV screen. -
Page 34: Camera Angle
DVD/VCD Playback (Continued) Playing a DVD/Video CD (Continued) Camera Angle If a DVD contains scenes recorded at different camera angles, you can select among these angles during play- back. Press ANGLE then press b / B repeatedly during playback to select the desired angle. The number of the current angle appears on the TV screen. -
Page 35: Audio Cd And Mp3/Wma Operation
Audio CD and MP3/WMA Operation Playing an Audio CD or MP3/WMA Disc The DVD Recorder+VCR can play audio CDs and MP3/WMA files on CD-ROM, CD-R,CD-RW, or DVD-R/RW discs. Before playing MP3/WMA files, read “Notes on MP3/WMA Recordings” on page 36. Insert the disc and close the tray. -
Page 36: Pause
Audio CD and MP3/WMA Operation (Continued) Pause 1 Press PAUSE/STEP (X) during playback. 2 To return to playback, press PAUSE/STEP (X) again. Skip Tracks Press PREV (.) or NEXT (>) briefly during playback to go to the next track or to return to the beginning of the current track. -
Page 37: Program Playback With Audio Cd And Mp3/Wma
Program Playback with Audio CD and MP3/WMA Program Playback enables you to make custom playlists of Audio CD or MP3/WMA tracks. Program can contain 99 Audio CD tracks or 256 MP3/WMA tracks. Insert an Audio CD or MP3/WMA disc. The Music menu will appear. Use v V to select a track or folder on the list then press ENTER. -
Page 38: And Mp3/Wma
Program Playback with Audio CD and MP3/WMA (Continued) Repeating Programmed Tracks Press REPEAT to select the desired Repeat mode. • TRACK : Repeats the current track. • ALL : Repeats all the tracks in the program list • OFF: Cancels Repeat mode (no display). Erasing a Track 1 Select the track that you wish to erase from the Program List then press ENTER. -
Page 39: Jpeg Disc Operation
JPEG Disc Operation Viewing a JPEG File JPEG The DVD Recorder+VCR can play discs with JPEG files. Before playing JPEG recordings, read “Notes on JPEG Recordings” on page 40. Insert a disc and close the tray. The Photo-CD menu appears on the TV screen. Photo - CD JPEG... -
Page 40: Jpeg Disc Operation
JPEG Disc Operation Still Picture Press PAUSE/STEP (X) during a Slide Show to pause playback. Skip Images While viewing a picture, press PREV or NEXT (. or >) once to advance to the next file or return to the previous file. Rotate Images Use v / V while viewing a picture to flip the picture clockwise or counterclockwise. -
Page 41: Vcr Playback
VCR Playback Before You Begin Press the VCR button to set the remote control to operate the VCR deck. Turn the TV on and select the video input source con- nected to the DVD Recorder+VCR. Audio system: Turn the audio system on and select the input source connected to the DVD Recorder+VCR. -
Page 42: Recording
Basic Recording Recording from TV Follow the instructions below to record a TV program. Turn on the DVD Recorder+VCR and load a recordable disc or tape. Make sure your TV input is set to view the DVD Recorder+VCR. • If you load a blank DVD-RW disc, you will be prompted to set the Disc Record mode. -
Page 43: One Touch Copy - Dvd To Vhs
Basic Recording One Touch Copy - DVD to VHS You can copy the contents of a DVD to a VHS tape using the COPY button. If the DVD you are attempting to copy is copy-protect- ed, you will not be able to copy the disc. It is not permit- ted to copy Macrovision encoded DVDs. -
Page 44: Timer Recording
Timer Recording The Timer Recording function allows you to record up to 8 programs within a period of one month. Press TIMER RECORD. The Timer Record menu appears. Timer Record Media Date Start Time End Time Ch.11 10/16 Thu 10:07 AM Timer Rec List TIMER REC •... -
Page 45: Recording From An External Input
Recording from an External Input Recording from External Components You can record from an external component, such as a camcorder or VCR, connected to any of the DVD Recorder+VCR’s external inputs. Make sure the component you want to record from is connected properly to the DVD Recorder+VCR;... -
Page 46: Title List And Chapter List Menu
Title List and Chapter List Menu Using the Title List-Original menu The Title List-Original is where you build and edit your Playlist, and where you can delete titles and make other changes to the Original content of the disc. You can also play individual titles directly from the Title List- Original menu. -
Page 47: Using The Chapter List-Playlist Menu (Vr)
Title List and Chapter List Menu (Continued) Using the Title List-Playlist Menu Press DISC MENU/LIST repeatedly to display the Title List-Playlist menu. • Use the v/V buttons to display the previous/next page if there are more than 6 titles or chapters. •... -
Page 48: Deleting A Title (Video)
Title List and Chapter List Menu (Continued) Using the Title List menu From the Title List display you can play, name and erase titles. Once a Video mode disc is finalized, the Title List screen changes its appearance and all you can do is select titles to play. -
Page 49: Title And Chapter Editing
Title and Chapter Editing About Original vs. Playlist Content Edits you make to the Original content of a DVD-RW disc in VR mode change the actual content of the disc. For example, if you delete a title or chapter from the Original content, that title or chapter is deleted from the disc, freeing up extra recording time. -
Page 50: Making A New Playlist (Vr)
Title and Chapter Editing (Continued) Making a New Playlist Use this function to add an Original title or chapter to a Playlist. When you do this, the whole title is put into the Playlist (you can even delete parts you don’t want later —... -
Page 51: Deleting Titles/Chapters (Vr)
Title and Chapter Editing (Continued) Deleting Titles/Chapters When you erase a title or chapter from the Playlist menu on DVD-RW discs formatted in VR mode, you only remove it from the Playlist; the title/chapter remains in the Original menu. If you choose to delete a title or chapter from the Title List or Chapter List menu, the title or chapter is actually deleted from the disc and the remaining time available for recording increases. -
Page 52: Renaming A Title (Vr/Video)
Title and Chapter Editing (Continued) Renaming a Title Video You can name Original and Playlist titles independently. On the Title List menu, use v V b B to choose the title you want to name then press ENTER. Options appear on the left side of the menu. Use v/V to select the ‘Rename’... -
Page 53: Moving A Playlist Chapter
Title and Chapter Editing (Continued) Moving a Playlist Chapter Use this function to re-arrange the playback order of Playlist chapters on the Title List-Playlist menu. Press DISC MENU/LIST repeatedly to display Title List-Playlist menu. To display the Chapter List-Playlist menu, refer to “Using the Chapter List-Playlist Menu”... -
Page 54: Programming The Multibrand Remote To Control Your Tv
Programming the MultiBrand Remote to Control Your TV You can program the DVD Recorder+VCR MultiBrand remote control to operate many TV brands and models. In the chart below, find the code(s) correspon- ding to your brand of TV. While holding down the TV POWER button, enter the 2-digit code number using the 0-9 but- tons. -
Page 55: Language Code List
Language Code List Use this list to enter the appropriate code number for your preferred Disc Menu, Disc Audio, and Disc Subtitle lan- guages; see page 21. Code Language Code 6566 Abkhazian 7074 6565 Afar 7073 6570 Afrikaans 7082 8381 Albanian 7089 6577... -
Page 56: Country Code List
Country Code List Use this list to enter the appropriate code number for the “Country Code” setting; see page 24. Code Country Code Country Andorra Eritrea United Arab Emirates Spain Afghanistan Ethiopia Antigua and Barbuda Finland Anguilla Fiji Albania Falkland Islands Armenia Micronesia Netherlands Antilles... -
Page 57: Troubleshooting
Troubleshooting Check the following guide for the possible cause of a problem before contacting customer support. Symptom The power cord is disconnected. No power. No picture. The TV is not set to receive DVD Recorder+VCR signal output. The video cable is not connected securely. The TV power is turned off. - Page 58 Troubleshooting (Continued) Symptom Cannot record or did not The remaining blank space on the disc is record successfully. insufficient. The source you are trying to record is copy- protected. When setting the recording channel, the channel is tuned on the TV’s own tuner. When recording to a Video mode disc, pro- grams that are copy-once protected cannot be recorded.
-
Page 59: Technical Specifications
Technical Specifications General Power requirements Power consumption Dimensions (approx.) Mass (approx.) Operating temperature Operating humidity Signal system Recording Recording format Recordable discs Recordable time Video recording format Sampling frequency Compression format Audio recording format Sampling frequency Compression format VCR Specifications Head system Timer Tape speed... -
Page 60: Technical Specifications
Technical Specifications (Continued) Outputs VIDEO OUT S-VIDEO OUT COMPONENT VIDEO OUT (PROGRESSIVE SCAN) Audio output (digital audio) Audio output (optical audio) Audio output (analog audio) RF OUT Accessory: Video cable ......1 RF 75-ohm Coaxial Cable . -
Page 61: Limited Warranty
Limited Warranty Who Provides the Limited Warranty During the warranty period, the GoVideo Warranty Administrator will honor service for 90 days labor, 1 year parts from the original date of consumer purchase. See below for Commercial, Industrial or Educational use coverage. Remote controls are warrantied for 90 days from the date of purchase. - Page 62 3834RV0011D Printed in Korea...
Need help?
Do you have a question about the VR3840 and is the answer not in the manual?
Questions and answers