Table of Contents
Advertisement
Quick Links
Advertisement
Table of Contents

Related Manuals for Foldawheel Phoenix


Summary of Contents for Foldawheel Phoenix
- Page 1 V2.0 Phoenix User Manual...
-
Page 2: Table Of Contents
TABLE OF CONTENTS Title Page Parts Introduction 1.0 Safety Tips 03 - 04 Standing Important point to note for operating the wheelchair Safety information on driving and free-wheel mode Rear wheels Armrests Power drive attachments Modifications 2.0 Set Up Upon Arrival The original package and accessories Unfolding the stand up wheelchair 3.0 Adjustment... -
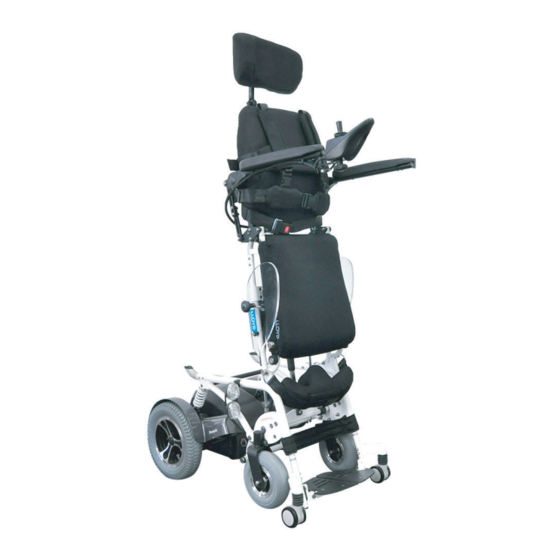
Page 3: Parts Introduction
PARTS INTRODUCTION... -
Page 4: Safety Tips
1.0 SAFETY TIPS 1-1. Standing Attention : Switch on the master power switch before using. (see P9) - Before using the stand up wheelchair, you should be familiar with the operation and the function. - Use only on standard household, and hard and even ground. Not to be used on a wet surface. -
Page 5: Safety Information On Driving And Free-Wheel Mode
1.0 SAFETY TIPS 1-3. Safety Information on Driving and Free wheel Mode Danger of injury if the wheelchair tips over * Only ever drive downhill at a maximum of 1/5 of the top speed! Avoid abrupt braking or acceleration on gradients. * If at all possible, avoid driving on slippery surface (such as gravel) where there is a danger of you losing control over the wheelchair, especially on a gradient! If driving on such a surface is inevitable, then always drive slower and with the utmost caution. -
Page 6: Set Up Upon Arrival
2.0 SET UP UPON ARRIVALS 2-1. The Original Package And Accessories The Original Package And Accessories Contain The Following Components : ~ Power stand up wheelchair, joystick, heel strap & chest belt ~ Knee support & headrest Set-up Video QR Code ~ Charger ~ User manual and tool ~ Options as ordered... -
Page 7: Adjustment
3.0 ADJUSTMENT Should you require adjustments and alterations to the mechanism of the wheelchair, or any maintenance work, please contact qualified technicians. 3-1. Adjusting The Seat Depth - Push the Joystick forward to raise the wheelchair frame.(P12) - After loosening the left (right) both side screws, the seat depth can be adjusted . Each holes are 1”difference. -
Page 8: Adjusting The Footrest Angle
3.0 ADJUSTMENT 3-3. Adjusting The Footrest Angle - After releasing the screws, the footplate angle can be adjusted using the different hole at 3 range incline angle.(P19 ~ 21) - Retighten the screws. Medium High 3-4. Knee Support And Belts The most important safety features of the stand-up wheelchairs are the knee support, safety belt and chest belt. -
Page 9: Adjusting The Armrest Height
3.0 ADJUSTMENT 3-4-3. H-Belt - The H-belt holds the upper body in place. - Close the catch on the belt and pull the strap to tighten. (not too tight) - To release the safety belt, press the top and bottom part of the center of the catch. 3-4-4. -
Page 10: Driving
4.0 DRIVING 4-1. Before Driving for the First Time Before you take your first trip, you should familiarize yourself with the operation of the vehicle and with all operating elements. Take your time to test all functions and driving modes. Make sure : * You are within easy reach of all operating controls. -
Page 11: Free Wheel
4.0 DRIVING 4-3. Free Wheel The motors are designed to engage the electromagnetic brakes when the vehicle is not in use or when the power is OFF. There is also a manual feature that allows the unit to “freewheel”. Free-wheeling is accomplished by pulling the free-wheeling levers to the free-wheeling position. -
Page 12: The Dynamic Shark Remote
5.0 CONTROL SYSTEM 5-1. The Dynamic SHARK Remote 11. On/Off 1. Battery gauge 12. Battery Full 2. Battery Empty 13. Right Signal LED 3. Left Signal Indicator 14. (2)Recline Actuator 4. (1)Standup Actuator 15. Speedometer 5. Horn 6. Slower Max Speed 16. -
Page 13: Battery And Control Box Connection
5.0 CONTROL SYSTEM 5-3. Battery and Control Connection The main electrical system is composed of the motor, control box battery and controller. The connection of the control system is as below : 5-4. Battery Charger 1. First, connect the battery charger line to the battery DC power socket and make sure the line is connectly. - Page 14 5.0 CONTROL SYSTEM 5-5. The Lock for Controller 5-6. To operate the lights Press the side light button to switch the Head(L/R)/Tail(L/R) lights on or off. • The side light LED is on when the sidelights are switched on. Press the indicator buttons to switch the indicators on or off.
- Page 15 5.0 CONTROL SYSTEM 5-7. Flash Code Flash codes indicate the nature of an abnormal condition directly from the SHARK Information Gauge. Without the use of any servicing tools, the cond ition can be diagnosed easily. Flash Description Suggestion/ Diagnose Code User Fault Possible stall timeout or user error.
- Page 16 6.0 MAINTENANCE When cleaning your Standing Wheelchair use a dry or slightly moistened cloth to wipe the wheelchair down. For stubborn or oily stains, apply a mild detergent to the cloth. Do not hose down your wheelchair with water. Check the state of the tread on the tyres every one to six months. If a tyre is heavily or unevenly worn, it should be replaced.
Need help?
Do you have a question about the Phoenix and is the answer not in the manual?
Questions and answers